

 by
by 


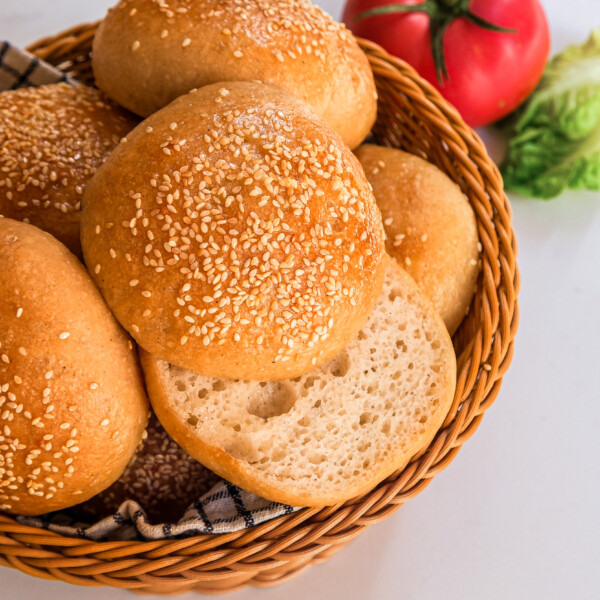
These are the BEST gluten-free sourdough hamburger buns—soft, fluffy, vegan, and nut-free. Packed with wholesome ingredients like rice flour and psyllium husk, they’re a game-changer for any burger night. Whether you’re craving classic cheeseburgers or veggie patties, these homemade burger buns are the perfect vessel.

For years, I’ve dreamed of a perfectly soft, spongy, a little chewy, and beautifully golden gluten-free burger bun. Gluten-free buns at restaurants tend to be so dry and crumbly that it makes the whole burger-eating process a bit of a fiasco. Definitely not the ultra-satisfying experience you crave when you order a burger. So, it was about time this recipe landed on our tables: gluten-free sourdough burger buns.
They’re everything you want in a hamburger bun, and more:
- Soft and spongy with an open crumb
- Durable enough to hold up to your loaded burger
- Will not fall apart at the touch of a sauce
- Topped with sesame seeds for the classic look
- Easy to adjust the size – sliders, anyone?
- A little tang from the sourdough for extra flavor
- Simple to make from scratch!
- No eggs and no xanthan gum needed.

As with everything sourdough, these sourdough burger buns do require forethought to be ready for your burger night, but the preparation is absolutely worth the result. They also freeze incredibly well, so you can bake, slice, and store for future burger nights on a whim.
How to make gluten-free sourdough buns
1. Make the Psyllium Gel
Whisk milk, water, and psyllium husk in a large bowl. Add honey and olive oil. Mix until thick and jelly-like.


2. Mix the Dough
In another bowl, whisk rice flour, tapioca starch (aka tapioca flour), potato starch, and salt. Add the psyllium gel and sourdough starter. Mix until smooth, soft, and slightly sticky.


3. Shape & Weigh
Divide the dough ball into eight equal pieces (~130 g each). Roll into smooth rounds and place on a parchment-lined tray.
4. Ferment
Cover and place in the refrigerator for 8–12 hours. The next day, keep the buns covered and let them sit at room temperature for 2 hours, until they are slightly puffed.
5. Preheat & Prep
Preheat oven to 400°F (200°C). Brush buns with water and sprinkle with sesame seeds. You can use an egg wash instead of water if you’re not vegan and want an extra shiny top.


6. Bake
Place the burger buns in the oven and immediately lower the temperature to 375°F (190°C). Bake 30 minutes, until golden and firm. Brush with melted butter and cool on a wire rack before slicing.


Prepare your gluten-free sourdough hamburger buns ahead of time
Make-ahead dough: After shaping the buns, you can refrigerate them (covered) overnight. Bring back to room temperature and finish proofing before baking.
Short-term storage: Once cooled, store your burger buns in an airtight container or freezer bag at room temperature for up to 2 days.
Freeze for later: Slice the buns in half before freezing—this makes it easy to toast them straight from the freezer. Store in a freezer-safe bag or an airtight container for up to 2 months.
Reheating: Warm in the oven at 300°F (150°C) for 8–10 minutes for a soft bun, or toast for crispy edges.

Having a gluten-free sourdough baking marathon? Try these recipes:
- Gluten-Free Sourdough Bread – for your toasted BLTs or avocado toast.
- Gluten-Free Sourdough Pizza Crust – turn leftover dough into pizza night!
- Gluten-Free Sourdough Bagels – great for a mimosa brunch or savory sandwiches.

Gluten-Free Sourdough Hamburger Buns
Ingredients
Dry Ingredients
- 120 g superfine white rice flour, superfine brown rice flour, millet flour, and sorghum flour also work. Add up to 30g more as needed if dough seems extra sticky
- 100 g tapioca starch
- 320 g potato starch
- 8 g fine sea salt
Wet & Gel Ingredients
- 24 g whole psyllium husk
- 320 g milk of choice, or any plant-based milk; I was using a soy milk
- 170 g water
- 200 g gluten-free sourdough starter at peak activity
- 70 g honey, maple syrup, or cane sugar
- 40 g olive oil
For Glazing
- Water for brushing
- 30 g sesame seeds
- 40 g vegan butter
Instructions
- In a large bowl, mix the milk and water with psyllium husk. Add honey and olive oil. Stir well — it may take a bit of effort to mix evenly, but keep going until the liquid is thick and jelly-like. This is your base for soft, well-structured buns.24 g whole psyllium husk, 320 g milk of choice, 170 g water, 70 g honey, 40 g olive oil
- In a separate bowl, whisk together the rice flour, tapioca, potato starch, and salt. Add the psyllium mixture and the sourdough starter. Mix with your hands or a stand mixer until the dough is uniform, soft, and slightly sticky but workable.120 g superfine white rice flour, 100 g tapioca starch, 320 g potato starch, 8 g fine sea salt, 200 g gluten-free sourdough starter at peak activity
- Divide the dough into 8 equal portions, about 130g each. Gently roll each piece into a round, smooth bun and place them on a parchment-lined tray.
- Cover and refrigerate overnight (8–12 hours). The next day, remove from the fridge and let the buns sit at room temperature for 2 hours, until slightly puffed.
- While the buns come to room temperature, preheat the oven to 400°F (200°C). Once the oven is hot, brush the buns with water with a pastry brush and sprinkle generously with sesame seeds for a beautiful crust. You can use an egg wash instead of water if you're not vegan and want an extra shiny top.30 g sesame seeds, Water for brushing
- Transfer the buns to the oven and reduce the temperature to 375°F (190°C). Bake the buns for 30 minutes until they are golden and firm to the touch. Brush with butter when the come out of the oven. Let cool on a wire rack.40 g vegan butter

I followed the recipe exactly and they came out flat and dense. They were super sticky, wouldn’t stay in a ball shape, and barely rose at all.
Hi Jacque, I’m really sorry to hear they didn’t work for you. That combo of sticky, won’t hold a ball shape, barely rising almost always traces back to starter strength. Was your starter nice and bubbly/doubled right before you mixed the dough? A sluggish or past-peak starter is the most common reason for little to no rise in gluten-free sourdough.
In the meantime, a couple things to try next time:
1. Make sure the psyllium gel is fully thick and jelly-like before adding it to the dry mix. If it’s added too runny, the dough will be stickier and lose structure.
2. If the rounds spread out instead of holding their shape, the dough was likely too wet for the flour blend. Try cutting the water by 20-30g (or adding up to 30g of extra flour, as needed to get a good texture) next time. I did add a note about extra flour to the recipe.
3. Add some physical support, like English muffin rings, parchment paper collar, or large cookie cutters, to help the buns hold their shape and encourage them to rise up, instead of out.
Again, I’m sorry you had trouble. I know it’s disappointing to spend time and ingredients on a recipe and have it not turn out the way you’d hoped!