How to Make Gluten-Free Sourdough Bread
Think you can’t bake gluten-free sourdough bread at home? Think again! This Gluten-Free Sourdough Bread Guide is more than a recipe: it is a beginner’s how-to and will be your go-to recipe resource for simple, delicious gluten-free sourdough bread. With explanations, encouragement, and links to all the ingredients and equipment you’ll need, you’ll be making fantastic gluten-free bread loaves in no time. This recipe has helped thousands of people successfully make amazing gluten-free sourdough bread!!
Want GF sourdough support? Join over 5000+ sourdough bakers in my Gluten-Free Sourdough Friends Facebook Group to ask questions and share tips, tricks, and successes!

Never ever has a recipe been more requested, or gotten more testing from me. Gluten-Free Sourdough Bread is more than a recipe – it is a project. For gluten-free sourdough bread success, you must be committed time-wise and energy-wise. You must be willing to accept that it’s going to take some time to figure out what works for YOU! One of my core beliefs with gluten-free sourdough is…
Making Gluten-Free Sourdough Bread is an intuitive practice.
YES, I recommend measuring everything out by weight, and following recipes exactly as you get started. There is a whole lot of science involved, but there are also SO many variables to consider.
Things like ambient air temperature, water hardness, and temperature, different brands of flours you’re using, etc. It’s easy to get wrapped up in the science, and that’s a lot of the fun, but remember to also use your intuition. The farther along in the sourdough making process you get, the easier to understand it’ll become. You’ll feel more confident with each loaf.
I’ve heard from a lot of readers and Instagram followers about nervousness about making sourdough bread. As long as you’re willing to commit the time, there’s nothing to be nervous about. Everyone can make great bread.

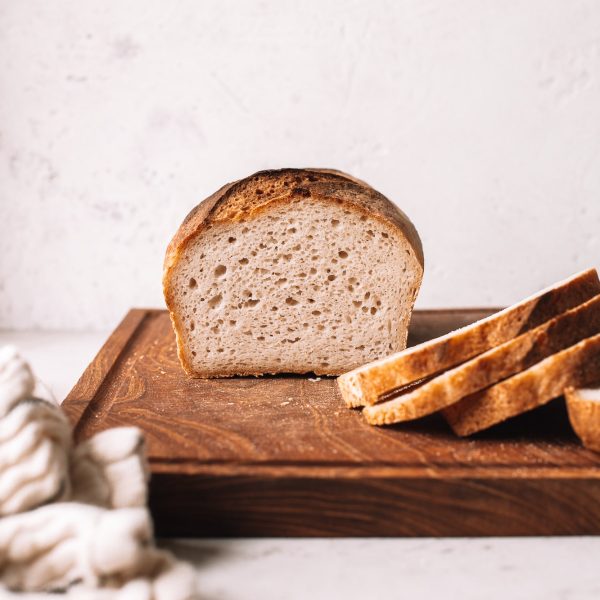
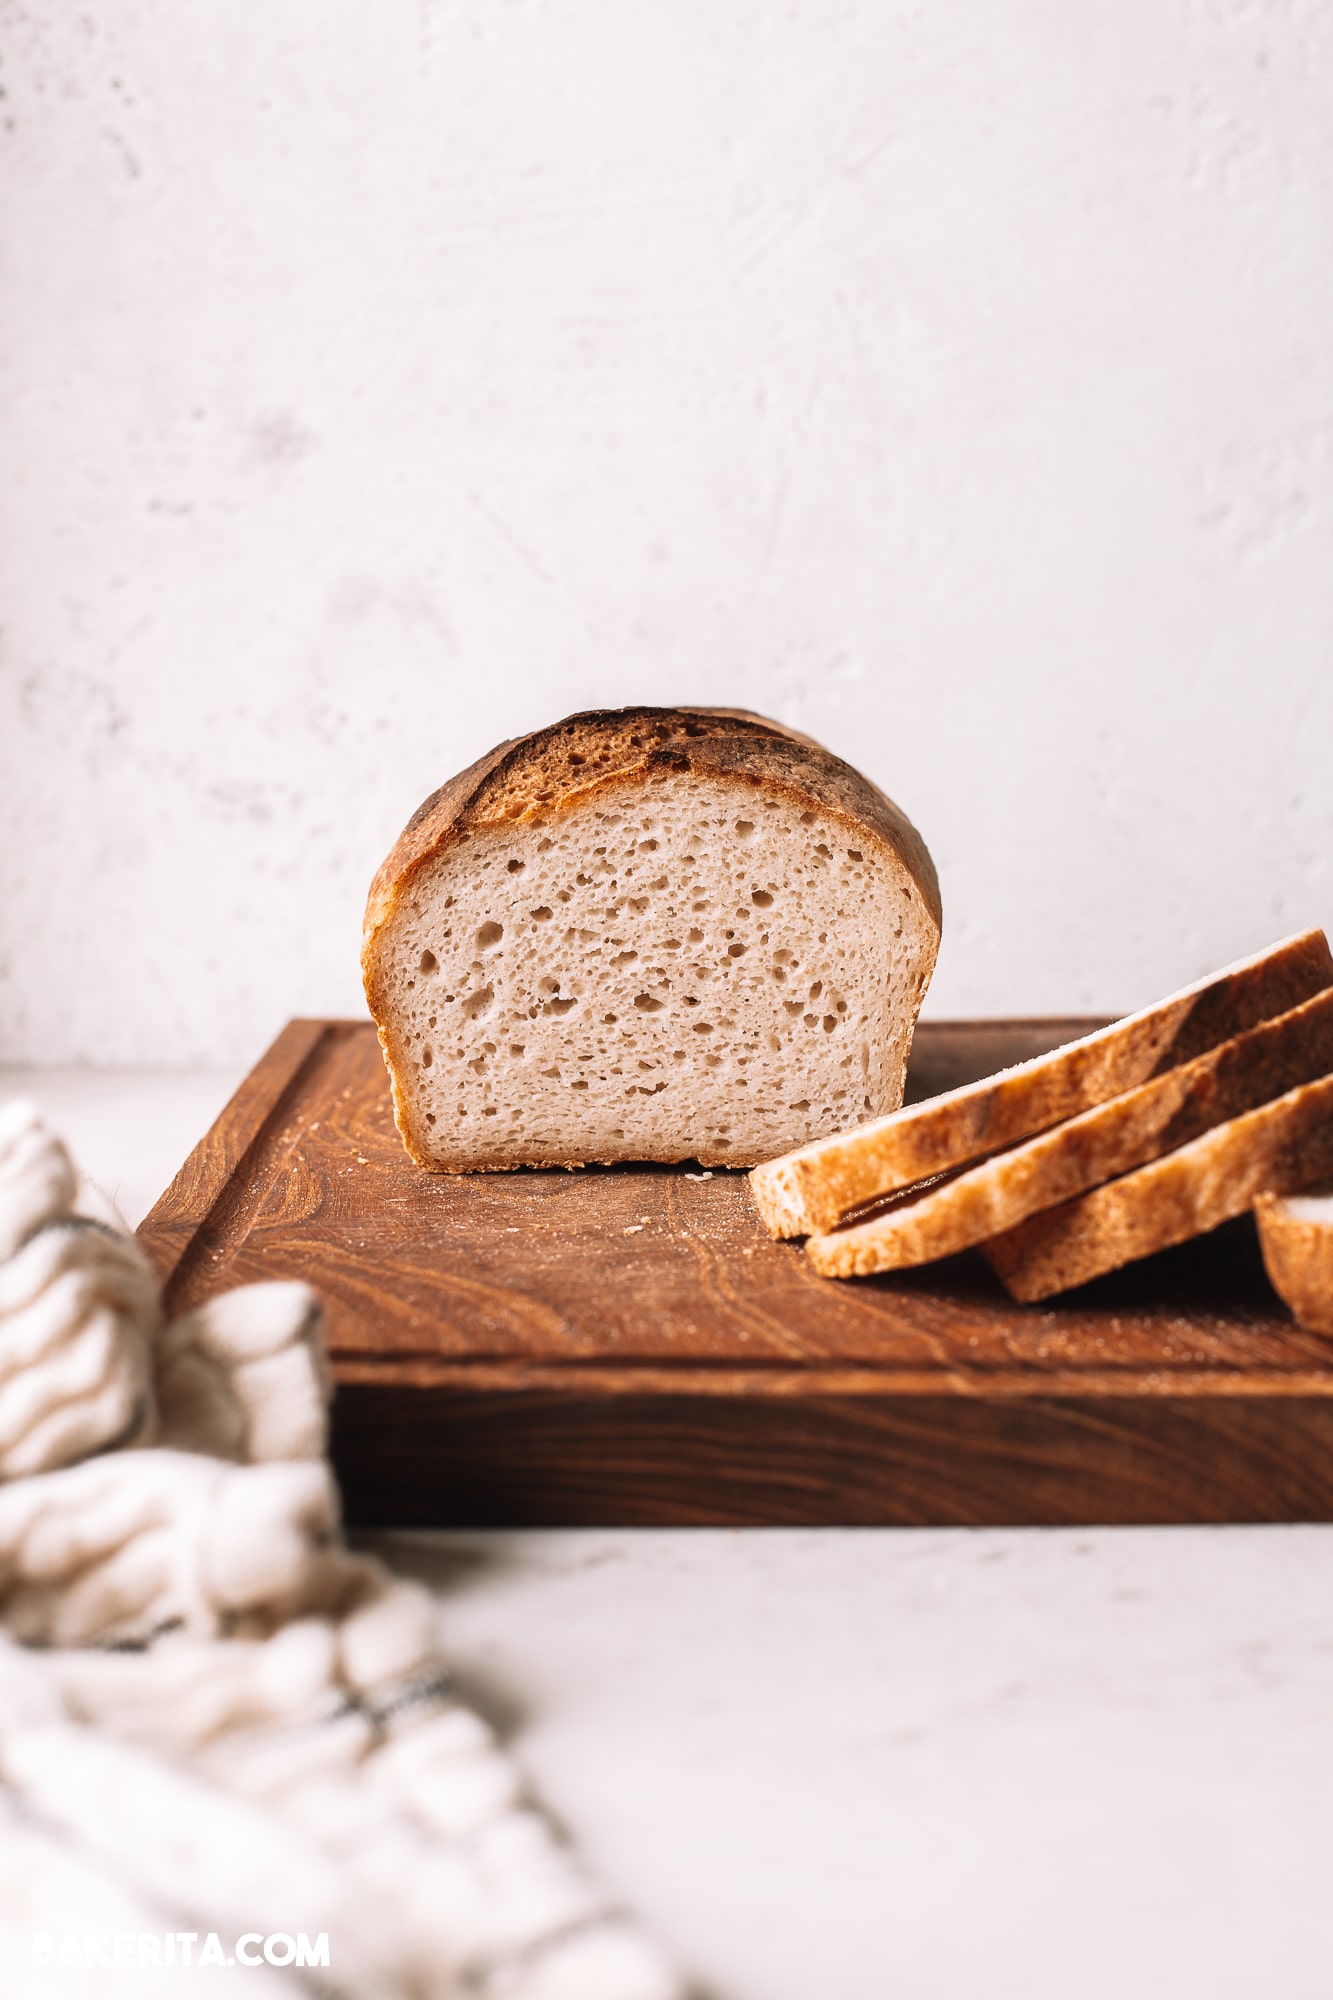
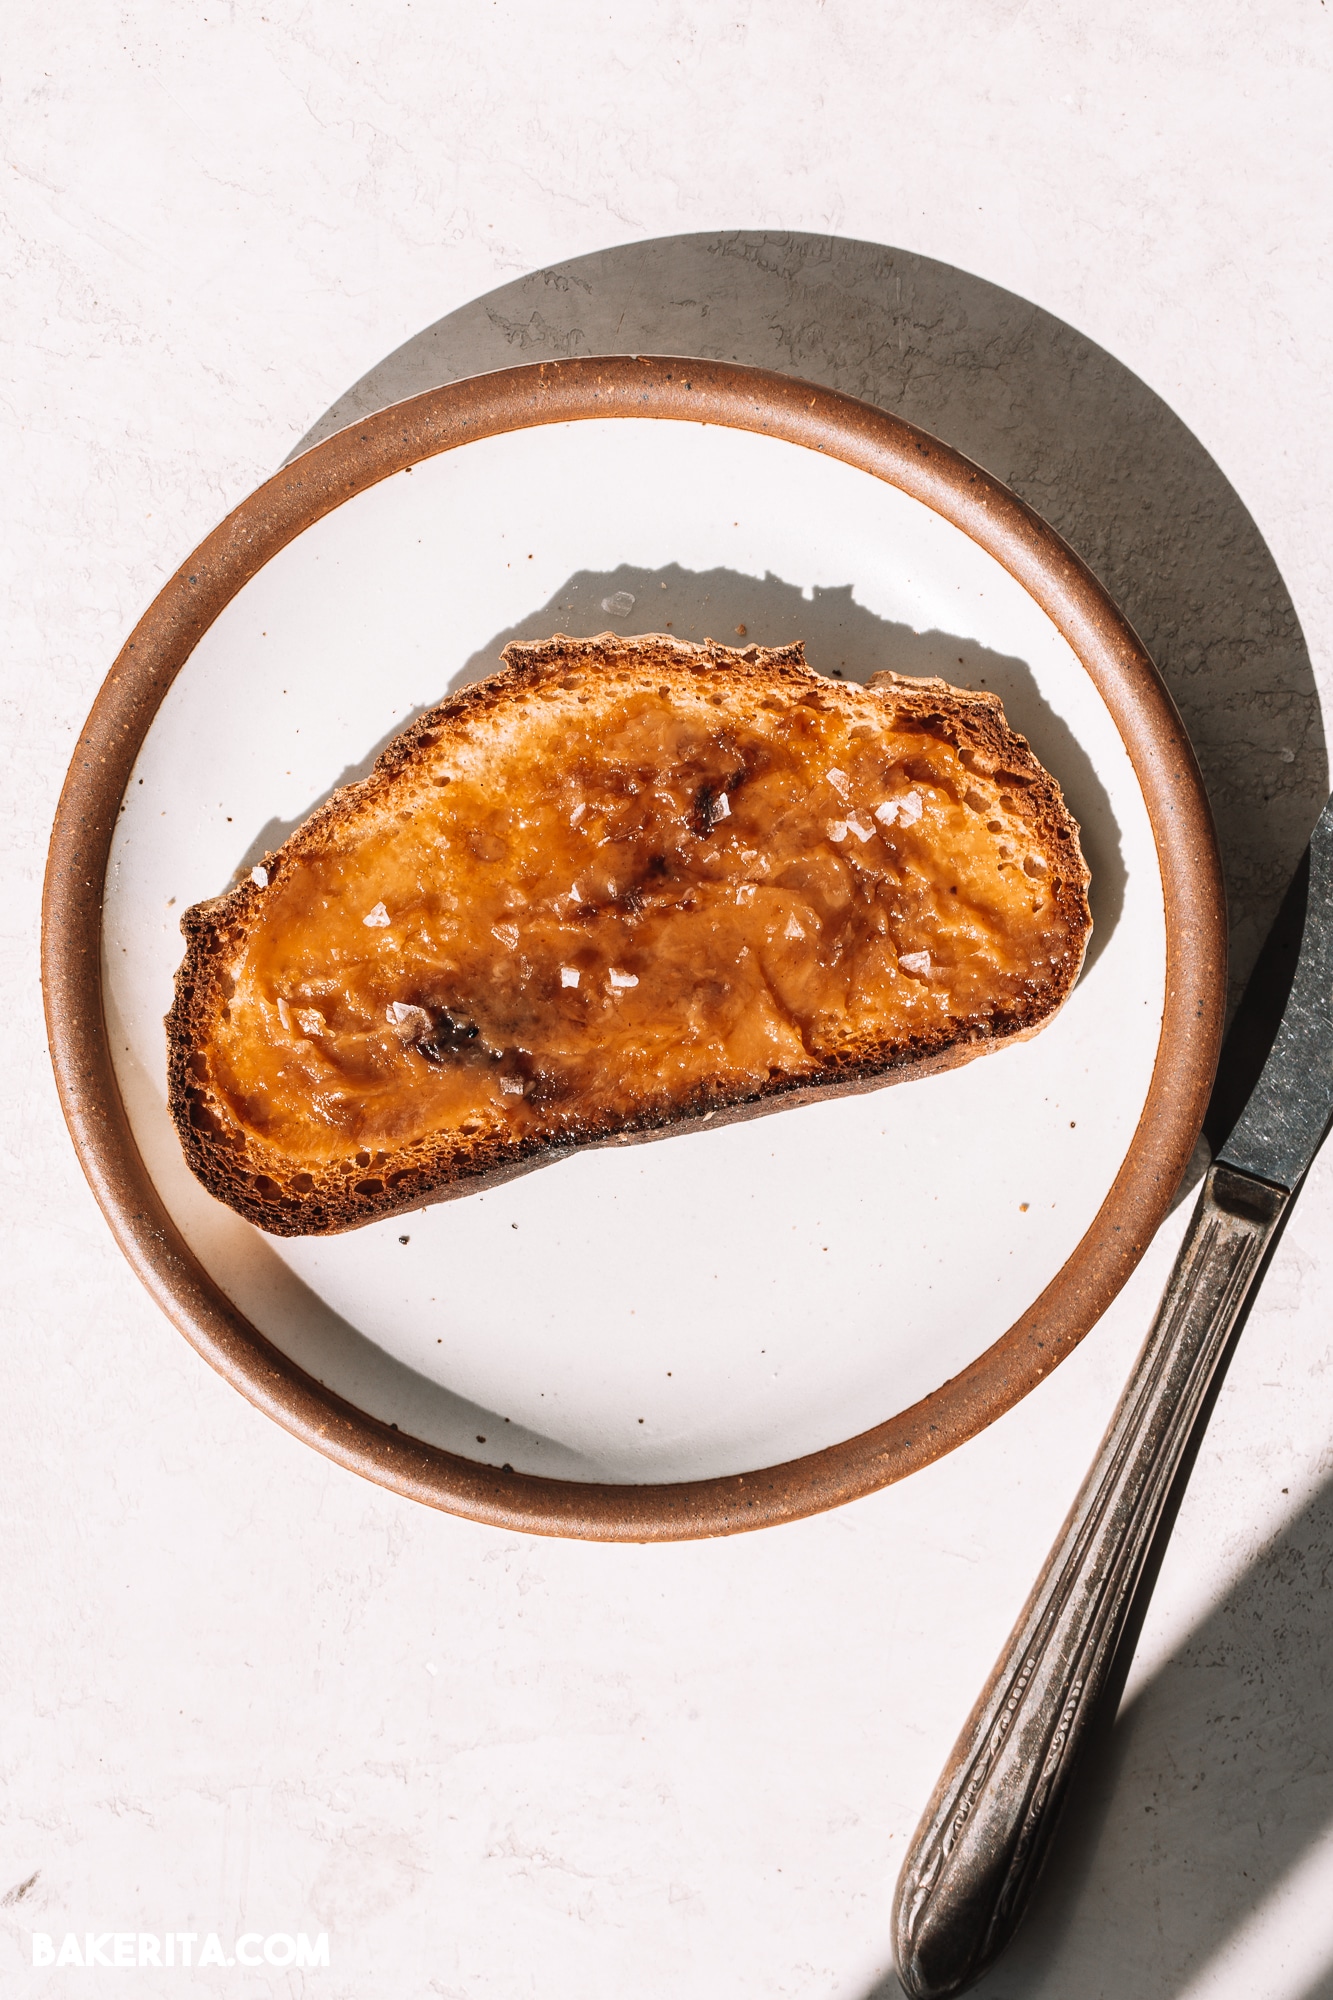
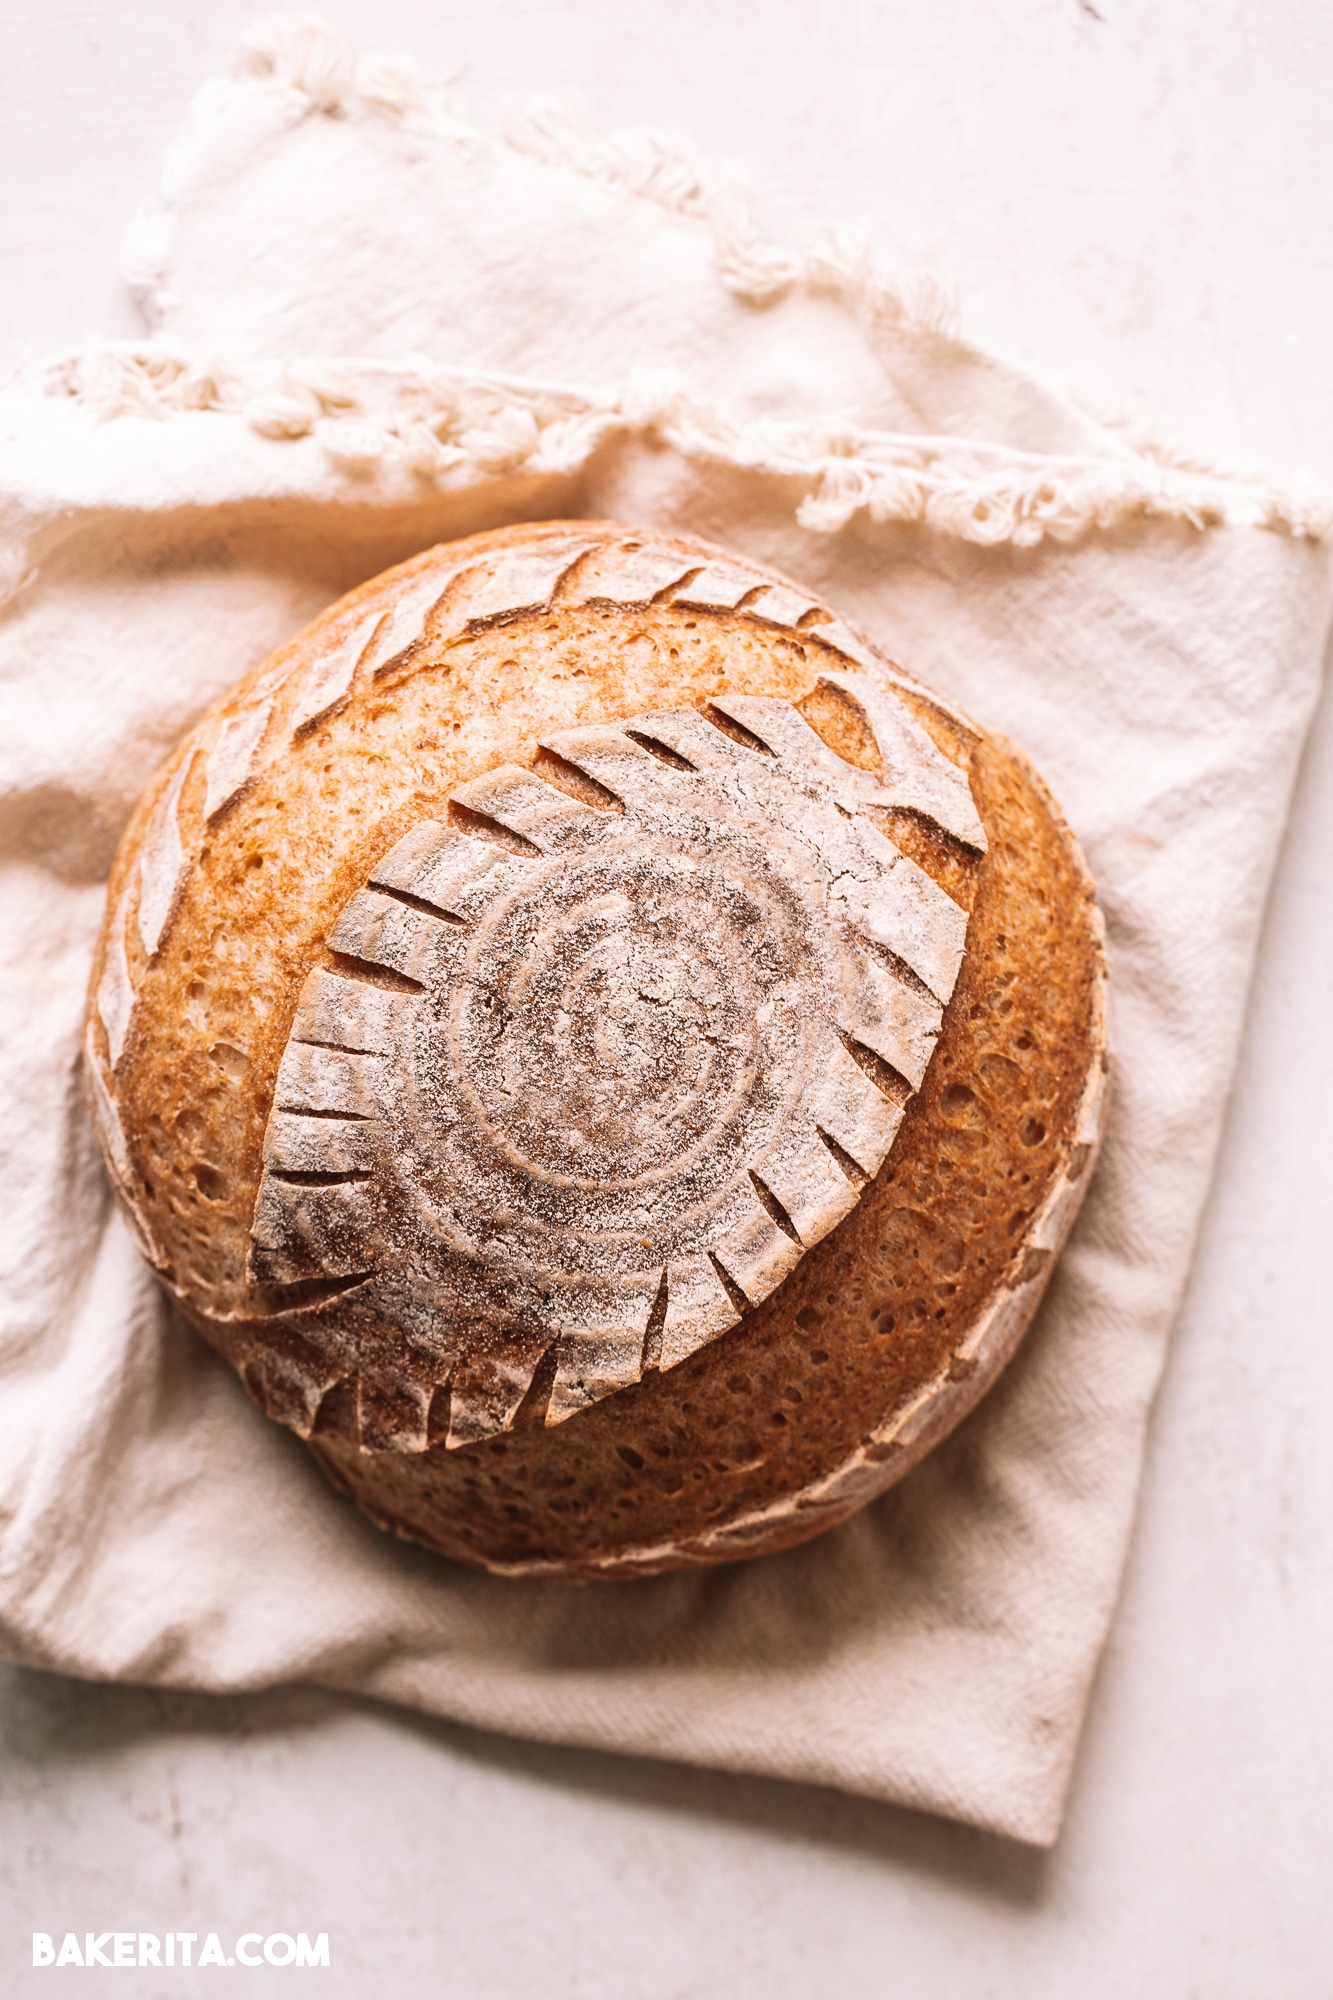
Now…should you choose to accept this mission, you will be greatly rewarded with fresh, golden loaves of heavenly gluten-free sourdough bread, perfect for toast, sandwiches, and garlic bread.
Before I get into this, I want to give credit where it is due: Georgeats has been my favorite gluten-free sourdough guide, and a lot of what I learned is from her! This recipe and this recipe of hers are super informative, amazing recipes. I’ll share even more resources for you to look through towards the bottom of the post. The more you know, the better you’ll do, and I don’t know everything! So, I like referring you to the people who know more than me for further learning! Alright – let’s get into it.

The Starter
You can see my full guide to making a gluten-free sourdough starter here.
This is the most important part of your bread. A healthy, happy starter is what will give you good bread. Without an active, happy starter, your bread will be dense and won’t rise well when it hits the oven.
I feed my starter with brown rice flour, but you can use sorghum, millet, or most other wholegrain flours for your starter. I would not recommend using a premade gluten-free flour blend, or a starch. Wholegrains work best because they give your starter a lot to feed on. You can also use a combination of multiple flours to feed your starter, like half brown rice and half sorghum flour.
I will admit: I am kind of lazy with my starter, and don’t use incredible precision with making sure it’s 1:1:1 of starter:flour:water. I typically remove half of the starter (just eyeballing it), add between 100-125g of water, and then a slightly less amount of brown rice flour (between 100-115g).
The texture is key. When you mix up your starter, it should be a thick and pasty consistency. This will make sure your starter has enough flour to feed on and get you some good bubbling action.
You’ll know your starter is ready to use when it doubles in size. You should see visible air bubbles. I keep a rubber band around my starter jar so I can see where it was when I first mixed up the starter, and can tell when it has doubled. You can also use a piece of tape to mark where your starter is right after mixing.
Don’t compare your gluten-free starter to a gluten starter. Gluten-based sourdough starters are almost always more vigorous in their growth than gluten-free, and can sometimes even triple in size. It’s doubtful your gluten-free starter will do that, so be patient with your starter. She’s doing her best!
If you’re not getting the rise you’re looking for, try increasing your feeding schedule. Feeding twice in one day can supercharge your starter and make it very happy. If you’re not seeing great growth, do two feedings, not too far apart, on bread baking day. This will make sure you’re at peak activity.

All about Psyllium Husk
Psyllium husk is our gluten for this bread: it provides the binding properties and elasticity that helps the dough become workable. It gives the structure and support for the bread to rise, as well.
You can read all about psyllium husk if you want to understand it and it’s properties better.
Psyllium is a form of fiber that is derived from the husks of plantain seeds 1. It has a lot of health and digestive benefits, but it’s the gelling, fiber-filled aspects of the plant that we’re after here!
From my experiments: you need psyllium husk for good gluten-free sourdough bread. For my bread recipes, I wouldn’t try to replace it. Psyllium helps make the dough workable, so it doesn’t squish and stick all over the place. It’s also what makes your bread chewy and stretchy.
NOTE: psyllium husk and psyllium husk powder are different. You want the full husk. You can generally find it more easily anyways, but make sure you don’t use the powder. It’s much more absorbent and I have not tried it in my tests. I usually find it in the supplement area of most grocery stores.

Picking your flour blend
These are the flours I use most for my gluten-free sourdough bread! I switch these up often, and I recommend you experiment with them as well, taking notes to see which combinations you prefer. I’ll go into a bit more detail about this in the recipe itself.
- Brown Rice Flour: my original starter (used to make all the bread you see pictured) is made with brown rice flour, and it’s a great staple for bread making. Make sure to source a superfine version of brown rice flour for the best results – a grainier flour will make a difference.
- Sorghum Flour: this is my MVP! I love the texture sorghum flour creates. It’s a mild, smooth-textured flour. It also has nutritional benefits: it’s high in fiber and filled with antioxidants, as an extra bonus.
- Millet Flour: millet flour adds a slight cakiness and sweetness to the bread, so I don’t recommend using a huge amount of it. It can also give your bread a slightly creamy, yellowish tint. It’s personally not my favorite flour, but it makes for a great texture. My dad, for instance, always LOVES my millet bread. Fun to play around with! Also loaded with good nutrients.
- Quinoa Flour: I find quinoa adds a little extra sour flavor that I love, makes for a fabulously textured bread too! The more I use quinoa flour, the more I like it! A great one to experiment with.
- Potato Starch (not flour): the potato starch you’re after is snow white and super powdery. It adds tons of lift to your bread and balances out the whole grains, so your bread isn’t too dense and heavy.
- Tapioca Flour or Arrowroot Flour: these are interchangeable, and work with the potato starch to add a lightness to your bread.
You can also use other flours, like buckwheat flour, teff flour, oat flour, and I’m sure others I haven’t mentioned! I’ve yet to experiment adequately with these to be able to speak to them, but I will update this post as I know more about those flours and how they perform within this recipe.
All the flours!

The Ratios of Sourdough
You’ll hear people saying things like “100% hydration” or “85% hydration” when talking about sourdough.
What they are talking about when they say this is the ratio of flour to water. So, if a loaf is 100% hydration, then the ration of flour to water is 1:1.
I would recommend not getting too caught up in hydration ratios. I mostly ignored them while I learned all about sourdough, and that works well for me. The only time I really refer to them is when talking about my starter, which I feed with about 100% hydration. All this means is that you’re feeding 1 part starter to 1 part water to 1 part flour.
Gluten-free flours vary far more widely in absorbency than traditional all-purpose flour does, which means it’s more important to look out for the right consistency in gluten-free sourdough starter, rather than precisely the right ratio. Many times with my gluten-free flours, I find I need more water than flour because the flour is so absorbent.
Bread baking terminology
Preferment / Levain: both terms are interchangeable. The preferment (my preferred term, and what I’ll use for the rest of this post) is a mixture of starter, water, and flour that will be the base of your bread. You’ll take the starter at peak activity and mix it with water and flour, and allow that to rise and ferment. How long this ferments will impact how sour your loaf is.
Proofing: this is your bread rise after you shape the loaf. Some bread recipes do two rises, but I only do one, especially since we do a preferment with the starter.
Banneton: this is a basket, typically made of rattan, that you’ll use for proofing your bread. It has better airflow than say, a bowl with a tea towel liner, which allows your bread to rise a little better. You do not bake in this basket. You also do not need one, but they are nice to have! My favorite size for this recipe is my 8-inch banneton.
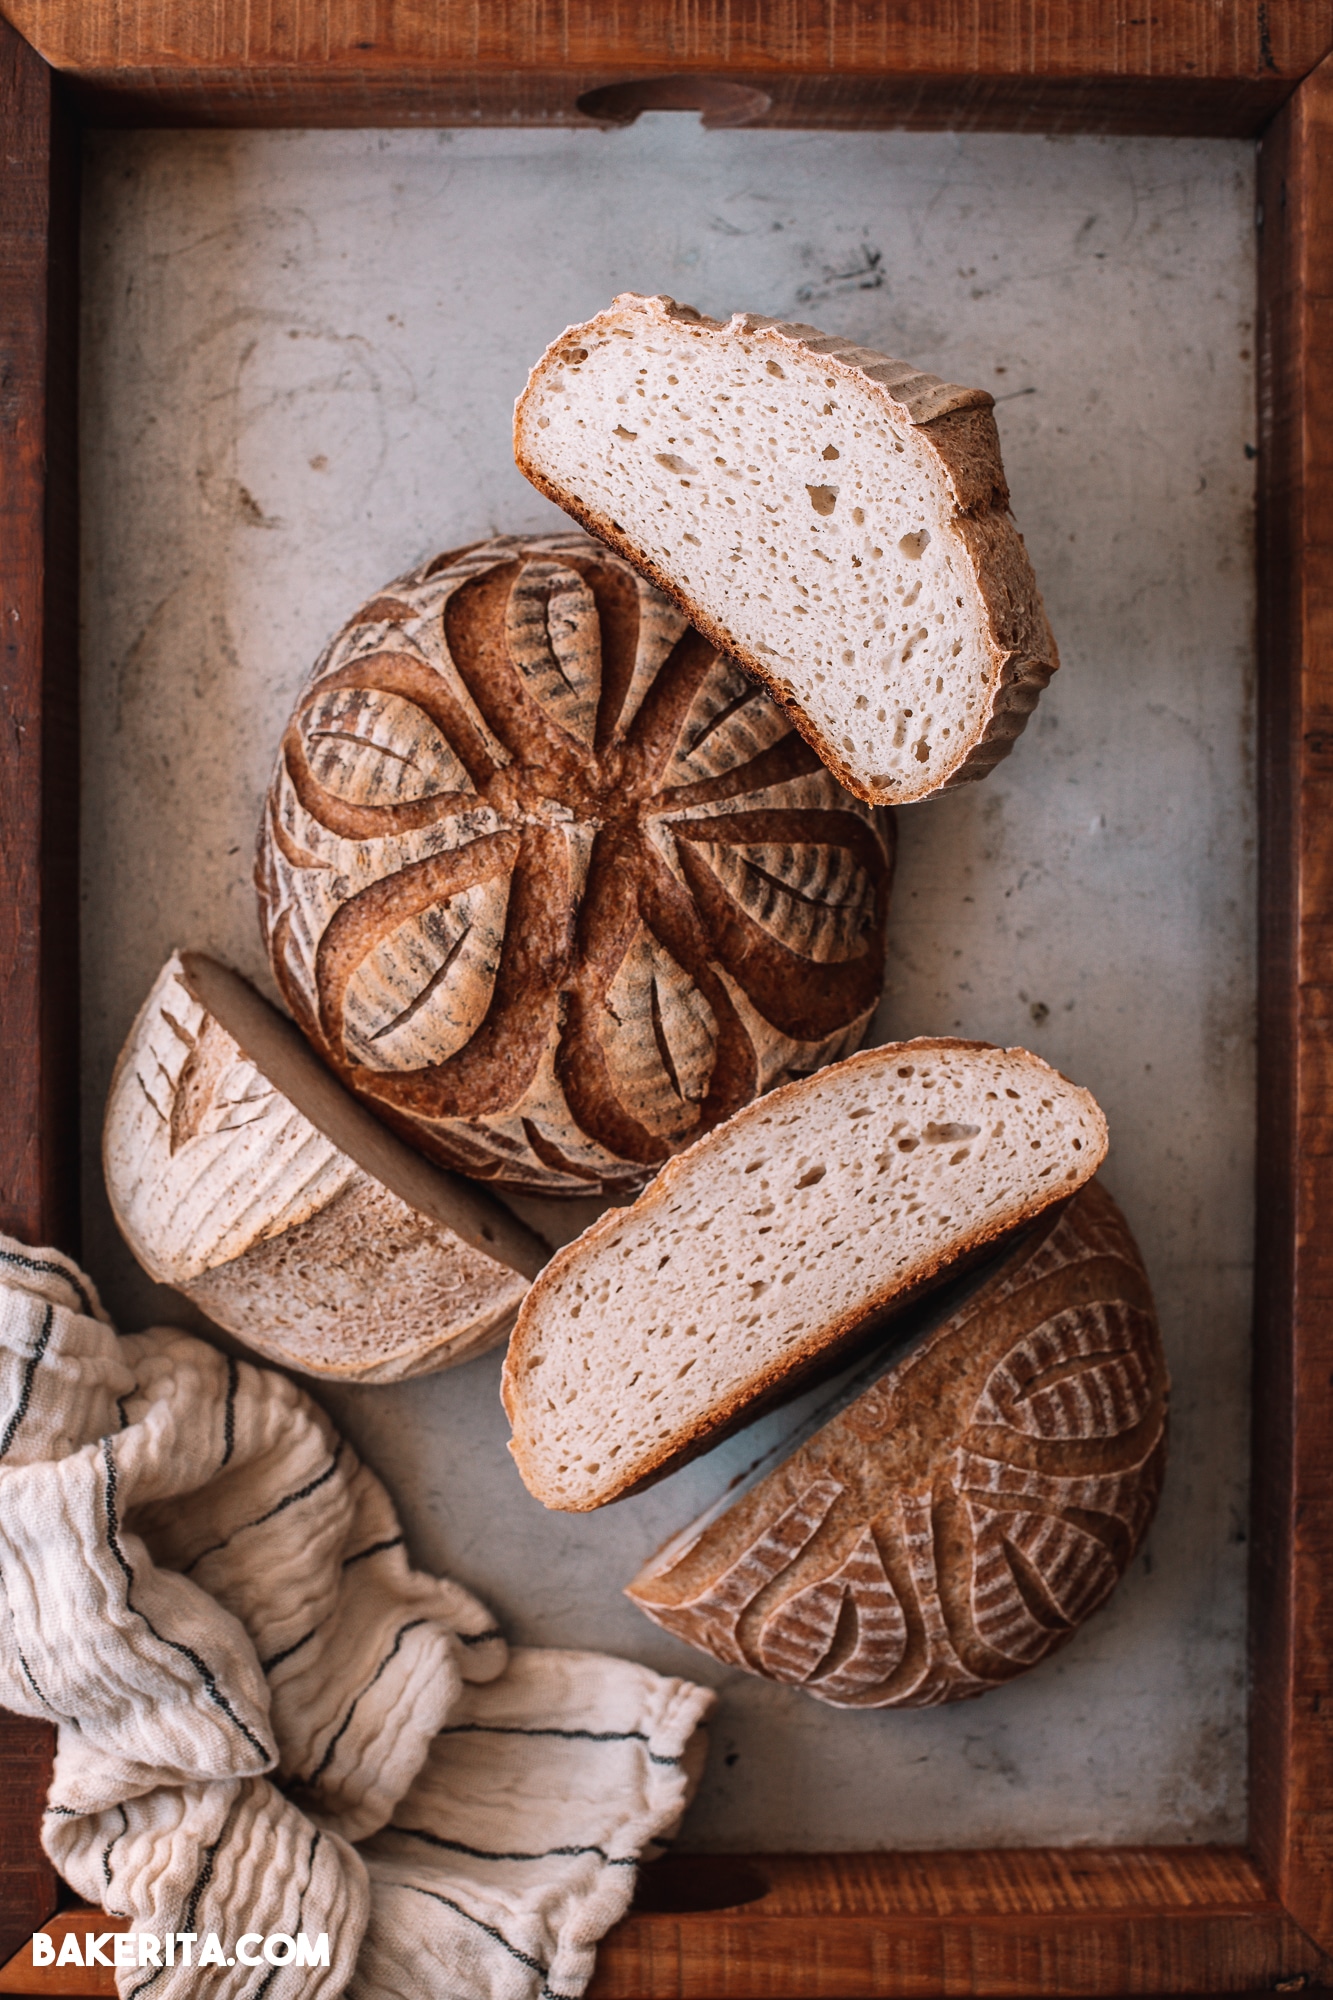
Scoring: this refers to the cuts you make on your bread before it goes into the oven, which allow the steam in your bread to escape. If you don’t score your bread, it will crack on it’s own to release the steam. By making your own cuts, you control where that steam escapes and allow the bread to rise in the oven more evenly.
Lame: typically used for scoring your gluten-free sourdough bread, it’s just a razor blade used specifically for bread! It’s usually attached to a handle of some sort. This is the one I use.
Oven Spring: this is the rise that happens right after your bread hits the oven, and it’s often helped along by preheating your Dutch oven in the oven to a high temperature before adding the loaf.

The tools you’ll need to get started:
- A happy starter: you want peak activity (doubling after each feeding) before you start baking.
- Banneton: you can also use a bowl lined with a clean cloth tea towel, but bannetons do give you beautiful ridges and provide a great environment for your bread to rise. I like using an 8-inch banneton.
- Lame: this is a razor blade you’ll use for scoring your bread before baking. A sharp knife will work well too. My lame is from Wire Monkey Shop.
- Stand Mixer: this is optional – I’ve made many loaves using a bowl, a wooden spoon, and my hands. But if you have one, making bread using your stand mixer and a dough hook makes things super easy.
- Dutch Oven: you don’t need a Dutch oven per se, but it definitely helps: the lid traps the heat and steam, and it helps provide a wonderfully crunchy crust. By preheating the Dutch oven, it also helps support your bread’s lift once it hits the hot oven. I have a pricey 5.5qt Staub dutch oven that I’ve had forever, but more affordable options also work just as well. I’ve linked some options beneath the recipe.
- Parchment Paper: I find parchment tremendously useful for making a “sling” to help lower your bread into the Dutch oven, so it doesn’t lose its rise from getting “dropped” into the Dutch oven, which can deflate the loaf. If you’re really invested in bread making, you may want to invest in something like this silicone baking mat that’s perfect for lowering and lifting your bread into the Dutch oven.
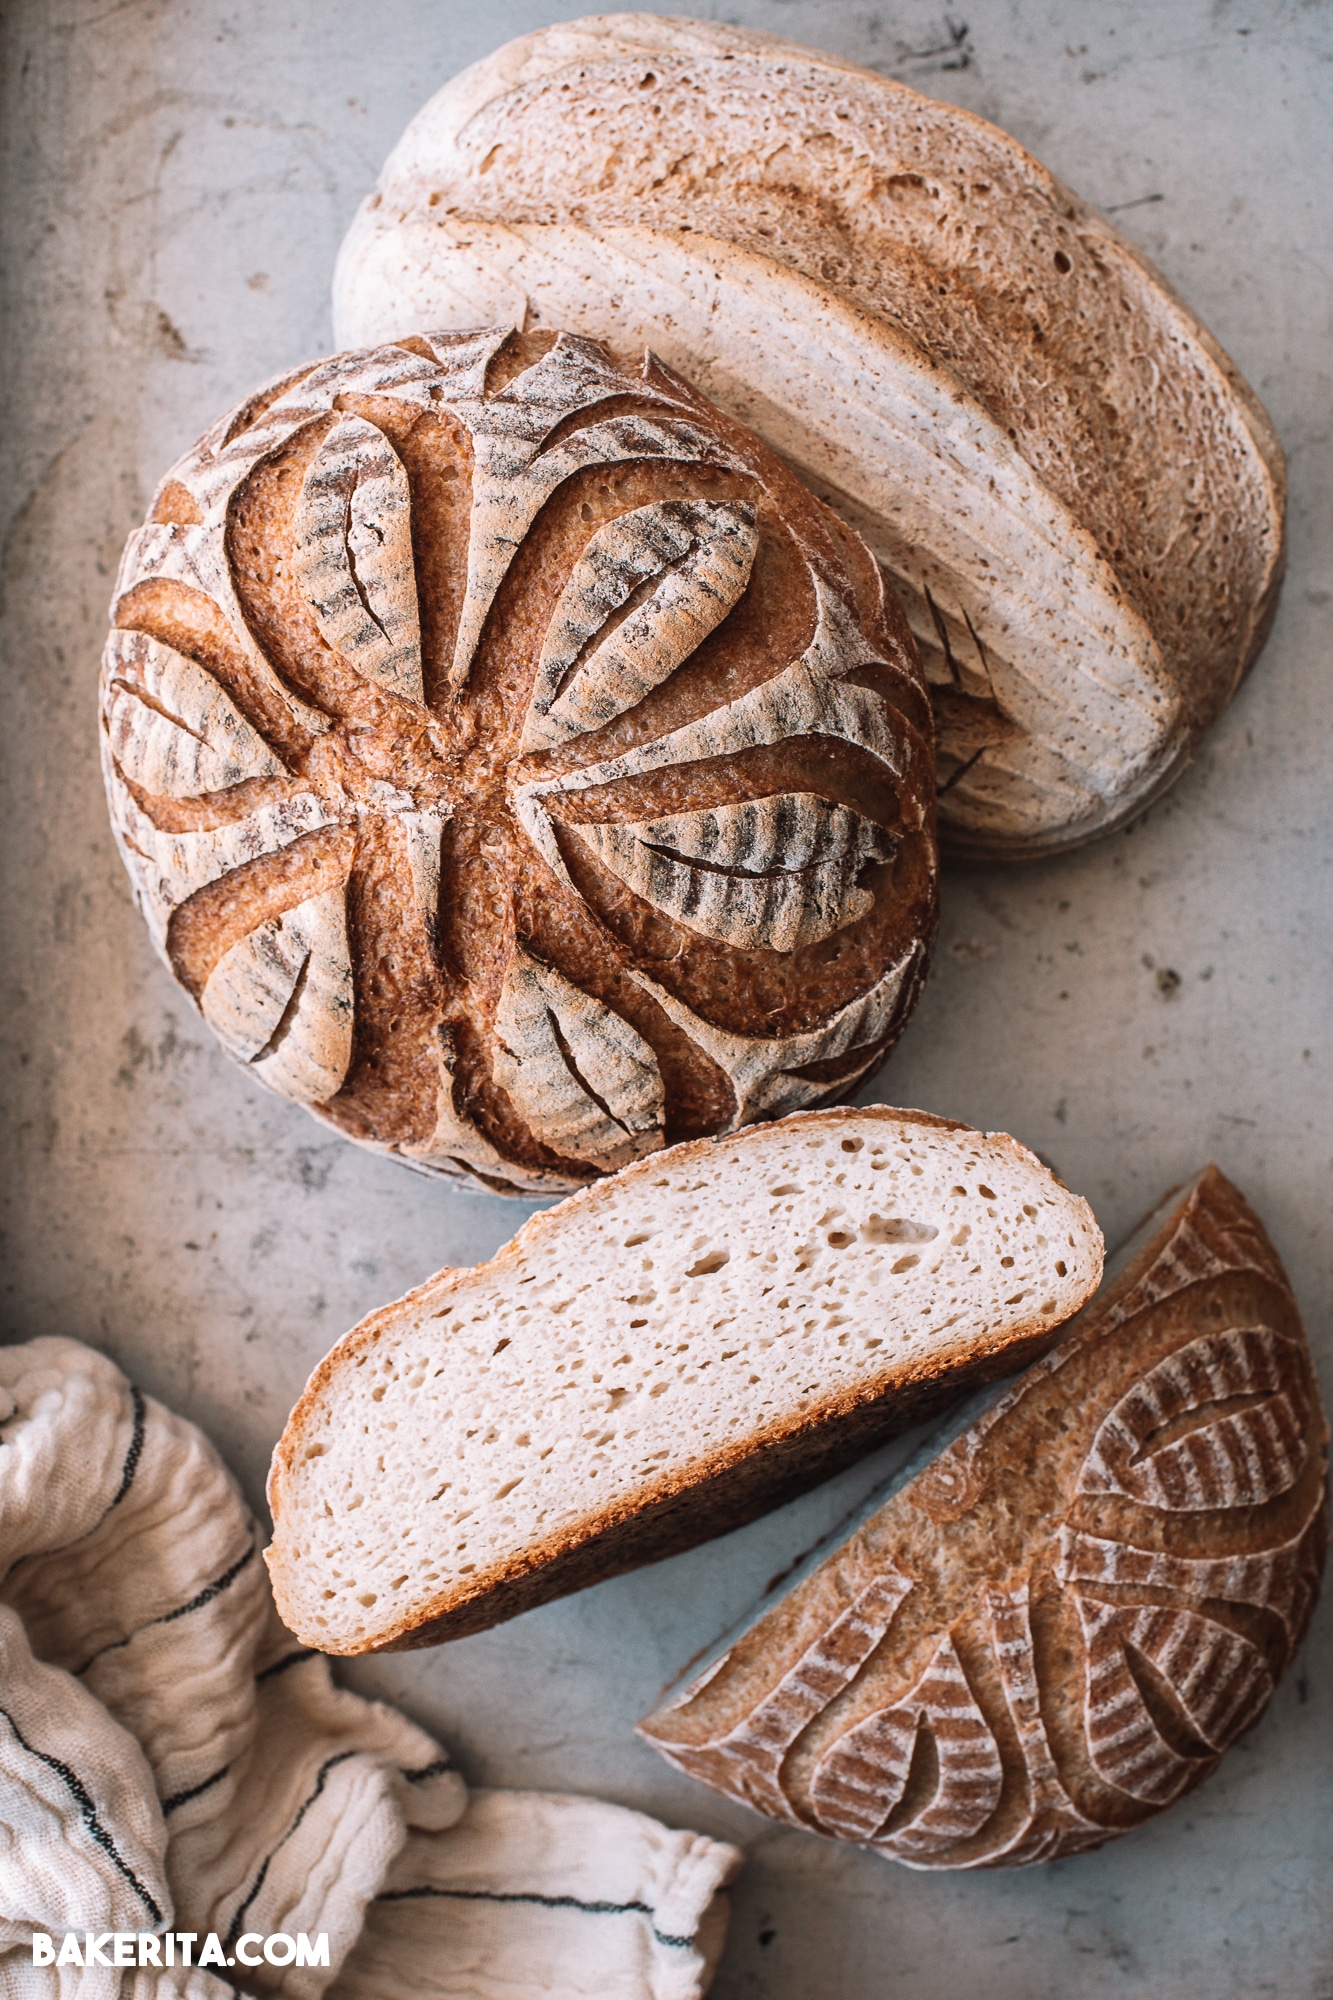
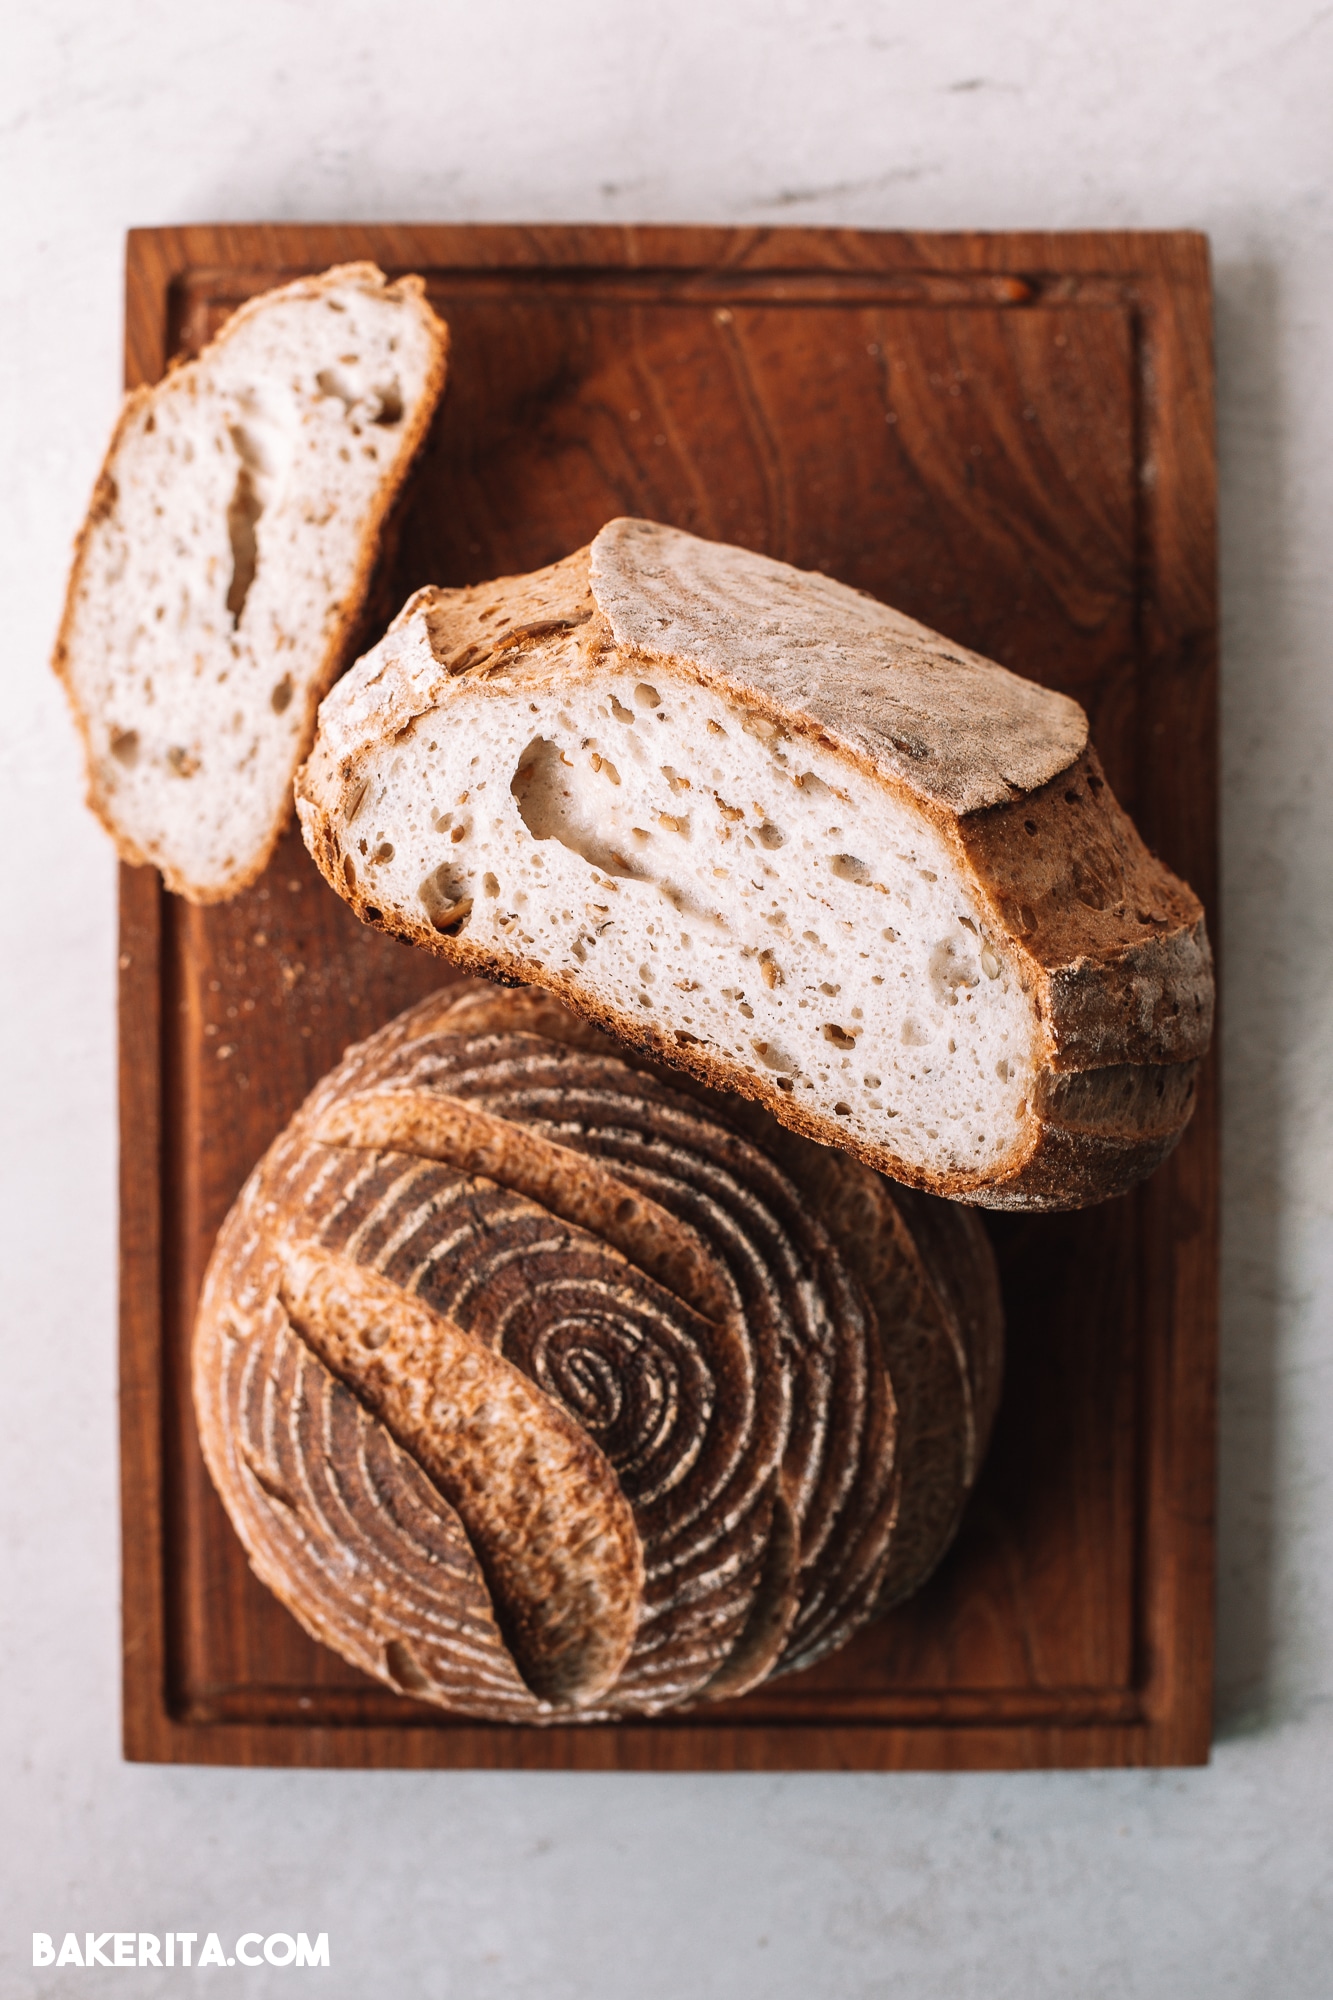
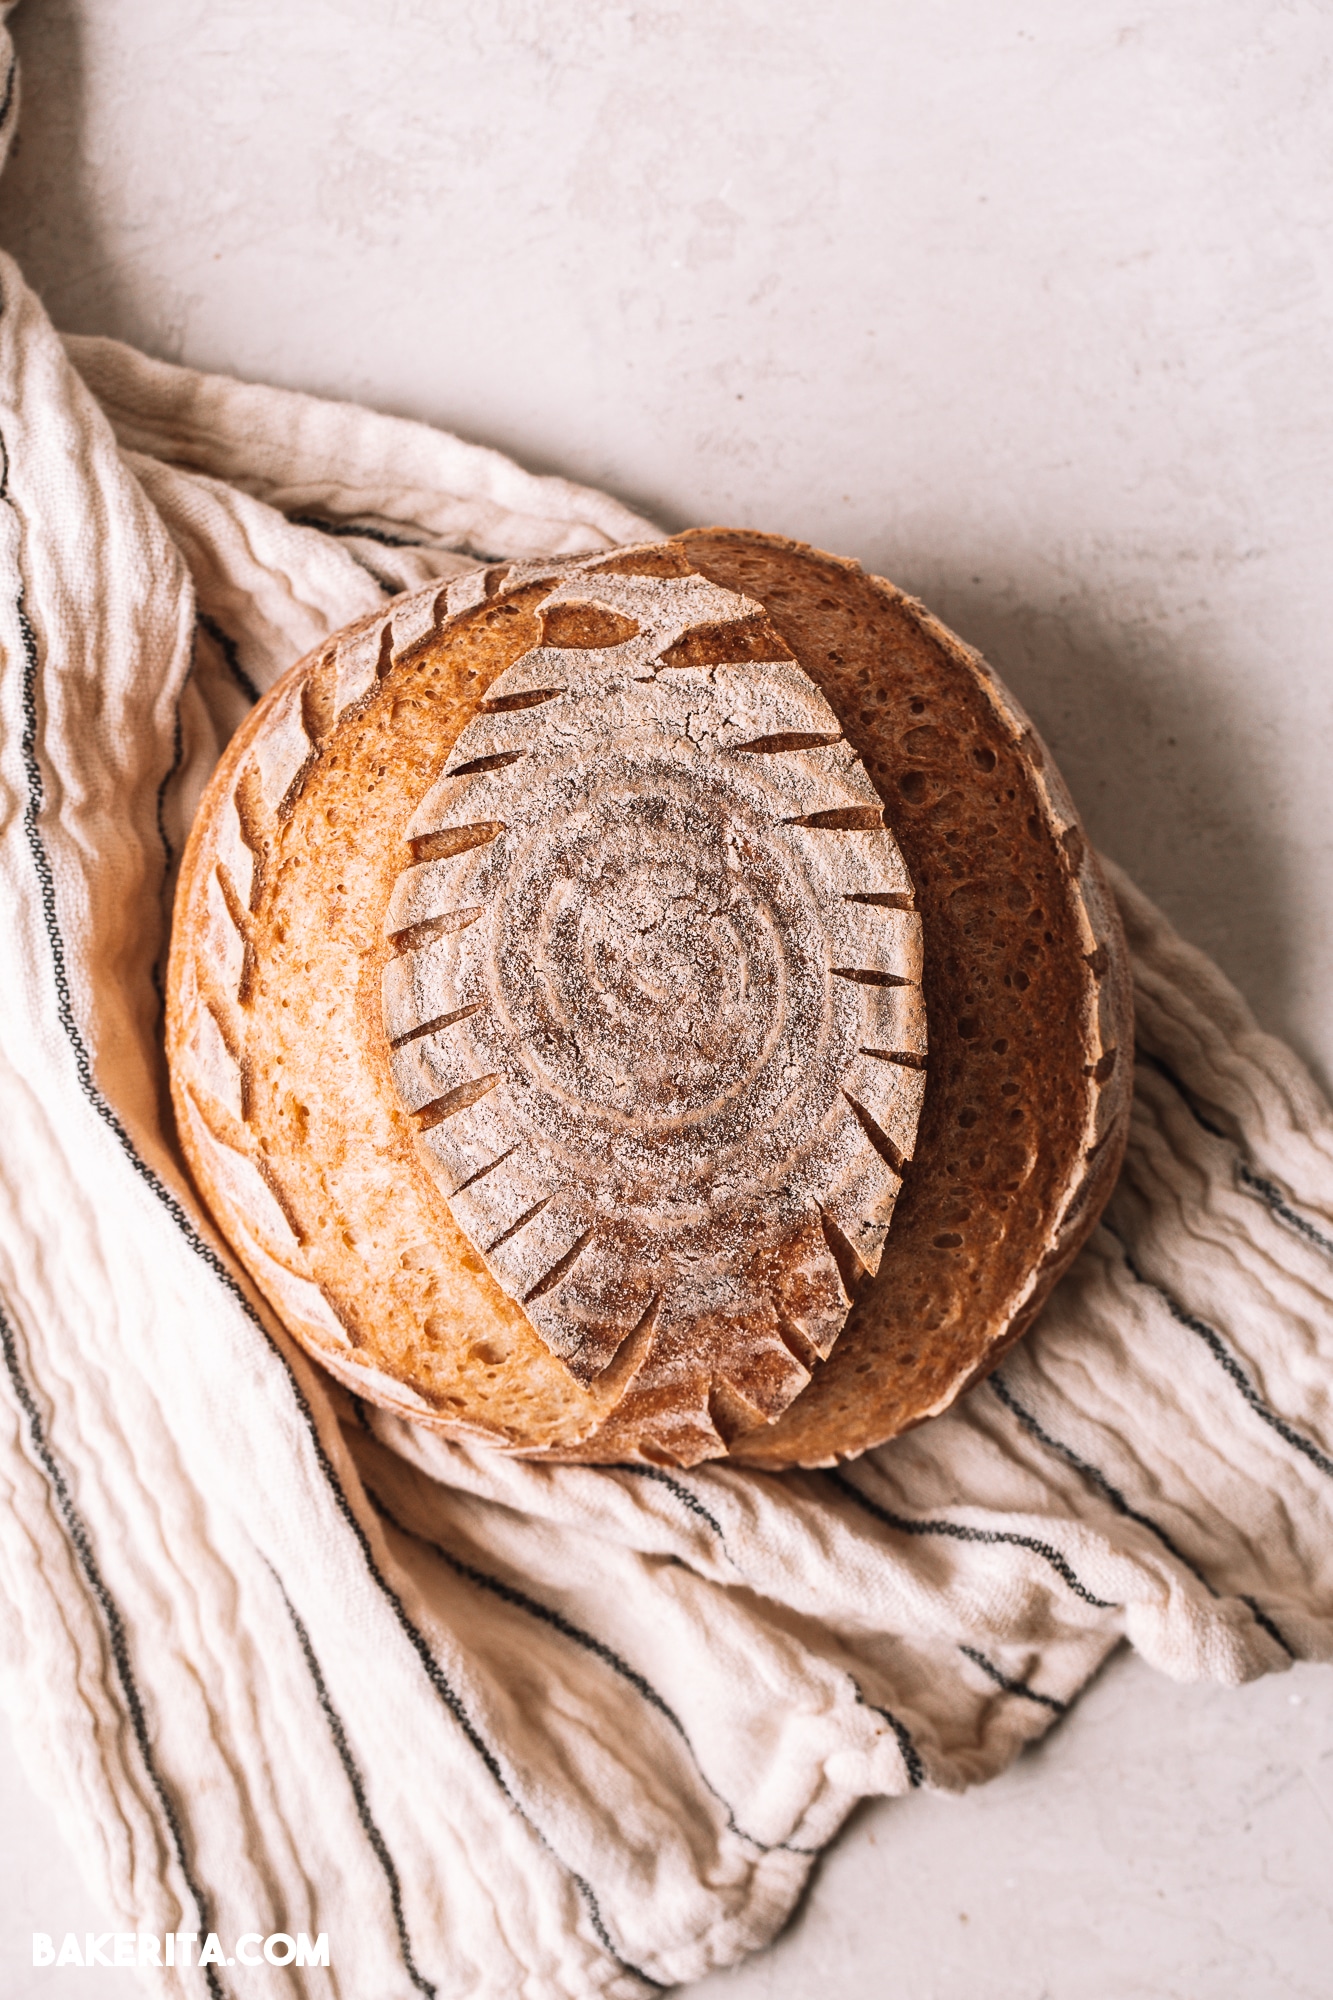
Loaf Shapes!
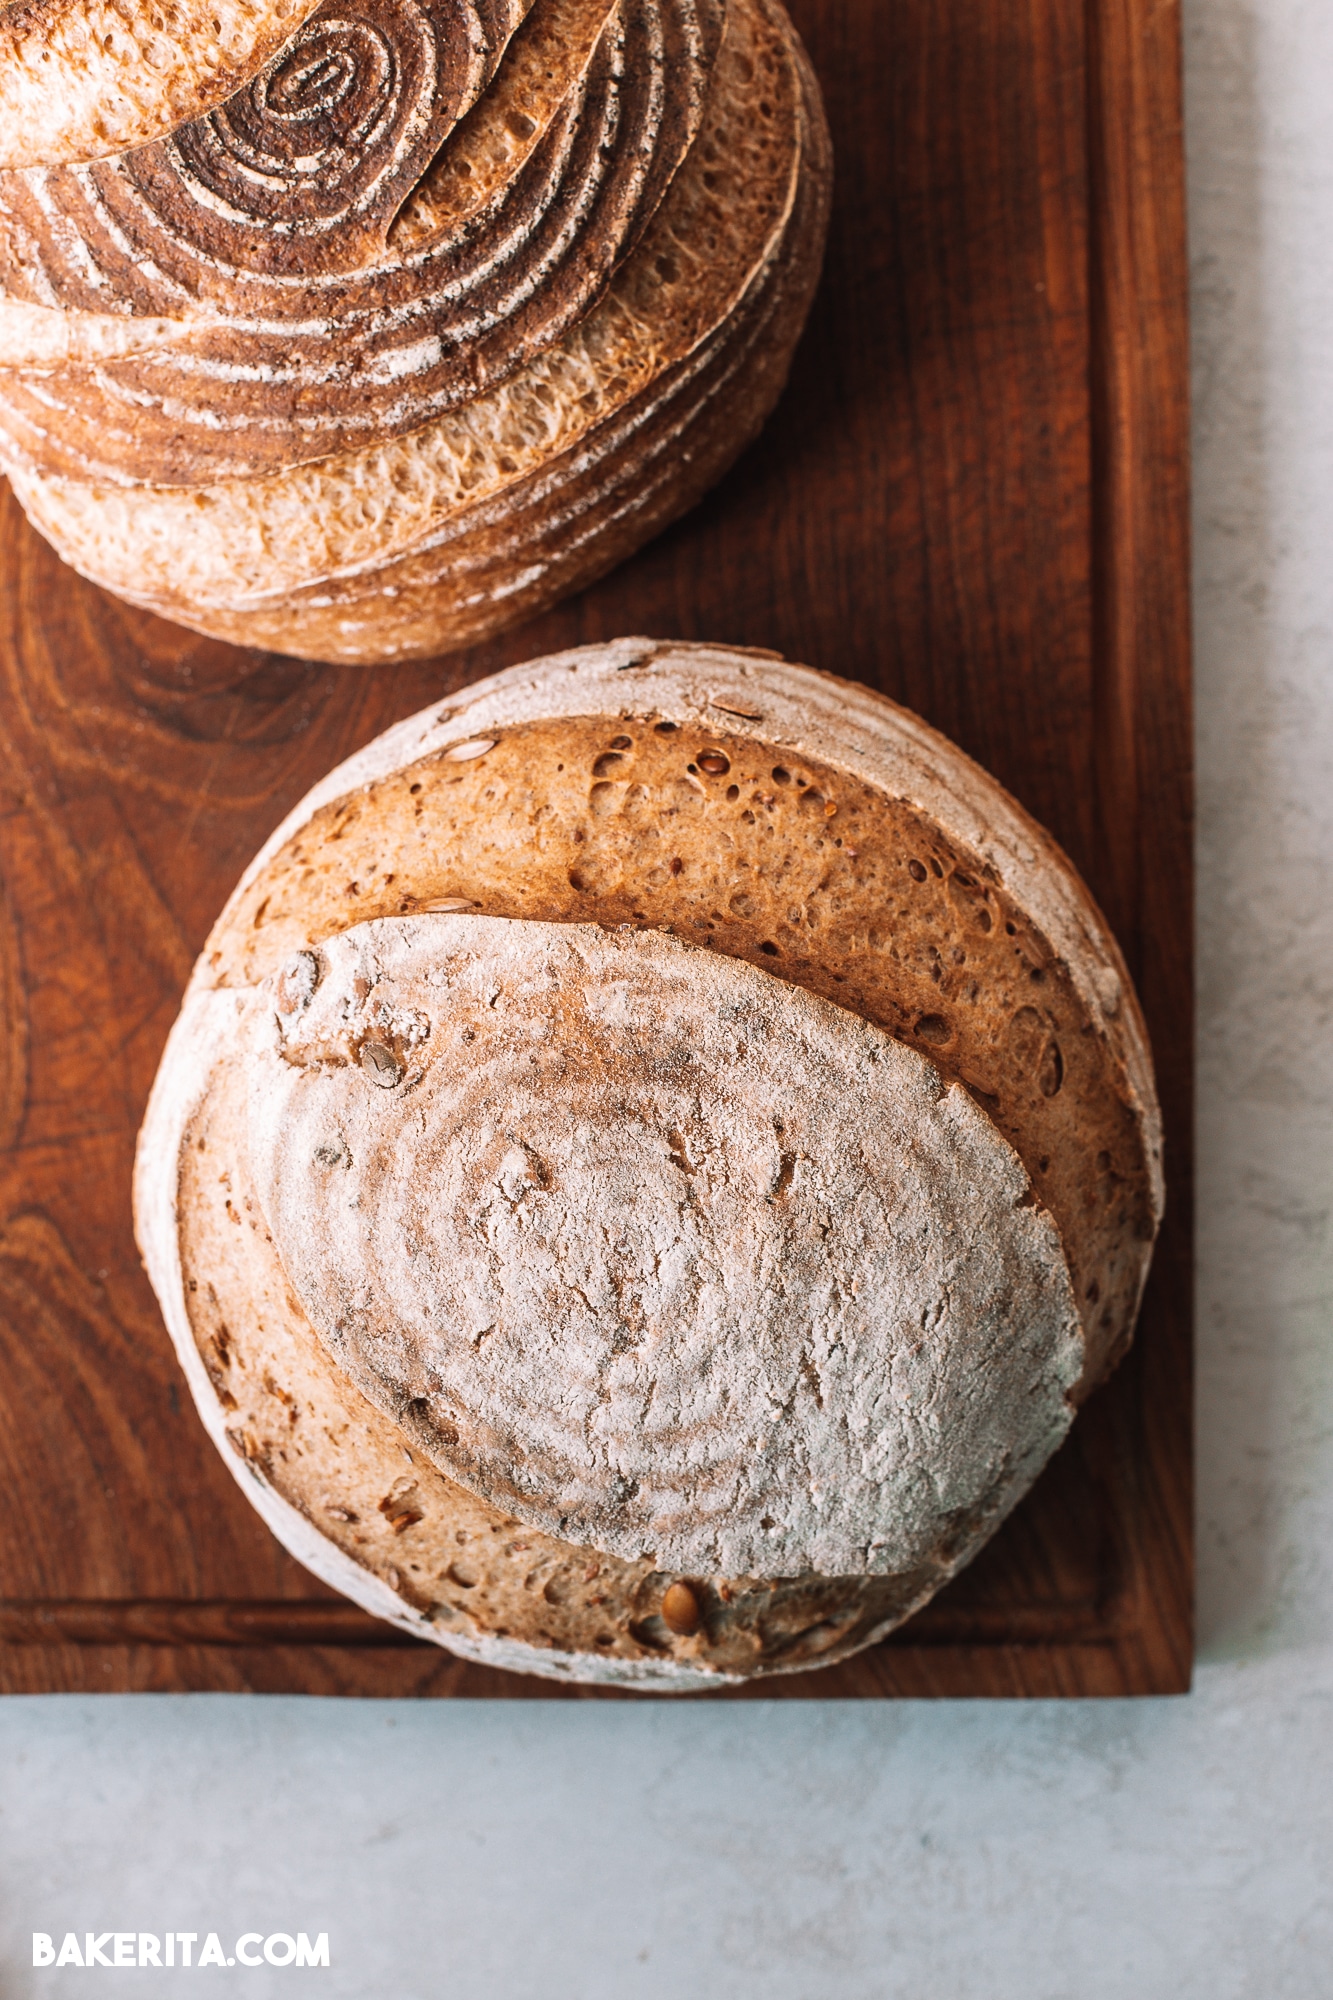
The classic round sourdough bread you’re probably thinking of is called a boule. It’s generally proofed in a banneton basket, or in a cloth-lined bowl, and then baked in a Dutch oven. But, why stop at round loaves?!
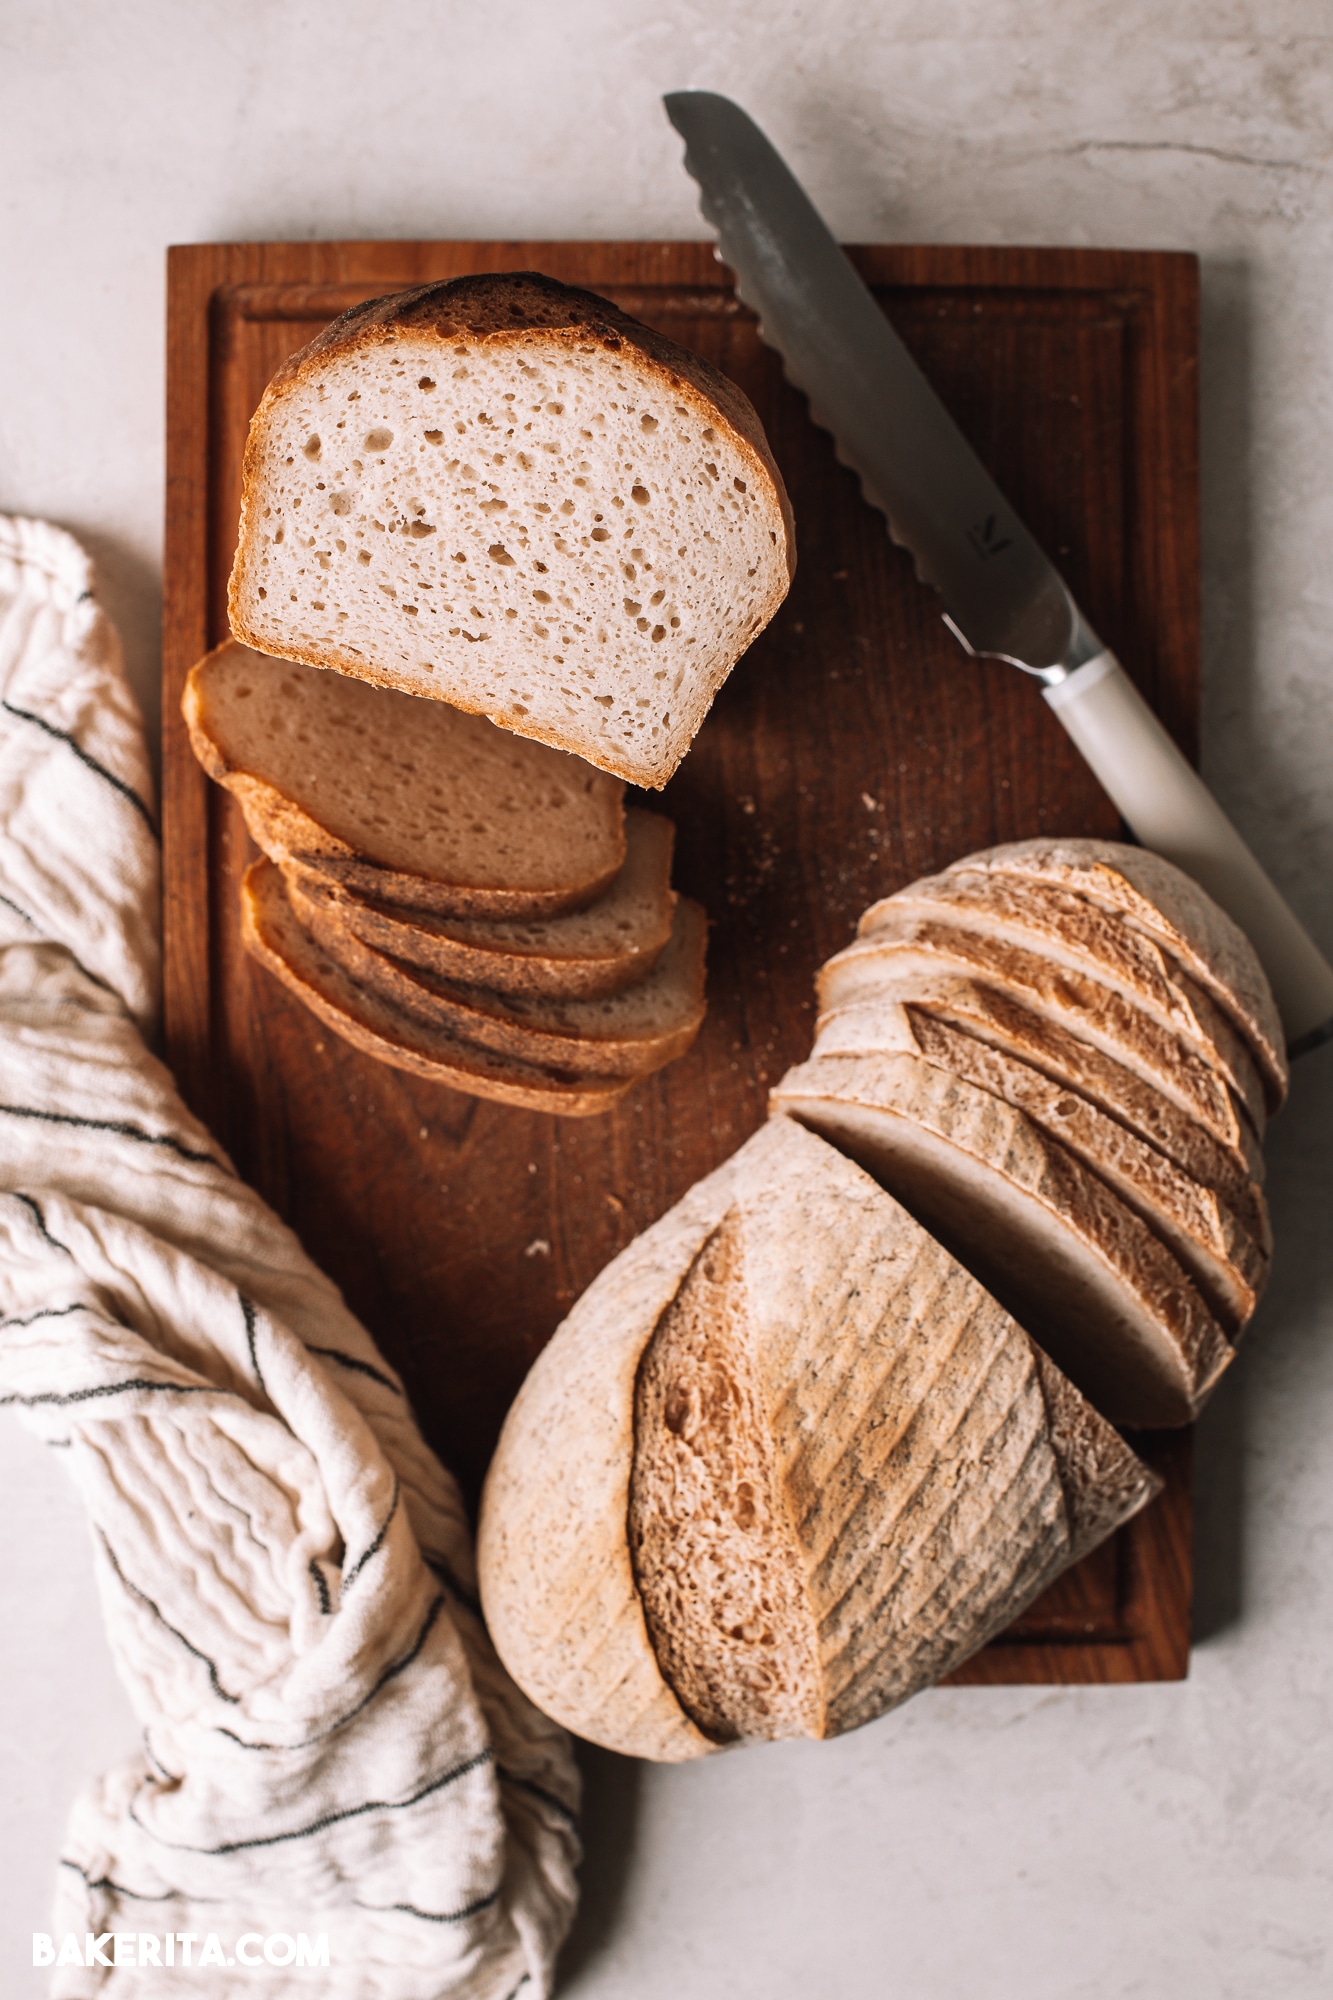
I love making this recipe in a classic loaf pan to get beautiful sandwich slices, and I also love making baguettes with this same recipe by just shaping differently and baking in a baguette pan. You can also get an oval-shaped banneton to make longer, more oval-shaped boules.
If you’re going to bake in any other pans, I recommend using metal. It will conduct heat a lot better than a silicone or glass pan, and will help get crispy bottom and sides to your loaf. To use a metal loaf pan, you’ll want to allow the loaf to rise completely in the pan so you won’t need to transfer it after it’s risen.

Getting your starter ready for baking
You’ll want your starter to be at peak activity when you mix up your preferment! You also want to make sure you have enough starter for your loaf, and to make your bread. So, before making bread, I like to do a big feeding (about 150g each water and flour) and get to a solid doubling in size of my starter.
If your starter had been in the refrigerator, you want want to do two feedings before making bread to make sure your starter is super happy and ready to go!
How to make gluten-free sourdough bread
First things first – let’s start with the preferment. That term refers to the initial mixing of active starter, flour, and water. It’s essentially a feeding of just the starter you’ll be using for the bread. The preferment can “proof” or activate anywhere from four hours to 18 hours. The length of fermentation will impact the level of sourness that your bread will have. A shorter ferment will lead to a less sour loaf. A longer one will give you a stronger sour flavor.
Once your preferment is bubbly and ready to bake with, it’s time to mix up the dough for our gluten-free sourdough bread! Here is the process, in order, of how I make the bread dough:
- Mix the psyllium husk, sweetener, and water. Whisk until combined and let gel while preparing the flour mixture.
- In a large bowl or stand mixer, combine all of the flours + starches, plus salt. This is also where you’re adding any herbs and other dry seasonings you may want to add.
- Whisk the psyllium gel mixture into the preferment, along with the olive oil if using. This is also when you’ll add any other wet seasonings (like garlic, soaked nuts or seeds, etc.).
- Add the wet ingredients into the flour mixture. Use a spoon and then your hands to bring the dough together. You can also use your dough hook to mix all of the ingredients until a smooth dough forms.
- Once your dough is soft and smooth, turn it out onto a clean, smooth work surface. Knead into a smooth ball, and use your hands to shape the dough into a round (or whatever shape you’re making).
- Use a dough scraper or your hands to transfer the dough into your banneton, or a bowl lined with a clean tea towel. Put the smooth side facing down, so the “seams” of the loaf are facing up. Since we’ll flip the loaf before baking, the seams will be on the bottom after baking.
- Cover, and let the dough proof for about three hours at room temperature, or overnight in the refrigerator.

All about proofing
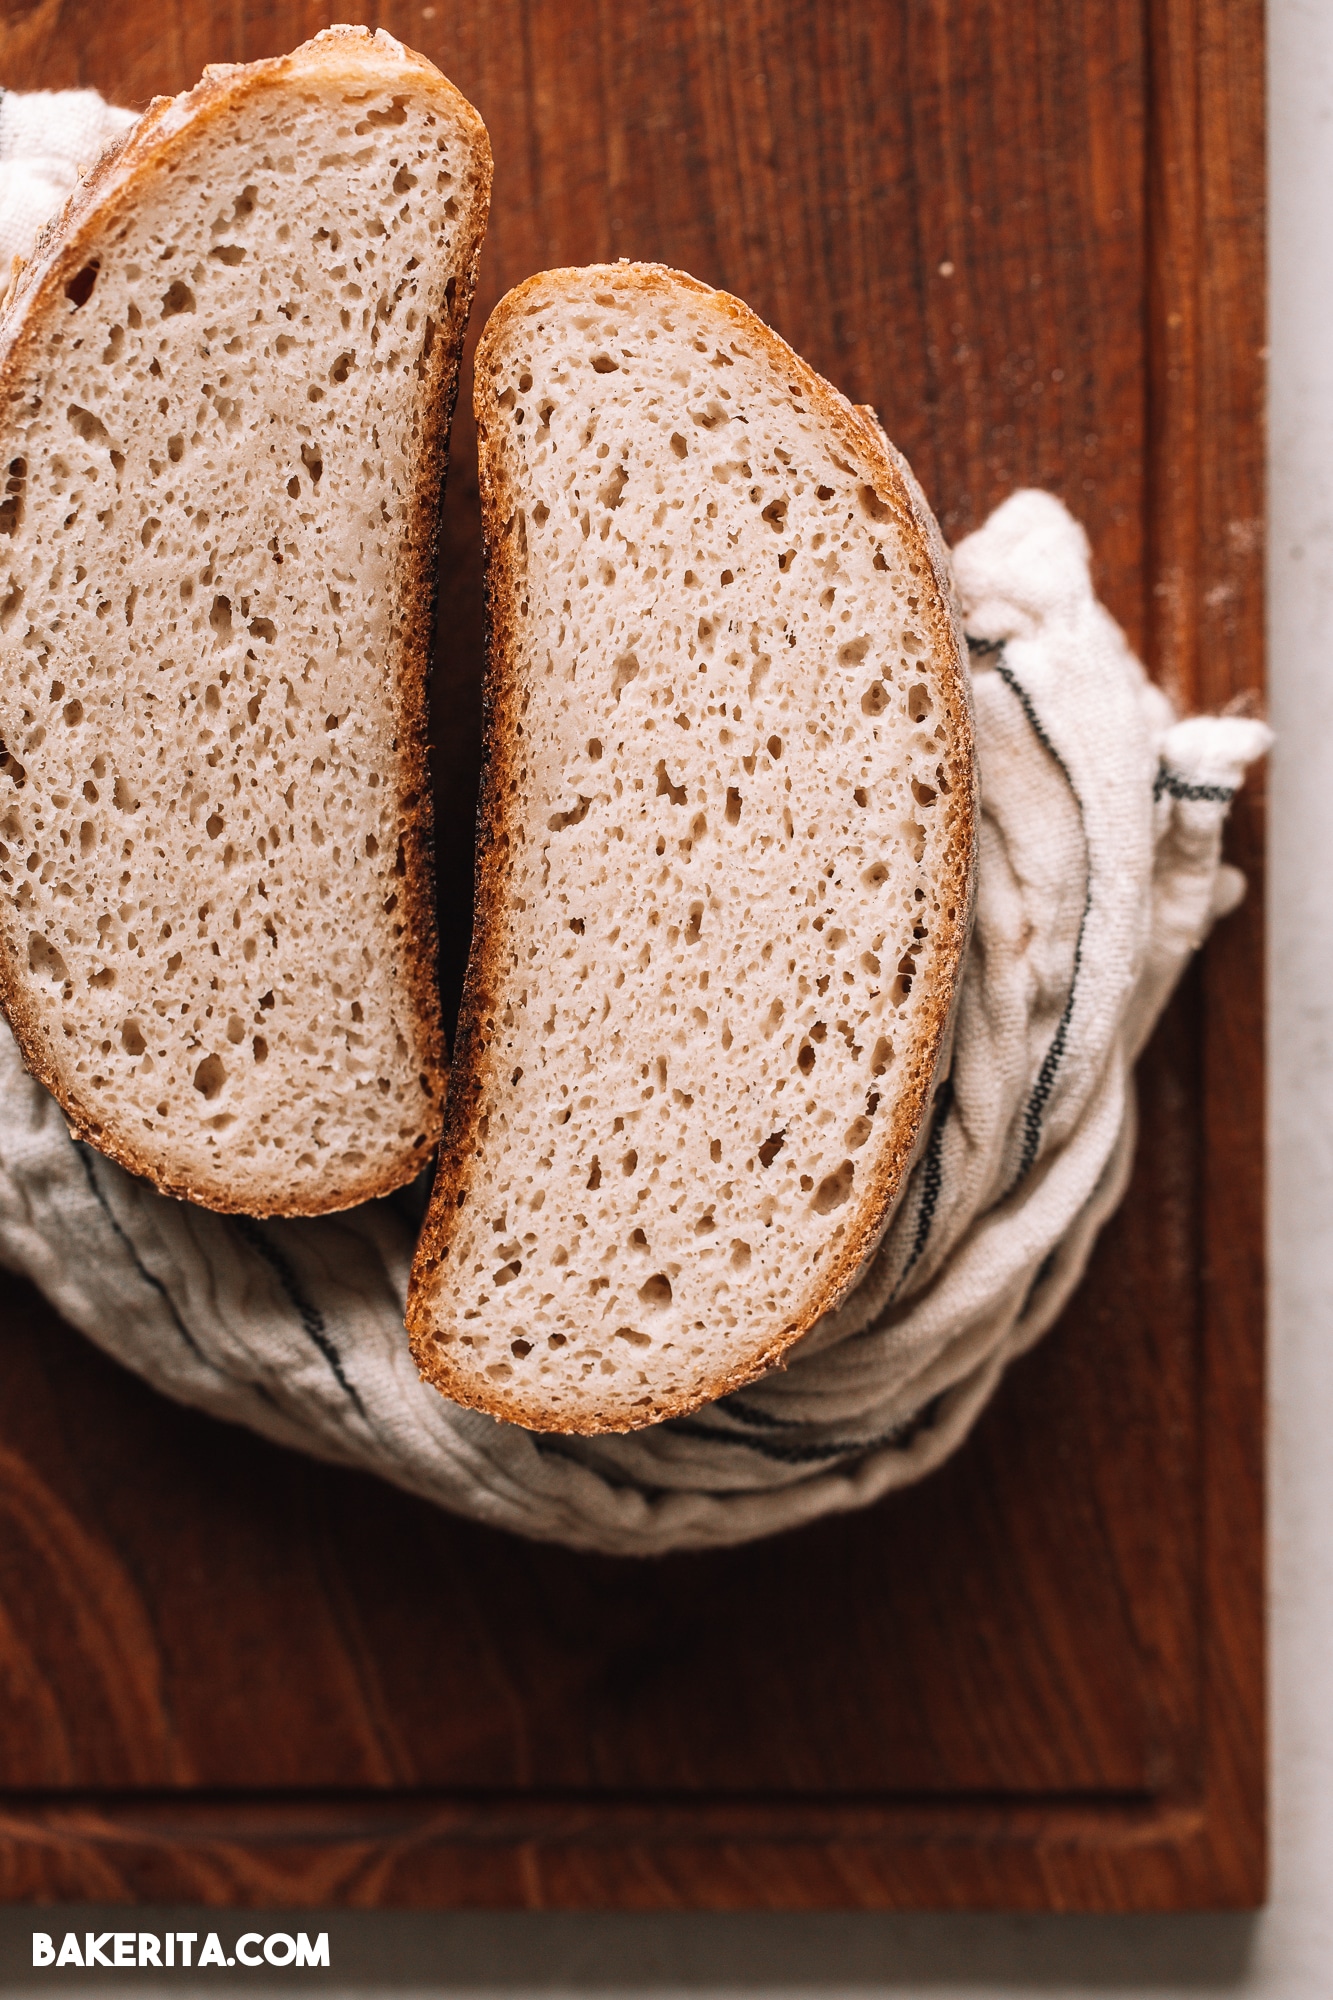
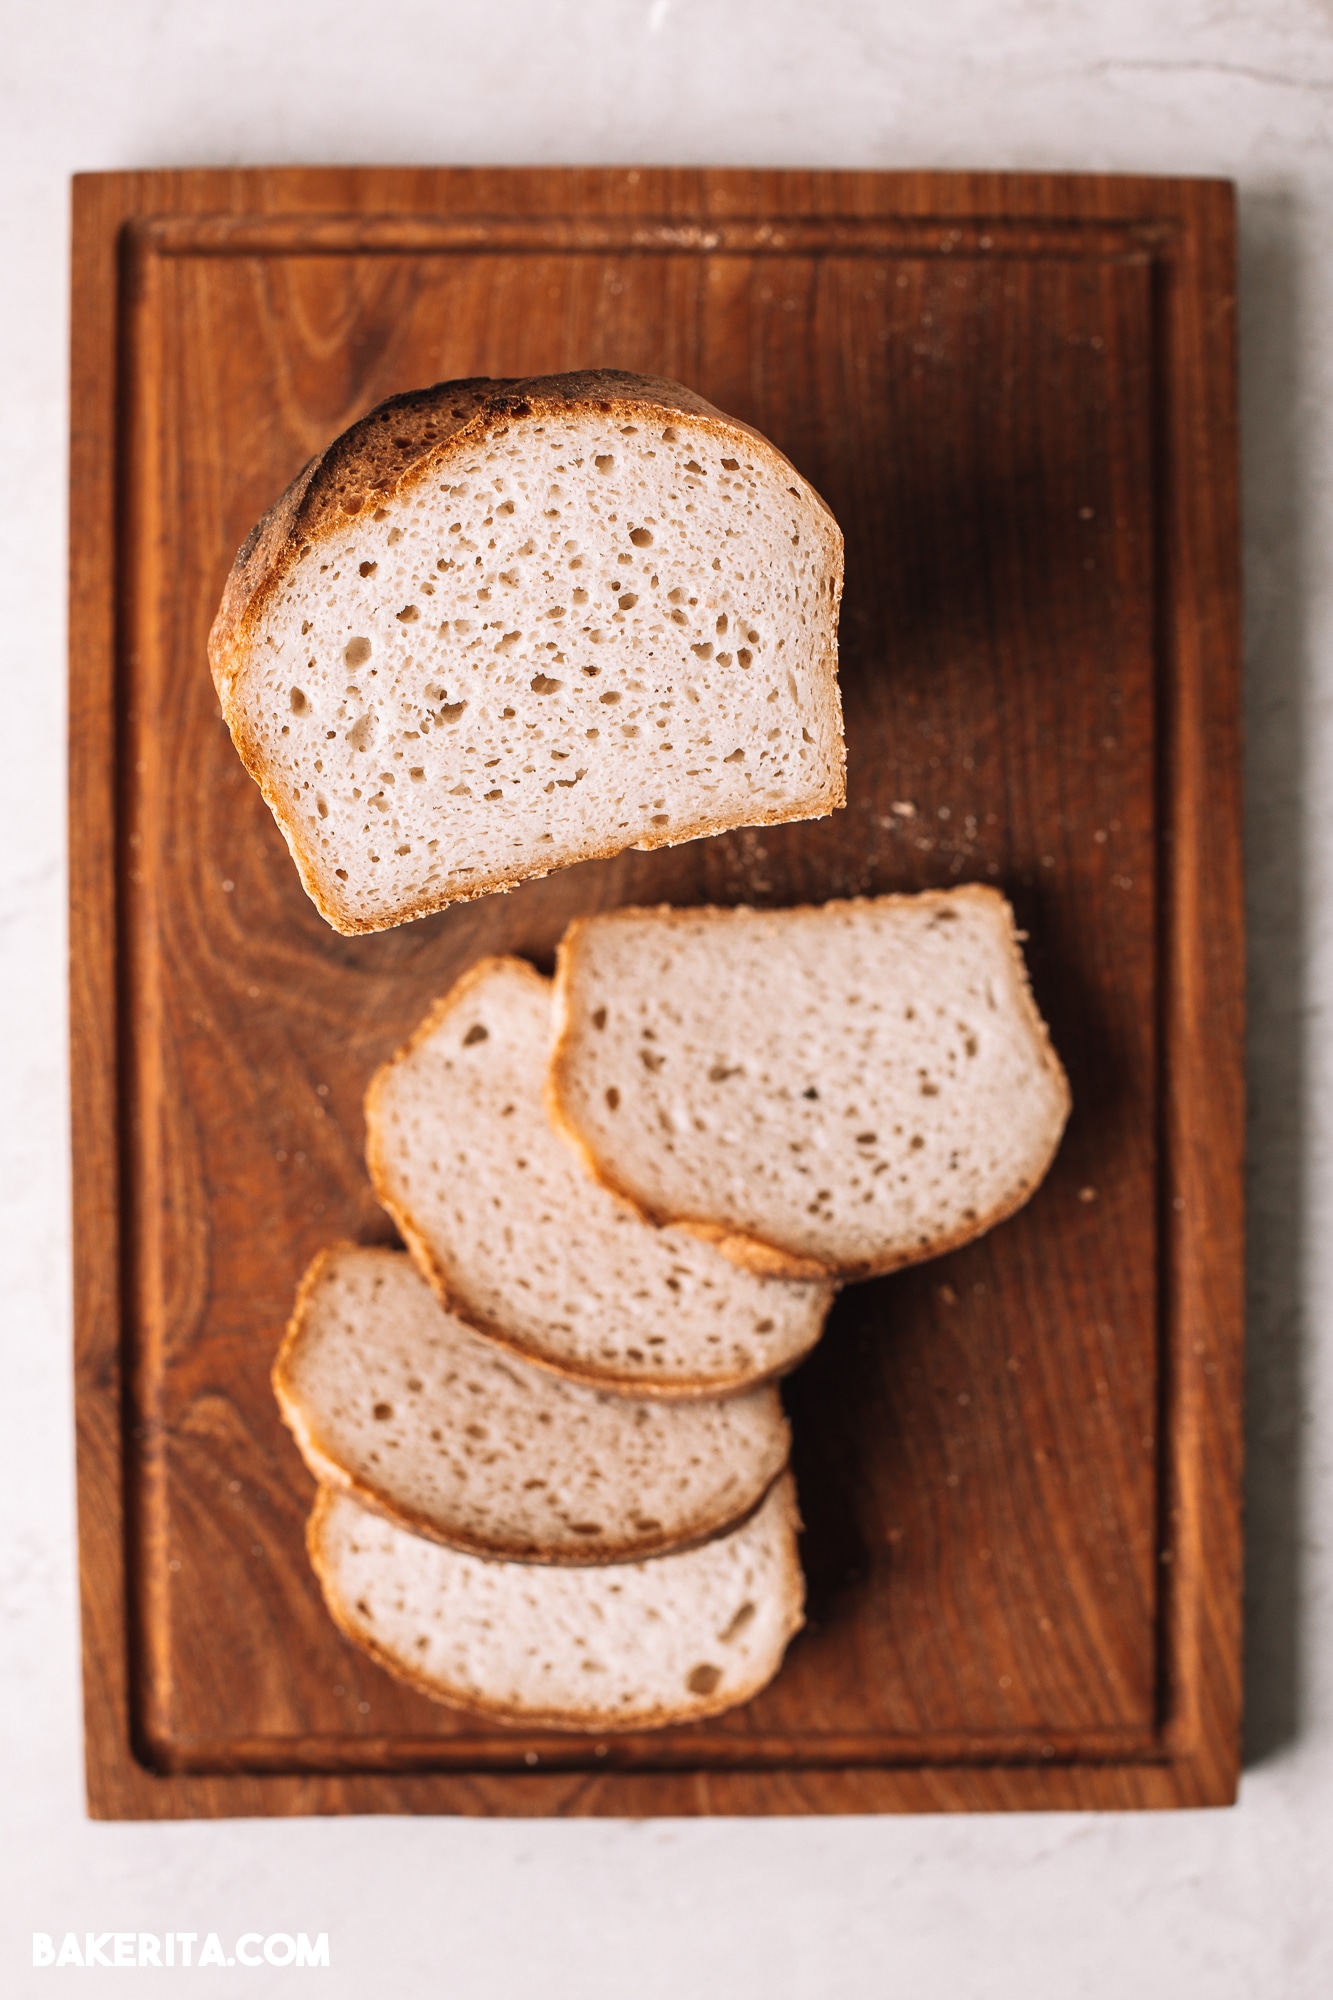
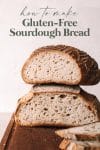
Proofing, scientifically, is a rest period after putting together your bread dough where the yeast ferments the dough and produces gases, which create the bubbles you see when you slice into a loaf of bread.
Proofing is SO location and temperature-dependent. In my steady San Diego climate, a 3 to 4-hour proof works pretty consistently for me – maybe a little longer in the winter, and a little shorter in the summer, due to ambient temperature. You can also proof your loaf overnight in the refrigerator, which also helps develop a more sour flavor!
If you live somewhere very warm and humid, your proofing time will be shorter. Perhaps your loaf is proofing too quickly – then you’ll want to decrease the amount of starter to give your bread enough time to proof and develop without overproofing.
If you’re in a cool place, or your starter is new and not very active yet, you’ll want to add a higher amount of starter and/or let the bread proof longer.
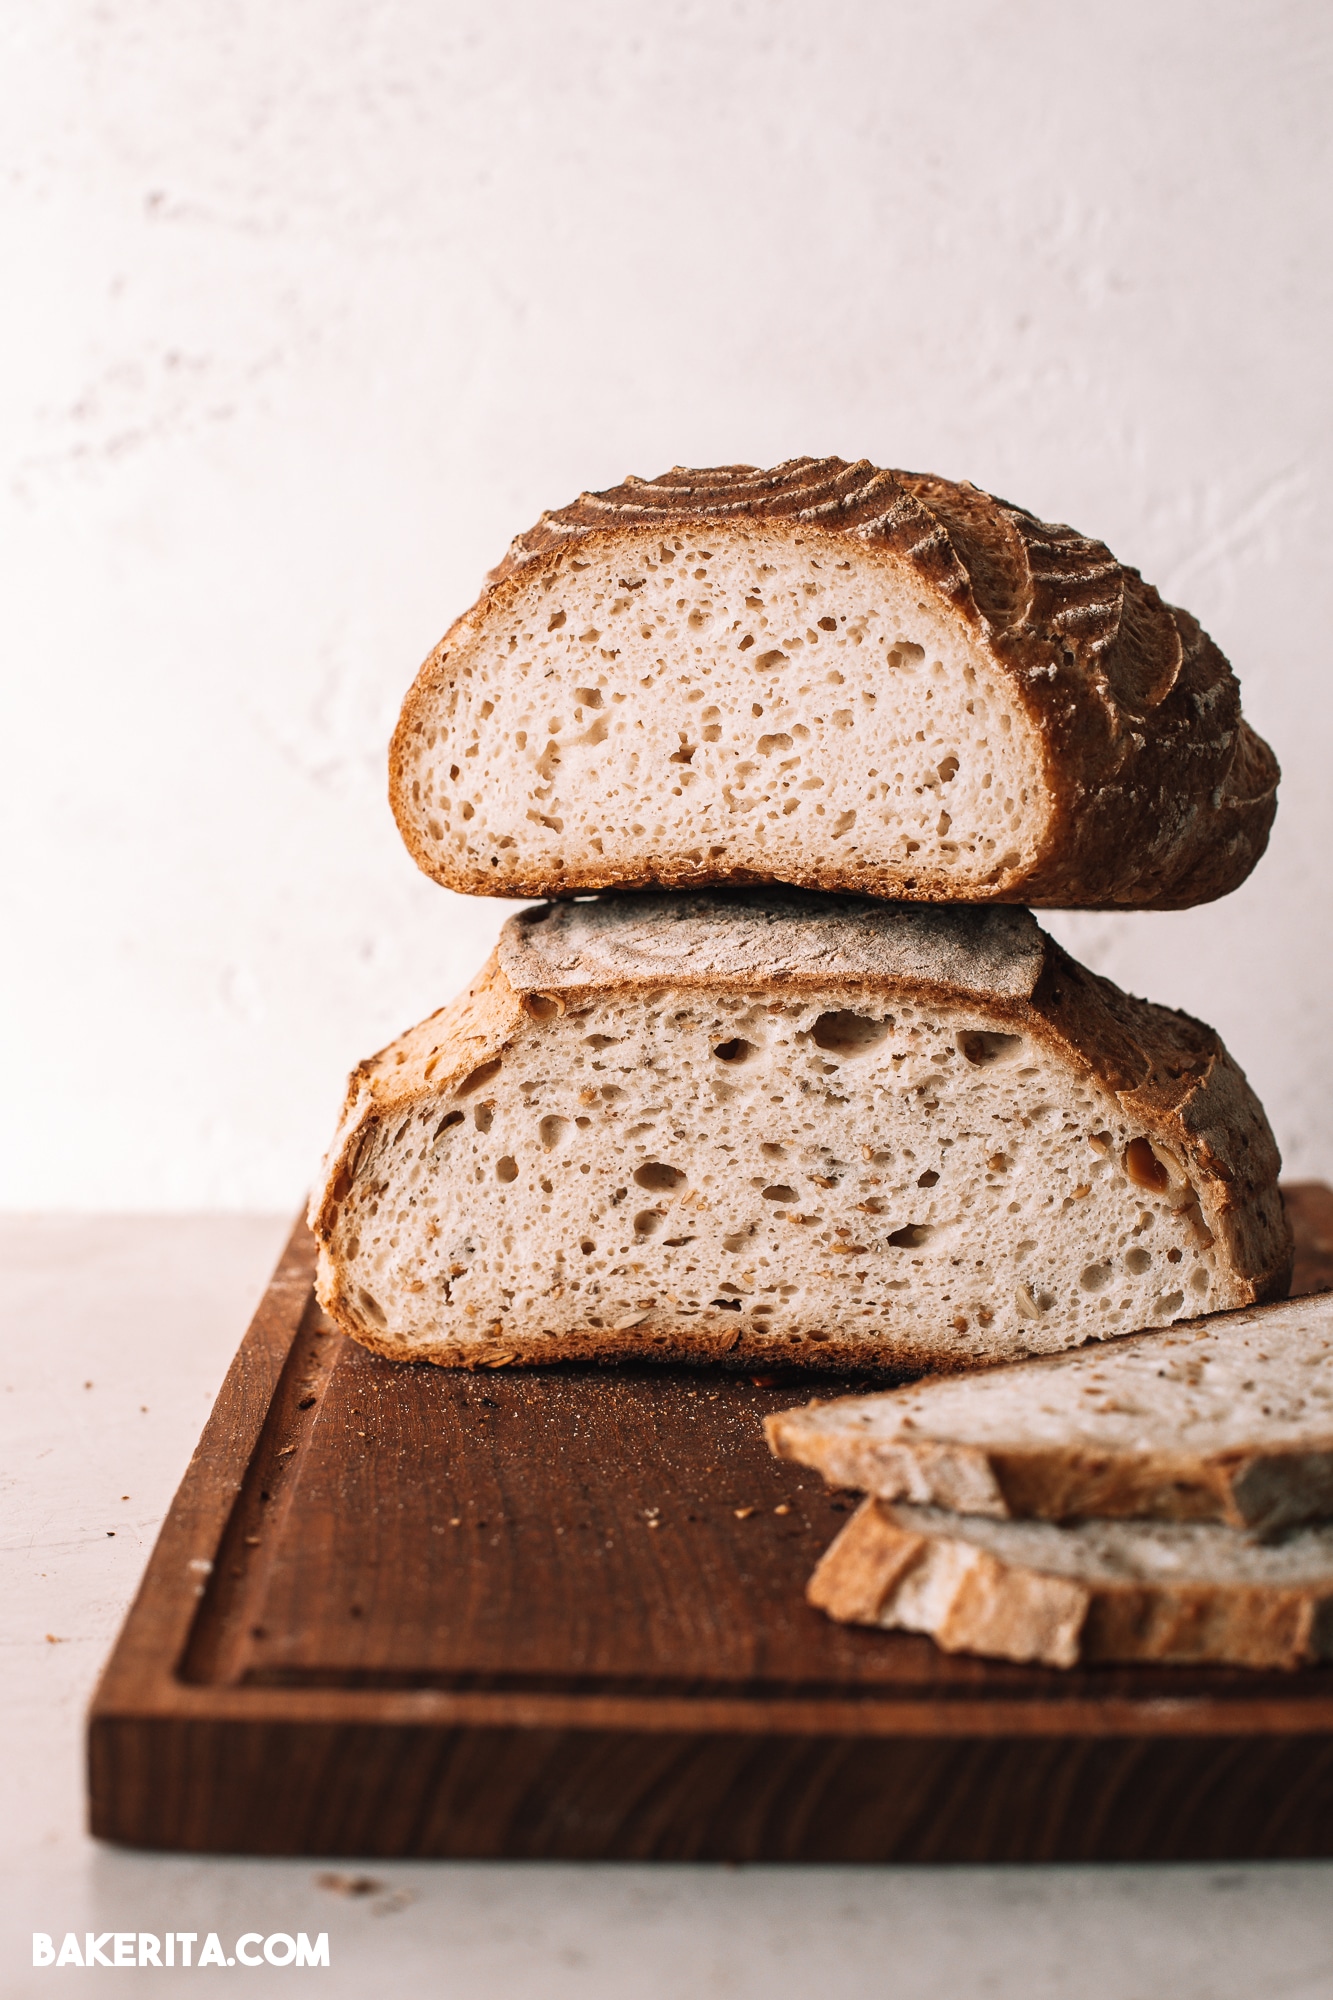
You’ll know your bread is well proofed when it seems to have increased in size – not quite doubled, but almost. When you press it, it should feel soft and airy and should spring back quickly. It’s hard to describe the exact feeling, but after baking a few loaves, you’ll get a feel for what a well-proofed loaf feels like!
If your bread is over-proofed: you’ll see a big hole at the top of your loaf, between the crust and the rest of the loaf, and it will likely be dense and gummy at the bottom, where the dough started to settle. To fix an over-proofed loaf (before it goes into the oven), you can punch it down, knead it and shape it again, and allow it to rise a second time.
If your bread is under-proofed: you’ll barely have any bubbles and your bread will be dense and gummy.

When you’re ready to bake…
An hour before your gluten-free sourdough bread is ready to go into the oven, preheat your oven to 425°F/218°C. If you’ll be baking in a Dutch Oven, allow it to heat inside of the oven. This will help you get a good oven spring with your loaf.
You can also bake on a preheated baking sheet, if you don’t have a Dutch oven, or if you’re doing a bread shape that doesn’t fit into your Dutch oven.
TIP: If you’re a slow mover when getting your bread into the oven, preheat to 450°F so you don’t lose too much heat with the open oven, and once your bread is in, lower to 425°.
Baking time!
When your oven is preheated and your dough is well proofed, it’s time to score your bread. Scoring is creating cuts in your bread that will direct the bread’s rise, so instead of the bread rising and cracking on it’s own, you can create some beautiful shapes and designs. Make sure your cut is deep enough, otherwise you’ll still have cracking where you didn’t cut through.
To score, you’ll flip your bread out onto parchment paper or a silicone sling. Then you’ll score your bread as desired. Remove your hot Dutch oven, carefully, from the oven. Carefully lower your loaf into the Dutch oven, being careful not to drop it, which would pop some of the air bubbles you’ve worked so hard for!
Replace the lid, and put your bread into the oven for 45 minutes. After 45 minutes, you’ll remove the lid and let it finish baking for 25 to 40 minutes – exact timing will depend on your oven and how golden brown you want your bread.
When the bread is baked to your liking, very carefully remove it from the oven and let it cool completely.

Your sourdough baking schedule
This gluten-free sourdough bread isn’t particularly hard to make, but you do have to follow its schedule for the best results!! Here’s a sample schedule of bread baking.
5:00pm: feed your starter a big feed to get it super active.
8:00pm: your starter should be at or close to peak rise. Once it is, mix up your preferment. Cover, and let it ferment overnight.
8:00am: mix up your bread dough. Place into your proofing basket or lined bowl and allow it to rise for three hours.
10:00am: preheat your oven with the Dutch oven inside of it, an hour before we’re ready to bake.
10:55am (or whenever your bread is fully proofed): carefully flip your proofed bread out onto a sheet of parchment paper. This will help us move it into the hot Dutch oven). Score your bread as desired.
11:00am: remove the Dutch oven from the oven, carefully! Close the oven to not let the heat out. It will be very hot. Take off the lid, and carefully lower your bread into the hot Dutch oven. Be very careful not to drop it in, or you’ll deflate the bubbles that you worked hard for! Put the lid back on, place back into the oven, and set your timer for 45 minutes.
11:45am: after 45 minutes of baking, quickly and carefully remove your the lid, and close the oven back up.
12:30pm: Bake for another 25 to 45 minutes. This will depend on your oven! Bake until the bread is golden brown, before removing it from the oven. If you can safely and carefully remove it from the Dutch oven, check the loaf by tapping or knocking on the bottom of the loaf. It will sound hollow when it’s done!
Let it cool completely before you cut into it. Honestly, this is the hardest part, but if you cut into it too early, you’ll release all the steam inside of the bread and it will get weird and gummy. Please use all your willpower to refrain!
This schedule can of course be adjusted. I’ve done it all in one day, starting early in the morning, but I wanted to share a sample schedule so you can visualize how long things take!

Let’s do some troubleshooting!
My bread is gummy inside.
Chances are, one of the following is the case:
- You didn’t cook it long enough
- You used too much water
- You cut into the bread too early, or accidentally broke the crust somehow while it was cooling
- You dropped the bread dough into the cast iron skillet too hard
Typically, it’s the first one. I would usually recommend baking longer! If you find your bread is getting too dark on the bottom, and still gummy on the inside, try lowering the temperature and doing a longer bake. This will help the bread dry out in the center for the perfect consistency, which is soft but not wet or sticky at all!
My bread is too sour/not sour enough – help!
The sourness of your gluten-free sourdough bread can vary based on a few factors, but time is the most important one! The longer your bread has to ferment (in the preferment and the rising time), the most sour your bread will be.
If you want your bread to be MORE sour: the easiest way to make it more sour, in my experience, is to let your preferment ferment for longer. I’ve done 16-ish hour ferments with the preferment and have gotten a pretty sour loaf that way.
You can also use less starter in the bread, and let it rise for longer. Less starter will slow the ferment, so instead of the three-ish hours my proofing usually takes, yours may take 4 or 5 or even 6 hours, depending on the amount you used. You can also do a refrigerated proof overnight in the fridge to develop flavor. Just be careful not to overproof when you’re trying this. It will lead to a dense bottom and a cavernous top.
Alternatively, you can add a little extra tang and help your rise a bit by using a teaspoon of apple cider vinegar in your bread dough.
This article from Homestead & Chill is not specifically for gluten-free sourdough. But, it has lots of helpful tips and science-y info for how to make your sourdough starter more sour.
If you want your bread to be LESS sour: I find this recipe isn’t too sour, so I doubt you’ll have this issue. If you do, you’ll do just the opposite of above! Use a little bit more starter (not too much, your bread still needs time to rise and you don’t want it to go too quickly) and don’t let it proof for too long.
Help – my bread is gummy inside!
Chances are, one of the following is the case:
- You didn’t cook it long enough
- There was too much liquid
- You cut into the bread too early, or accidentally broke the crust somehow while it was cooling
- The bread dough was dropped into the Dutch oven too hard
Make sure to be aware of all of these!! I found that under baking was the case whenever I had gumminess. Don’t be afraid of a longer bake – the outside may seem dark, but I promise the inside won’t overcook!
More Gluten-Free Sourdough Bread Resources…
- How to Make a Gluten-Free Sourdough Starter
- Introduction to Working with Gluten-Free Sourdough from Cultures of Health
- Gluten-Free Sourdough Starter & Bread Q&A from The Art of Gluten-Free Baking
- Gluten-Free White Bread Sourdough with TONS of tips & troubleshooting help from GeorgeEats
- How To Make Your Sourdough More Sour from Homestead & Chill
I’m sure I will be adding to this post, and will also be creating a gluten-free sourdough bread Q&A page of my own, so feel free to reach out about questions/concerns you have, either below in the comments section, or on my Instagram. The goal is to have everyone making amazing gluten-free bread!!!
Want baking support? Join over 800+ sourdough bakers in my Gluten-Free Sourdough Friends Facebook Group! We discuss all things gluten-free sourdough and it’s a great place to come ask troubleshooting questions and share your loaf pics!
Print
How to Make Gluten-Free Sourdough Bread
- Prep Time: 20 minutes
- Cook Time: 1 hour 20 minutes
- Total Time: 1 hour 40 minutes
- Yield: 1 sourdough boule 1x
- Category: Bread Baking
- Method: Baking
- Cuisine: Bread
- Diet: Gluten Free
Description
The Gluten-Free Sourdough Bread Guide to help you make the best gluten-free and vegan sourdough of your life!!
A few equipment notes…
- A kitchen scale is a must-have! I don’t share volume measurements for the lack of accuracy.
- I use a banneton basket for all my bread proofing. You can also use a bowl and a clean towel.
- A stand mixer is not necessary, but helpful in mixing together your dough.
See underneath the recipe card for links to all of my favorite sourdough-making equipment!
4/28/2021 Note: I adjusted the recipe to add 15g more brown rice flour, which should help with gumminess issues some bakers have experienced!
Ingredients
Preferment
- 150g active gluten-free sourdough starter, it should be at peak rise and super bubbly, see Notes
- 100g filtered water
- 80g superfine brown rice flour
Liquids
- 20g psyllium husk, the whole husks, not psyllium husk powder
- 20g maple syrup or honey
- 300g filtered water
- 8 to 15g olive oil, optional, helps soften the crust slightly, I recommend the higher amount of flour if you use this
Flour Mix (see Notes for options)
- 80g potato starch, not potato flour!
- 60g tapioca flour or arrowroot flour
- 80g sorghum flour
- 65g to 80g superfine brown rice flour, if you’re having issues with gumminess, use the higher amount of flour
- 12g sea salt
Instructions
To make the preferment
- In a bowl, mix together 150g active starter, water, and brown rice flour. Mix until smooth, and then cover and let rest for anywhere between 4 and 18 hours. The longer it ferments, the more sour your loaf will be. I’ve had success all across the time spectrum!
To make the dough
- Whisk together the psyllium husk, sweetener, and water. Whisk until combined and let gel while preparing the flour mixture.
- In a large bowl or stand mixer, combine all of the flours + starches, plus salt. This is also where you’d adding any herbs and other dry seasonings if you want to flavor your dough.
- Whisk the psyllium gel mixture into the preferment, along with the olive oil if using, and any other wet seasonings (like garlic, soaked nuts or seeds, etc.).
- Add the wet ingredients to the flour mixture. Use a spoon and then your hands to bring the dough together, or use your dough hook to mix all of the ingredients until a smooth dough forms. It will take a few minutes in a stand mixer. If you’re using your hands, you will likely want to knead the dough together for a few minutes to make sure all the flour is hydrated and the dough is smooth.
- Once your dough is soft and smooth, turn it out onto a clean, smooth work surface. Lightly flour it if your dough seems sticky – mine usually doesn’t need any flour. Knead into a smooth ball, and use your hands to shape the dough into a round (or whatever shape you’re making).
- Dust your banneton or tea towel-lined bowl generously with brown rice flour. You can place the dough directly into the banneton if you want the horizontal lines you see on my round loaves, or you can use the liner for a smoother look.
- Use a dough scraper or your hands to transfer the dough into your banneton, or a bowl lined with a clean tea towel. Put the smooth side facing down, so the “seams” of the loaf are facing up. Since we’ll flip the loaf before baking, the seams will be on the bottom after baking.
- Cover, and let the dough proof for about three to four hours at room temperature, or overnight in the refrigerator. (While this timing works pretty consistently for me here in San Diego, other bakers have mentioned that sometimes their bread can take up to 6 to 8 hours to rise well. Remember to look for the soft, puffy texture instead of relying strongly on the exact timing. Conditions of weather, your starter, ingredients, etc. can vary this timing pretty widely!)
When you’re ready to bake
- An hour before your dough is fully proofed, turn on the oven to 425°F. Make sure your Dutch oven is preheating inside of the oven if you’re using one. If you did an overnight proof in the refrigerator, I recommend taking the bread out to finish rising at room temperature for an hour to two while the oven preheats. You want the loaf to feel puffy when it’s going into the oven.
-
When your oven is preheated and your dough is well proofed, carefully flip the dough onto a sheet of parchment paper. Score the bread as desired, making sure your cut is deep enough, otherwise, you’ll still have cracking where you didn’t cut through.
-
Remove your hot Dutch oven, carefully, from the oven. Carefully lower your loaf into the Dutch oven, being careful not to drop it in, which will cause gumminess and reduce the loaf’s rise. Replace the lid, and put your bread into the oven for 45 minutes.
-
After 45 minutes of baking, remove the lid and let it finish baking for 25 to 40 minutes. The exact timing will depend on your oven and how golden brown you want your bread.
- Once the bread is golden brown to your liking, remove it from the oven. Very carefully remove the bread from the Dutch oven and let cool completely at room temperature before slicing into it. This is the hardest part, but worth the wait!
To store your sourdough bread
- It will keep well at room temperature for two or three days. You can store it in a linen bread bag to extend its life. If your loaf gets a bit stale, put it in a 300°F for 10 minutes to refresh the crust. You can also slice and freeze the bread. It toasts from frozen perfectly!
Equipment
Notes
General Notes
- If you’re in a very warm climate, you may want to use less starter, around 125g, to get a longer rise.
- For the flours, you can absolutely play around with alternative flours than I have listed here, but I’d stick with the total amount of flour to keep the liquid to flour ratio steady. Note that more starches (tapioca, arrowroot & potato) will cause a quick rise and a more “white bread” texture and flavor, whereas adding more whole grains will make for a less fluffy, light loaf. Experiment with subbing in different flours, like quinoa and millet, for the brown rice and sorghum, to see what you like best!
For a loaf shape
- If you’re wanting to bake your sourdough in a loaf pan, follow the same instructions up until you’re placing the dough in the banneton. Instead, shape the dough to a longer oval shape and place the dough seam side down in the metal loaf pan you’ll be baking in. The one I use is 8.5″ x 4.5″.
- Allow the dough to rise in the loaf pan. When ready to bake, bake for an hour. Check on the loaf and if it’s firm enough, remove it from the pan and bake directly on the oven racks for another 20 minutes or so, until golden all around and hollow-sounding when you knock on the sides or bottom.
Keywords: gluten-free, sourdough bread, sourdough, vegan
This guide is amazing. So detailed and I really like your explanations and the schedule. Thank you! Hoping to try it out this weekend
Thank you Hannah!! I cannot wait to hear how your first loaf goes :D
Is the water 300g total that is divided between the psyllium husk mixture and the starter? Or is in 300g each? I may be misreading the recipe entirely and you don’t add more water to the wet mixture.
Hi Sara, the preferment has 100g of water and the psyllium is mixed with 300g of water. Hope this clarifies things!
How long does it typically take for the starter to be ready to use? I can’t wait to make this!!!! Squeee!
Hi Tina!! So that will depend on conditions more than timing, but it’s ready to use when it’s smelling pleasant at peak rise (yeasty, not too sour, like bread) and doubling or getting close to doubling in size.
This recipe turned out amazing on my first try, and I’ve never baked bread in my entire life! Used a 14 day old GF sourdough starter, exactly like the recipe says, and read and re-read the instructions and carefully prepared and weighed all my ingredients. I followed her Timeline Guide as well, and since I’m in chilly Toronto and it’s winter, I had my gas fireplace on in the room I have my starter AND rose my bread there, so it took 4 hours for the proofing in my climate, baked exactly 45 min w the lid closed, plus 35 w lid off. Cooled in my basement for 5 hours and BOOM! Best ever GF Sourdough! The instructions are very comprehensive and I couldn’t have had the confidence to do it had I not followed along w her stories and made the starter together with Rachel via Instagram! So visit/follow her, check out her GF Sourdough Starter highlights and GET BAKING THIS BREAD ASAP PEOPLE!!
★★★★★
Vanessa, you are the BEST!!! Thank you so much for your review – so glad the post was helpful and I can’t wait to see all the amazing breads you make!!!
When you proof in the refrigerator, do you use something to cover the bowl? Shower cap or towel, how about when it’s proofing on the counter?
Thanks
Hi Lane, yes you’ll cover it with a tea towel or something similar when rising on the counter – my bannetons all came with cloth covers, so I use those. In the fridge for a long proof, you can alternatively cover with plastic wrap or something similar, a shower cap would actually probably work well as long as it’s clean and not coated with anything, so it doesn’t dry out during a long proof.
I’ve read that flax can substitute for phsylum husk, have you had experience with this? I’m wondering if it’s the same water ratio? We can’t get phsylum but I have flax seed grounds.
★★★★★
Hi Cassandra, I don’t believe flax will work quite in the same way as psyllium here. I haven’t tested pure flax, no psyllium loaf, so unfortunately I can’t confidently recommend it, but of course, you’re welcome to try it!! There is a group called “Gluten-Free Sourdough Bakers” where I think I’ve seen a psyllium-free loaf being passed around…you may want to join that group for suggestions on making the substitution :D
How do you know if it is over-proofed? I have seen where some people suggest a cold proof after the first proof but I feel overwhelmed by that! Is it necessary?
Hi Shelby, definitely don’t need to cold proof – some people just prefer it, but I’d get more comfortable with the process before you try it. Overproofed will feel super puffy and light, and pretty delicate – like it will fully shrink if you poke it too hard or put the basket down with too much force.
I can’t wait to try this! Do you have any suggestions for a substitute for brown rice flour? I’m allergic :(
Hi Maura, yes!! Sorghum and quinoa flours both work really in place of BRF for this recipe, so I’d recommend using one or the other for the preferment, and then just replace quinoa flour for the brown rice flour in the flour mix. Enjoy!! :D
Absolutely delicious!! I’m not gluten free but this bread is easy and soooo yummy!! Instructions and tips are perfect!! Another winner Bakerita!! Thank you!
★★★★★
Hurray! Thanks for the feedback. Robin!
I plan to make my first loaf today. I’ll be using a loaf tin instead of a Dutch oven. Do I need to grease or flour the loaf pan
Hi Yvonne, I generally don’t but my pan is non-stick. You can also line with parchment paper!
I didn’t know it was possible to have gluten free bread THIS GOOD! I followed the recipe exactly and had an amazing loaf of bread come out of my oven, just like magic! My husband is a 2020 self-taught sourdough wizard, and even he was impressed. I will be maintaining my starter and using this recipe for years to come!
★★★★★
So thrilled you’re loving the bread, Sara!!! :D thank you SO much for your feedback!
I would like to try making as a loaf but would like clarification before trying. For a loaf tin do you bake covered, uncovered or use steam at all? And do you need to use different temperature settings throughout the bake.
I generally bake uncovered for loaves, but you can cover if you want a softer/less crispy loaf. No need to change the temp!
This is the best recipe ever!! Can i replace potato starch with tapioca?
So thrilled you’re loving it, and yes that will work out just fine!! :)
Oh no, what am I to do now? My stomach reacts very badly to starches. If I just omit them, and use oat rice and sorghum will I succeed do you think?
I was so ready to do this, and my starter is bubbling away
Hi Carina, you can definitely do a 100% wholegrain loaf but it will definitely be a bit denser than the ones I have pictured since they are heavier flours.
I made your recipe after trying a whole grain recipe that was too dense, and yours was absolutely wonderful! Amazing flavor, texture, etc! Finally found homemade GF bread that tasted good, With the added benefit of being sourdough!
Though I can eat starches, I prefer whole grain, so I returned to the other recipe, used techniques you had here, along with some techniques that I used when making whole wheat bread, and — voila — produced a loaf as light and airy as the one I made with your recipe. I say this here for the benefit of the person asking about whole grains.
Thanks so much for your careful instructions! I am sooo excited to finally find a gf bread I can not only live with — but love! Far better than any store bought GF bread I’ve had!
Woohoo! Love that you were able to make it your own and have a fabulous loaf that you love. Thanks so much for the feedback and happy baking, Sarah!
what flours did you end up using? and did you use equal quantities replacing the starches?
I have been making more WG loaves lately so I’d love to try your version! thank you!!
Sarah could you share whole grain recipe?
★★★★★
My 16th grandchild was just born yesterday. I will share as soon as I get a chance.
Wow, congratulations!! Sounds good!
Thanks for the great recipe! Can I substitute the maple syrup for white sugar?
Also I noticed you don’t add any gum like xantham or guar, is it best not to add gum?
Thanks!
★★★★★
Hi Tam, you can use white sugar instead of maple syrup. I develop my recipes to be gum-free – they’re not needed here!
I’m sorry I have read this so many times but I still don’t think I am sure how to make the starter itself.
Is it just one part flour to one part water?
I read the intro the recipe and the notes – maybe I missed it?
Hi MR, this post does not cover how to make the starter! A post is coming soon with that info, but that’s definitely a post all on its own. I have story highlights on Instagram (@bakeritablog) showing how to make a GF starter, or there’s plenty of posts from other people about how to make a GF starter as well.
OK, I will check out some of the resources you reference here as well as IG. Whew this is a PROJECT but am so envious of all the GF sourdough you are posting that I really want to try my hand at it all!
Hi Meredith – it’s definitely a project, but it’s so fun once you get into it and learn the ropes!! :) and then you have BREAD!! :D
Question in regards to Brown Rice Flour replacement. Can I use Ultra Fine White Rice Flour?
Hi Brenda, yes absolutely. Enjoy!
Turned out awesome!! I’ve made plain and cinnamon raisin walnut, and jalapeño cheddar bread is next on the list. I’d love to know how you bake this as sandwich bread and rolls? Thanks for the killer recipe!
★★★★★
Hi Chelsea – that’s amazing!!! So glad you’re loving the recipe, and all of those sound amazing. More resources coming soon on different shapes, but I do reference how I do the loaf in the “shapes” section of this post :)
Have you ever used this dough to make anything else! I want to make pizza crust and bagels. Any recommendations?
Hi Rachel – I’ve got you covered!! I have a gluten-free sourdough pizza crust and gluten-free sourdough bagel recipes :) enjoy!
Hi Chelsea!! My daughters & I LOVE this break and we’ve been wanting to try cinnamon raisin. Any advice/guidance on measurements of each? Why type of raisins did you use & did you need to soak them first? Thx.!!
I do about 5g cinnamon, a big handful of raisins (I always forget to measure them) and add two tablespoons of coconut sugar :) I soak the raisins in hot water and drain before using. I used crimson raisins but any kind will work. Enjoy!!
This is SO helpful, thank you so much and thank you for your quick reply!! Already started the pre-ferment!!
★★★★★
Happy to help!! :) enjoy, and happy baking!
Rachel is the queen of gluten free bread!!! I’ve been gluten free for the better part of 11 years now and have never had bread like this! This post has SO much amazing info! And the base recipe makes perfect bread. I can’t wait to try some of the suggestions for substitutions to experiment!
★★★★★
So happy to hear this!!! Thank you so much for the feedback, Shannon :D so happy you’re loving it.
Hi Rachel,
These are such comprehensive instructions. Thank you. I am not sure if anyone asked this question but can the potatoes starch be substituted for corn starch?
★★★★★
Hi Sandra, I haven’t personally tested it so I cannot speak to that with personal experience unfortunately!
Rachel – THANK YOU, to you and GeorgEats for both guiding me through this process. Thankfully, you can’t see how many times I logged on to this page to read and re-read instructions! The end result was fantastic. I baked 45mins lid on, and 40 mins lid off at 220 degrees C. I do have a question though if I want a lighter colour crust, what would you suggest is best approach? Should I turn down the heat to say, 200C when I take the lid off and cook for longer? I’m just not sure how long for? I’m just so scared of the curse of gummy bread!! Thank you again. Truly. I can appreciate how much work went into testing and writing these fantastic instructions. xx
Hi Kate! So glad you’re having success with this recipe, so happy to hear that. I would recommend reducing the heat for a lighter color and doing a slightly longer bake, or you can keep the lid on for longer which will help prevent as much browning. Hope this helps!!
Are there USA measurements available. Thank you
Hi Margaret – I mention this in the post, but volume measurements don’t work well here because everything must be so exact, and measuring with cups is very imprecise. I’d recommend getting a kitchen scale for best results.
Ok… I am sooooo happy with this recipe.
First of all, the recipe is simple and easy to follow which, in the world of gluten free bread baking Is a BIG plus. Secondly, it is not hard to make the loaf look beautiful, I used a steak knife to score and it still looks good!
When I took the loaf out it was golden and making that snap/pop sound that we bread bakers love! It was not so crusty that it was difficult to cut which I was happy about .
Lastly, the taste was amazing! Easily the best gluten free bread I’ve ever had. I ate it at room temp and it was wonderful, great texture, a hint of sweetness and not too sour. I’m definitely serving this to my gluten eating friends. I’m so pleased!
★★★★★
Hi Justina, this makes me so happy to hear!! So glad you’re enjoying your first GF sourdough loaves, of many to come – I’m sure! Thank you so much for sharing your feedback.
I am by NO means an instinctual baker and was a little nervous to try out this whole process, but man has this boosted my baking confidence! The starter was super easy to follow on both Rachel’s instagram stories and the website instructions, and my final loaf turned out beautifully thanks to these detailed guidelines! I don’t have a dutch oven so I simply placed my bread on a preheated cookie sheet with parchment paper, and added another cookie sheet filled with hot water on the bottom oven rack to help with the steam. (looks like I retained something from all those episodes of GBBO).
This was my first attempt at any sort of homemade bread (aside from quickbreads) and I am so excited with how successful this turned out. Will definitely be making lots more loaves in the near future! Definitely recommend giving this a try, even if you’re an inexperienced baker like myself! This has been so fun. Thanks Rachel!
★★★★★
So happy your first try was a success, Kellie!! Thank you SO much for sharing your experience – super helpful, and I can’t wait to see all the beautiful loaves you create!
the best gluten free sourdough! I tried with the king arthur blend and it didn’t turn out, so I decided to follow the advice in this recipe and use the various flours. oh my LANTA, is it worth it! it has the perfect texture and is more nutritious and (dare I say) better than gluten sourdough. thanks for a great recipe!
★★★★★
Hi Vanessa, I’m so happy you’re loving the recipe! Thanks so much for your feedback.
Hi! I love this recipe and ate the whole loaf in 2 days.
I do have a question though, when I proof in the refrigerator overnight, do I have to take it out and proof again in the morning?
Or does it need to come to room temperature? I have this fear of proofing in the refrigerator and messing up with the rise and open crumb.
★★★★★
Hi Christine, I usually bake within an hour of pulling it out from the fridge – you don’t need to let it do another three-hour rise after pulling it out if that makes sense, but you can let it puff up a bit. If you’re going for a lot of height though, baking straight from the fridge can help you achieve that!
I had this exact same question about how long the bread needs to be out of the fridge before baking so Im glad you have comments on your recipes! Thank you! I have made this recipe 3 times already and love it!
★★★★★
So glad you love it, Sunny!!! Thanks for the feedback. I’ll add that info to the post as well!
RE: “If you’re going for a lot of height though, baking straight from the fridge can help you achieve that!”
Can you explain WHY you get more height by baking straight from the fridge ?? I’ve been letting it come to room temperature [+ or -] by setting in stove top while I heat up the oven.
This guide is just amazing! Thank you!
I have a question though, which psyllium do you specifically recommend? I live outside the US and I have to import it (and it gets pretty expensive) so I’d like to order the one that works. Better be safe than sorry
Appreciate your help!
Hi Juliana, I’ve used a variety of brands – the key is to make sure you’re ordered the full husks, not the powder. NOW Foods, Organic India, and Anthony’s have all worked well for me.
Is it ok to use the proof setting on my oven to proof? Would I need to shorten the proof time significantly?
Hi Kimberly – I don’t have that option so I personally have no experience with it and wouldn’t know how to adjust. I would check on it regularly to see how it’s coming along if you opt to use it! That’s what its meant for, so it should work out well :)
I followed your instructions and reread everything like 12 times , BUT, it came out PERFECTLY! I’m so excited. I haven’t had any bread that’s tasted like bread in 7 years since I’ve been GF. Thank you so much for this amazing recipe and fantastic instructions. I’m making another loaf tomorrow!
★★★★★
SO happy to hear this, Tina!!! So glad the recipe worked out well for you :)
I only had psyllium husk powder and mixed it according to your instructions and the bread came out great, delicious and with a perfect crunch/crust!
★★★★★
Yay so glad you’re loving it, Melanie!!
Absolutely LOVE this gluten-free sourdough recipe! I am forever grateful to Rachel for providing such informative and detailed instructions – I never would have had the confidence to make sourdough bread, let alone a gluten-free version, without this guide. Despite being an avid baker, I have never made any kind of sourdough prior to this, and now I’ve made 6 loaves in the span of a few weeks! It turns out excellent every single time. I’m amazed at how surprisingly simple it is, and I still can’t believe it’s gluten-free! And I now have a happy starter that can be used whenever I want it. I can’t wait to experiment with other flours too. Thank you SO SO much Rachel! You are the best!!!!
★★★★★
Woohoo!! SUCH an amazing compliment – thank you Emma! So happy you’re a gluten-free sourdough baker now :D
I echo All the compliments. I was feel So overwhelmed about trying again after my first-ever loaf using a different recipe failed (in part due to 2 mistakes I made lol). This recipe is A1. I belong to a FB Gluten-free sourdough baking group and so many folks have such wonderful results using this recipe. :-)
★★★★★
Woohoo!! I so love to hear that, Kathryn :D thanks so much for the feedback!
This recipe is outstanding. It works!!! I have successfully made GF sandwich bread, pizza dough, and cakes but never succeeded in sourdough breads that checks all the boxes. I used refrigerator proofing for about 15 hours. Seeing the dough not rising much, I left dough at room temperature (summer evening, about 70F) for about 5 hours before baking. Flavor and texture both spot on. Thank you!
So glad to hear it was a hit, Sue! Thanks so much for the feedback. Next time, it’s super helpful if you can leave a star rating with your review :)
This bread is amazing!!!! I have made my 3rd loaf and it tastes so good! My three little critics (children) love it too! One question though, my dough is quite sticky. I have to use a lot of flour to knead it. Should I add less water?
★★★★★
Hi Erin, so glad you’re loving it! The dough shouldn’t be too sticky – mine typically requires no flour at all to knead. I would recommend letting your dough sit for 10 to 15 minutes after mixing it up and seeing if that helps, the psyllium should do some work at absorbing the water and make the dough easier to handle.
Hi Rachel,
This post is awesome! I have been following your IG highlights to make my BR starter and I’m now ready to bake with it! I have managed to find all the flours listed in your recipe except for Sorghum (I can buy online) here in London (shock), but I was wondering if I could replace it with more of the other flours listed rather than buying a separate flour? I saw you suggested quinoa and millet as an alternative but if it could work with just more of the other flour I might start with that! Thank you and congrats on this amazing post! Francesca xxx
Hi Francesca, if look in the notes of the recipe, you’ll see how I recommend replacing the flours. I wouldn’t add more starch, but more brown rice flour would work okay!
What are baking instructions for loaf pan instead of Dutch oven?
Hi Koreen – I edited the recipe card to add loaf instructions. You’ll find them in the recipe notes!
I started following Rachels sourdough starter instructions and after one failed attempt and switching to a different flour, my starter was ready. I just made my first loaf of bread using this recipe and I was blown away! I would not guess this bread is gluten free. I was tired of spending $7 on a loaf of gluten free bread that really didn’t taste that great and I’m glad I decided to make my own. I highly recommend using this recipe and following the instructions carefully. It came out great on the first try. Thank you!
★★★★★
So thrilled it was a hit, Rachel!!! Woohoo for not having to buy sub-par gluten-free bread any more :D
This recipe is so wonderful and I can’t wait to toy with the ingredients and see what else I can incorporate. As someone with Celiac disease I never thought I would be able to enjoy fresh baked bread again, let alone sourdough! Even my husband who eats gluten was blown away by how delicious it was! I used 3 week old sourdough for my first try. I’m in freezing cold Colorado and was worried about my elevation (7500 ft), but your recipe holds up so well. I am so grateful for your detailed guidance and instructions. Thank you, thank you, thank you!!!!
★★★★★
I am SO happy you’re loving it, Melanie, and it’s so helpful to know that it works at elevation too! Thanks so much for your feedback.
My sourdough has turned out consistently amazing! Thank you for this recipe, Rachel! I want to do baguettes next…do I shape it in that pan you linked and cover with a dish towel to proof in the pan? Any instructions for baking temp/time? I am also drooling over your rolls from your insta stories. Do I roll these on a cookie sheet and cover to proof there and bake on the sheet as well? Thanks for any guidance you can give.
★★★★★
Hi Jen, yes shape and let them rise right on the baguette pan!! Same baking temp – bake for about 30 minutes, depending on your oven. All detailed recipes for variations are coming soon in an ebook.
HI!! Thank you so much for this recipe! The bread is amazing! I have made it twice now and love it. I am finding the middle is a tad sticky (still delicious) but wondering the texture you typically get? From reading your recipe, maybe i should try to cook longer with lid on? Would love your input.
Thanks again for your cooking passion!
★★★★★
Hi Danielle, yes for gumminess I recommend baking for longer in general to give it more time to dry out!! If you’re getting any burning on the bottom, you can do it for longer at a lower temp. Hope this helps!!
I began my sorghum starter the same day that you did and honestly, it has been a game-changer. Having access to crusty, flavorful, and bubbly bread for the first time since becoming GF 10 years ago is DANGEROUS but I have zero regrets!!
My starter was not bubbling as actively as it should, but I impatiently wanted to bake a loaf and successfully added baking powder to create some extra bubbles. I also accidentally used psyllium husk power for my first loaf with great success, but have otherwise followed the recipe as written and am in love with this whole process.
Cracked black pepper and rosemary is my current favorite flavor, but I have a garlic and kalamata olive loaf in the oven right now which may soon change my mind on that! Thank you a million times over for all of the help and guidance and testing that you’ve done :)
★★★★★
Thank you for this comment, Kaitlin!! So happy to have you on the sourdough journey with me, and I’m so glad your first loaf turned out so well! Those flavors sound AMAZING!! :D
I’m curious to learn more about your using ‘cracked black pepper and rosemary’…. and the ‘garlic and klamata olive loaf’ sounds really good too. How much did you add of these additional ingredients and did you add at the ‘mixing the flours’ stage or AFTER all the ingredients were all mixed ..??…
This recipe is amazing! I followed it very carefully and my bread came out so delicious – crispy edges, soft and airy interior. Thank you so much for this amazing blog post that is so detailed and helpful, and also for your instagram starter content. Never would I have imagined I’d be able to make gluten free sourdough bread!
★★★★★
Fabulous!! Thank you so much for your feedback, Helena!
Looove this recipe!
Question. Does the honey/ sugar help with the rise / feed the starter or can be omitted?
Thanks!!
★★★★★
Hi Maite, it’s there to help feed the starter and doesn’t affect flavor. You could leave it out but it may affect the rise.
Thank you!!
★★★★★
This was really fantastic and had delicious flavor and texture. Even my non-gluten free family members didn’t realize it was gluten free!
★★★★★
We love that! Thanks for your feedback, Amie!
Made my loaf this past weekend and it was amazing! I have to admit that this was first time baking any sort of bread and my gf sourdough turned out delicious. The instructions are clear and straightforward. I haven’t had sourdough in forever due to my gluten intolerance and this is definitely life changing for me. I plan to bake another loaf this weekend. Thank you so much for putting this out!!!
★★★★★
I am so happy you’re loving it, Tammy! So glad the instructions made it easy for you :) woohoo for enjoying sourdough bread once again!
Hi i was wondering if this could be adapted to a cup for cup recipe?
Hi Erin, I don’t use any mixes because their ingredients are inconsistent between brands and can be unreliable. You’re welcome to try it out, but I’d recommend looking for one without gums or other additives for the best results!
I am 1 year into quarantine sourdough baking, and multiple recipes later…. this is my favourite.
Your instructions are clear for a newbie, and a great recipe for those with some experience,
Now I just need the patience to wait till fully cooled before I cut into it!
★★★★★
I’m so thrilled you’re loving it and found the instructions clear. Thank you so much for the kind feedback, Tilly! Happy bread baking!
Just made sourdough using brown rice starter and turned out so so well. Never thought I would be able to experience what real bread tasted like again since being gluten free, but I was wrong! I usually only bake very simple treats so was a little intimated but her instructions and highlights on her Instagram page are so incredibly helpful that they make the process easy.
★★★★★
Woohoo!! This makes me SO happy. I hope you’re enjoying fabulous homemade gluten-free sourdough for many years to come!!
This bread is amazing! After 2 years of being gluten free I haven’t eaten a bread I enjoyed until I made this with Rachel’s amazing guidance and recipe!
★★★★★
The best compliment!! So glad I could help you enjoy amazing homemade bread again :D
This recipe is excellent! I followed Rachel’s recipe to a T and not only was my loaf beautiful but it also tasted incredible. My Family devoured it! I will be making this over and over again.
★★★★★
Love to hear this, Amber!! I hope there is a lot of delicious sourdough in your future!
Is there a substitute for potato flour? My daughter reacts to white potato.
You can use more starch, like arrowroot or tapioca! Might require a slightly longer bake time, though!
i had always been super intimidated by sourdough recipes, especially as a long-time GF baker. rachel’s tutorials and tips have made it SO easy and accessible! i love rising in my banneton or loaf pan for different shapes, and experimenting with different seasonings. this bread is a huge hit around here, i have it every day for lunch!
★★★★★
I love this!! Thanks Andie :D so glad you’re loving the recipe and having fun experimenting!!
Hi Rachel,
Of all the gluten free Sourdough bread recipes I have tried in the last year, yours is the best! My husband who is not gluten-free has tested them all and he said yours hands down! Your explanation and step by steps were so informative and educational. The first time I made it, I didn’t follow your instructions by letting the psyllium husk gel as instructed. I recommend for anyone thinking to make this yummy sourdough bread to follow her directions. She did the work for us and it works!! I’m so hooked. I make this weekly. Store bought is trash. Thank you so much Rachel!
Sandra
★★★★★
Yay thanks Sandra!! It’s always nice to get gluten-free bread approval from the gluten-eaters in the house :) I hope you enjoy homemade bread for many years to come!!! I appreciate you sharing your feedback :)
Thank you! I used your recipe, tips and instructions amd I made my first gluten free sourdough loaf. Any tips on how to make it more tangy would be greatly appreciated.
★★★★★
Hi Sophia, there is a section in the post on how to make your bread taste more sour, not too far above the recipe card :)
Sorry just saw this now will be making this soon i need to make sourdough starter for thus i never make sourdough starter before i never had sourdough bread before perfect for my office snacks will dm you if i make this and let you know how it goes Thanks Ramya
This recipe was perfect. Not too much psyllium and ratios are perfect. I baked full 40 minutes after taking the lid off and let cool for 5 hours. Nice texture, cuts well and I don’t have to clean any gumminess of my knife half way through cutting the loaf. Thank you!!
★★★★★
I’m so happy you’re loving it, Marena!! Thanks so much for the feedback :D happy sourdough making!
Great recipe. Followed your instructions and mine turned out great. I wonder if you’ve experimented making ‘raisin bread’ with this GF sourdough recipe ?
★★★★★
Hi Jann, yes I have!! It turns out great. I’d recommend hydrating the raisins with hot water (and draining before adding) so the raisins don’t dry out the bread by absorbing extra moisture from it. Adding some cinnamon tastes great too. I’m currently working on an ebook that will include exact recipes for all sorts of variations :) So glad you’re enjoying the recipe!!
Awesome! I’ll give it a try. Thinking about adding some coconut sugar too. I really like that flavor.
This recipe is lifesaver!!! I’m gluten sensitive and just recently found out that I can’t tolerate brown rice either. :( All store bought GF breads are made with brown rice flour. I missed bread so much that I decided to finally get on the bread making train and give this a go! I’m loving every step of the process. Rachel keeps it simple so it’s not too intimidating for newbies. The instructions are easy to understand, the notes, substitutions and trouble shooting are super useful and her instagram videos are all very helpful.
I use the combo of sorghum and quinoa flours and loved each bread & baguette so far.
Thanks, Kriszta
Hi Kriszta, so happy I can help you make bread that’s perfect for you! Thanks so much for your feedback.
Question! I have already started my starter with king Arthur’s gf mix. Can I start feeding it with the brown rice flour since that is what you recommend instead of the mix? After a few feedings then use it for the bread or do I need to do a fresh starter with brown rice flour?
Hi Pam, yes you can switch the flour you’re using for the starter! No worries there :) it should adapt just fine to the new flour.
Hi Rachel,
I’m in love with your recipes. Thank for sharing your knowledge. Regarding baking in the loaf pan, do you have any tip or guideline to avoid having the sheet of parchment paper stick to the bread :(
I’ve baked a couple of them and I’ve let them proof in the parchment paper and then put them directly in the loaf pan and then to the oven but the paper get wet and during the baking it get stick to the base of the bread.
Thank you
★★★★★
Hi Vanessa, I recommend letting the bread proof right in the pan to avoid collapsing bubbles in the transfer process. I’ve never had issues with the parchment sticking, it may be the brand you’re using – but you could try just letting it proof right in the pan without parchment to fix this problem. Hope this helps!! Glad you’re enjoying the recipe.
Hi so i misread the recipe and fed my sourdough earlier in the day just in the jar like i normally do. I have no idea how much to take out for the recipe. What does the preferment weigh?
Hi Erin, I’m a little confused by your question – you do want to feed your starter as you regularly, and then measure out the 150g called for in the preferment when it’s at peak activity. The preferment is a combination of 150g active starter (taken from your starter jar) mixed with 100g water and 80g flour, for a total of 330g. You would not want to just take 330g of starter to use instead of preferment.
Hi Rachel, thank you for sharing your fabulous recipe. Despite tweaking your pre ’28th April 21 notation’ and some minor changes to proofing/baking – intended and accidental – the crust was easy to cut through and there was NO gumminess. You’d be forgiven for thinking this loaf contained gluten! Instead of 65g Br Rice Flour (from the Flour Mix) I used 20g Br Rice Flour, 25g Chickpea and 25g Br Teff Flours. The preferment was on the bench top for 21hrs and after mixing in all the other ingredients I placed the banetton in the fridge for around 26hrs. Removed from fridge and sat on the bench for about 1/2 hr before placing it into a preheated DO with ice cubes placed beneath parchment paper before replacing the DO lid and baking for 45mins. Temperature probe reached 100c/213f and was a tiny bit gummy at the very end. Removed the DO lid and baked for a further 15mins. Then removed from DO and placed on oven rack for 15mins with oven switched off and door ajar. The hardest part was waiting for the loaf to cool completely before slicing and enjoying with a bowl of soup. Freshly baked or toasted the loaf was VERY yummy!
★★★★★
Hi there, thank you so much for the fabulous feedback about your baking time to achieve no gumminess! So so glad you’re loving the loaf.
Hi, my first attempt at this recipe is currently in the oven and I’m really excited to see how it turns out. Your instructions are so thorough and I’m very grateful for them. My question is, if I wanted to add some milled seeds to this recipe, do I need to reduce any of the flour/starch ingredients or just add them into the existing recipe? Many thanks
Hi Maria, I haven’t experimented with adding any milled seeds to this recipe, just whole seeds! You’ll want to make sure to soak and drain before adding so they don’t absorb too much liquid from the bread, but you should be okay to just add them into the recipe. Enjoy! :)
What flour do you like best for the starter? I have a starter made with Bob’s Red Mill 1:1 gluten free flour blend, would that work well?
Hi Christina, I have a brown rice flour starter and a sorghum flour starter. Please refer to this post all about how to make a gluten-free sourdough starter, but in short, I generally don’t recommend using a flour mix for starters because they tend to contain starches and gums.
So helpful, thanks!
Thank you so much for so much detail and educational material in this post! I’m wondering if you have a post with pictures of your whole process, like what your starter looks like when it’s doubled, how bubbly your pre-ferement is, how much you let your loaf rise before baking it etc.? I think for some of us trying to refine our sourdough techniques this might be a helpful visual :D
Hi Annelie, not yet, but you can watch the sourdough highlights (there are a few) on my Instagram for TONS of visual cues. I’ll add more photos/videos of the process soon!
I never write comments, however this bread is amazing. I faithfully followed both the starter and bread recipe and it is the best bread I have ever made! Give this recipe a try!
★★★★★
Great recipe, thank you! Really beautiful and delicious bread :) I added a spice mix to the dough made of crystallized honey, saffron and lemon which worked very good and gave the crumb a lovely yellow warm color. I used 75g of superfine brown rice flour to avoid any possible issue with gumminess, and I baked it for 45 + 25. Also I let it rest overnight in the oven turned off but still warm after baking and with the door ajar.
★★★★★
WOW I need to try that spice blend, sounds amazing!!! So glad you enjoyed the recipe, Federica. Grateful for your feedback!
Can you use all tapioca or arrowroot starch, I can’t have potato?
Hi Heather, yes you certainly can. It may change the texture a touch but will absolutely work. Enjoy!!
For sour dough stater which flour hv u used i hv sorghum flour stater can i use same ingredients or i hv to do any changes
★★★★★
Hi Bharti, I have a sorghum starter and a brown rice flour starter, and each works fabulously for this bread recipe as-is!
Thanks so much for sharing this recipe and the detailed instructions. Easiest way to a perfect loaf! I was so sad when I had to stop eating bread. Sourdough especially. But this recipe is absolutely perfect! It’s actually better than the gluten filled version. I followed it to the letter and it came out perfectly! I was so excited! Everyone who tried it said it was amazing. Getting ready to make another one!
★★★★★
SO happy to hear that, Sheila! So glad I could help you bring bread back into your life :D
Great recipe! This was a real hit in my house. I am not an experienced baker, but this was super easy. I have to admit that I cut into it while it was still slightly warm – I couldn’t wait any longer!
★★★★★
So glad you loved it, Bari!!! Thanks for the feedback :D
So the final quantity of levain mixed in the flour mix will be 330grms(150starter+100water+80rice flour)
Can I make a white rice flour starter
So there no step of cold ferment in this. Can I do a 12-16hrs cold ferment, after 3-4hrs of bulk, will it make any difference in the bread or do u suggest baking straight after bulk of 3-4hrs of bulk ferment..
★★★★★
Hi Roma, yes that is the correct quantity for the levain, and you can use the flour of your choice for the levain! I recommend seeing this starter post about how to make your starter. As for the cold ferment, I typically put it straight into the fridge for a cold ferment, and then let it rise for about 1 to 2 hours before baking! Usually though, I do a 3-4 hour bulk ferment at room temperature. A longer ferment in the fridge can help develop flavor, I recommend trying both ways and seeing what works best for you.
Everything about this post is perfect! The instructions are easy to follow and Rachel was so helpful by answering all of my questions through Instagram. Every loaf of bread I’ve baked with this recipe has been a success, even my non gluten free family members love this bread :)
★★★★★
So glad you’re loving the recipe, Sofi!! Thanks so much for your feedback :D
Hello, I am currently making this bread now. I have been making sourdough for a while now but this is my first time making gluten free sourdough.
After the dough has been kneaded and shaped into a banneton, do you need to prove the bread prior to putting the dough into the fridge?
Do you put the cold dough into a preheated dutch oven?
Hi Alex! For a cold-proof, I typically put right into the fridge and then let it rise for an hour or two right before baking, until it’s nice and puffy. Hope this helps!!
Tq for sharing very detailed recipes for beginners.
★★★★★
Truly my pleasure!
I’ve made this recipe multiple times now and it almost always turns out amazingly. It’s so delicious and is such a great alternative to the sugary white gluten free bread you find in supermarkets. I have found the most success with making the dough late at night and letting it proof overnight in the fridge. I also would advise people not to overwork the dough (there’s no actual gluten to activate, so it doesn’t need to follow the same rules as normal bread dough) – the sweet spot for me is letting it mix in a Kitchen Aid with the big dough hook for around four minutes, and then I carefully shape it, trying not to knead it much more at all. Thanks so much for sharing this wonderful recipe!
★★★★★
Thanks for your super helpful feedback, Charlie! I’m so happy you’re loving this recipe! Happy bread baking :)
Hi Rachel! I’ve been working with your recipe since the day you posted it- thank you! Seemingly out of nowhere, my starter just isn’t bubbling after feedings. Any ideas why that might have happened? Too long between feedings? (I tend to feed once a week but it hasn’t been an issue until now) Should I start from scratch again? Thank you!
★★★★★
Hi Belisa, how odd! I’d try using a combination of flours and seeing if that helps give a little boost. You can also try dropping in an apple slice or a raisin for a few days and seeing if the extra sugar can help revive it :)
The apple slice did the trick! I think this starter also prefers being fed more than once a week – even in the fridge. She’s a greedy one lol. Thanks so much Rachel!
★★★★★
I like ur receipe want try can u pls tell me which stater hv u used means for making stater which flour hv u used rice flr or sorghum
★★★★★
Hi Bharti, you can see my whole post about how to make a starter here!
I’m keen to make this. I’ve made one similar but without the preferment step. Instead it included 200g active starter
When you say overnight how many hours is that?? I did overnight and ended up with flying crust.
Hi! Do you mean for the proofing in the fridge step? Overnight for me is generally between 9 to 12 hours. Usually, the separated crust comes from over-proofing at room temp. I’ve never had that issue with a fridge proof.
I made my 3rd or 4th loaf this past weekend, and I feel like it’s the best one yet. There was NO gumminess or settling at the bottom, which I’d had a bit of with the other loaves, and I’m so excited about it!
★★★★★
Woohoo!!! Love to hear that Jenny :) so glad you’re making fabulous gluten-free sourdough!!
Did your bread actually “rise”? I’ve tried both overnight in the fridge and 3-4 hours in the counter and I don’t think mine rose at all. It’sa very small loaf.
★★★★
Hi Haley, oh yes it should definitely be rising – mine just about doubles in size. I’d guess you need to let it rise longer. I find it usually rises the most in the last hour or so. It should feel springy and soft to the touch. It can definitely take longer in cooler weather or with a new starter, too. I’d go based on feel rather than time, since it varies so much based on conditions.
Hello!
Thank you for this recipe! I have a question about proofing times. What external temperature is ideal for a three-hour proof?
Hi Josie, it’s hard to say exactly since so many different factors contribute to the rise time. Three hours would be in a relatively warm environment. That’s about how long it takes when it’s around 75-80F here in San Diego.
Is the bread recipe in your baking book? Thanks!
No it’s not, I hadn’t learned how to make sourdough yet when I wrote the book!
If I am not using the Dutch oven n baking in a baking steel directly. Do I have to put hot water for developing steam(as we do in regular Sourdough)
N will I have to reduce the baking time if I am making a smaller loaf(50% small)
Hi Roma, you don’t have to do the steam but it definitely helps if you’re not using a Dutch oven. I would reduce bake time for a smaller loaf, I’d check on it about 40 minutes in.
Haven’t had bread this great since I went gluten free. Wow!! I’ve also made the crackers. Utterly addictive.
★★★★★
So happy to hear you’re loving it, Francine!!
This is an incredible recipe. I was smiling non-stop as I ate my first sourdough bread since 15 years!!! Astonishing chewy crust and perfect sour flavor, somehow with this recipe I also achieved a light and airy crumb. I thought it was impossible to make a decent gluten-free bread but right now I’m feeling like the sky is the limit. Try it out!
★★★★★
I’m SO happy to read this comment, Marissa!!! So glad I could help bring sourdough back into your life :D
Hi, thanks the recipe sounds great.
I cannot have any sugars. Couid i just leave out the honey/maple syrup?
The sugars are actually there to feed the sourdough yeast, and help the dough rise more, so most of them actually aren’t there by the time the dough is baked. You can leave them out but the rise may not be as quick/high!
I just have to say this is the best. I have made bread for 40 years and sourdough for 15. After becoming gluten free, sourdough was what I missed the most. This is be best bread I have found and the most like what I used to make. Even my husband likes it. It’s great
★★★★★
What a compliment from such an experienced bread baker!! Thank you so much for the kind words, and I’m so thrilled you’re loving this recipe, Vicki.
I only have the option of psyllium husk powder in my location. I used it but decreased the amount called for in the recipe by 5 grams and increased the water a few grams to offset the psyllium husk powder absorption issue. The loaf turned out beautifully. My sourdough mother (affectionately called Daisy) is a strong two years old and has served me well during the pandemic.
★★★★★
Thank you so much for this super helpful insight about using the powder, Laura! Super helpful for those who can only find the powder and not the full husks. So glad you’re loving you bread, and I hope Daisy brings you many more delicious loaves to come :D
Now, see what you have done.
I’ve generally snubbed gluten-free bread baking due to the bland, chewy/chalky samples I’ve tried, and the weirdness of ‘gluten-free flour’ I’ve seen in stores.
But the above pics, ingredients/instructions, ecstatic comments and my (and the guests I feed) undying love of your vegan, gluten-free cornbread (https://bakerita.com/cornbread-gluten-free-vegan) has me all braved up to try my hand at this GF (and vegan, right?) sourdough. I have a shelf full of homemade dips and spreads just waiting for a slice, and a pandemic winter keeping me indoors.
The recipe and instructions (and comments!) look promising – can’t wait to try and let you know!
★★★★★
Hi Yodan – I hope you love it!!! :) let me know what you think once you’ve tried the bread, and yes it is vegan as well!
Hi there! I made this and am still in shock how incredibly perfect it turned out on my first try. Thank you so so much. You’re so wonderful!!! I want to try baguettes now, and I have a silicon baguette “pan” so i’m wondering if that would work or not? I didn’t see any instruction in regards to baguettes but I did see a baguette pan in your linked equipment so i’m hoping this recipe will work for it!! Is the silicone a problem?
Hi Riley, so glad you loved the recipe!! Baguettes are totally possible, but the silicone may prevent the bread from crisping up as much since it doesn’t conduct heat like metal, which helps crisp the bread. I’ve always used a metal baguette pan so I can’t say for sure, but I know people haven’t had great success doing loaves in the silicone pans.
Okay great thank you so so much for your response and help! I have secured a metal baguette pan now…is it the same baking instructions? or do i proof for less maybe? bake for less time i’m assuming as well!? thanks again!
I proof for a similar amount of time, and bake for about 40 minutes :) enjoy!
What a great recipe! My husband just made this today. He used homemade oat flour instead of sorghum, but otherwise followed the recipe exactly. He appreciated that you specified grams for the ingredients. This one’s a keeper! Thank you
★★★★★
So glad you and your husband loved it, Jen! Thanks so much for the feedback.
Thank you for this recipe! I am attempting my first bake today. Has anyone adding anything to the top (not just in it), like everything seasoning, before baking?
Hi! Yes I add seeds on the top all the time before baking – usually my dough is just sticky enough that the seeds will just stick right on without an issue.
I have been searching for a gf sour dough bread for so long. This recipe isn’t just good for gf bread it’s just good! I love being able to double the loaf and make one for the family and make one for a friend.
★★★★★
Woohoo, I love to hear that feedback, Heather!! So glad you’re loving the recipe :)
My oven is currently broken. I am waiting for the parts to repair the oven. I am wondering if I can bake the bread in bread machine. Do you have any thoughts or suggestions? Thank you! Beth
★★★★★
Hi Beth! I’m not sure as I haven’t tried, but you’d want to make sure to use a setting that only does one rise for best results.
Very nice recipe! I have followed the recipe but have found that my loaf is not rising. The preferment went a full 17 hours. I let the dough rise for 4 hours, but no rise. I just put it in the fridge so it can go overnight. I’m thinking of taking it out and sitting for a couple of hours prior to baking. Any tips?
★★★★★
Hi Donna, sometimes too long with the preferment can make the loaf take longer to rise because the preferment is no longer at peak activity. Also, in colder weather the rise can take a lot longer – sometimes up to 6 hours depending on conditions. I would recommend doing what you mentioned and letting it rise for an hour or two as the oven preheats. You’re looking for it to feel nice and fluffy to the touch! Hope this helps :)
Can I swap out the superfine brown rice flour for superfine white rice flour? Or is Anthony’s brown rice flour fine enough for this recipe?
Hi Hannah, white rice flour works great, and so does Anthony’s! :)
Very yummy and easy to make. Will definitely be making again and again.
★★★★★
So happy to hear you’re loving it!
So I was finally able to make the loaf last night but I think I messed up… or perhaps it was my scales. It otherwise looked great and texture wasn’t too bad considering it was my first attempt of any gluten free bread making that wasn’t a bag mix in a bread machine. And I did goof the mixing part a little. But I think I used either the wrong salt or my old digital scales are duff. I didn’t have normal grain sea salt only superfine Morton’s or normal grain Himalayan salt. So I used the Himalayan salt and my boule ended up incredibly salty tasting. I went back and tested my scales with just salt and it’s almost three teaspoons of the salt I used before it registers 12 grams.. is it my scales? Or is it because I used the wrong salt? I would have thought sea salt and Himalayan salt would weight similar though?
Kade your gf sourdough today. Worked out beautifully. Tastes amazing. Thank you!
★★★★★
So glad you loved it!!
Hi Rachel!
First, I can’t even tell you how much I appreciate all of the info you have given! I have been through many sites and as a beginner, yours has the best info and makes me feel less intimidated about getting started! I have two questions, first do you know if I can use sprouted flours for the rice and sorghum? Not sure if that will completely change things. Also, closest to I have to 5.5qt with my Staubs are 4, 8 and 7 oval. Would any of those work? I have a 5.5 le creuset, but much prefer the Staubs! Thanks so much! Oh and appreciate the Amazon links! Will use those for the baskets and lame!
So happy to hear that, Jennifer!! Yes, you can absolutely use sprouted flours for the rice and sorghum. You can use any size Dutch oven, but the 4 may be a little small – whichever one you use just needs to fit the loaf and it’ll work out just fine. Happy baking! :) Let me know if you have any other questions.
Hey when you remove the 150g of starter for the preferment, do you feed your starter at the same time? 75g of both brown rice flour and water to replace the 150g removed? Thanks :)
★★★★★
Hi Frances, yes I usually feed the starter at that time! You can do the smaller amounts if you’re just maintaining it, or do a full 1:1:1 feed if you’ll be using it for bread again soon.
You are so wonderful for responding and thank you so much for your help!! :) That is great news for me on both fronts. I joined a helpful FB group today and have already seen so many ppl recommend and rave about your cookbook, so I’ve added that to my cart also! You write wonderfully and give such clear and concise instruction, so I can’t wait for your book to arrive! Thanks so much again!! :)
Thank you so much, Jennifer – it’s so wonderful to hear that! Hope you love the book as well :)
I followed your baking directs and cooked the loaf in a ceramic covered cast iron Dutch oven. My loaf was beautiful and tastes wonderful. However, it is a little too dark on the bottom. A different loaf I made had the same issue. I put a cookie sheet on the rack below to attempt to disperse the heat. Improved some, but still almost burned. Any ideas?
Hi Monica, usually this happens when your oven heats from the bottom and your loaf is too close to the bottom of the oven. If there’s any way you can bake on a higher rack, that’s usually the best and easiest solution!
I made this recipe after trying a different gluten free sourdough and feeling disappointed. This recipe turned out so well! The crust is soft and has such good flavor! Thank you so much! I have 2 questions. 1.Do you keep your brown rice flour in the fridge or freezer like some companies recommend? 2.When you take 150g of starter to make the preferment do you then feed your starter (the one in the jar) again or leave it til the next days feed? I guess if you feed your starter 150g of flour before the preferment to beef it up there will still be a good amount in there, but does it have enough to still feed on for the next 12-24 hrs? Does that make sense? Anyway thank you so much again. I am over the moon about this recipe!
★★★★★
So thrilled you’re enjoying it, Mackenzie!! I don’t keep my flours in the fridge because I go through them so quickly, but if they’ll be around a while, it helps keep them fresh. When I remove some starter from the jar, I usually feed again right away but leaving it until the next day is also okay. You can also add in a scoop of flour and a splash of water to give it a little extra food until the next feed but don’t want to do a full feed. Hope this helps!!
Thank you so much!! Very helpful!
★★★★★
Can I use regular sugar instead of honey? Same quantity?
Hi Becca, yes that would be fine, same quantity will work.
I’ve been baking a different recipe for GF bread with great success the past two years, but wanted to try your recipe. The levain was perfect after four hours, the loaf shaped and in the bread pan rose, not doubled but had spring after five hours.Baked with a pan of steamy water underneath. Here’s the but: the bottom 3/4 ” dense, somewhat gummy, toasts well, flavor good. what do you think went wrong. I didn’t think I’d have a brick of a loaf after reading all the favorable reviews. Please help me here. Not a novice
Hi Jo, sorry you had trouble! Without photos, it’s hard for me to know exactly what went wrong, but if the bottom was denser than the rest, that usually indicates over-proofing, which can also lead to gumminess. Did you change anything about the recipe? I also don’t use steam so not sure if that would impact it at all, although I know others do with my recipe and have success. If you have any photos, feel free to send me an email and I can help figure out what went wrong – it’s hard for me to know just based on “the bottom 3/4 ” dense, somewhat gummy”.
Thanks for sharing this lovely thought out recipe! I have a question, just because i have it at home, can i sub potato starch for tapioca starch? Will it give same results? Thank you! :)
Hi Aline, it will be a teeny bit different but should work out okay since they’re both starches! Enjoy :) let me know how it turns out for you!
Is this for one Loaf or two?
If it is for one can I double the recipe for two?!
Hi Liz, this is for one loaf. You can double it to make two, no prob!
Are you supposed to put the parchment paper in the dutch oven with the dough for baking? Or just slide it off the parchment into the dutch oven?
I recommend keep the parchment paper on so you can use it as a sling to remove it from the Dutch oven more easily when it’s done baking.
Thank you thank you thank you for putting this recipe and guide together! An absolute game changer.
I have been making a loaf or 2 on the weekends for a month or so. One for my household and one to share.
We had some mung bean starch in our cabinet from past gf baking adventures – today I tried subbing that starch for the potato starch. It worked nicely! Might be a good option to try for folks who can’t do nightshades?
Thanks again so much for all of your time spent on this.
★★★★★
This makes me so happy to hear, and so great to hear about the mung bean starch working out well for you – appreciate this tip! Happy baking, Keni!
We love this bread!!! I always have it on hand. I do have to up the brown rice flour to about 90 grams to get rid of the gumminess. But, other than that I make as directed. Thank you for such a wonderful recipe!!!
★★★★★
So glad you’re loving it, Amy! Thanks so much for the feedback :D
Hello… What do I do…my won’t rise at all. I followed everything but it would not rise at all.
Help please, danni
Hi Danni, was your starter at peak activity? Did you follow all instructions? Also, how long has it been? Without any information at all, I really can’t help!
It was a week. I did follow the instructions… I think it was at peak. It wasn’t quite double in size but close.
Yes I followed the instructions… started was about a week old with me feeding it like twice a day. It wasn’t quite doubled but close.
That’s a pretty young starter. How long did you let it rise? And at what temperature? Sometimes it takes longer than others and if it doesn’t seem to be rising, it’s best to let it keep going because it eventually will as long as you have an active starter. Did you read through the entire post thoroughly?
thank you
I have been making sourdough bread with regular wheat flour for years. I just found out that I’m gluten intolerant, and so I made a sourdough starter with rice flour. I used your recipe and the bread turned out amazing. Moist on the inside, with small air pockets, and a nice crunchy crust. The sourdough taste is way stronger in this bread than in my regular wheat sourdough. I’m going to definitely try this recipe again.
★★★★★
So so glad you’re loving it, thanks so much for the feedback, Rebecca! Happy we could have you making sourdough bread even after your diagnosis :)
This recipe is amazing! We’ve made about 8 loaves in the past couple weeks. :-) We were using another sourdough recipe with xanthan gum, but this is so much better.
One question: When I bake in a dutch oven or any container with a lid, the bread turns out great. When I bake in a loaf pan or baking sheet, the top of the bread is pure white – kind of funny looking. Still tastes great, but looks weird. Any idea why?
So glad you’re loving it, Matthew. What you’re seeing is just baked flour essentially – you can get rid of that by adding steam into the oven (that’s why it doesn’t happen in the Dutch oven) or brush with a little oil before it goes into the oven. Hope this helps!
Hi Rachel! I am so happy I found this recipe. I am a fairly experienced sourdough baker who recently had to go GF, and I’m hoping to have success with this recipe.
A couple things:
– Instead of making my own starter, I bought a packet of french wild yeast from King Arthur to use. Maybe this was the problem. I fed it overnight and it bubbled up to double volume but maybe it was not strong enough?
– I pre-fermented for about 12 hours, and the preferment had kind of collapsed by the time I started mixing the dough.
My first loaf was really dense and small, but still fairly tasty. Great sour flavor. Any advice for my next attempt? Should I make my own starter?
Hi Lucy, I would recommend making a starter since that’s how this recipe was developed and without it, it’s hard for me to help with any issues. You probably would have wanted to use the preferment at peak rise with the yeast. Glad it tasted good though!
Thanks for sharing this! Baked once and it’s great!
I wanted to try out the other types of flour that you mentioned- the millet and the quinoa flour. Wondering though, how much of it do I use in the recipe, and what flour will it replace in the flour blend?
★★★★★
Hi Iris, glad it turned out well for you! You’d replace the sorghum and brown rice flours with the other whole grain flours if you want to experiment :)
Hallo Rachel
Is Psylliumvezel poeder ook goed?
Groetjes Toon
Hi Toon, I haven’t ever tested it out, but it should work okay – maybe reduce the amount by a few grams, to 16 or 17g. Enjoy!
I’m just getting to my second week of Starter. I’m so curious how little flour there is in ratio to liquid in the bread recipe. Its the opposite in gluten sourdough. I’ll be really interested how my first loaf comes out.
Hi Wendy, the ratio is actually almost 1:1 when you’re including the preferment and the starches in the flour count! I hope your first loaf goes well :)
I have a son-in-law who has celiac disease and doesn’t like most GF breads on the market. I became a SD bread baker during the pandemic and knew I wanted to try GF SD. First attempt at a starter was a fail as was the bread I made. Your starter was super easy and successful. I delivered my first loaf to him without even trying it as it looked amazing. Asked for pictures of the inside and honest rating and it was a thumbs up! Excited to make more and try it myself soon.
★★★★★
So so glad it was a hit!! So kind of you to bake for your son-in-law – I’m sure he appreciates it so much!
Hi Rachel, just wanted to say thanks for such an awesome sough dough recipe and love all the things I can do with the discard. The crackers are a real hit with my hubby he’s just gone gluten-free. Keep up the good work.
★★★★★
Love to hear that! Thanks so much for the feedback, Deborah.
I now have both regular and gf starters in my fridge. My best friend is gf and I promised her (and myself) that I’d make her some sourdough once my starter was a bit more “alive.” Well, I made a loaf the other day following the directions to a tee, and it came out great! My friends partner even said this loaf was better than the regular glutinous loaf he also tried. I’m looking forward to more of Rachel’s sourdough recipes and my starter continuing to mature. Thank you for the thoughtful and guided post on how to create something so delicious. It always feels more special when we can make something from scratch and share with friends.
★★★★★
So so thrilled you and your friend are loving the bread, Carrie! So sweet of you to make it for her :)
i made this bread taste wonderfull , i only have one question how do i get it to become bigger ?
Hi Harm, do you want an overall bigger loaf or a better rise? If you want a bigger loaf overall, you can make the loaf 1.5x bigger to have a larger overall loaf!
Has anyone tried this with regular brown rice flour? I don’t have superfine but have a 25lb bag of regular to use up.
Hi Gwen, yes it works with regular too, I just find superfine makes for the best result.
Would you use the same amount of flour?
Yes use the same amount!
Recommendations for high altitude baking? (7000 ft)
Unfortunately I’ve always lived at sea level so I have no experience with high altitude baking!
Great recipe! I gave a new oven and am having difficulty cooking all the way through. Do you know what internal temperature the bread needs to reach before removing from the oven?
Thank you!
Melissa
★★★★★
Hi Melissa, I don’t use a thermometer but I believe it should be between 190-200 degrees internally! Have you tried using an oven thermometer to see if your new oven is correctly calibrated?
Rachel, this was an incredible guide, thank you. So well written. My question is – how would you translate this recipe for a bread machine?
★★★★★
Hi Skyler! Unfortunately I don’t have and have never used a bread machine, so I’m not sure about their functionality or how one would work on converting a recipe to use one.
If I proof overnight in the fridge, can I place the dough directly in my preheated Dutch oven? Or does it have to come up to room temp for a certain amount of time before cooking?
It depends if it rose significantly in the fridge – if it did, you can go straight in. Otherwise, I usually let it rise at room temp while the oven preheats (about an hour or so).
Hi. I loved the consistency but the psyllium husk flavor was overwhelming to me and the bread is brown. Can I reduce the amount of psyllium husk? Thanks
★★★★
Hi Jovita, you shouldn’t be able to taste the psyllium husk – I’ve never had anyone mention this at all. Are you sure your psyllium husk hasn’t gone bad? It also doesn’t affect the color. Did you use any brown-colored flours, like buckwheat or teff? I presume you mean the inside of the bread is brown, because the crust will always be a golden/brown color.
I don’t seem to get a huge rise when it’s proofing in the banneton. I get some rise, but not to the point that it is almost over the top or makes for a poofy loaf. I can’t figure out where the disconnect is
Hi Lacie! How long are you proofing for? It may need longer. Also, if you’re using a larger banneton, it won’t rise quite so high because it will get wider as it rises. Did you get a good oven spring when it went into the oven? Doing it based on feel (should feel fluffy and bouncy when pressed in, not too dense) is more important the height.
This recipe is FANTASTIC! Even my friends who are not GF liked it and said the flavor and consistency were impressive!
All of your tips and explanations are incredibly helpful!
I had never heard of the “preferment” and that seemed to be the game changer that made my sourdough succeed! I had tried a couple other recipes before this one and to no avail. I was about to give up when I came across this one and gave it one last try. Now, I’ll be making bread almost weekly, because this recipe was a SUCCESS!!!
One question I do have: when making the “bread pan” style loaf, since there’s no lid, do you have to have a pan under it where you pour in water to get it to “crust” like a lot of recipes call for? I’m guess not and that the loaf will just have less of a “crusty” outside, which is obviously good for more “bread”-like loaves anyways.
Thank you for this FANTASTIC recipe!!! I’m already sharing it with all my family and friends.
★★★★★
I’m so glad it was a hit, Rachel!! Thank you so much for your kind words. I’ve done the steam method and without for loaf-style bread and honestly, I haven’t noticed a huge difference, except you maybe get a slightly crustier outside with the steam. It’s worth experimenting with both ways in my opinion to see what you prefer, but I usually don’t bother :) happy bread baking!
Hello! I was absolutely blown away just now trying my first loaf! It actually tastes and feels like normal bread!!! Even though the bottom was burnt (black) and the inside was the tiniest bit gummy it was still amazing and *by far* the best gluten free bread I’ve ever eaten. You mentioned in the troubleshooting section to try turning the heat down and baking for longer to solve the burnt bottom / gummy issue. Hope you don’t mind me asking – how much would you recommend turning the heat down? How much longer would you bake it for? I’m very grateful you invested SO much time into figuring all of this out – I honestly can’t thank you enough!!!!!
★★★★★
I’m SO glad you’re loving it, Sara! You can try reducing the temp down to about 400-410 and see if that helps. Bake for 10-15 minutes longer. If you can bake the bread on a higher rack and/or place a baking sheet on the rack below, that tends to help absorb extra heat from the bottom too. So much is oven-dependent, so it just requires some troubleshooting for your specific situation! My old oven used to get super dark bottoms, but in my current oven, the bottoms are perfect. Let me know if you have any other questions – hopefully this helps!
I baked mine in a loaf pan for 1 hour and didn’t add the last 20 minutes because it looked VERY done! It looks and feels like a brick and I have to saw through to cut it into slices. Surprisingly, it is moist inside. What happened? My daughter made and loves it and hers stayed soft to cut;, etc. I followed the directions exactly. What can I do? PS: I used brown pysillium husk.
★★★★★
Hi Lisa, it would be moist inside because you didn’t bake it enough. That last 20 minutes of cooking time really helps bake off the remaining moisture on the inside of the loaf. Toasting it will help reduce that extra moisture, but the cook times are very important for this recipe and are based on the amount of moisture in the loaf. I wouldn’t recommend shaving time off gluten-free bread loaves, as the times are intentional and important! If the outside is getting too done, I’d recommend baking with steam added to the oven, whether that’s in a separate dish, or in a Dutch oven. You can also cover the loaf to reduce browning.
HI again! I left you a msg this morning about my loaf being like a brick and very dry. I just realized that I used pysillium powder instead of husk! I will retry with husk + use white pysillium instead of brown. Hopefully it will make a difference! I gave you a 5 star because my daughter raves about you and I think I will get this right sooner or later!
★★★★★
Oh yes, the powder vs husk definitely makes a difference! If you’ll be using powder, only use about 70-80% of the amount called for.
This is now my go-to recipe. Perfect every time! I’m so glad to have bread back in my life!
★★★★★
So happy to hear this, Nadel!! :D
I’m wondering if quinoa flour can be made by grinding dry quinoa in a coffee grinder? Also, is the maple/honey replace-able with sugar or brown sugar?
I haven’t ever made quinoa flour myself, so I’m not sure if it would get fine enough to use. You can always sub a different whole grain flour if you don’t have it. The maple can be subbed for white sugar :)
Hi Rachel!
Do you have a video of you making this? I nornally make gluten sourdough bread. I’m just a little confused by the 8pm mixing for the perferment and the 8:00 a.m. mixing.
Thanks! Super excited to make it!
★★★★★
Hi! I have lots of stories on my Instagram, but somehow haven’t made a video yet, I’ll do that soon. The timing is just a suggestion/example, certainly not a necessity. The preferment just needs to ferment for 4 to 16 hours. This can be done in the morning, or overnight as the example timeline suggests. Let me know if that makes more sense – happy to help out! :)
Great recipe. I thought I’d screwed it up but turned out perfect. I didn’t work the dough much and just used premix gluten free flour from supermarket and some buckwheat flour, substituted sugar for honey.
★★★★★
So glad it turned out well, Duncan! Thanks for sharing your method and feedback.
Good Morning,
Round 3 of trying the GF Bread. This time I’m following the Sourdough Recipe.
How do I know when it is proofed….
I want to avoid the over and under proofed syndrome.
Thanks!
Hi Ilene, it should feel puffy and light when pressed, it’s hard to describe in words — have you ever made bread before? It’s one of those things you’ll get to know as you make it more regularly, but it should have some give but still bounce back after pressed lightly with a finger.
Hello!
I baked the GF Sourdough Bread and there wasn’t any oven spring but at least it didn’t deflate.
The dough did bounce back when pressed lightly.
I took its internal temperature when it came out of the oven. It was 208F. Is that about right?
I do bake SD bread regularly and I get lots of oven spring so this loaf is quite petite compared to my gluten SD bread.
So is it a petite loaf when baked?
Hi Ilene, I never temp check the bread since it’s not super accurate for GF breads – a better test is to knock on the bottom of the loaf, it should sound hollow. It’s definitely different than traditional sourdough bread so I’d do your best not to compare. I’ve found people who are used to baking regular sourdough get the most frustrated with the process because it’s different. It’s not a huge loaf, but it depends on how many pounds of dough you’re used to working with for your usual gluten-free bread. I don’t find it to be a petite loaf, but if you’re used to big ones, it might be!
Hi Rachel,
It definitely sounds hollow when I knock on the bottom of the loaf. Yay!
Now I wait until it is completely cooled down before I cut into it.
Fingers crossed that it passes the taste test.
Thanks!
I’ll let you know.
Woohoo!! I hope it tastes delicious :) enjoy!
Hi! I have made 4 loaves using this recipe and they taste delicious everytime! However, I’ve been struggling to get a good rise. My starter double very quickly and it super active but I feel like my baked loaves always end up kind of low. Do you have any tips?
★★★★★
Hi Paula! So many things can impact this – how big is your banneton? Is the oven fully preheated to give good oven spring? Are you adding any steam? Is it rising the correct amount of time? Without being in the kitchen with you it’s hard to know what’s going on. Generally, switching to a smaller banneton or rising vessel can make a huge difference with this if all else is good!
Okie I think the Banneton size is the culprit. It’s 9“ and I proof the dough for 3 hours at about 76 degrees Celsius. I also let the Dutch oven preheat in the oven and add a few ice cubes to a tray to create steam. I’ll try a smaller banneton and see how it goes! Thank you :)
Oh it’s definitely the banneton then – I use a 7″! It would be a lot wider and flatter with a 9″ like you’re using – I notice a big difference even with my 8″! 7″ gives the perfect height for me for this loaf.
It was perfect, a work of art!
★★★★★
Woohoo!! Happy bread baking, Brenda!
Does the preferment need to be in glass or ceramic? Or is a metal mixing bowl OK? Making my first-ever GF sourdough loaf. My starter is a week old, and is lovely, light, bubbly, growing like crazy. I plan to bake in my pullman loaf pan (metal), so I will have it rise in that. When I bake it for the first hour, should the pullman lid be on? Thank you!
I would avoid stainless steel because the starter can eat into it, but other metals should be ok! Good luck with your first loaf :) you can keep the lid on if you want the loaf to be a more square shape – if you want a loftier loaf with a higher rise, leave the lid off. Enjoy!
I have a sensitivity to potatoes, can I use Tapioca starch and arrowroot instead? Or maybe use all tapioca starch?
Yes for sure, a combo would be great but I’ve also done all arrowroot and it was fine.
I’d love to incorporate eggs into a bread recipe using my GF sourdough starter. Do you have recommendations? I’m not vegan, so it would be great to include eggs for protein, etc. Have lots of millet & oat flours to use…Thanks!
Hi Trish! I keep all of my bread recipes vegan but there are many websites that use eggs for gluten-free bread. I’d recommend checking out Gina’s recipe on her site https://glutenfreegourmand.blogspot.com/
Hi Rachel! I found you via your cookbook which I absolutely love, so choosing to try your recipe for gf sourdough was an easy and smart choice! Thus far I have made one loaf and a batch of rolls, and both have been spot on delicious! My loaf didn’t have a lot of rise, but it tasted great! Thank you for all your time in writing the steps and instructions for both the starter and bread in such detail.
Today when I began to prepare to ready my starter to bake loaf two, I realized I’m not sure I read a step correctly, so I want to clarify. When you wrote, “ Getting your starter ready for baking
You’ll want your starter to be at peak activity when you mix up your preferment! You also want to make sure you have enough starter for your loaf, and to make your bread. So, before making bread, I like to do a big feeding (about 150g each water and flour) and get to a solid doubling in size of my starter.”
Does this mean you add 150g water+ 150g flour to 100g of starter?
Or does it mean you add 150g water + 150g flour + 150g starter keeping a 1:1:1 ratio?
I’m asking because I read somewhere that when you refrigerate your starter, you can add an additional 25g of both water and flour above the amount in grams of the starter to give a “big feed” to your starter. So now I’m not sure what you meant when you said “big feed”. I kept it 1:1:1. It worked, but maybe my loaf would have a better rise?
★★★★★
Hi Millie! Thanks for asking this to clarify. I keep it at a 1:1:1 ratio, so I’d discard less and do 150g of each. The big feed for refrigeration is essentially giving your starter extra “food” to help it last longer without feeding while it’s hanging out in the fridge. I hope this helps, and I’m so glad you’re enjoying the bread, rolls, and cookbook!
When I mix the psyllium, sweetener and water, do I also add the olive oil to that mixture? Or should the psyllium mixture form a gel WITHOUT the oil, and then oil is added to the dough separately? I added the oil directly to the psyllium along with the honey & water, but wondering if that is wrong… thanks!
Amazing recipe! I have been experimenting with gluten free sourdough for a year now and this recipe is a winner so far. What I really like about this recipe is that it uses ingredients I can find in my country. So many recipes call for things we don’t have here and this is the recipe I was able to make without substitutions! Thank you so much for this wonderful recipe.
★★★★★
So thrilled you’re loving it, thanks Natasha!
Two times now when I have made the preferment where your recipe calls for only 80g of flour to 100g of water (and 150g of starter), it has made the mixture all watery and I have had to add flour to make t the usual pasty-like starter. Why do you only suggest using the 80g instead of the 1:1:1 ratio you always use?
Hi Lisa, the preferment is different than the starter and is not meant to have a thick, pasty consistency. It is meant to be thinner and more watery. It will throw off the results of the final loaf if you add extra flour to the preferment.
Yikes! I did throw if off!! Thanks for clarifying that for me! I thought it was just the same as the starter! Mine was like pure water. Is that OK?
I was given a starter and I’ve been making this recipe now for a couple weeks. I don’t have a dutch oven and I’ve been using a large cast iron frying pan, covered loosely with aluminum foil. This is delicious bread – probably the best gluten free bread I’ve had. One issue I’m running into is that the bottom of the loaf is considerably darker, to the point of burning slightly. I’m preheating the pan and baking the minimum time (45 minutes covered + uncovered). Any advice?
★★★★★
So glad you’re enjoying the bread, Karin! You can try placing things under the pan, like a baking sheet or two, to help absorb excess heat from the bottom. Some people also do 3-4 layers of parchment paper to help prevent the bottom burning as well. This tends to be more common with ovens that heat from the bottom, and just need something beneath the pan so the bottom doesn’t burn. Hope this helps!
Question.
What would be the “ideal hours” for overnight fermenting in the fridge? I am scared to overferment it….
Thanks!
Best gf bread I ever had. I honestly never thought I would be eating sourdough bread after going gluten free. Thank you! Please keep your recipes coming
★★★★★
Woohoo!! So glad to hear it, Sara :)
Question
My loafs come out with a huge bubble on top that deflates as it cools so I’m left with disk. Tastes great, but not the shape I’m going for.
Hi Tami, usually that’s a sign of overproofing if you mean that the top of the crust has separated from the rest of the loaf!
Hi, I am trying this recipe . But the preferment looks very dry , following the exact amount. I have tried it once before and the same thing happened, and i could not proceed .
Please guide , is it because of the quality of the brown rice flour ? I am using sorghum starter well bubbled up . Should I make any adjustments ?
Suchitra
Hi Suchitra, how dry is it? It definitely shouldn’t be super dry – does your starter seem dry too?
Hi, My starter seems fine, looked bubbled up and airy. But the pre ferment is still dry after more than 24 hours. It has been cold here, can i just wait to see some bubbling ? Can i just go ahead even if it doesnt bubble up ?
Thank you for your meticulous instructions and notes! I made my first boules and although they were kinda flat, they tasted awesome, I had some decent air bubbles, and the crust was great. I think I need to proof it for much longer though–I live in WI and a fellow sourdough-friend (non-GF) here mentioned that she proofs for almost 20 hours. I’m just happy I did it and my family really enjoyed it! (I also used your instructions and highlights on IG to make my sourdough starter and those were also very helpful, thank you!)
★★★★★
So glad you enjoyed it, Justine! You’ll definitely get to know the best timing for your area the more you bake, but I’m thrilled you’re off to a delicious start :) thanks for the feedback!
Hi, My starter seems fine, looked bubbled up and airy. But the pre ferment is still dry after more than 24 hours. It has been cold here, can i just wait to see some bubbling ? Can i just go ahead even if it doesnt bubble up ?
Hi Suchitra! What do you mean by the preferment being dry? It should be wetter/thinner than the starter is due to the higher ratio of water.
The 80 gms Brown rice flour just absorbed the water. Is it the quality of flour used ? Should i compensate or just proceed ?
I live at a high altitude. Think I’ve figured out oven temps and timing, also ingredient amounts but after freezing this bread, it seems to dry out. Love the flavor but is there a solution for the dryness?
Hi Susie, are you sure it’s wrapped well before freezing? I always keep it in a freezer-safe zip bag and try to remove as much air as possible before freezing.
I followed the recipe all step by step for GF/Sour dough starter bread with no yeast and all steps worked well. It did not rise though. I was trying to let is rise in oven with light on but it is cold in our climate now -I did not get a rise at all. Wonder if I add more starter in winter months? Thanks
Hi Lori! How long did you let it proof? Sometimes it can take a LONG time depending on the strength of your starter and the temperature outside!
30 hours, it tasted great but just did not have that rise, it was cooler, I had it in oven in a loaf pan, then wrapped in plastic then in a roasting pan with lid, light on in oven, just not sure how else to make it rise here in winter, if I put warm setting on oven, that is likely TOO hot. I am super excited since it is close to perfect, yeast free and GF, never had anything like it, will keep trying , I will look at your tips and tricks in the newsletter, thanks, just need to keep it warm – perhaps inside a crock pot….wonderful taste (let me know if I can proof it longer than 30 hours, just did not want it to go bad)
★★★★★
I have put a pyrex measuring cup with 1 cup of water in the microwave and heated it almost to boiling and then put my covered bread in the microwave with it off, and let it raise in there. Nice and warm. Good luck.
I will try that. I think I will have better luck in the summer heat. The -32 degrees C is not helping this weekend! Thanks!! I am still eating it-tastes sooo good, just waiting for more rise.
Hi Bakerita!
I’m wondering a few things, can you please help me?
1. Why do we need SUPERFINE brown rice flour? Can I use regular brown rice flour? Or is it possible to turn my brown rice flour into superfine flour by blending it?
2. Why must the seeds/nuts be soaked? Can I use plain raw hard seeds/nuts?
3. Would you say that the 3hr daytime proofing is better than the overnight proofing? And if the bread isnt “springy” to touch, should we let it proof for longer until it is?
4. Can I feed my starter at 10am and then mix the preferment at 5pm? Or is that too long in between? Would it be better to feed my starter at 5pm and then mix the preferment at 8pm like youve put in your schedule?
5. I’m getting some GF starter from a lady down the street. How do I feed the starter? Ive never made sourdough before so have no idea what to do with the starter haha, eeep. Can I use brown rice flour to feed her starter even if she hasnt used brown rice for her starter? And how do I feed it? Do I weigh how much starter there is, and then add half that amount of flour and half water?
Thank you so much!!
With love,
Lara xx
★★★★★
Hi Lara. Superfine flour absorbs water better, so it helps prevent a gummy loaf. You can use regular, but if your loaf turns out gummy, that may be a contributing factor. Most blenders aren’t strong enough to break down brown rice flour. I recommend soaking the nuts & seeds because otherwise they will absorb water from the loaf and may dry it out a bit. The proofing differences are personal preference – most people experiment with both to figure out what works best for them. The timing is less important then the feel of the loaf, so I’d wait until it’s springy rather than sticking right with the time. As I mentioned, everyone’s timing is different based on conditions. You want to mix the preferment when the starter is at peak rise or just before that, which is different for everyone – my timing is a guideline based on my starter, but yours may vary. You can see full instructions regarding starter maintenance here. Hope this helps!
Hi Rachel,
Thanks for your reply! :)
My bread did not turn out so well. What is meant by “gummy”? My bread didn’t have many bubbles, didn’t rise very much, and was very dense. Is this what you mean by gummy?
Also, when I was doing my proofing, the loaf rose only the tiniest bit. Do you think this might have been due to a starter that wasn’t active enough? Do you have any photos to share of what a nice and active starter should look like? :)
★★★★
I have made this recipe in double quantity many times over and think it is terrific. Today I noticed as I was re-reading the recipe, it says:MAKE THE PREFERMENT
In a bowl, mix together 150g active starter, water, and brown rice flour. Mix until smooth, and then cover and let rest for anywhere between 4 and 18 hours. The longer it ferments, the more sour your loaf will be. I’ve had success all across the time spectrum!
In the ingredients listing at the beginning for the 2X recipe, it says mix the preferment using 300gms sourdough starter.
My question is do I have to use 300gms of starter for two loaves in the preferment or will 150 gms of starter?
The other day I made your yeast GF bread and it was a hit.
Thank you for your recipes.
★★★★★
Thank you so much for such a detailed recipe! I followed your instructions for the gf starter and my first loaf turned out great. But it didn’t rise as much as I hoped. I put the remaining starter in the fridge after discarding bc I had a busy week. I pulled it out and ended up having to feed a few times before it started rising again, but it’s just not doubling like my first round did. Any tips? Or am I doing anything wrong? The bread also wasn’t rising much during the proofing this second time around. Did I mess up the starter by refrigerating it? Should I start over or just go back to feeding the starter daily for a while? I really want to get it right and would love any suggestions. Thanks again!
Hi Julie, it should bounce back after continuing to feed. Refrigerating is fine but if the starter wasn’t super strong going it, it will take longer for it to bounce back and get really active again. Having a strong, healthy starter is imperative to getting good rise, so that’s likely why the bread didn’t rise as much as you’d hoped!
Hello – I need to bake my bread longer (it came out gummy). If I am going to increase the time would it be when the lid is on the Dutch oven or after I take it off – of should I do some of each? And any input on how long to increase the time?
Thank you!
Julia
I would increase the time with the lid on so the bread doesn’t get overly browned!
I live at a high altitude. Think I’ve figured out oven temps and timing, also ingredient amounts but after freezing this bread, it seems to dry out. Love the flavor but is there a solution for the dryness?
Hi Susie, I live at 5,800 in Colorado. I’ve dabbled messing around with different cake recipes but never bread. Could you share your tips?
Thank you. I have been putting baked bread – and slicing it – in a ziploc before putting in freezer but maybe I’m waiting too long to put it in freezer, and do I specifically need freezer ziplocks?
Freezer specific ziplocks definitely help avoid freezer burn!
Sorry I don’t understand the active sourdough starter. Do I make this somehow or where do I buy this?
★★★★★
Hi Kim, follow the steps in the following post to make a sourdough starter: https://bakerita.com/how-to-make-a-gluten-free-sourdough-starter/
How do I know if the dough is fully proofed?
It will feel light when pressed and spring back, and will have risen a decent amount.
Hi..I’m afraid to start baking..but it’s time! I’ve been feeding my starter for a month! My Question – for the PREFERMENT – do I cover it with plastic wrap or a tea towel..Sorry if I missed the answer somewhere. This is certainly a labor of love!
ALSO, in your opinion, is it better to proof in the fridge or left out? Thanks for everything!
Do you have a YouTube Channel?
Hi Luann, you can cover it with either! I usually proof on the counter unless there’s a time-related reason that an overnight fridge proof would be better. Most people experiment with both to pick what they prefer and works better for their schedule. Hope this helps! I don’t have a YouTube channel at this time.
HELP!!! I have tried the recipe 3 times and every time it is gummy. I have followed it exactly. I live in FL and since it is “winter”, humidity is fluctuating however my house is around 76 degrees during the day and 74 at night. My starter is relatively young – I followed your recipe and it 3 weeks old. I use Sorghum and Brown Rice (25 g each) and 50g water. The bread is puffy before scoring and putting it in the oven. I am wondering if my oven is not getting hot enough? Regular sourdough works for me at 450 degrees. I am wondering if should cook at 450 instead of 425.
Can you provide me any advice?
Hi Debora, have you tried the tips for the gummy loaves (increasing flour/decreasing water/baking longer) to try and mitigate the issue yet? Usually one or a combo of these helps a lot – reducing water may be key for you since you’re in such a humid climate. I’d stick with the recommended temp – baking at a higher temp would likely burn the crust before the inside has a chance to cook through, which would just enhance the gumminess issue.
Attempting first loaf – tried to proof overnight in fridge. I don’t think it proofed/rose at all. Been sitting on my counter for one hour this morning. What do I do now?
Hi Amanda, I recommend letting it proof for a few hours at room temp to let it get puffy/fluffy after a night in the fridge!
I did a teff-starter and then used teff and brown rice flour + tapioca and corn starch.
Perfect, thank you so much for this great recipe, also the discard pizza is great
So glad you’re loving it, thanks for the feedback!
I have made this boule sourdough probably 10 times now! The taste is great, but my loaf always comes out flat and only has a slight rise. I let it rise for 4-5 hours but it is never a huge rise. I do keep it in a warm environment to rise as well. Any tips?
★★★★
Hi Shannon! What size banneton are you using? A 7-inch will help give you the best loaf – a wider one will allow the bread to flatten out as it rises. How is your starter, also? Are you adding it right at peak rise or just before? There’s a lot of factors that contribute to the rise so it’s hard to know exactly which would help, but these things are worth looking at first :)
So perfect every time! I’ve made the bagels, focaccia, and OMG the deep dish pizza! All great! Create more GF sourdough recipes, please! Curious about making different shapes (baguette, loaf pan); advice for making those shapes that wouldn’t use a Dutch oven?
★★★★★
So glad you”re loving them all, Allison! I have tips for making a loaf in the notes of this recipe, I can add some notes about making it into baguettes as well :)
Getting closer!
I’m on my third or fourth loaf and it’s still not perfect but it’s getting better. I have increased cooking time to 1hr 15m with the lid on and 20m with lid off. Crust is nice and brown/crunchy but it’s still a bit too moist/gummy on the inside. I am using the higher amount of brown rice flour (80g) suggested in the recipe. Any suggestions? More flour? More cooking time?
Thank you!
Hi Julia, you may want to try reducing the water a little bit if you’ve tried the other two suggestions! Is your brown rice flour superfine? Sometimes if you the flour is too coarse it won’t absorb water in the same way and can lead to a gummier loaf. Hopefully the other loaves have been still edible and delicious once toasted, though!
Rachel –
Thank you for you quick reply! They have all been very yummy especially when toasted. It’s been a lot of fun to learn and I’m really enjoying it. Thank you!
My brown rice flour is “Anthony’s Premium Finely Ground Brown Rice Flour.” It doesn’t say “superfine” but it sure looks that way. Is that okay to use? The flour you have linked is Bob’s but it doesn’t say “superfine” either – so just checking.
Do you have a recommendation for how much to back off on the water?
Thanks again!
Julia
I know you mention you highly recommend the psyllium husk, but have you or anyone in the comments ever used xanthan gum? Having a difficult time finding psyllium and really want to try this recipe as everyone raves about it!
Hi Melissa, unfortunately, they’re not interchangeable! I’d recommend ordering some psyllium on Amazon if you can – that’s where I get it for convenience sake!
I really appreciate the detailed knowledge you have shared for gluten free sourdough! Is it necessary to put sweetener in the bread mix? Thank you :)
★★★★★
Hi Janet, the sugar is to feed the yeast in the sourdough, not to sweeten! Hope you love it.
I have had same situation as Julia and using same rice flour . So I look forward to your answer regarding water
Hi Carolyn, there are a lot of comments from Julia’s, not sure which one you mean. Can you specify what your question is, please?
Hey Rachel!
My sourdough starter is just about 2 weeks old and i’ve attempted 2 loaves so far! I followed your recipe exactly and the flavor is AMAZING! The outside is so so crunchy and flavorful. However, I’d love to experiment with other flours. I purchased buckwheat flour and wondering which flour I should substitute it for? The brown rice maybe? Also, I am having issues with gumminess and it taking forever to rise. Could it possibly be because my starter is so new? It has been at peak activity every time I used it, however it just doesn’t seem to get much height. I am also using an 8” banneton so maybe that is why? Thank you so much for your instructions, I’ve referenced your recipe probably 30 times within the last week You are amazing, thanks!
★★★★★
Hi Chloe, so glad it’s going well so far – you can try subbing the buckwheat for any of the grain flours (brown rice or sorghum). Rising would definitely be impacted by the strength and age of the starter. You may also need to proof for longer, and smaller bannetons definitely help with height. I prefer a 7″ :) so glad it’s been helpful on your sourdough journey!
I am new to baking, but trying my best to make a millet and quinoa bread with psyllium husks, filtered water and salt. I have made a millet/quinoa, sourdough starter. That is very active and happy!
My problem is my bread is coming out with the psyllium husks, looking very unappetizing, (like worms) and a gummy bread. I am really at a loss to know how to incorporate properly the psyllium husks. I would appreciate any kind of assistance. Thank you very much, Gigi.
Hi Gigi, how odd that you’re even noticing the psyllium husk in the baked bread – you can try using psyllium husk powder instead (75% of the called for amount) and that should help with any odd textures it’s creating. Are you mixing the psyllium husk with water as directed in the recipe? Did you look at the section in this post about reducing gumminess? Baking longer, increasing flour, and/or reducing water all help with that.
My first time baking a GF sourdough bread and I have to say this turned out pretty darn good! I made my starter using RedMill GF All purpose flour, and a few other tweaks to the recipe. I used avocado oil rather than olive oil, and xanthum gum as a thickener. Baked in a dutch over covered for 45 minutes, then about 40 minutes uncovered. The bread developed a very number crust, and bread had a nice flavor, of course, different from my regular sourdough, and very nice texture. Thank you Rachel for the great recipe.
★★★★
So glad you enjoyed this recipe, Irv! You used xantham gum in place of the psyllium husk? Thanks for sharing that worked, I haven’t ever tried it that way.
Yes, I substituted xanthum gum for the psyllium husk, 3 1/2 tsp for the recipe. Picture of the bread on my Instagram @nachampion.
★★★★
I badly want to try baking this bread! But wondering if this recipe will work using a loaf pan and a large commercial oven? (Steam can be adjusted) And how I would go about it?
Evantually, I’d like to bake multiple loaves at once. Is this possible?
Hi Rosanna, it will definitely work in a loaf pan. I’ve never used a commercial oven so unfortunately I can’t give specific guidance there but I don’t see why it wouldn’t work! Loaf pan instruction are in the notes of the recipe card.
Thanks for the quick reply! Reading the notes now. :) I’m excited to try this recipe since I love sourdough and eat gluten free.
Of course, hope it helps!!
This was my first time ever making gluten free bread or working with sourdough starter and it turned out amazing! My son has been missing sourdough bread so much since having to go gluten free, and he dislikes all the store bought kind, so I thought I’d give this a try. I followed the directions exactly. I was sad at first when my dough wasn’t coming together well, and remained extremely sticky, so I took a chance and added a little more brown rice flour and sorghum flour. It still was still slightly sticky when I put it into proof, but in the end it turned out beautiful and delicious! The timeline was especially helpful. Thank you for the detailed directions — I think I read and re-read them at least 10 times before attempting this!
★★★★★
So glad you and your son enjoyed the bread and that you found the instructions helpful! Thanks so much for the feedback, Kara, and I hope there’s a lot more delicious sourdough bread in your future :)
This bread is delicious! Thank you for this recipe!
I followed this recipe twice and made 2 beautiful loaves, but neither of them raised that much. I used my starter at its peak activity and let my preferment to rise a few hours.. but the dough itself didn’t rise that much. Maybe I didn’t do it right, should I mix the preferment and the psyllium husk together? Will there be a difference if I will add the salt to the dough at a later stage?
Or maybe this loaf doesn’t suppose to rise that much?
Thank you!!
★★★★★
Hi Anna, if your starter is new, that could be the case. Also, how long did you let it rise? Sometimes it takes a pretty long time, so you may just want to let it rise for longer in a warmer spot :)
Hi Rachel (:
My starter IS new! It is something like a month old. To the first loaf I gave 3 hours in room temperature,
And the second loaf was in the refrigerator over night. Both of didn’t rise that much.
Would you recommend me to keep with daily feedings for some time to make my starter stronger? (I keep my starter in the refrigerator between uses).
Thank you so much for helping me!! (:
★★★★★
Hi Anna, more feeds will definitely help strengthen it! And I would recommend a longer rise – you want to let it rise until it’s puffy feeling. The feeling of the dough is a lot more important than following the exact timing. Hope this helps!
Hi Rachel!
I am feeding my starter daily again as you recommended me! and I just thought maybe the problem is the flour, I made your sourdough starter recipe but I couldn’t find a brown rice flour anywhere, so I used white rice flour instead! do you think it may have something to do with it?
Thank you so much for helping me again!!
(∩^o^)⊃━☆
★★★★★
Hi Anna, white rice flour should still work, but may take a bit longer – try adding a bit of sugar or a different type of flour to give it a boost!
I am SO close. Just one (last) question. I had to reduce the water (225g) to get rid of the gumminess and it is almost perfect. The loaf is still very moist when I cut it in half. Is that normal? I don’t know what it’s supposed to feel like. It’s definitely not dry like a store bought loaf. Any input? Thank you again!!
Hi Julia, no it shouldn’t be too moist! It sounds like you maybe need to bake the loaf for longer – how long are you baking it?
Rachel – I baked it for 90 minutes with the lid on and 20 with the lid off. My oven is older and when I checked it with a thermometer, 425 was more like 400. I’m trying to not change more than one thing at a time to stay consistent which is why I haven’t messed with the temperature. Thanks!
Awesome bread! Thank you so much for sharing. I have Celiac and my daughter has gluten intolerance. So worth the effort! Love it, and no more store bought bread for me.
★★★★★
So glad it’s a hit with you and your daughter. Thanks for the feedback, Karen!
Hello! I love your cookbook and used many of the cookie recipes for a New Year’s Eve gathering to usher in 2023. Everyone was so surprised the cookies were GF and vegan. YUMMY!
I’ve made your GF sourdough starter and am patiently waiting to make my first loaf. I was wondering if a 5 qt dutch oven would work with your recipe, before I go to the expense of buying a 5.5 qt. I am new to baking any kind of bread and am not sure if it would be a problem to use a smaller dutch oven. Used the GF sourdough discard for pancakes this morning. Very tasty! Thanks, in advance,for your advice!
Hi Beverly, yes a 5 qt will absolutely work! A variety of sizes will work, I just mention a 5.5 qt because that’s what I have. I wouldn’t recommend a super small one, but these are similar enough in size that it will be fine. Enjoy, and so glad you loved the cookies!!
Thank you so much for your quick reply! I hope to see a bread baking cookbook from you soon!!
Hello,
After perfecting my gluten sourdough sandwich loaves over the last 3 years I’ve developed a gluten sensitivity and am attempting gf baking! I’ve tried one other recipe with not great success and was hoping to give this one a try! I see mentioned in the post that you can make this in a 9×5 loaf pan but don’t see any directions for exactly how to shape or bake…. Am I missing the instructions somewhere?
Hi Summer, those instructions can be found at the bottom of the recipe card in the notes section!
Absolutely blown away by the taste of my first loaf. And I undercooked it, cut into it too early, and slightly burnt the bottom. I still couldn’t believe how good it was and that my starter worked! Thank you so much for giving me back sourdough!
★★★★★
Woohoo!! So glad your first loaf turned out good – they’ll just get better from here :) happy baking, Emily!
Sorry if this has been answered! I went through the first 50 of 200 results for “starter” on this page. :D Must I use your starter recipe or can I use a gluten-free oat sourdough starter I have? Thanks so much!
Any gluten-free sourdough starter will work! Happy baking :)
Thanks so much! I decided against using that one and am now making yours after seeing all your discard recipes. I’m so excited! My son and I started it yesterday morning (so it’s had 3 feedings total), and it’s already a bit bubbly and rising. I fed it this morning and noticed it had risen quite a bit after a few hours, so put on a rubber band, and it’s continuing to rise. It’s 73.4 in our kitchen, but wow, this is quick. I used half brown rice flour and half buckwheat.
What’s the minimum amount of time you’ve needed in the summer? And for anyone else who wants to use that combination, I also needed 12 extra grams of water like Rachel did in her videos!
Oh, whoops. This comment belongs more to the starter post. Will go post it there!
Hi Rachel! I’m so new to this so asking a very silly question. In your directions you say that you like to feed your starter a good feed prior to baking bread. So do you discard have of your starter and then add about 150 grams of flour and 150 of water or so? Am I supposed to be discarding a certain amount every single time before I use my starter? Sorry I know it’s a very silly question, but never done this before
Hi Lena, have you read my post all about making and maintaining a sourdough starter? It should help give you a more well rounded perspective about the starter, but to answer your question, yes you will do a 1:1:1 feeding – after discarding, feed the remaining starter an equal amount of flour and water (approximately – sometimes you’ll need a tiny bit more water or flour depending on the flour fineness). Hope this helps!
Yes thank you! I did read it, but I guess I still had some questions :) also, with my starter, once I feed it, it looks great and bubbly and more thick at the top, but kinda more liquid toward the bottom of the jar. Is that normal? Can I still use it? I do stir really well when I feed it.
Yes totally normal, just generally means its hungry and this can also happen more often if you flour isn’t superfine, because it just won’t absorb the liquid as well, but nothing to be concerned about. Just stir it in when you feed!
Rachel thank you for the recipe! I had a quick question though. I followed everything to the t and my starter looks beautiful and doubles in size before I use it. The bread looks like yours does in the pictures, but it’s still gummy. I baked it for 50 minutes covered and then another 40-45 uncovered. Do you think adding a little bit more brown rice flour would help to fix the gummy texture? Thank you!
Hi Lena, yes you can try reducing the water a bit or adding a little bit of extra flour. Is your rice flour super fine? Sometimes if it’s a little courser this can also make it gummier, since the flour isn’t able to absorb the water as well.
Ok thank you! I would say it’s fine flour. I used bobs red mill organic brown rice flour. Is there a better flour maybe you could suggest?
Regarding a little more flour, would you say adding 15grams more would be too much or about right?
Thank you!!!
Hi! Love this GF recipe and am going to try it today (fingers crossed).
All I have access to is the pre-mix flour (1:1 type).
My starter seems to LOVE IT!can I use this for the bread until I can find something else?
Maybe grind up and make my own rice flour?
Thanks do much for your time in making these recipes available!
★★★★★
Hi Adrienne, things may get a little wonky if you have a 1:1 flour that contains any gums, like guar gum and xantham gum, because this recipe already has the binders it needs (psyllium husk) and isn’t designed to use a flour with more binders. If your flour contains one of these, you may end up with a gummy loaf. I hope this helps explain! Enjoy the bread! :)
Thank you for this!! Is there any way to make this more airy, and light like traditional sourdough?
★★★★★
Hi Rose, the more mature your starter is, the lighter and fluffier it will be, but you’ll never get quite the same super open crumb as a gluten sourdough since gluten is what holds the bread together enough to support that super open structure. Increasing the starch ratio can make the bread lighter and help achieve a lighter, wider crumb, but can also cause more gumminess if the ratio is off. Hope this helps!
This receipe is perfect! I added soaked whole and grounded up seeds which worked well. I will try with Buckwheat next time and not disturb my loaf at all….i never checked baking time and took it out too early. But i did put it back. Wonderful thank you!
So glad you’re loving it, Karin! Thanks for the feedback.
Hi, I’ve been using this recipe for a few years now and it just gets better and better. it might be my starter or just that I know what my dough needs by feel now. There is no comercial gluten free bread that compares to this. It’s delicious!
Thank you!
★★★★★
So happy to hear this, Catherine! Thanks so much for the feedback. It definitely gets better both as the starter matures and as you’re able to adapt for your ingredients & environment :)
Hello Rachel
And thank you so much for your ground breaking recipes
Is there caloric info for this lovely bread?
xx
Hi Yariv, I don’t provide calorie info because it depends on the exact flours that you use and how big your slices are. You can calculate yourself on an app like my fitness pal!
Rachel, I’m still getting my head around sourdough baking and notice a range of different amounts for the flour – this recipe totals 300gms, whereas your other recipe lists flours that amount to 460gms. I am confused – yet another teacher has 450 gms and on it goes. Please clarify why there is so much difference in the total flour content, and what is a general rule for the total flour amount. Thank you
Hi Mariana, each recipe requires a different amount of flour for a variety of reasons. Some are smaller yields of dough (like my focaccia or pizza crust recipes) and if you’re comparing gluten-free sourdough versus gluten-free yeast bread, one has a preferment that includes flour, and one doesn’t. There is no general rule for total flour amount – it’s like asking why cookie recipes have different amounts of flour. Just depends on the recipe.
Hi there! I’m so excited to have found this recipe. I just tried my first loaf and I proofed it overnight in the fridge and pulled it out this morning to find it had not risen at all, nor any bubbles…. Thoughts? My preferment doubled beautifully with lots of bubbles.
Hi Brenna, the rise is much slower in the fridge because of the cool temp and you usually won’t see any rise. Some folks let it rise at room temperature for a few hours until they see a little puff, and some people put it right into the oven to start baking out of the fridge and still get a good rise! You can experiment with what works for you and your timing and see how they turn out :)
Hi, I tried your gluten free sourdough bread recipe and loved it. But, for reason it didn’t rise. I have never made a starter, so maybe there was something wrong there? I used Bob’s Red mill (millet) sourdough starter recipe and it was sour and the consistency of a starter and everything looked good. When I did your starter recipe I let it set for about 12 hours and nothing happened. Should it have risen a bit or frothed?
Next time I make the recipe, I will take the starter out of the refrigerator and feed it for 4 days (according to the recipe) and see if it works.
I know that it could be anything, but if you have some suggestions, I would appreciate it.
★★★★★
Hi Bob, do you mean the bread didn’t rise at all, even in the oven? When you mention my starter recipe, are you referring to the preferment or my actual sourdough starter instructions? Either way, you should see some activity – nice bubbling but doesn’t need to be a huge rise to be active. I do recommend having an active, rising starter before you start making bread since that’s what gives the bread levity. Hope this helps!
My starter is at 14 days today and it’s not quite doubling in size. I fed it last night and this morning and thought it would be ready to use this afternoon, but now I’m not sure. Should I do a few more extra feedings to help it along and then start the baking process? I want it to be right before I start so I don’t waste my products. Thanks,
Dawn
Hi Dawn! It doesn’t need to fully double, but as long as you’re seeing good bubbles and activity, it smells good, and you’re getting about a 1.5x rise, you should be ready to bake!
Thank you so much for this wonderful recipe! I just made my first ever sourdough bolle and it came out beautifully. The only thing that I want more is for the bread to rise a bit more. I proofed for 6 hours. . I will go longer next time. Thank you again!!!
★★★★★
So happy to hear that, Deborah! It will also get better rise when your starter is more mature. If you’re using a large banneton, downsizing to a 7″ can also help :)
Has anyone tried coconut flour in place of the sorghum? I don’t have sorghum, quoina, or millet flours local but I do have coconut flour on hand. I’m hoping this recipe will work for me. I’ve had the worst luck with gf bread…
★★★★★
Hi Erin, I wouldn’t recommend it! Coconut flour is much more absorbent than any other flour and it doesn’t substitute well for anything – I recommend seeking out recipes that specifically call for coconut flour to use it up.
Okay thank you! I’ll order some sorghum from Amazon and try it!
This recipe bakes beautifully as is, but over time I’ve made some tweaks to suit my tastes and schedule—
For the grains I do 60g brown rice, 20g teff, 60g sorghum, 20g quinoa. The flour changes don’t make a difference in rise as I get the same result following the recipe as it is, I just like the flavor of this mix!
I also changed the method a bit which allows me better control over the timing—
Day 1: mix preferment/levain as follows:
First feed- 30g starter + 60 brown rice flour + 60g water — allow to reach peak (4-5 hours)
Second feed- add 80g brown rice flour + 100g water — allow to reach peak (4-5 hours)
Mix dough, shape and place in banneton, place banneton in plastic bag and put in fridge overnight to ferment.
Day 2: remove from fridge and plastic in the morning and cover with a towel. Allow to rise at room temp until fully proofed, then score and bake as directed. (425, 45min lid on 25min lid off).
★★★★★
Thanks so much for sharing your feedback, Kyra! So glad you’re enjoying the recipe :)
If you already have proofed started can you just use 330 grams of starter or do you have to do it the way you have suggested. Thanks
Hi Lynne, the recipe is formulated using the preferment method – anything else you’d have to experiment with and I can’t guarantee the result.
Ugh I accidentally bought WHITE rice flour. Besides taste will this make a difference with measurements?
Hi Sara, nope you’re all good! :)
Hi! I’m coming over from making “traditional” sourdough at home, and I’m staring at my loaf (going to wait just a bit longer before carving it up) and it looks incredible. Thank you so much for the recipe, the directions and suggestions, the links and all the details. It’s *GREATLY* appreciated. I just had one question, as someone who hasn’t usually added sugars to naturally leavened breads, what happens to them over the course of the leavening and baking? I’ve read that at least some gets metabolized and some helps with crust browning, etc. I’m assuming that’s the same with gluten free natural yeasties. Or what is going on in there? Thank you!
★★★★★
Hi Nick, the sugar helps to feed the natural yeast and promotes some browning, but I have done it without and it still works, so feel free to remove it from the recipe if you’re not doing sugar for whatever reason. Hope you love the bread, and I’m glad the post is helpful!