Gluten-Free Sourdough Bagels
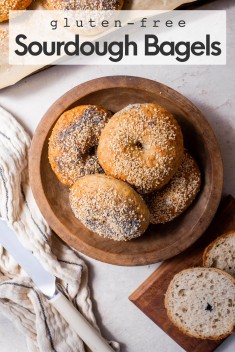
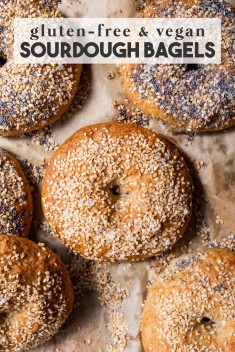
These Gluten-Free Sourdough Bagels are also vegan and made with gluten-free sourdough starter, whole grain gluten-free flours, and whichever toppings and mix-ins you love! These gluten-free bagels perfect for enjoying fresh from the oven or keeping in the freezer for a rainy day.
No gluten-free sourdough starter but still craving bagels? Check out these amazingly fluffy gluten-free bagels made with yeast!
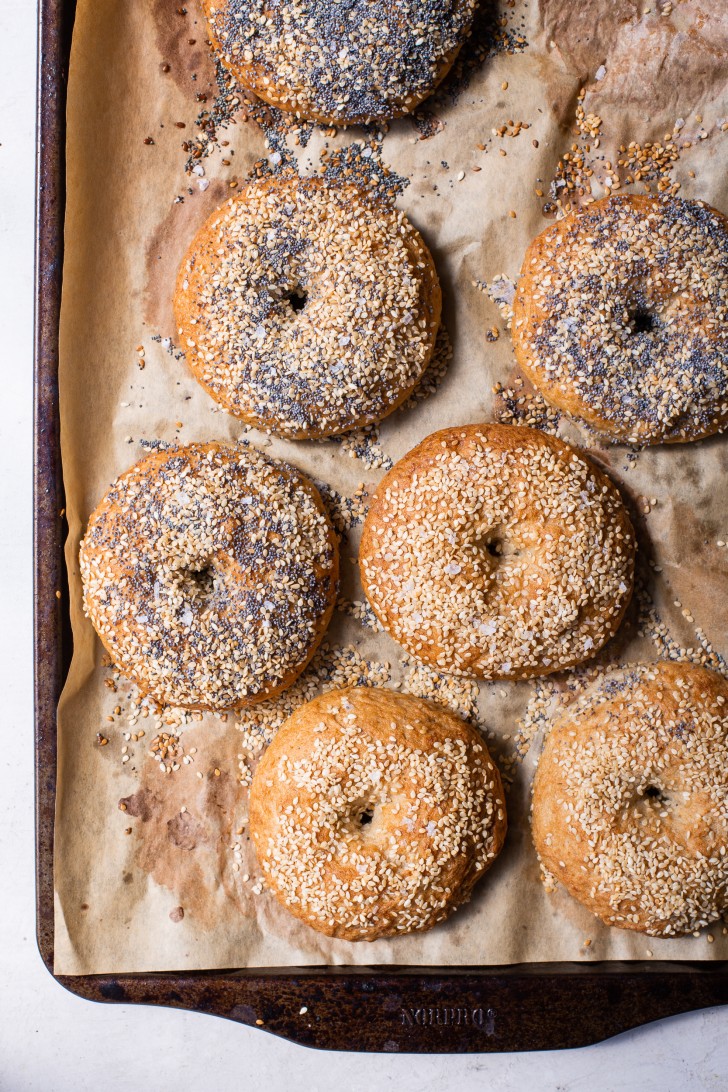
Practically every single day since I first posted the recipe for my homemade gluten-free sourdough bread, I’ve gotten requests for one sourdough recipe more than anything else: gluten-free sourdough bagels!
In my Gluten-Free Sourdough Facebook Group, people request a gluten-free bagel recipe all the time. And I am SO thrilled to finally be able to share the recipe with you – and it’s a good one!!
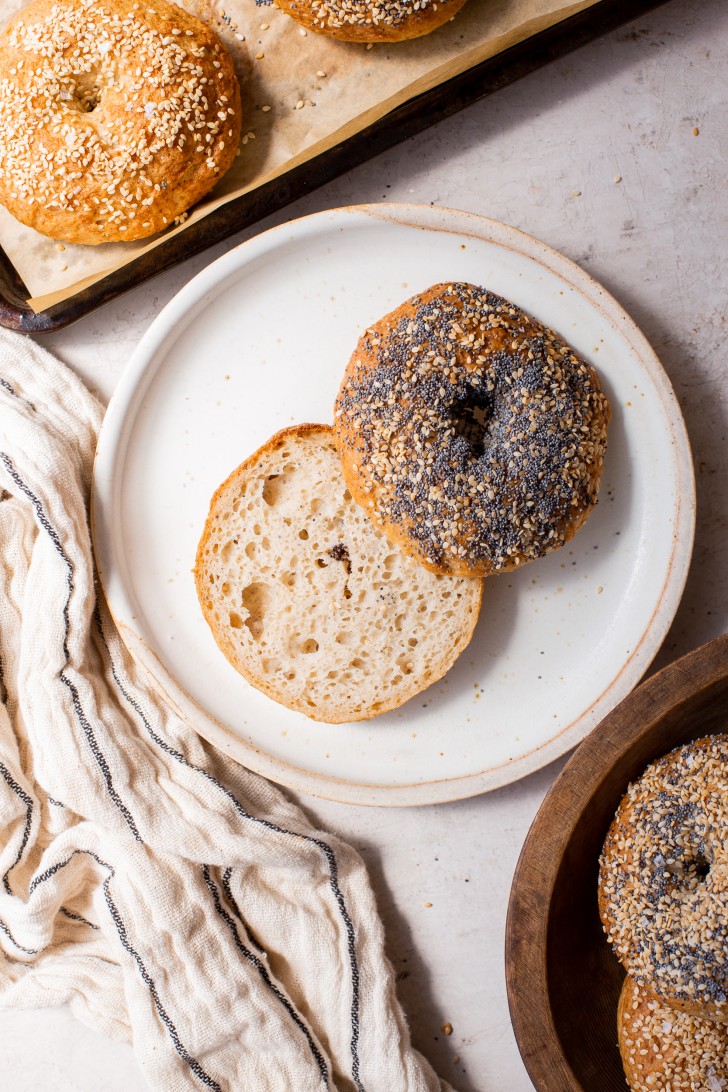
Bagels have a very special place in my heart, so I wanted these to be perfect. For my whole life, my paternal grandparents have told me stories of the Jewish bakery that my great-grandparents owned in New York that made the most amazing bagels.
My grandparents, who met when my grandma was 13 and my grandpa was 15, would go to the bakery after school for egg bagels and water bagels hot from the oven. Unfortunately, no recipes have been preserved for me, just one cake server remains as my connection to that bakery.
But, as you can imagine, once I started recipe testing for gluten-free bagels, I needed them to be amazing. It runs in my blood! Of course, a gluten-free sourdough bagel isn’t what my ancestors were making, but I know these would make them proud.
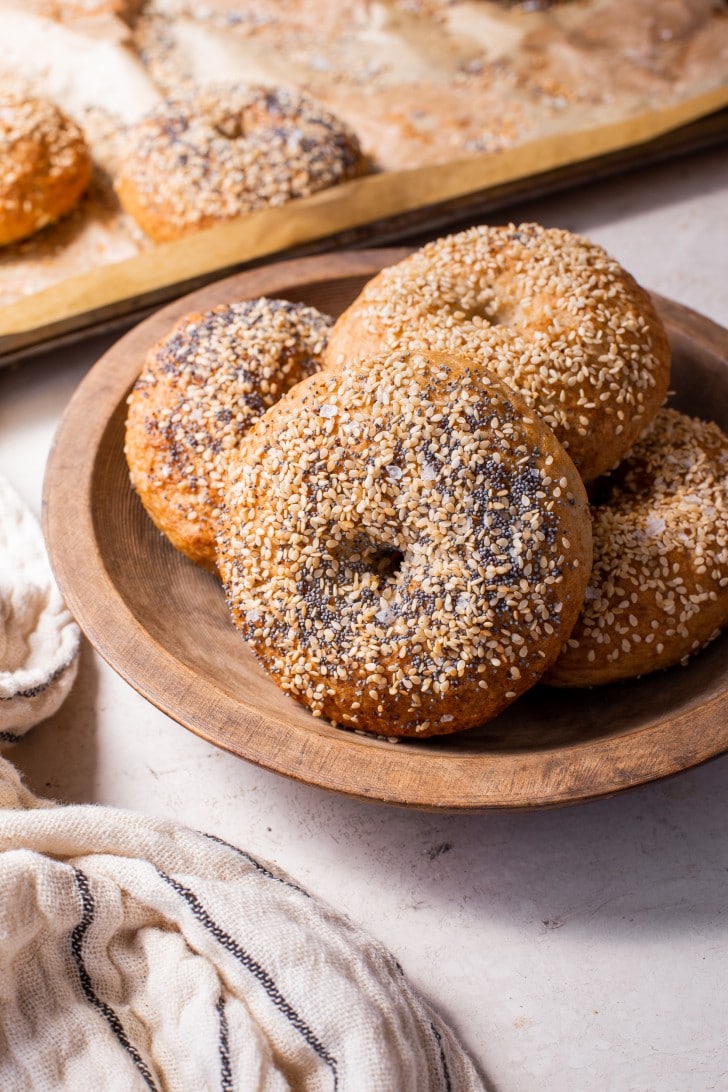
These gluten-free sourdough bagels are…
- Perfectly baked and chewy on the outside
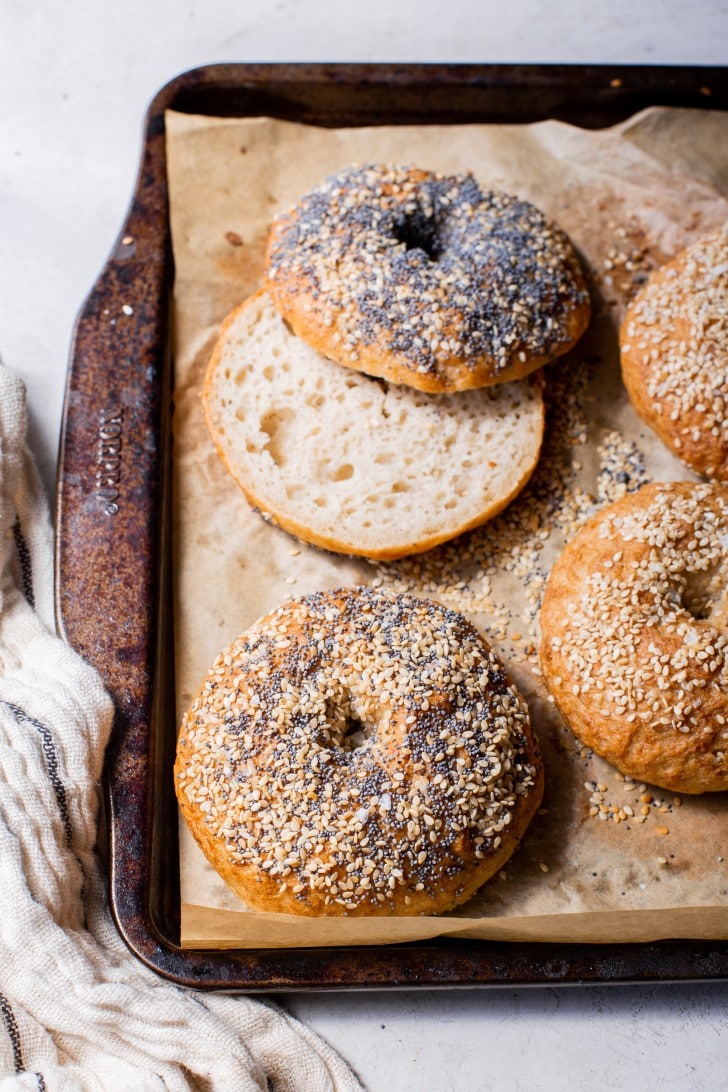
- Soft, tender crumb on the inside
- Mild sourdough flavor that isn’t overwhelming
- Perfect for adding your favorite toppings
- Easy to make with a little patience
Are bagels gluten-free?
No, unless you’re specifically seeking out gluten-free bagels, like these gluten-free sourdough bagels, bagels are not naturally gluten-free. They are traditionally made with wheat flour.
What is in gluten-free bagels?
So if not all bagels are gluten-free, you’re probably wondering what is in gluten-free bagels. Well, let me tell you! For this recipe, we’re using these ingredients:
- Active Gluten-Free Sourdough Starter: if you don’t have a gluten-free sourdough starter yet, follow this guide for how to make one! Since we’re skipping a preferment for this recipe to help these bagels be made more quickly, you’ll want your starter at peak activity when you make this recipe.
- Whole Psyllium Husk: psyllium husk is a form of fiber that acts as our gluten for these bagels: it provides the binding properties and elasticity that help the dough become workable. It gives the structure and support for the bagels to rise, as well. You cannot skip it or replace it with another ingredient.
- Maple Syrup: this provides sugar for the yeast to feed on, which allows the bagel dough to rise.
- Water: filtered water is best for all bread making!
- Olive Oil: this helps soften the crust so it doesn’t get too crunchy in the oven.
- Starch: starches, such as potato starch and tapioca starch, help give a nice, fluffy texture to the bagels.
- Gluten-Free Grain Flours: I love using a combination of different grain flours for this recipe, such as brown rice flour, sorghum flour, quinoa flour, millet flour, teff flour, buckwheat flour…I provide a recommended and tested combination in the recipe, but you can experiment with different combinations here.
- Salt: because no recipe is complete without it :)
- Baking Soda: this isn’t added to the dough, but you’ll use it for the baking soda boil that’s needed for a bagel to be a true bagel. It gives the classic chewy bagel crust!
Can I use a GF flour blend for this recipe?
If you would like to use a mix that you can pre-make to simplify the baking process, I recommend using my homemade gluten-free bread flour blend. This blend contains both starches and whole grain flours, so you’ll use it in place of the total amount of starch + flour. In this case of this recipe, that is 380g.
If you prefer a store-bought blend, I like this multi-flour blend from Vitacost. This blend uses very similar ingredients to the ones my recipe calls for, with no additives or gums.
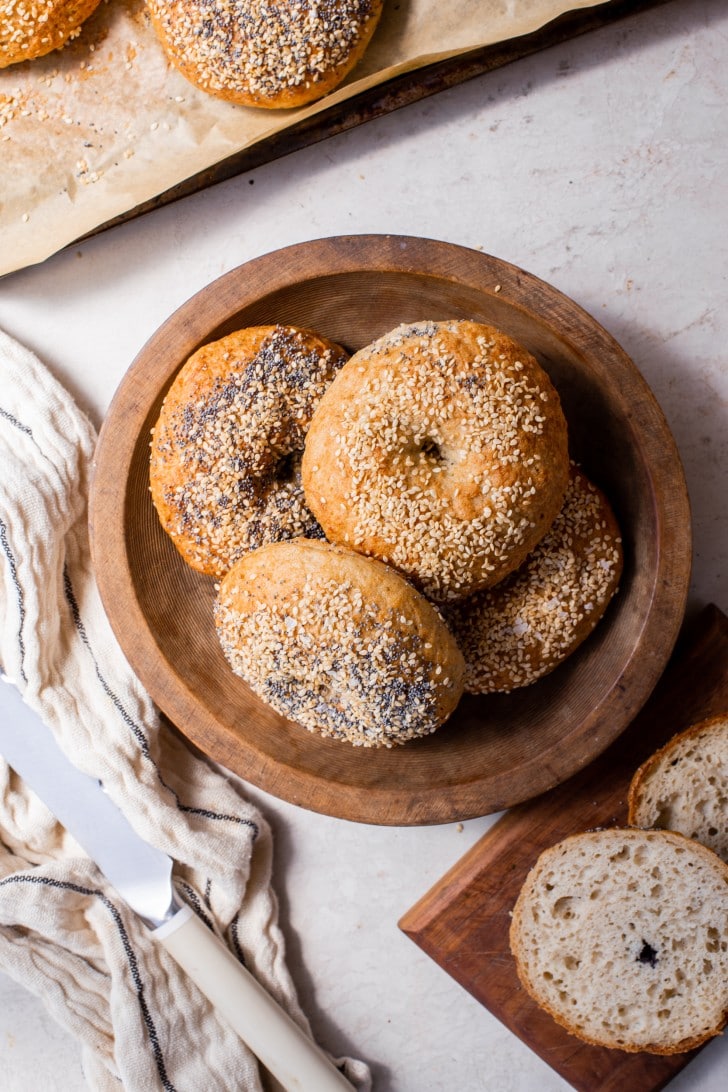
How to make gluten-free bagels:
- Start by hydrating the psyllium with water, and then mix in the maple syrup, olive oil, and active sourdough starter. It should form a thick, gel-like consistency.
- While that hydrates, mix together your starches, gluten-free grain flours, and salt in a large mixing bowl or the bowl of a stand mixer.
- Pour the liquid ingredients into the dry ingredients. Use a dough whisk or the dough hook of your stand mixer to mix into a smooth dough, scraping down the sides as needed to make sure all of the dry ingredients are incorporated.
- Cover and let the dough bulk-ferment in a warm place for about three hours, or until noticeably puffy.
- Divide the dough into 8 equal pieces and shape each piece into a bagel. I like to do this by rolling into a ball and then using my thumb to press a hole in the center, and then open the hole a bit more with my fingers.
- Place the bagels on a lined baking sheet and cover with a towel; let rise for 1 hour.
- While the bagels rise, preheat the oven and get a big pot of water boiling.
- When the bagels have puffed up, add the baking soda to the boiling water and boil the bagels 1 or 2 at a time, depending on the size of your pot, for 30 seconds on each side. Remove from the pot, letting the excess water drip off, and place back down on the baking sheet.
- Repeat for all bagels and add any toppings, like everything bagel seasoning or other seeds of your choice.
- Bake for 30 minutes or until golden brown!
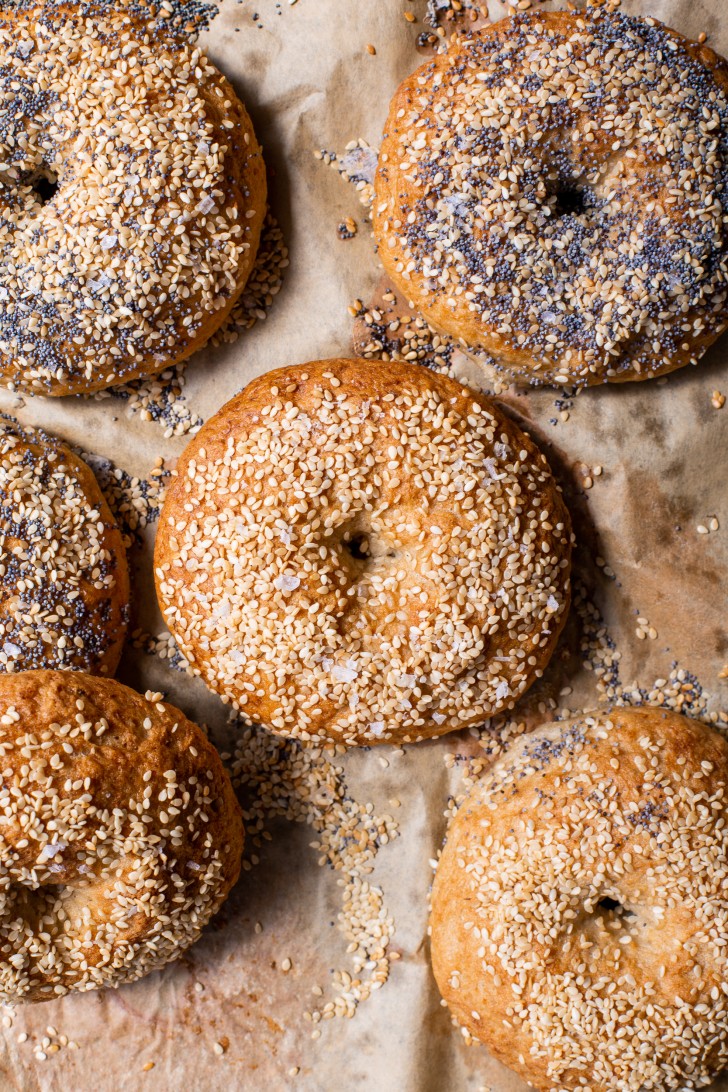
How to store gluten-free bagels:
To store, keep in an airtight bag or container for 2 to 3 days at room temperature.
You can also slice them in half and store them in an airtight container in the freezer for up to 6 months.
Want more gluten-free sourdough recipes?
- How to Make Gluten-Free Sourdough Bread
- Gluten-Free Sourdough Crackers
- Gluten-Free Sourdough Pizza Crust
- Rosemary Roasted Garlic Gluten-Free Sourdough Rolls
- Gluten-Free Sourdough Chocolate Chip Cookies
- Gluten-Free Sourdough Focaccia
Gluten-Free Sourdough Bagels
- Prep Time: 30 minutes
- Rising Time: 4 hours
- Cook Time: 30 minutes
- Total Time: 5 hours
- Yield: 8 bagels 1x
- Category: Sourdough
- Method: Baking
- Cuisine: American
- Diet: Gluten Free
Description
These Gluten-Free Sourdough Bagels are also vegan and made with gluten-free sourdough starter, whole grain gluten-free flours, and whichever toppings and mix-ins you love! These gluten-free bagels perfect for enjoying fresh from the oven or keeping in the freezer for a rainy day.
Ingredients
For the bagels
- 150g gluten-free sourdough starter
- 20g whole psyllium husk
- 380g filtered water
- 20g maple syrup or honey
- 20g olive oil
- 60g potato starch
- 50g tapioca starch
- 130g brown rice flour (see Notes)
- 140g sorghum flour (see Notes)
- 12g salt
- 1½ tablespoons baking soda
- 6 cups water
Instructions
-
In a bowl or large liquid measuring cup, hydrate the psyllium husk with water, and then mix in the maple syrup, olive oil, and active sourdough starter. Let stand for about 10 minutes. It should form a thick, gel-like consistency.
-
While that hydrates, mix together the tapioca flour, potato starch, sorghum flour, and brown rice flour (or my homemade gluten-free bread flour mix) and salt in a large mixing bowl or the bowl of a stand mixer.
-
Pour the liquid ingredients into the dry ingredients and use a dough whisk or the dough hook of your stand mixer to mix into a smooth dough, scraping down the sides as needed to make sure all of the dry ingredients are well incorporated.
-
Cover and let the dough bulk-ferment in a warm place for about three hours, or until noticeably puffy.
-
Punch down the dough to release the air bubbles, and then divide the dough into 8 equal pieces (about 122g each) and shape each piece into a bagel. I like to do this by rolling into a ball and then using my thumb to press a hole in the center, and then open the hole a bit more with my fingers. You can also roll the dough into a long piece and then seal the ends together.
-
Place the bagels on a lined baking sheet and cover with a clean tea towel; let rise for 1 hour.
-
While the bagels rise, preheat the oven to 425℉ and get a big pot of water boiling.
-
When the bagels have puffed up, add the baking soda to the boiling water and boil the bagels 1 or 2 at a time, depending on the size of your pot, for 30 seconds on each side. I use a spider to place the bagels in the water and remove them, as it allows excess water to drip off easily. Remove from the pot, letting the excess water drip off as much as possible, and place back down gently on the baking sheet.
-
Repeat for all bagels and add any toppings, like everything bagel seasoning or other seeds of your choice. Immediately place into the preheated oven.
-
Bake for 30 minutes or until golden brown on top and crisp on the bottom.
-
To store, keep in an airtight bag or container for 2 to 3 days at room temperature. You can also slice them in half and store them in an airtight container in the freezer for up to 6 months.
Notes
For the flours: I love using a combination of different grain flours for this recipe, such as brown rice flour, sorghum flour, quinoa flour, millet flour, teff flour, and buckwheat flour…the recommended combination works well, but you can experiment with different combinations here, as long as the total comes out to 270g of whole grain flour, or 380g total flour + starches. Each kind of flour will add it’s own unique flavor and texture, the recommended combination makes for a mild bagel similar to a classic wheat bagel.
If you would like to use a mix that you can pre-make to simplify the baking process, I recommend using my homemade gluten-free bread flour blend. This blend contains both starches and whole grain flours, so you’ll use it in place of the total amount of starch + flour. In this case of this recipe, that is 380g.
If you prefer a store-bought blend, I like this multi-flour blend from Vitacost. This blend uses very similar ingredients to the ones my recipe calls for, with no additives or gums.
Keywords: gluten-free bagels, vegan bagels, sourdough bagels


These came out amazing! I’ve been wanting a bagel bagel since moving from NYC and having to go GF and it just hasn’t materialized in anything I’ve purchased. I was slightly afraid to try making my own because, bagels? But these are perfect -chewy outside, fluffy inside, not too dense, not too light, just yum!
★★★★★
Wooohoo! I’m so happy you’re loving them and that they satisfy the craving :) now time to experiment with all the different flavors…
Just made these. Fabulous!!! Haven’t had a good gluten free bagel, ever. These were SO GOOD!! Can’t wait to make them again and start experimenting with our favorite flavors. I made the dough and set them in a warm oven to rise and forgot all about them. 5 hours later I found them, formed them into bagels and boiled then baked them and they were still fabulous! Can’t wait to have them following the instructions- I’m sure they will be even better.
★★★★★
SO glad you loved them, Liz!! And yes, the dough is pretty forgiving, especially during the bulk ferment. Have fun experimenting with flavors!!
You are a genius- that is all! So good!
★★★★★
Woohoo! So glad you’re loving the bagels, Lisa.
Hi.
If you make 6 bagels instead, how much cook time do you recommend?
★★★★
Probably 30-35 minutes will be good!
Well… it’s been less than 24 hours and they have been made, passed out to my own and extended GF family, and now completely gone! I’m making a double batch tomorrow! Lol.
Seriously though, these are soooo good. I wasn’t sure how I’d feel with it being sourdough for a bagel, but they really don’t have a sour flavor at all – they just taste like a NORMAL delicious bagel! I topped a few with everything bagel seasoning, a few with dried onion flakes, garlic and flaky salt, and the rest got the flaky salt.
I would be curious if there is a way to get that sour flavor, similar to making the preferment for the sourdough bread and letting it sit… I may have to experiment some with that!
Thank you for this awesome recipe!!!
★★★★★
Hi Tina, yes you can absolutely do a preferment, or let the bulk ferment go for a while to develop a more sour flavor :) I’m SO thrilled these turned out so well for you!! Thank you so so much for the feedback.
Your recipes are always so tantalizing, do you have any Grain-Free suggestions to use this one??
Thanks, Tanya! I haven’t done a grain-free version yet, because I don’t have a grain-free starter.
Hi, just to clarify: when you say starter you don’t mean cold starter out of the refrigerator you mean starter you have just fed and is at its height of activity. correct? Looking forward to trying your recipe. I have had limited success in making good GF Bagels. Thank you for your help.
Hi Suzi, yes I mean starter that has been fed and is at peak activity :) hope they’re a hit!
Oh no! I used my sourdough starter cold out of the fridge, will they not work?
Hi Sam, it’s best to use active starter for the best results!! It should still get some rise with cold starter, though – you just may need to let the bagels rise longer.
Hi!
Thanks for your lovely site and fb group.
When I boil the bagels they fall apart. Could you tell me where I went wrong?
❤️
Hi Yariv, is your water at a strong boil or more a simmer? If the water is boiling too hard it may jostle them too much. I’ve never had any issues with them falling apart. If they aren’t properly shaped and have too many seams, that could also cause an issue – are they dissolving or breaking into pieces? More info can help me solve the problem!
Thank you so much for taking on the mission!
The water were surely boiling strong, so I’ll try a simmer.
As for the shape, i made 8 balls and then made a hole like you recommended.
They did not rise too much though, would you suggest a longer time of proofing?
Thanks again
They should definitely rise to a nice puffy texture for the best results, and the exact time that takes can be dependent on a number of factors. A less strong boil should help them hold together better next time! Hope they still tasted good at least?!
Why do you use grams i don’t understand can you please use cups and let me know, thank you.
Hi Donna, all of my bread recipes use grams because it’s a lot more accurate!
For those of us who have put in the work to keep a sourdough starter, this recipe is a must-try. They are fabulous, scrumptious, beautiful, and fun to make! They really taste amazing! Thanks SO much for this recipe, Rachel. You are truly a food genius!!
★★★★★
So glad you’re loving them, Julie! Thank you so much for the sweet compliment :)
These are so yummy! Do you think they could be made into stuffed bagel bites?
I haven’t tested it, but it’s certainly worth a shot – sounds delicious!
Such a great gf bagel recipe! They have a chewy bite to them just like I remember of regular bagels. Thanks for sharing this amazing recipe.
★★★★★
Yay so glad you’re loving them Aly!!
Ok WOW. I have made these twice and the first time I didn’t follow instructions well. I boiled for only 30 seconds but the whole 60 seconds (30 a side) definitely made a difference. They’re so chewy and toast beautifully. The dough is super forgiving, almost as much as the sourdough pizza crust. I am so glad you finally released this recipe, Rachel! Most Gf bagels from the store have eggs which I can’t eat so I am so glad to have these with simple ingredients!
★★★★★
So glad you’re loving these, Kate!! Thanks so much for your feedback!
I made this bagel recipe today and it was a success! To be honest, I went into this recipe with zero expectations simply because the last time I tried a gluten free sourdough bagel recipe, they came out very dense. I didn’t get my hopes up even with everyone’s raving reviews.
But this recipe is amazing!!! The whole fam loves these bagels so much that I have already been asked to make more lol. Thank you Rachel for sharing this amazing recipe! These bagels are delicious and the best gluten free bagel I’ve ever had. Actually, scratch that. Best bagel EVER!
★★★★★
Woohoo!!! So glad you and your family are loving them, Jasmine :)
I made these bagels after seeing others bake them successfully. They are so delicious! I thought they were going to be heavy when I took them out of the oven but they were the perfect texture. I left 2 plain, sesame seeds on 3 and EBTB seasoning on the other 3. They were all very tasty! Even my gluten eating husband loved them and was very impressed. Highly recommend this recipe! Thank you Rachel for the recipe!
★★★★★
So glad you enjoyed them, thank you so much for the feedback Lisa :D!!
These were super yummy…but more than half turned out having gummy pockets in them. Any idea why?
I did use tapioca/arrowroot as a sub for the potato starch…
And my sourdough started was active but perhaps not active enough…
perhaps I needed to proof them for longer than 3 hours perhaps? I am in San Francisco, and it was cold the day I made them…
I would appreciate any ideas to avoid future gumminess.
I will definitely make them again…because they are delicious and have a great chew. Best GF bagels I’ve ever had!
★★★★★
Hi Alyssa, that could be from over- or under-proofing, but without photos or anything it’s hard to know! Did they seem nice and puffy before boiling? Proofing time can be sooo influenced by the conditions. A lot of times gumminess can go away from a longer bake time as well! Glad you enjoyed them, and hopefully these tips help avoid more gumminess in the future :)
What is the best substitute for potato starch ? My wife is allergic to potatoes.
More tapioca or arrowroot starch will work!
Hi Rachel,
They didn’t seem very puffy…on the first rise…nor after I shaped them and let them proof for the 2nd rise. I think this was most likely the problem.
Funny thing though…a couple had no gummy pockets…I am thinking I let those boil for a bit longer than the ones that were gummy. I got distracted and let a couple bagels boil for almost twice as long.
Thanks for your tips. I will definitely make them again soon to see if I can figure it out. (The ones I made are long gone…)
★★★★★
Ohh interesting that the boiling maybe had something to do with it…is it possible that those could be the ones with the gummy pockets?
It seemed like the ones I boiled longer puffed up a bit more…so I assumed those were the ones that were less gummy…but I’m not 100% sure on that!
I’ll just have to make them again!
★★★★★
Got it, you’d know better than me since you’re seeing and eating them but just a thought!! :) sometimes gumminess can come from not cooking long enough too so that could make sense – they may just need a little longer in the oven too! All of our ovens are different and yours may just need a little longer.
Yes…very true on the oven too…mine regularly runs 25-50 degrees cooler than it says.
I’ll make them again and let you know.
Thanks for all of your help with the recipe!
★★★★★
I followed the recipe exactly and they turned out great! My toddler ate them plain and my husband said the texture was spot on. This is my new favorite Bakerita sourdough recipe!
★★★★★
So glad you loved them, Nina!! Thanks so much for the feedback :)
These bagels were delicious! Even my very picky adult son loves them.
★★★★★
So happy they’re a hit, Caroline!
Ever since Rachel released this recipe, I’ve been making these GF Sourdough Bagels every other week! The texture is spot on, flavor is amazing, and the instructions are so thorough. I’ve been doing EBTB seasoning for most weeks, but for this week’s batch, I mixed cinnamon with coconut sugar and sprinkled on top and it made for a perfect sweet tooth fix :) THANK YOU, RACHEL!
★★★★★
SO glad you’re loving them Jess! So fun to experiment with flavors, too :) thanks so much for the feedback!
Hi,
This is a great recipe. But I cannot have baking soda or baking powder . So is it ok if I omit it in boiling water ? If not with what can it be replaced ?
Thank you
★★★★★
You can replace it with molasses! Enjoy :)
We love these bagels! We’d love to have some fresh ones baked in the morning, and while I plan on experimenting, was wondering if you had tried to refrigerate these after shaping and boiled/baked in the morning?
Thanks!
★★★★★
Hi Ashley, I hadn’t tried that but it should work well to let them proof in the fridge overnight instead of at room temp. Enjoy!!
Could you make 6-7 instead of 8? They seem a bit small and I like to use them for sandwiches.
★★★★★
Hi Angela, have you tried making them yet or just basing that on the photos? I’d say they’re a pretty decently sized bagel, but you can definitely make less to have them be bigger if you prefer! :)
Yes, I did make them; awesome texture and flavor. I am making them today; I will try 7 and see if they are the size I want; these are the best bagels I have made. I have tried several recipes and yours are easily the best plus they hold up well if I freeze some – using them within 3 weeks.
★★★★★
Perfect!! So glad to hear that – reducing to 7 or 6 should definitely give you a good sized bagel for sandwiches!
Amazing! Thank you! So so easy and delicious! Will be making again and again!
★★★★★
So glad you’re loving them!!
Hi, how can I make these into cinnamon raisin bagels?
Thank you,
Cindy
I’d add 1 teaspoon cinnamon and 1/3 cup rehydrated raisins to the dough :)
Thank you so much for the recipe ! We used rice and buckwheat flour with corn and potato starch and it turned out amazing. I made my own sourdough starter so i am doubly proud (buckwheat, water and honey; with added rice flour and water every other day until nice and strong, I named it Hector !!!)
So thank you for taking the time to write this recipe out, will check the rest of your GF recipes !!!
★★★★★
So glad you’re loving them, Marjo! Thanks so much for the feedback :) happy bread making!
Thank you! I’m looking forward to making bagels. I love your SD bread recipe.
Excited to make these! Want to clarify. In the notes it says, “as long as the total comes out to 270g of whole grain flour, or 380g total flour + starches.” Does this mean I can just use 270g of all-purpose flour and not use the starches?
Disregard! Just reread recipe and understand.
Hey Rachel, can you please tell me if there is any alternative to psyllium husk? I’ve used it before in a few recipes and I can’t stand the taste and it always seems to come through when I use it unfortunately. Does the taste come through in this recipe? I’m struggling to find vegan gf recipes without psyllium husk. Thank you in advance!
Hi Christina, I’ve never noticed the taste of it in any recipe – could it be the brand you’re using? It definitely shouldn’t come through as a flavor. It is imperative to the texture of the recipe and nothing else works in the same way that could replace it, unfortunately.
Can you put these in fridge either before boil or after and the bake in am?
Yes, I would recommend refrigerating before you boil during the second rise.
The first time I made these I didn’t use fresh starter and they didn’t really rise.. but honestly still super good. I left some plain for my son with allergies. For my bagels, I grated some cheddar cheese and topped some of my bagels with onion and garlic seasoning and put cheese on top about 10 min prior to bagels being done. Fantastic!!!
I have learned these disappear fast and now make a double or triple batch to freeze. These are sooo good. My son loves when I make pizza bagels with these and his DF cheese.
★★★★★
So glad you love them, your toppings sound so delicious! Thanks for the feedback, Kate :)
Would psyllium husk powder work?
Yes, it would, just use 75% of the called-for amount.
Is there a halfway point that I could make part of these at night and finish them in the morning so we can eat them for breakfast?!
Hi Becka, you can put them in the fridge right after shaping them!
So good! Finally a dairy free, gluten free recipe that tastes great! I tried something another recipe recommended and boiled them in molasses water (sub 1T molasses instead of baking soda) and they turned out so good!!
Thanks!
★★★★★
So glad you loved them, Beth! Thanks so much for the feedback :)
I’m gonna give this a shot tomorrow! I was wondering if you’ve tried to make these as cinnamon raisin?? Do you think it would work with this recipe?
Super excited, as I’ve had great success with your sourdough bread recipe.
Hi Sarah, yes I did make a cinnamon raisin version! I added about 1 teaspoon of cinnamon I believe, and just mixed in raisins until the amount seemed correct. Hope this helps, and enjoy!
Oh My Goodness These bagels are divine!! Perfect texture and flavor! I did half with everything bagel seasoning and half just sprinkled with cinnamon sugar (a la Panera cinnamon crunch bagel) and even my non celiac husband was impressed! Thank you for this recipe, as well as all of your others!!
★★★★★
What is the benefit of punching down the dough and then shaping? It seems to not rise as well the second time. Why not just shape them and rise longer?
★★★★★
Hi Julie, it helps develop the flavor, however you can skip right to shaping if you prefer :)
Can you let them proof in the fridge overnight then bake them in the morning?
Yes that should be fine!!
Can I make this recipe without honey? Or could I use monkfruit? Looking for a sugar free version.
Hi Heidi, I wouldn’t recommend honey. The sugar is there to feed the yeast, not provide sweetness – most of it gets used by the yeast as food during the rising process, but you can try cutting it down or eliminating it completely. You may get slightly less rise, though.
Hi! So far I’m loving the bread recipe! Going to try the bagel recipe
As is, any tips on attempting a cinnamon raisin bagel in the future?
Go for it!! They’re so delicious – I did a cinnamon raisin bagel with my regular gluten-free bagels. Amounts depend on how much dough you’re using, since I just did a few bagels of that flavor, but you’ll want to add between 1/4 teaspoon to 1 teaspoon cinnamon to the dough and as many raisins as you’d like folded into them! I hydrated mine to make sure they didn’t suck too much liquid out of the dough. Don’t add too many or they dough structure will be compromised :) hope this helps!
Hi! First, I appreciate you! I’d like to troubleshoot what may have gone wrong. I used your method 4 times now. The first 3 times were with gf blends that had xanthan gum because I have a ton. By the 3rd try they were almost perfect, not gummy but ever so slightly tacky before toasting. Toasted was perfect.
I finally gave in and bought all your recommended flours and waited until my starter was a peak activation and followed the recipe exactly. The dough didn’t seem to rise much after 3 hours (75 degrees where it was sitting) and was somewhat dry and so making the dough balls was more challenging than previous renditions. After an hour wait for second rise again I didn’t notice much difference but tried boiling the first bagel. It sunk so I kept doing this every 15 minutes until it was another hour later.
The bagels have decent flavor but are dense and not very attractive as my previous ones. I’m perplexed. I even used a micro scale to measure every ingredient.
Do you think I should have added more water or oil when I noticed the dough being so dry? Would have had hurt to let them rise longer for both? It seems like 75 degrees is warm enough though.
Lastly, how do you cover your dough? I just used a tea towel over the bowl for first rise (the dough seemed like it dried out too much then). And I covered the formed bagels with a tea towel as they rose.
I appreciate any insight. I used flours you link to so I don’t think that’s a problem.
I’ve got your sourdough bread dough rising right now and it seems perfect so hoping that will turn out!
Thanks, again!
★★★★★
After multiple tries I was finally able to get a perfect bagel. Part of the experiments were my fault because I didn’t have all the flours you listed but had lots of bags of blends with xanthan gum and they are approaching their expiration date so I was hoping to use them to avoid food waste. They actually weren’t bad (they puffed up wonderfully) but IMO were a little gummy, which may have been eliminated if I cooked them longer. However, toasted, my husband thought they were perfect and he’s super picky!
In any case, I did finally get all the individual flours.
The first try was not a complete flop but I think my dough dried out too much during the rise because it’s very dry here where I live in the PNW. Or maybe I messed up a measurement. Not sure. They didn’t rise much.
When I use all the listed flours, a much longer rise time is required in both steps than written in your recipe. The second rise needs at least 2 hours during the cold PWN, even with a controlled 75 degree area for some reason. After the second rise this time, noticing that the dough had a dry crust on top, I kneaded the dough again before forming into balls, which seemed to help. I baked the batch 30 minutes, covered the bagels with parchment paper, and baked another 5 minutes. I let them cool overnight before cutting open.
Question 1: what do you suggest to prevent dough from drying out in dry environments? I thought about dampening my tea towel that covered the dough but was afraid of ruining my batch so didn’t dare. I wasn’t sure if the dough needed to breath through the tea towel. I’ve seen where people spray olive oil on plastic wrap before covering but I don’t want plastic wrap to touch my food. I do have beeswax cloth though but again, wasn’t’ sure if the dough needs air.
Question 2: how long to you allow bagels to cool before cutting?
Question 3: you mention over proofing in one of your responses to a comment about gumminess. How do you avoid over proofing? Is this just experimentation due to environmental conditions?
Thank you!
★★★★★
Hi Holly, glad you enjoyed the bagels! You can definitely use a damp tea towel or some sort of beeswax wrap to prevent the top of the bagels from drying out. I usually let the bagels cool most of the way to the touch before cutting into them, it helps to prevent gumminess but it’s hard to resist a warm bagel fresh from the oven :) over-proofing is when the dough gets far too puffy/too much rise and it does depend on timing, unfortunately because everyone’s rising conditions are different it’s impossible to give a specific time period that this might happen in.
If I want to put them in the fridge overnight should I bring them to room temperature before boiling and baking the next day?
Hi Zoe, if they don’t seem to have risen much, I’d let them rise at room temperature for a bit! If they have, you can go straight to boiling.
Thank you!! They turned out so good my family couldn’t believe how tasty they were
★★★★★
I was wondering if I am able to ferment these in the fridge overnight compared to 3 hours in warm place?
Hi Lauren, yes that’s fine! Enjoy.
Hello! These were fantastic bagels – thank you so much!
★★★★★
So glad you loved them!
Hi! I’m excited to try and make these! I don’t have tapioca starch though, so could I just use 110g of potato starch and 270g of flour? Thanks!
Hi Jessica, yes that will be fine.
Could both the potato & tapioca starch be replaced by corn starch? I’m just starting gluten-free and I’m just learning different replacements. I know corn starch is a replacement but didn’t know if it would greatly affect the outcome. Thank you!
Hi Sandy, yes you can use cornstarch :)