
Have you always wanted to make your own gluten-free sourdough bread? First, you’ll need to learn How to Make a Gluten-Free Sourdough Starter! All it takes is gluten-free flour, water, and time.
So you want to make gluten-free sourdough bread? And all sorts of gluten-free sourdough discard treats?? Well, before you start, you’ll need your very own gluten-free sourdough starter! Though creating a sourdough starter from scratch takes about one to two weeks with daily maintenance, it is super easy and only takes a few minutes each day.
What is sourdough? Is all sourdough gluten-free?
Sourdough bread is a type of bread that is made with a sourdough starter, which is a combination of flour, water, and naturally-harnessed wild yeasts. Creating the sourdough starter culture is done through a process of fermentation, and that sourdough starter is used as the leaver for our gluten-free sourdough bread! Not all sourdough is gluten-free though, so it’s important to make sure you use gluten-free flours to create a gluten-free sourdough bread.
Not all sourdough is necessarily super sour! You can make it have a more sour flavor with a longer ferment, but if you do a short ferment, you can also make it taste not very sour. It’s up to your personal preference! A major plus of eating sourdough is the health benefits. Because sourdough is a fermented food, many people find it helps their gut health by improving their gut flora and microbiome. It’s also easier to digest than other breads, which can have a lot of additives.
The Science of a Sourdough Starter
As I mentioned above, a sourdough starter is made up of flour and water – that’s all. So how exactly does that mixture turn into a living thing that will help your bread rise? Through a process of fermentation, and harnessing the wild yeast and beneficial microbes that are in the air and all around us.
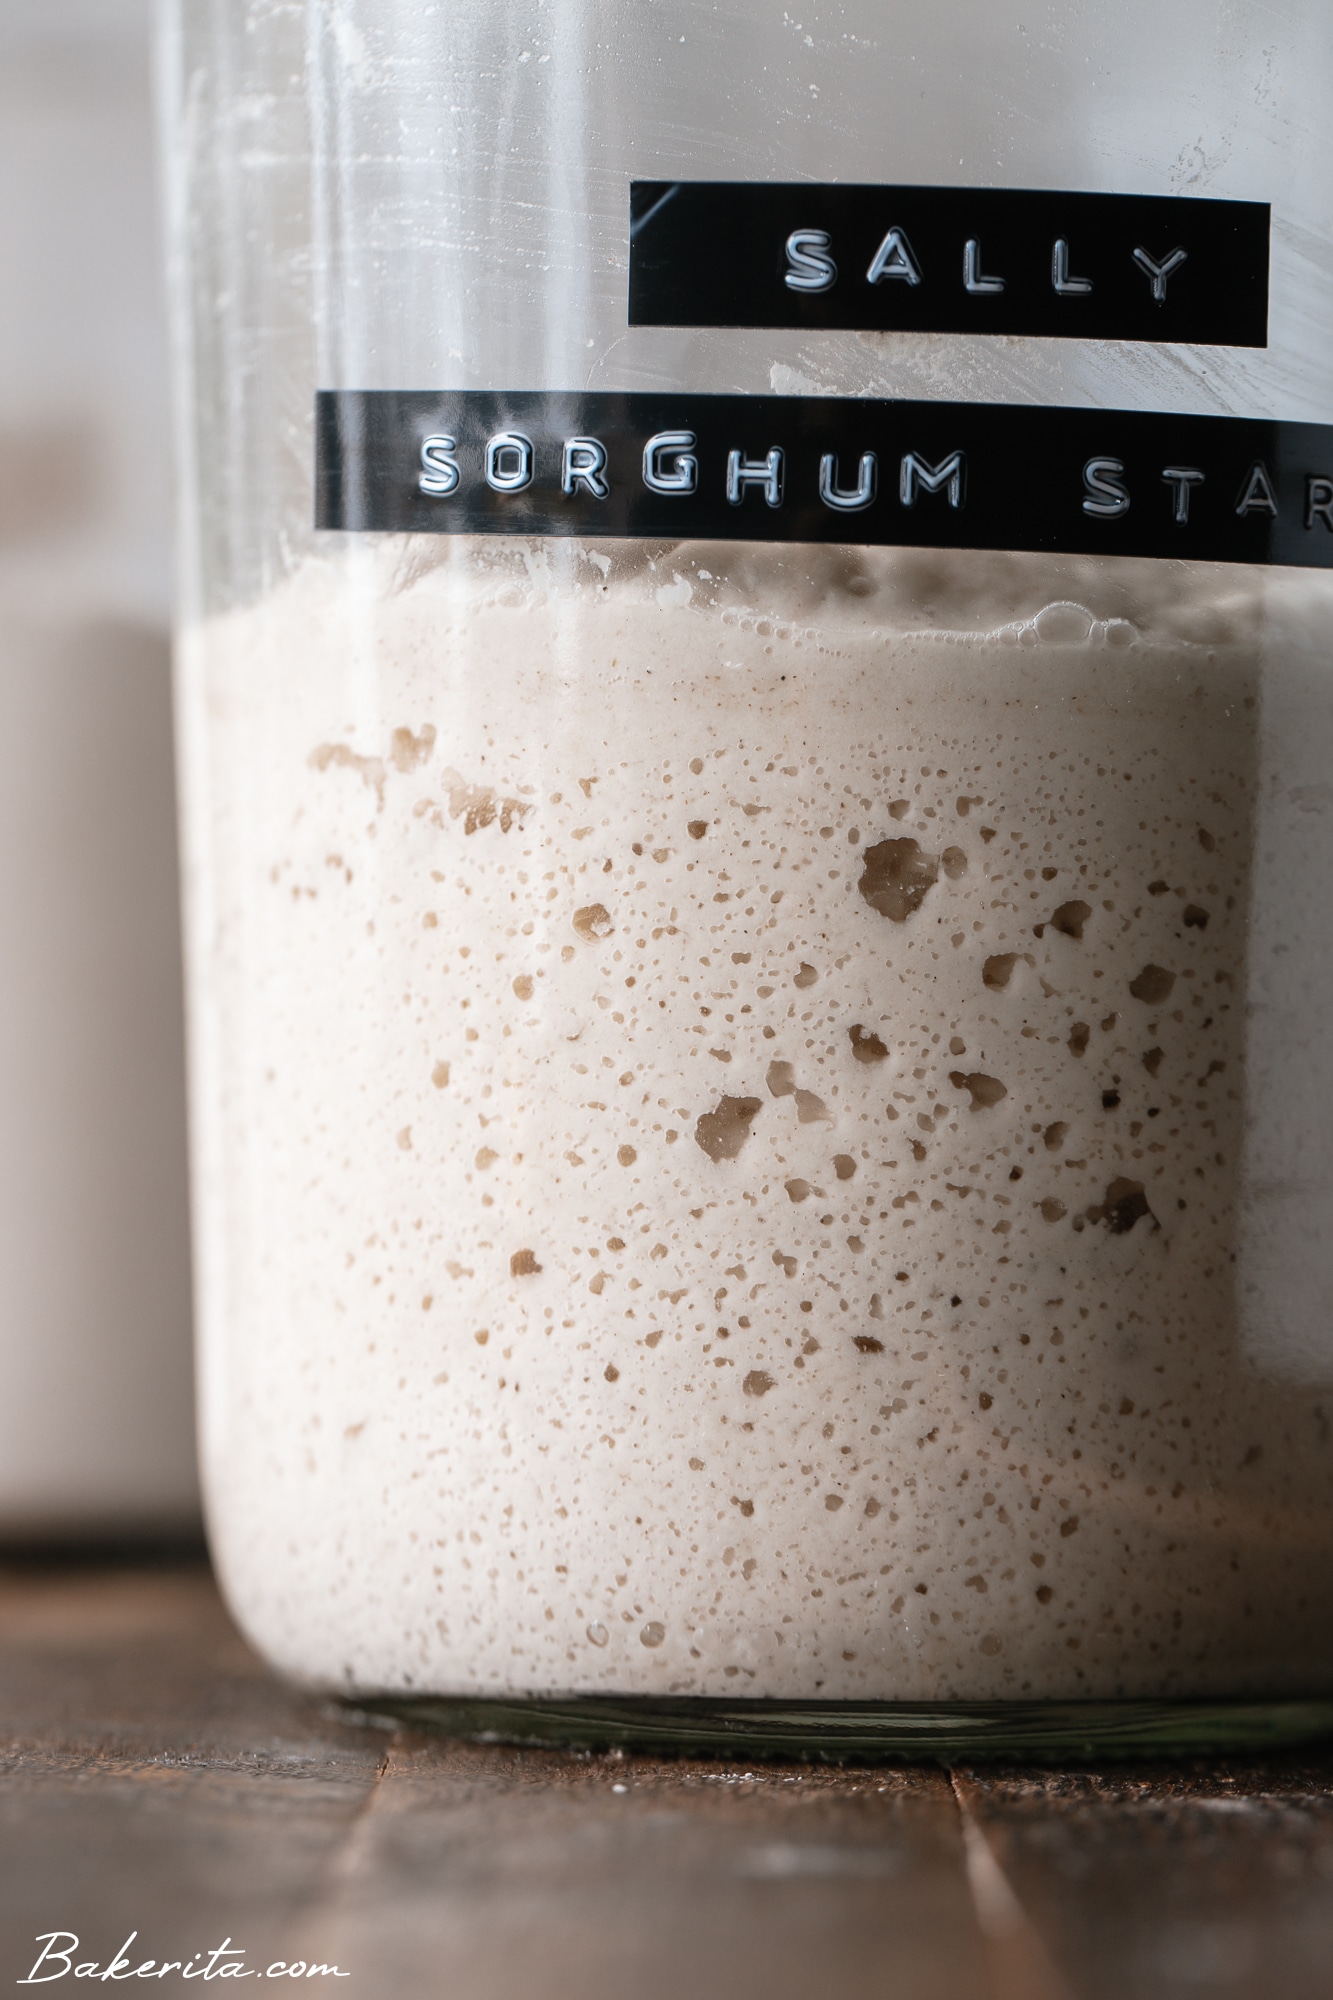
The yeast and microbes in your starter feed on flour, which then turns the starch and sugars in the flour into lactic acid and acetic acid, which is what gives the “sour” to your sourdough bread. It also improves the shelf life and the texture of the bread! The yeasts and microbes also create carbon dioxide. Those carbon dioxide bubbles are what helps your starter to bubble and grow, and gives your sourdough bread a light, fluffy crumb.1
This process works the same way for a traditional gluten-filled sourdough starter and a gluten-free sourdough starter, but they don’t look or feel quite the same.
Ingredients & Supplies for your Gluten-Free Sourdough Starter
This process is pretty simple, but it does require one to two weeks of feeding and nurturing to get to a point where you’re ready to bake! There are only two (well, three) ingredients needed for your gluten-free sourdough starter. Since they’re so few, each one is important.
- Flour: since this is our only true “ingredient”, it’s important! You’ll want to use whole grain gluten-free flour – something like brown rice flour, buckwheat flour, sorghum flour, or millet flour. Do NOT use a gluten-free flour blend, which can contain starches, gums, and other additives that you don’t want in your starter. You’ll want to have about 3 lbs. of flour on hand to get your starter going. For some reason, quinoa flour acted oddly for me and created a very runny starter. I wouldn’t recommend it based on my experience.
- Water: I recommend always using filtered water for feeding your starter, as water that is high in chlorine (which a lot of city tap water is) can impede the growth of the bacteria, and therefore impede your starter’s growth.
- Air/Time in a Warm Location: the ambient air in your house is what will feed your starter and give it the bacteria it needs to grow. As your starter ferments, it will collect “wild yeast” from the air. It’s best to keep your starter relatively warm to help it grow.
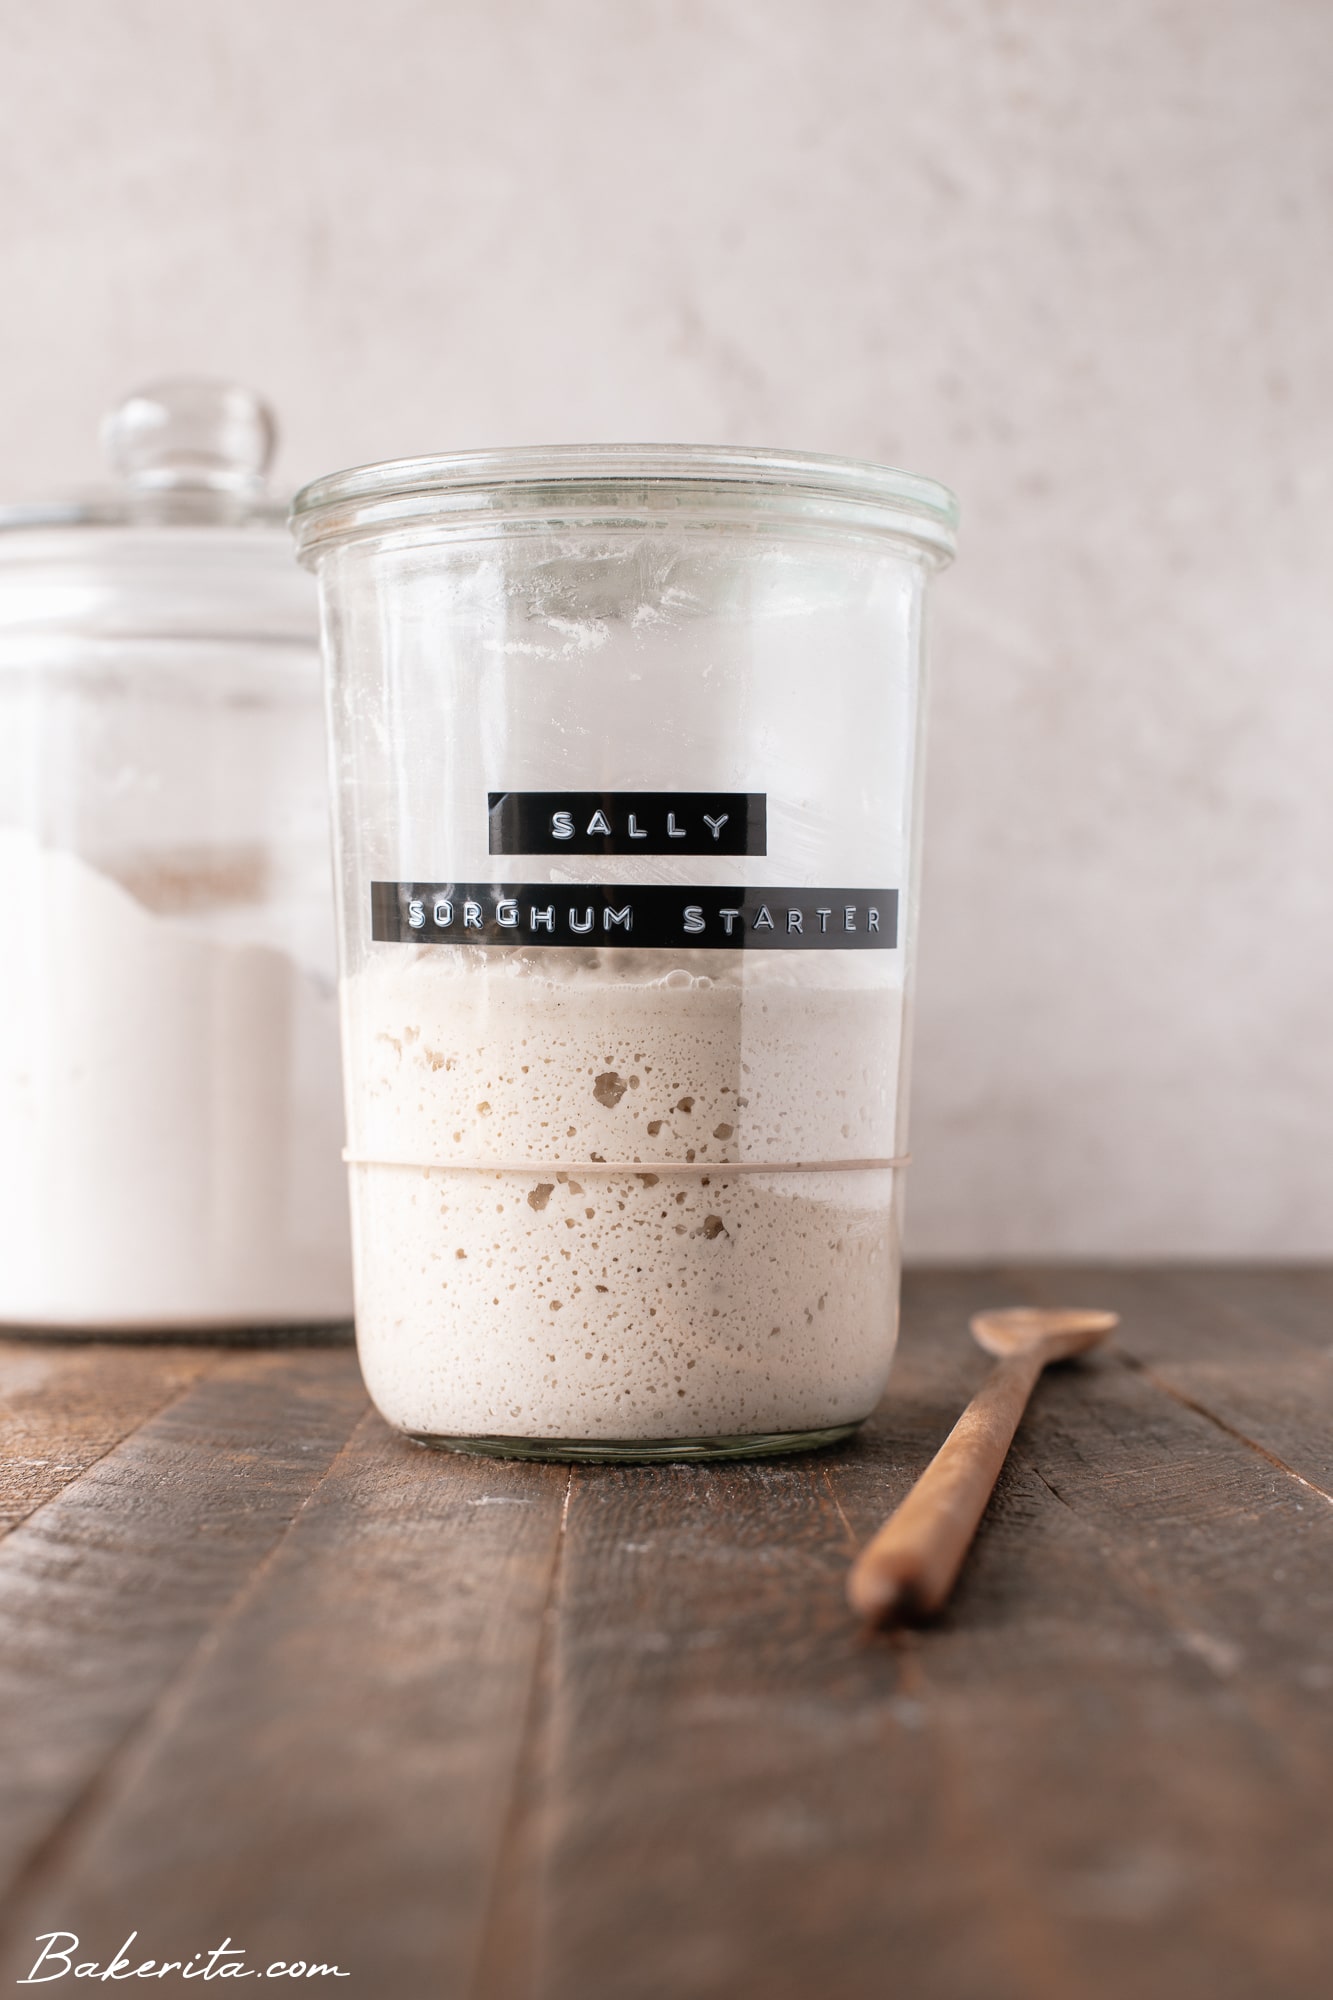
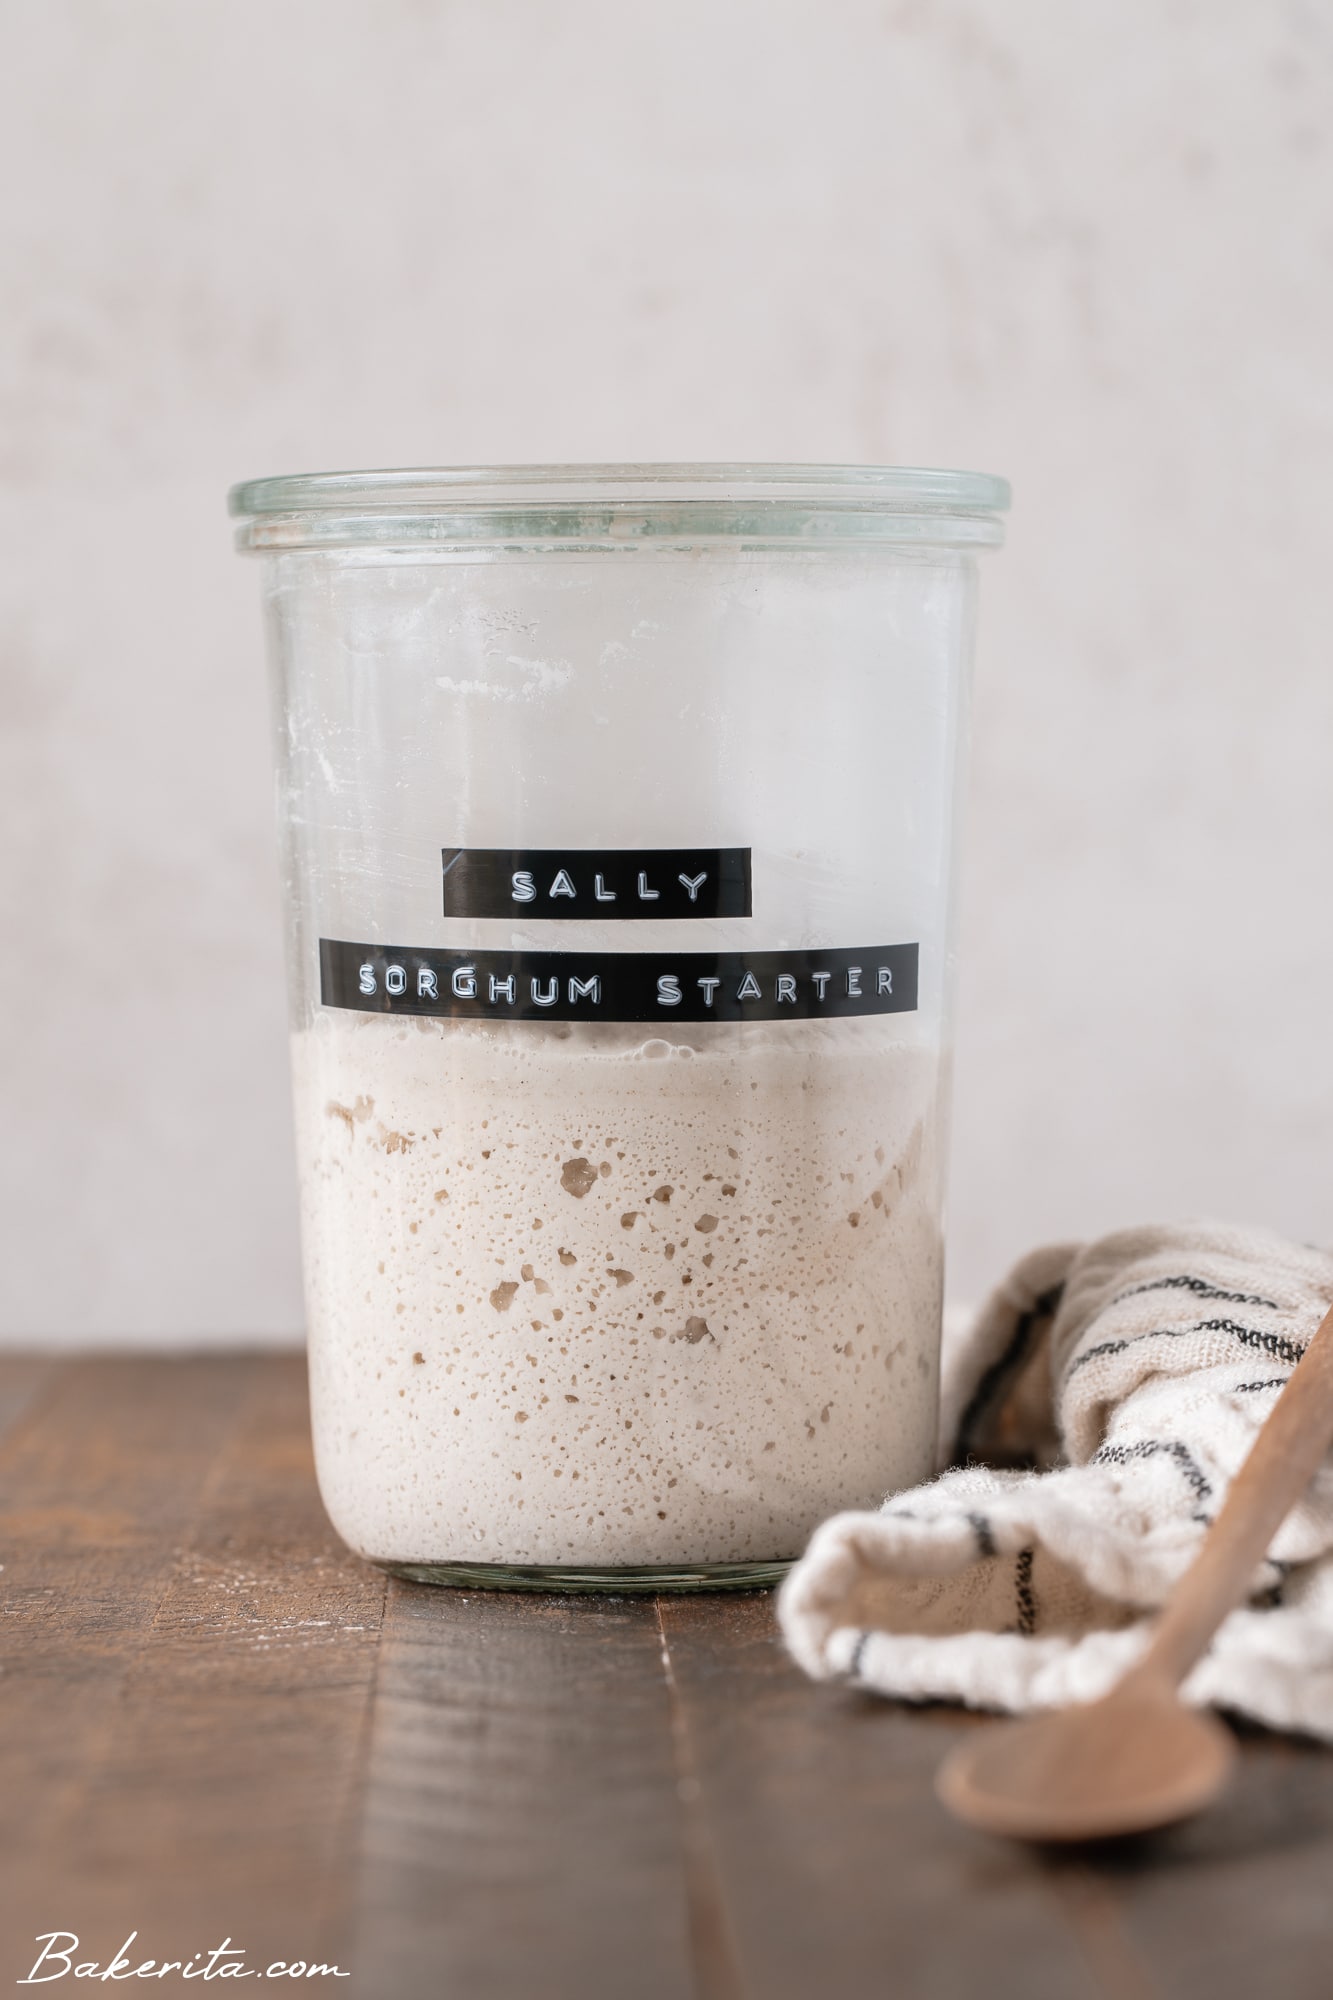
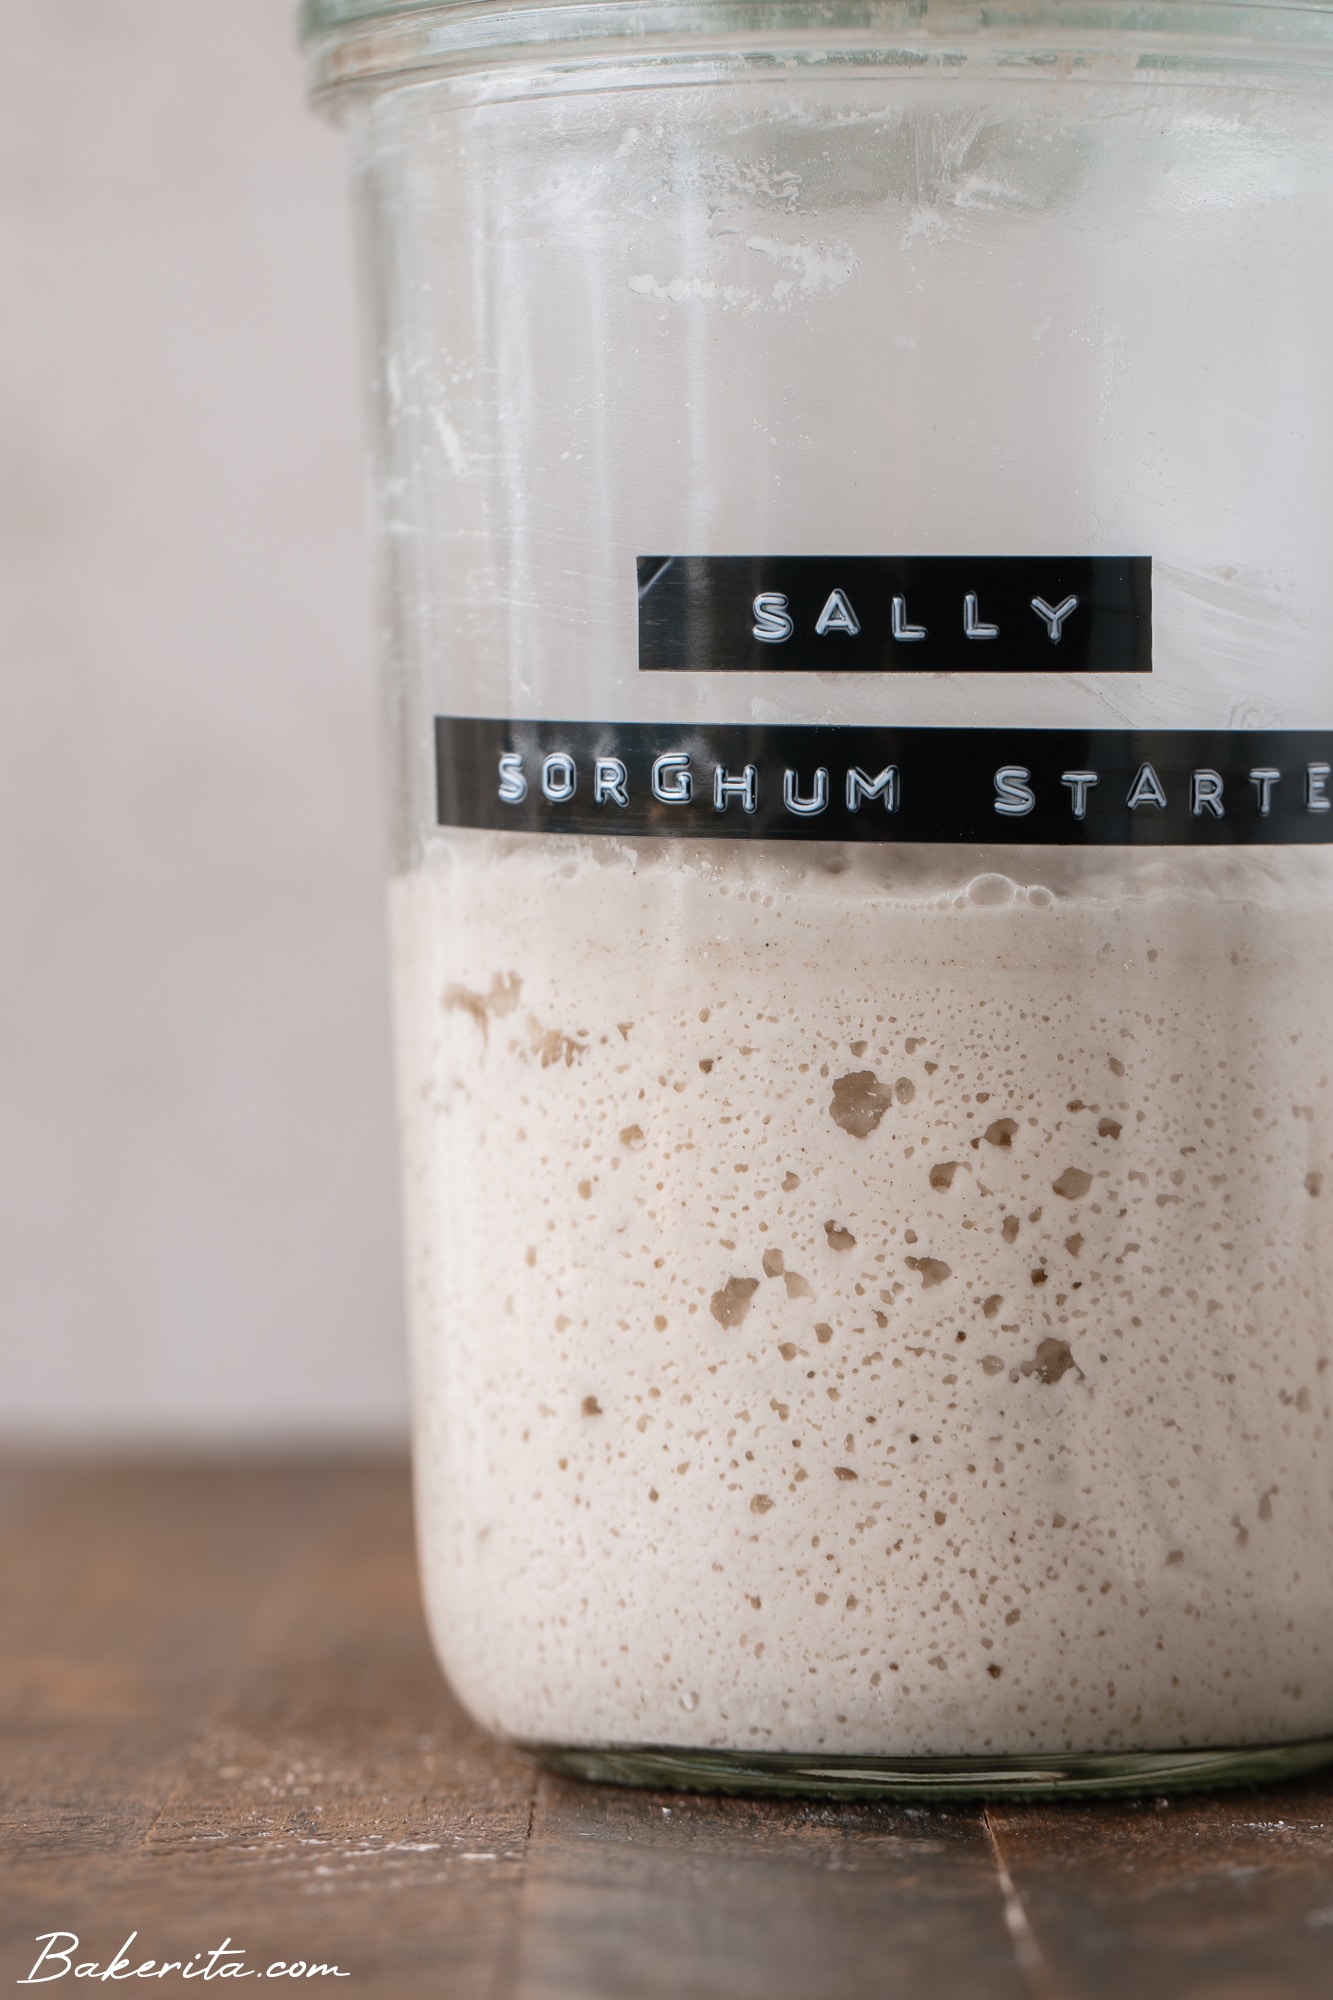
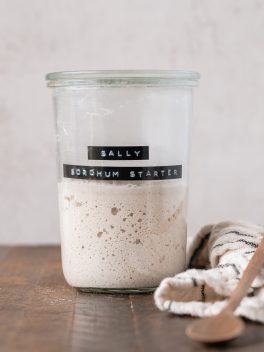
- Glass Container/Jar: mine is about a quart. I find that to be a pretty perfect size for a mature starter. Make sure it’s not too small, or your starter may expand past the top and make a mess. You’ll need a lid for your jar, or a clean tea towel, and a rubber band.
- Kitchen Scale: you’ll need a scale for all of your bread-making, including weighing out your starter feeds.
- Wooden Spoon or Whisk
Items you’ll need for Gluten-Free Sourdough Starter
How to Make A Gluten-Free Sourdough Starter
Full instructions are listed in the recipe card below, but here’s a run down to get extra familiar with the process.
Days One and Two: twice a day feedings
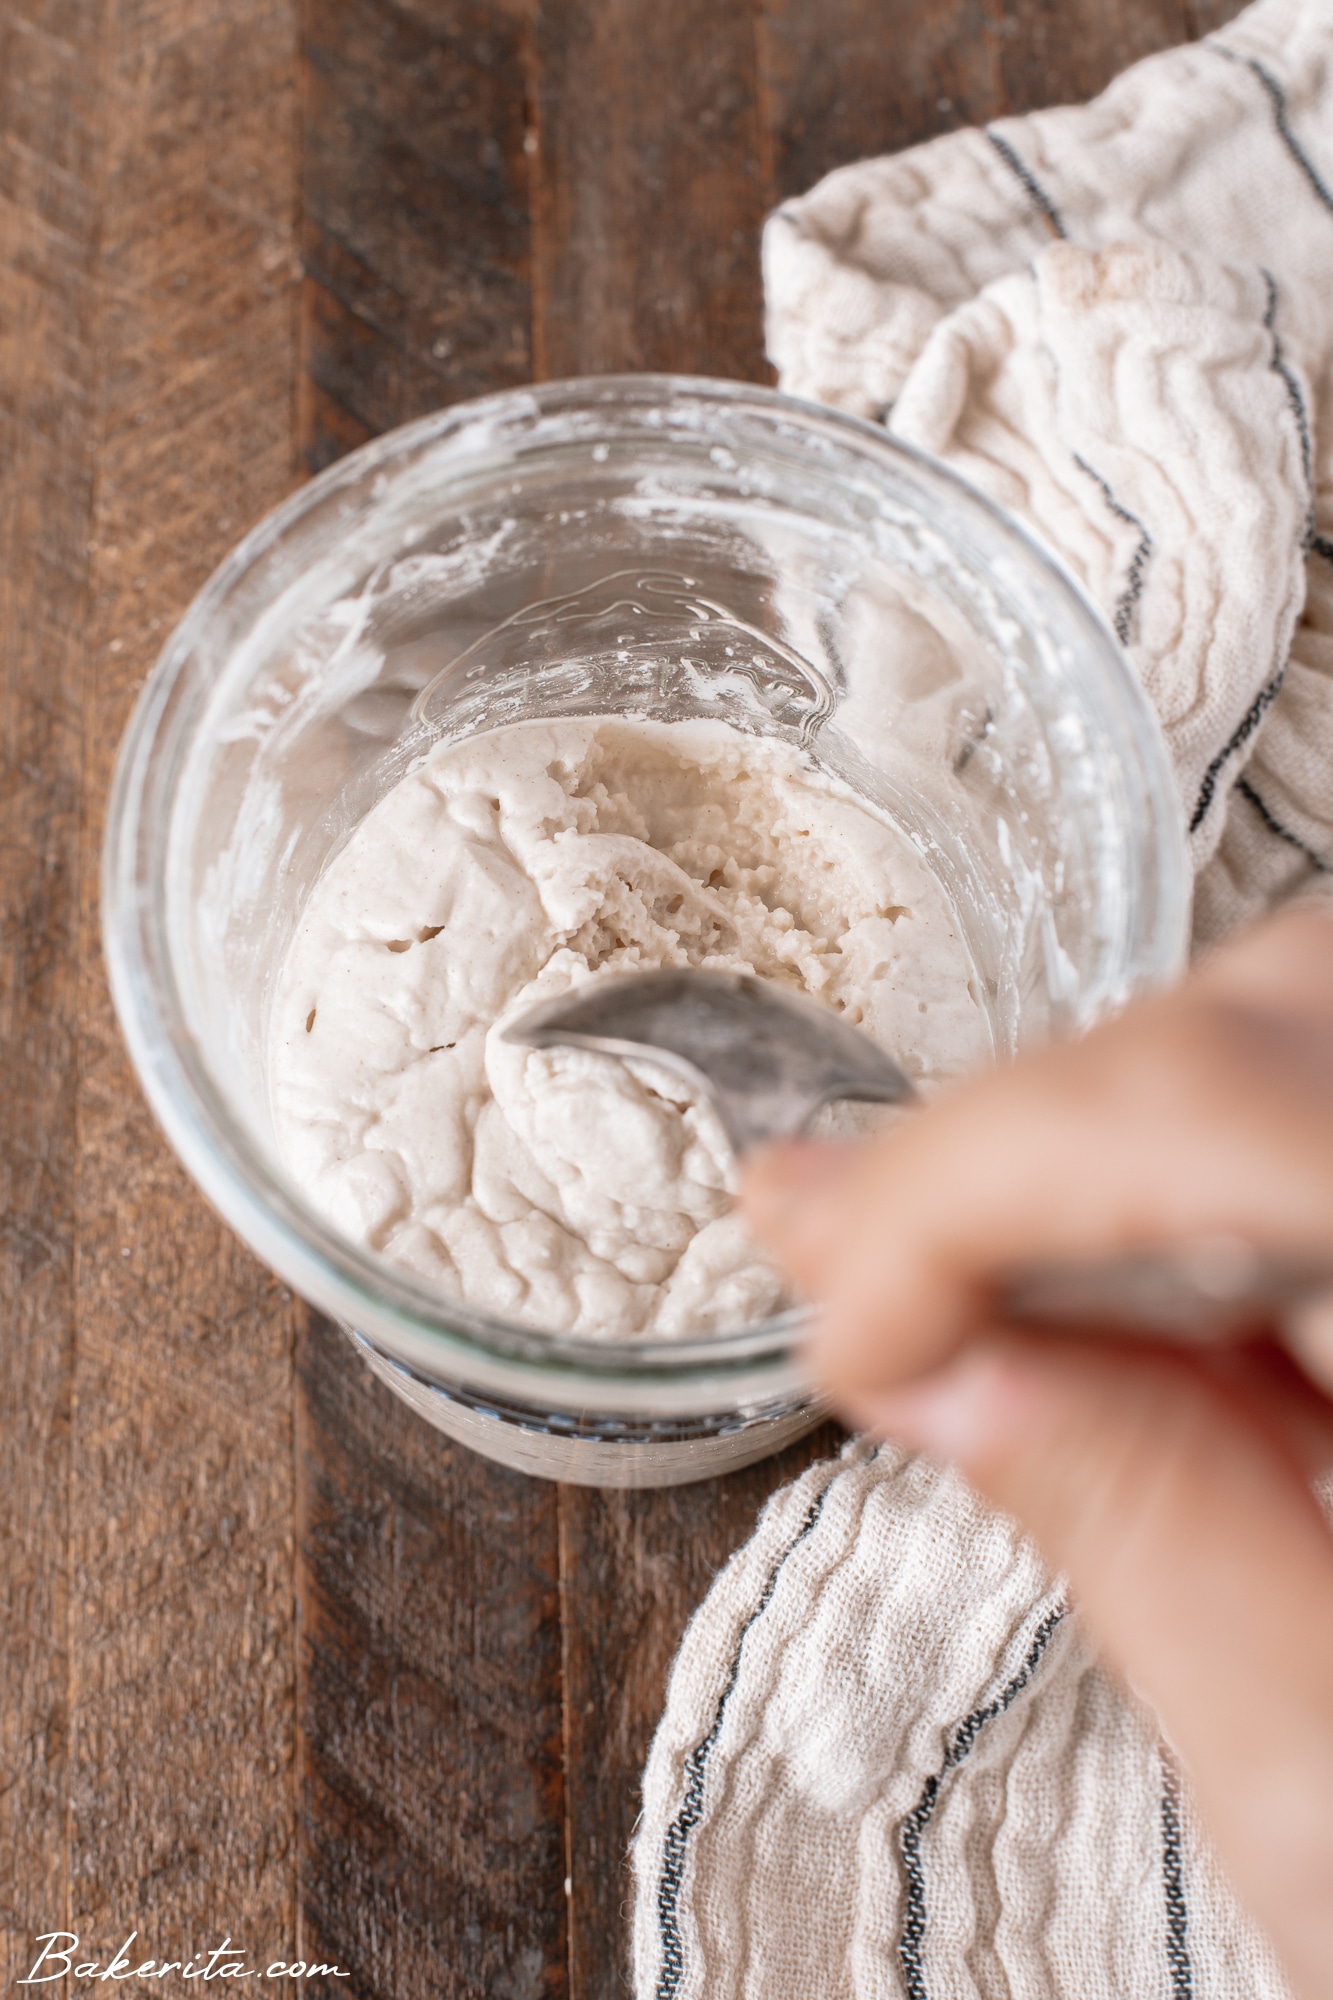
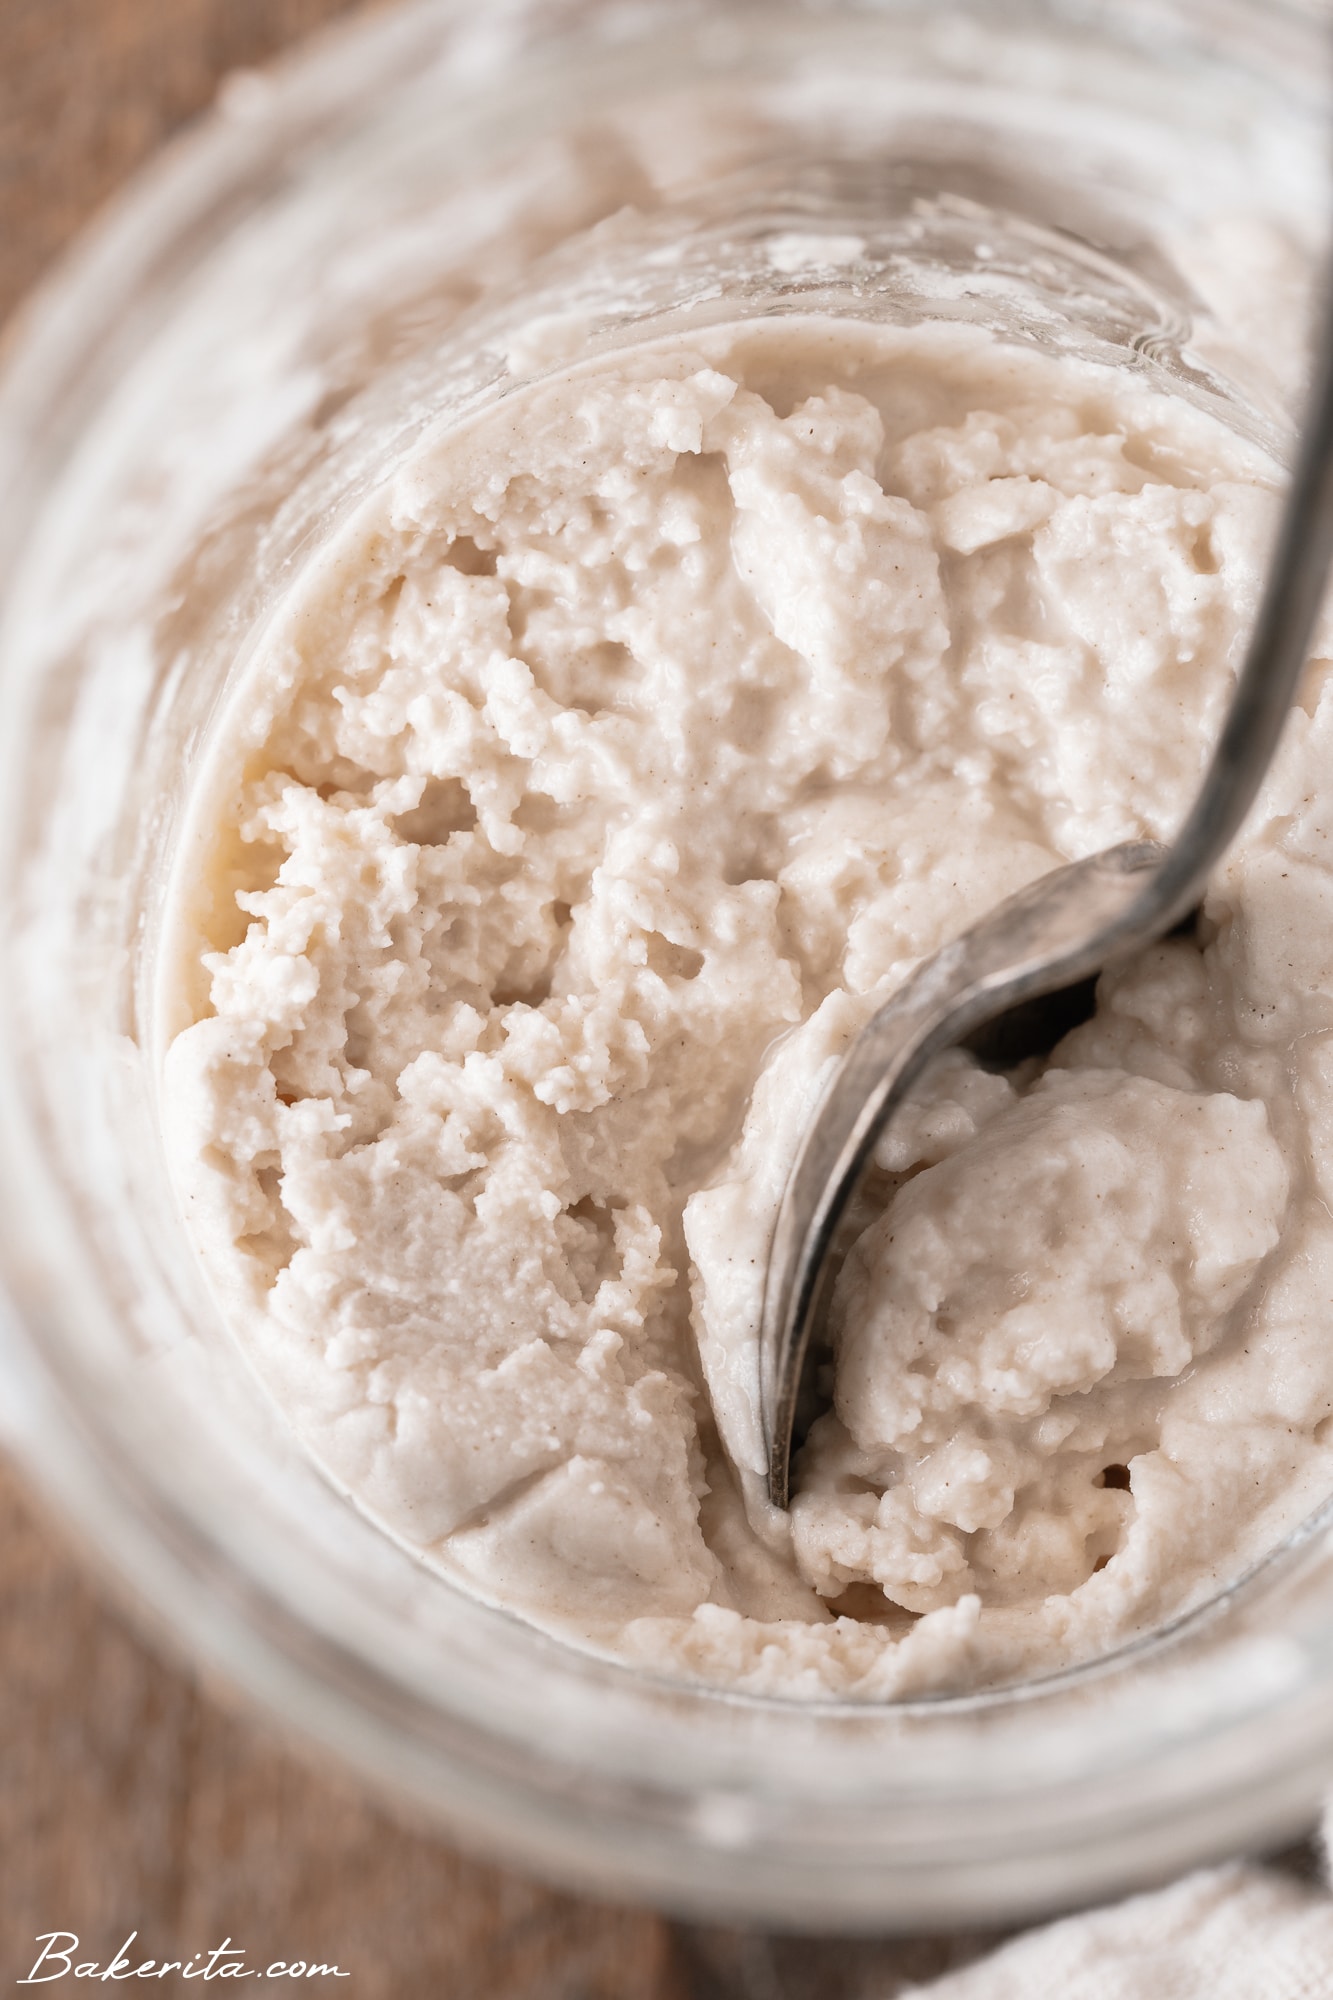
In the morning, combine 50g flour and 50g room temperature water in your clean jar. If you’re using an absorbent type of flour, you may need a little bit more water. You’re looking for a thick paste-like consistency. Scrape down the sides of the jar and close lightly, not fully sealed but covered. You can also cover it with a tea towel and a rubber band to hold it in place. Leave in a slightly warm place overnight. I keep mine on the counter, but don’t place next to a drafty window or anything! I also like to put a rubber band on the jar at the line where the starter is so I can track any rise.
Repeat at night before you go to bed (about 12 hours later), adding 50g more of each flour and water to the jar. Stir, and scrape down. We’re doing twice a day feedings in the beginning to help strengthen the starter quickly.
Repeat this process morning and night for two full days, or four total feedings. You should be noticing some bubbles by now, and maybe some odd smells!
Days Three through Seven:
Time to start discarding! The morning of day three you’ll want to remove all but 100g to 120g of the starter. Later on in the process, you can keep the starter to use for other recipes. But at this point, you’ve still got bad bacteria in the mix, so I recommend throwing it away or putting it into your compost.
For the next five days, you’ll want to discard all but 100g of starter every feed. Keep feeding 50g each of flour and water. We’ll up this to 100g for maintenance when we start baking with it. For now, we don’t want to create any extra waste! You may notice your starter gets less active when you start discarding it. Don’t worry – that’s normal, and your starter is just gaining strength.
Keep feeding twice a day until you start seeing good bubbles. Once you’re seeing good bubbling and a decent rise, you can switch to once-a-day feeds and increase your feedings to 100% hydration.
100% hydration feeding means a 1:1:1 ratio of starter:flour:water. This can vary slightly based on the absorbency of your flour, but it will be about equal. For my brown rice flour starter, it ends up being pretty even. With my sorghum starter, I find I only need about 80g of sorghum flour to 100g each of starter and water. We’re looking for a thick, pasty consistency, so add a little extra water if your starter gets too thick.
Week 2
Around this time is when I generally start having a nice bubbly starter with a pleasant, yeasty smell. However, everyone’s conditions are different, so don’t worry if you’re not there yet! Just continue on with feedings. If your starter is smelling good (a sour sweet aroma, like a good sourdough) at this point with good bubbles, you can start using the discard for sourdough discard recipes.
Once you switch to the 100% hydration feeding, you will start seeing good growth and should notice that your starter will double (or come close) sometime between three to five hours after feeding. When it’s at its highest, that’s what we call peak activity. Peak activity is when you’ll want to mix up your preferment for your sourdough bread.
Remember! As your starter matures, it will make better bread, so if your first loaf comes out a little flatter than you’d like, don’t fret – as the starter strengthens through feedings, you’ll get bigger bubbles and a better rise.
Gluten-Free Sourdough Starter Maintenance
Where to store your starter: I store mine on the counter and it does well. In cooler climates, some people prefer to keep it in a warm area, such as on a fireplace mantle, the microwave, or in an oven with the oven light on. If you choose to risk it with the oven, I recommend place a post-it note over the “on” button so you don’t preheat your oven with the starter in it! Once established, you can store your starter in the refrigerator.
Regular Feeding Instructions: if your starter is at room temperature, you will want to feed it every day so it doesn’t get too hungry. You will continue with the 100% hydration feedings. This means you will discard down to 100g of starter every day, then feed it with 100g room temperature filtered water and 80-100g gluten-free whole grain flour. Mix well and cover lightly.
Storing your starter in the refrigerator? you will only need to feed once a week, following the same instructions as above.
- If you are feeding for maintenance: you can feed and return straight to the refrigerator.
- Feeding to prepare for a bake: remove from the refrigerator, feed as normal, and bake at peak rise. Sometimes, two feedings are needed to help the starter come back from its dormancy in the fridge.
Frequently Asked Questions
My gluten-free sourdough starter isn’t bubbling yet.
Usually, a little more time, patience, and nurturing will help your starter along! Harnessing wild yeast for a sourdough starter is so conditional, and sometimes it just takes longer than other times. This depends on things like the climate, temperature, time of year, and many other factors, such as which strains of wild yeast are in the air around you!
If you want to help give it a boost, placing it in a warm place can help. Also, adding an apple slice or a few raisins can help give it a boost. I’ve personally never needed to use this, but you can do outside research if you’re having a difficult time getting it started.
If it’s been three to five days and NOTHING is happening, it may be time to start over!
My starter isn’t doubling.
It’s best to wait to start baking bread until your starter is doubling, or close. But catching it right at the doubling point can be tricky! Even while I was trying to catch the precise doubling time in these photos, it started to fall.
You’ll want to keep a close eye on your starter in the beginning so you can notice how long it takes to reach peak rise in your conditions. As you get to know the timing better, you can check on your starter to catch it at peak rise to make your preferment. I find that it doubles faster on hot, humid days, and takes longer on cooler days.
There is mold/colored slime on my starter 😬
This isn’t a great sign and if your instincts tell you something is off, it’s time to start over. This shouldn’t happen if you’re keeping your starter happy and fed, but occasionally something can contaminate your starter to cause this and you don’t want to risk your health with anything that seems off.
What’s the alcoholic smelling liquid on top of my starter?
That’s called hooch, and it’s an alcoholic byproduct of the fermentation process. You can stir it in and continue, or you can drain it off. I find it makes the starter a bit more sour if you stir it in, so keep that in mind depending if you want a more or less sour starter.
Once established, do I need to feed my starter every day?
No, you don’t! You can keep it in the fridge and feed it about once a week if you prefer. But if you prefer to bake often, you should keep it at room temperature and feed it every day. If you forget and miss a day, it’s not the end of the world, and your starter isn’t ruined.
You can also dehydrate your starter if you don’t plan on using it for a long time but want to hold on to it. The dehydrated starter will rehydrate in water.
Can I use gluten-free all-purpose flour?
I don’t recommend it, as it often contains many starches and gums, neither of which are great for your starter. Whole-grain flours create the best starters because they contain natural strains of yeast.
Do I need to use the same flour to feed my starter forever?
Nope! You can switch flours if you need to. It’s best to be relatively consistent with your flour initially, but after your starter is established, you can switch your flours. Try not to switch every time, though.
Can I feed my starter with a combination of flours?
You can! Many people find success with a combination of flours, such as brown rice flour and buckwheat flour or sorghum flour and brown rice flour. If you’re having a hard time getting your starter going with just one flour, combining flours can help give it a kick-start.
What should I do with the discard? I don’t like throwing it away!
You certainly don’t have to, and I rarely throw mine away. Thankfully, I’ve got a few recipes using gluten-free sourdough discard. Here they are:
- Gluten-Free Sourdough Scones
- Gluten-Free Sourdough Chocolate Chip Cookies
- Easy Gluten-Free Sourdough Pizza Crust
- Gluten-Free Sourdough Cinnamon Sugar Crackers
How to Make a Gluten-Free Sourdough Starter
Ingredients
- Gluten-Free Whole Grain Flour, I recommend brown rice flour, sorghum flour, buckwheat flour, or millet flour, or a combination. I’d start with about 3 lbs – you’ll need more for maintenance but this will be a good starting amount!
- Room Temperature Filtered Water
Instructions
- How to Prep for Your Starter
- Clean your jar well with soap and hot water. It doesn’t need to be sanitized in a hot water bath like canning, but it needs to be clean to make sure there are no bacteria lurking around that will harm your starter and hinder its growth.
- Weigh your jar on your scale. Using a label or piece of tape, mark your jar with how much it weighs. This will help you to know exactly how much starter you have left in your jar when you’re feeding.
- Days One and Two: twice a day feedings
- In the morning, combine 50g flour and 50g room temperature water in your clean jar using a non-reactive spoon, like stainless steel or wood. If you're using an absorbent type of flour, you may need a little bit more water. You're looking for a thick paste-like consistency. Scrape down the sides of the jar and close lightly, not fully sealed but covered. You can also cover it with a tea towel and a rubber band to hold it in place.
- Leave in a slightly warm place all day. Repeat at night before you go to bed (about 12 hours later), adding 50g more of each flour and water to the jar. Stir, and scrape down. We’re doing twice a day feedings in the beginning to help strengthen the starter quickly.
- Repeat this process morning and night for two full days, or four total feedings. You should be noticing some bubbles by now, and maybe some odd smells! Persevere through any bad smells, they should go away in a few days.
Days Three through Seven:
- First Discard:If you see bubbles and have a sour smell, you're ready to discard. On day three, you'll want to remove all but 100g of the starter. Later in the process, you can keep the starter for other recipes. But at this point, you've still got harmful bacteria in the mix, so I recommend throwing it away or putting it into your compost.
- For the next five days, you'll want to discard all but 100g of starter every feed. Keep feeding 50g each of flour and water. We'll up this to 100g for maintenance when we start baking with it, but for now, we don't want to create any extra waste! You may notice your starter gets less active when you start discarding it. Don't worry—that's normal, and your starter is just gaining strength.
- Keep feeding twice a day until you start seeing good bubbles. You can switch to once-a-day feeds once you’re seeing good bubbling and rise.
Week 2
- Around this time, I generally start having a nice bubbly starter with a pleasant, yeasty smell. However, everyone's conditions are different, so don't worry if you're not there yet! Just continue with feedings. If your starter smells good at this point and has good bubbles, you can start using the discard for sourdough discard recipes.
- Once you start seeing good bubbles and having a pleasant smell, which is usually sometime during the second week, increase your feedings to 100% hydration with 100g of flour.
- 100% hydration feeding means a 1:1:1 ratio of starter:flour:water. This can vary slightly based on the absorbency of your flour, but it will be about equal. For my brown rice flour starter, it ends up being pretty even, but with my sorghum starter, I find I only need about 80g of sorghum flour to 100g each of starter and water. We’re looking for a thick, pasty consistency, so add a little extra water if your starter gets too thick.
- Once you switch to the 100% hydration feeding, you will start seeing good growth and should notice that your starter will double (or come close) sometime between three to five hours after feeding. When it's at its highest, that's what we call peak activity. Peak activity is when you'll want to mix up your preferment for your sourdough bread.
- Starter Maintenance
- Where to store your starter: I store mine on the counter and it does well. In cooler climates, some people prefer to keep it in a warm area, such as on a fireplace mantle, the microwave, or in an oven with the oven light on. If you choose to risk it with the oven, I recommend place a post-it note over the "on" button so you don't preheat your oven with the starter in it! Once established, you can store your starter in the refrigerator.
- Regular Feeding Instructions: if your starter is at room temperature, you will want to feed it every day so it doesn't get too "hungry" and create a lot of "hooch", the alcoholic liquid that can form on top of a hungry starter. You will continue with the 100% hydration feedings, meaning you will discard down to 100g of starter every day, and feed it with 100g room temperature filtered water and 80-100g gluten-free whole grain flour. Mix well and cover lightly.
- If you are storing your starter in the refrigerator: you will only need to feed once a week, following the same instructions as above.
- If you are feeding for maintenance: you can feed and return straight to the refrigerator.
- If you are feeding to prepare for a bake: remove from the refrigerator, feed as normal, and make your preferment when the starter is at peak rise. Sometimes, two feedings are needed to help the starter come back from its dormancy in the fridge and get to a good, bubbly rise.

Hi (:
I have a couple of questions..
1. From days Three through Seven you wrote “Keep feeding twice a day until you start seeing good bubbles”. Should I discard the sourdough with every feeding or once a day?
2. You wrote “100% hydration, with 100g of flour”, does it mean I need to feed 100g of starter with 100g of flour and 100g of water?
3. What do I need to add to the starter after I use some of it and I want to put it in the refrigerator?
4. For the question “If you are feeding to prepare for a bake” you wrote “feed as normal”. Did you mean a 100% hydration feeding or 50g of flour and 50g of water? and do I need to discard the starter in this process?
Thank you for this recipe! I’m going to make your sourdough bread recipe right after the starter will be ready!
Hi (:
(I sent this comment before but I cant see it anywhere.. so I’m sending it again)
I have a couple of questions..
1. You wrote “Keep feeding twice a day until you start seeing good bubbles” on days Three through Seven, should I discard the starter every feeding or just once a day?
2. ON week two you wrote “increase your feedings to 100% hydration, with 100g of flour”, does it mean I should discard the starter, feed 100g of the starter with 100g of flour and 100g of water?
3. For the question “If you are feeding to prepare for a bake” you wrote “feed as normal”, did you mean to 100% hydration feedings or 50g of flour and 50g of water feedings?
4. What do I need to add to my starter if I used some of it and I want to put the rest of it in the refrigerator? do I need to feed it before it goes to the fridge?
Thank you!
Hi Avery, let me answer your questions!
1) once you start discarding, you’ll want to discard with every feeding.
2) yes, that’s correct – you’ll feed equal amounts of the starter with flour and water. I recommend 100g of each!
3) feed as normal will refer to the 100g feedings, after the first bit you’ll always be feeding 100g (unless you want to maintain a smaller amount of starter)
4) I recommend feeding the regular amount right before you put it in the fridge.
Hope this helps – let me know if you need any more clarification!
Thank you so much!!
Hi, I started to discard the sourdough with every feeding, since then the starter doesn’t have as much bubbles as it had before, I saw you wrote it is fine that the starter is less active after it was discarded and been fed, but my starter has very few bubbles. Is it fine? Should I change something? Or should I just keep feeding it?
Thank you!
Hi Alen, it’s totally normal for it to slow down a bit as you start discarding – it will rebound in a few days!
What is a preferment? I’ve never heard that term, and have been making sourdough bread (regular) for a long time. Thanks!
Hi Diane, it’s essentially another feeding before you make the dough, and all of it goes into the dough. You can read all about it in the main sourdough bread post!
Hello Rachel, Is it possible to make the sourdough starter also from whole rice flour and not from brown rice only?
Thank You, Ziv
Hi Ziv, you can use any kind of rice flour to create a sourdough starter.
Hi! I am about 1 1/2 weeks in with my gluten free sourdough starter. I am using organic buckwheat flour. I was seeing bubbles and some rise when I was doing the 2x per day feedings, but since switching to the 1x per day 1:1:1 feeding, I haven’t seen as much activity. Should I switch back to 2x per day?
Hi Sonya, it does tend to slow down around the point you’re at. This is totally normal and I believe this is discussed in the post. You’re welcome to switch back to 2x a da feedings to speed up this process of strengthening the starter.
Thank you so much Rachel
Rachel, Just to make sure I understood correctly – from the third to the seventh day throw away half of the sourdough twice a day? Thank you, Ziv
Hi Ziv, yes, that’s when you’ll begin the discarding process! You don’t have to do it twice a day, but it helps build up the starter to be stronger more quickly. I have story highlights on my instagram (@bakeritablog) if you want to watch the whole process.
Hi Rachel, Sorry every step begets new questions. 1. Today I started feeding my starter at a ratio of 1:1:1. I fed at 08:30 in the morning and saw that at 15:30 it reached it’s peak, grew about half of it’s size. My question is, should I wait until tomorrow morning for the next feeding, that is, stay with one feeding a day, or feed more times a day? Won’t it be hungry by tomorrow morning and have hooch?
Second question, I want to keep the sourdough in the refrigerator – with what and how to cover it?
Thank you, Ziv
I just mixed my first 1:1 beginning starter. Making it with fine brown rice flour and filtered water. 50g of each. My question is how thick is the first paste? Mine is a crumbly paste. Should I add a little more water?
Hi Karen, yes it should be a thick paste – different flours (even same type by brand) have different absorbencies, so you’ll need to adjust as needed to get to a thick paste consistency.
Hey I’m making my started from brown rice flour, it bubbles a little but it simply won’t rise and it’s been 9 days now :(
Any tips would be awesome
Hi Jo, it can take a variety of times depending on conditions, but you can try adding a bit of sugar to help give it a boost!
It worked! I have a doubling starter! Thanks sooooo much :)
Fabulous, happy baking, Jo!