
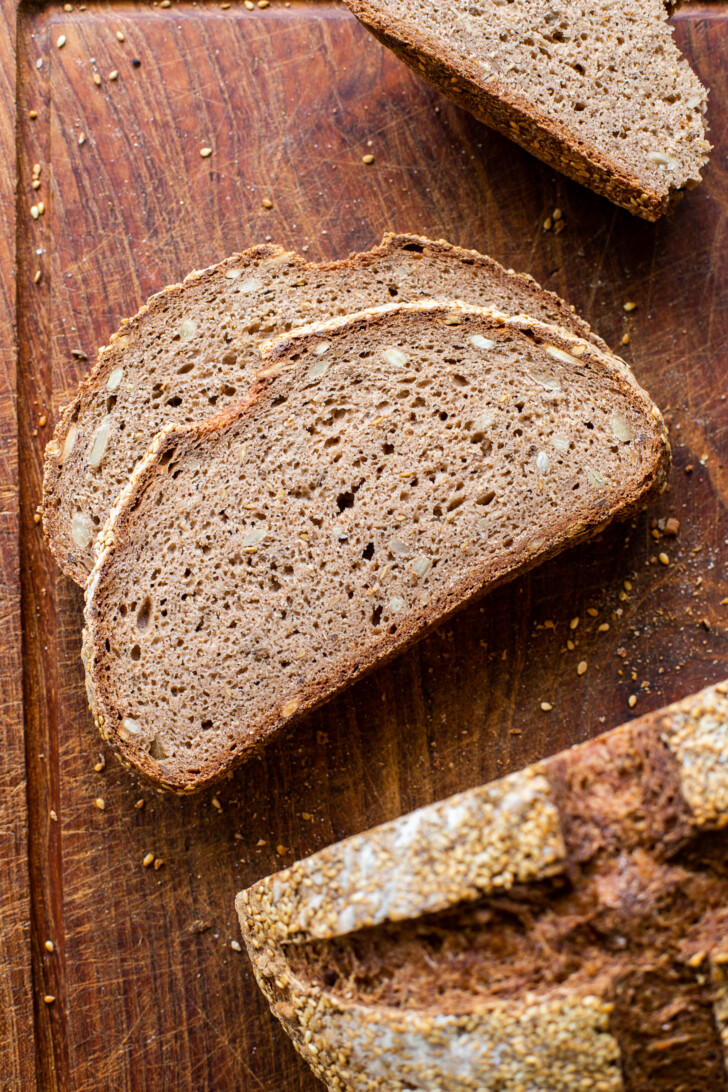
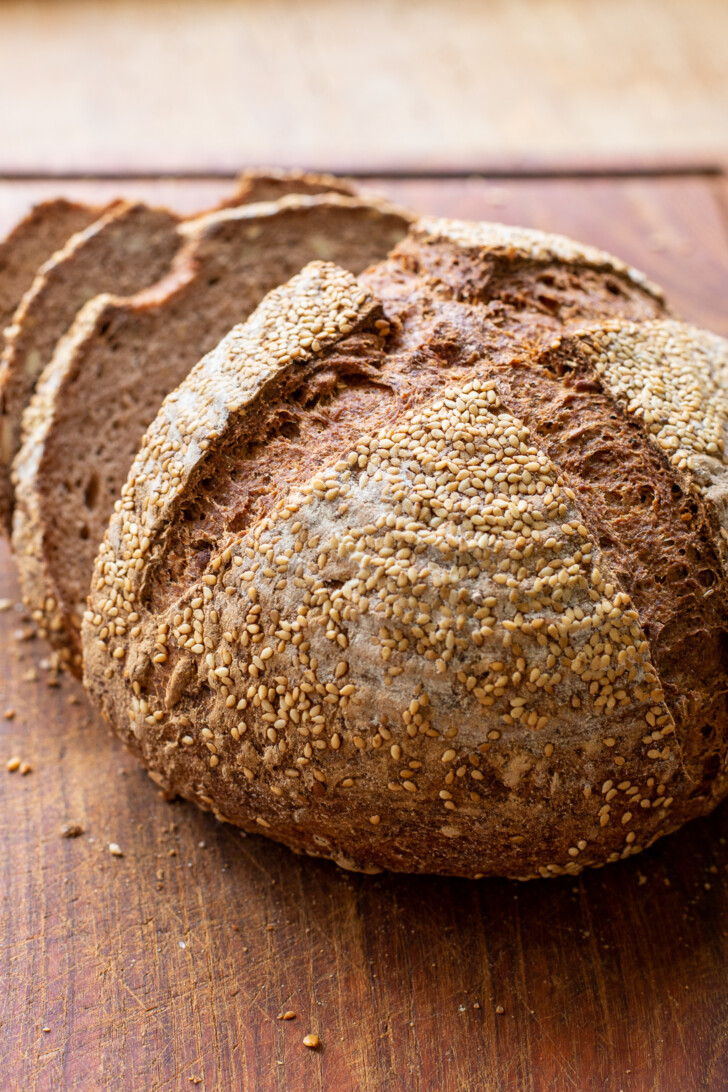
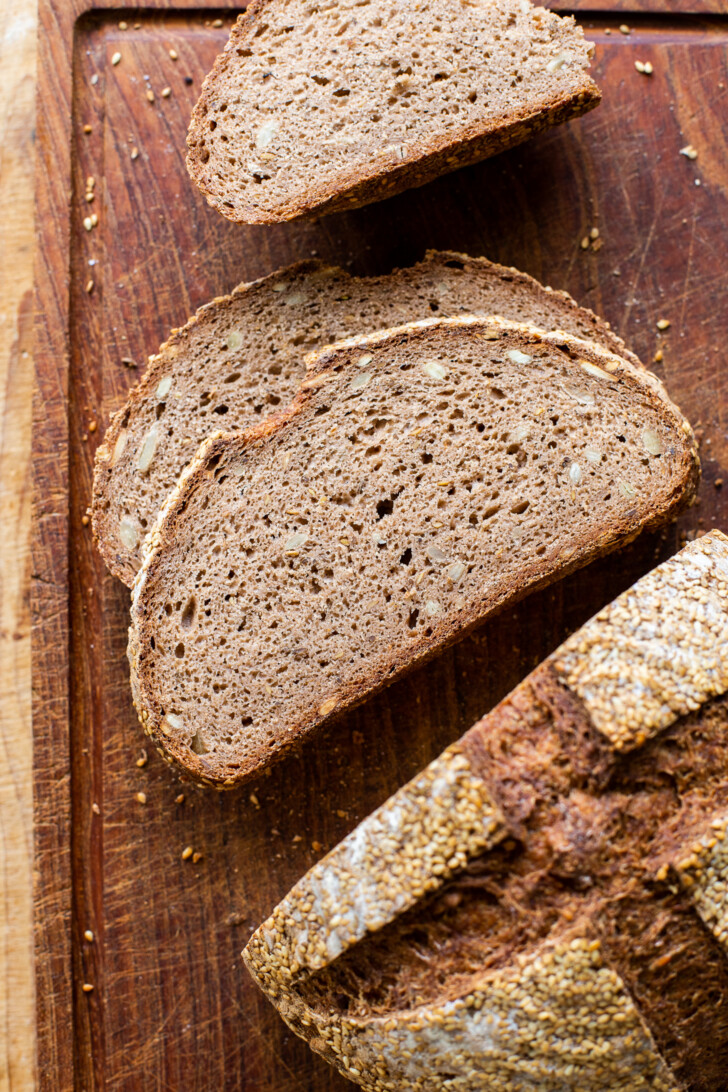
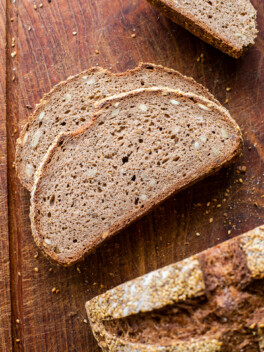
Although rye bread inherently has gluten, since rye is a gluten-containing grain, we recreate it’s key flavors with this Gluten-Free Rye Bread! This rye-style bread is made with buckwheat flour, caraway seeds, and cocoa powder to mimic the flavors and textures you love – all without the gluten.
Hello to all my rye bread lovers!! When I started making gluten-free sourdough bread back in 2020 and sharing it with my gluten-free family members, my dad immediately started making one request, over and over again: gluten-free rye bread. After explaining to him that rye bread is inherently not gluten-free, since rye is a grain that contains gluten, I told him I would try to create a rye-style gluten-free bread that would satisfy the same cravings.
My great grandparents owned a bakery in New York that was famous for their rye bread when my grandpa was growing up, so I knew I had to nail this recipe. It’s in my BLOOD! I had to get approval from grandpa, and this recipe has gotten two VERY big thumbs up from him. My dad and grandpa are requesting loaves of this gluten-free rye weekly!
This recipe has been in the works for over two years and has undergone a number of iterations. I hope you love it as much as my family does. If you’re missing rye bread too, I hope it satisfies all your cravings.

What makes this gluten-free “rye” bread look and taste like rye bread?
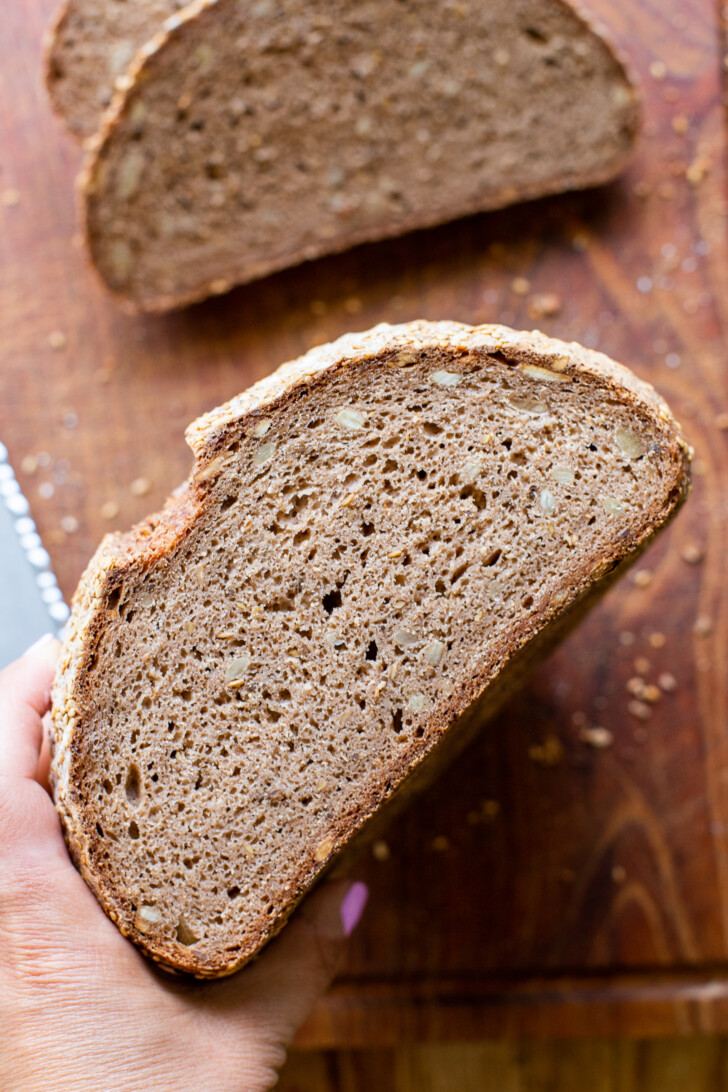
This was the key. It needed to not just look like rye bread, with that rich, golden brown color, but it also needed to taste and feel like rye bread. These are the ingredients that get it done:
- Date Syrup: this is my sweetener of choice for making rye bread. You can substitute maple syrup or cane sugar, but I prefer date syrup because it contributes to that darker color and adds a subtle flavor the rye loaf.
- Cocoa Powder: this adds a bit of bitterness to the loaf, and contributes to the darker color. I’ve also experimented with using black cocoa powder when my grandpa requested a gluten-free black rye bread, and that works well too! The flavor isn’t too different, but the color is dramatic.
- Caraway Seeds: a must when you’re making any kind of rye bread, gluten-free or not. Don’t skip these – without it, it doesn’t taste like rye!
- Buckwheat Flour: rye bread has a nutty, earthy flavor that buckwheat helps to mimic rather well. I’ve used my gluten-free bread flour blend for the rye bread too. That also works, but using buckwheat if you have it on hand is one of my favorite iterations of this bread.
How to make gluten-free rye bread
Make the psyllium gel by combining the psyllium husk, date syrup (or other sweetener) and hot water. Whisk to combine, and let it set for a few minutes while mixing up the dry ingredients. It will thicken and gel during this time.
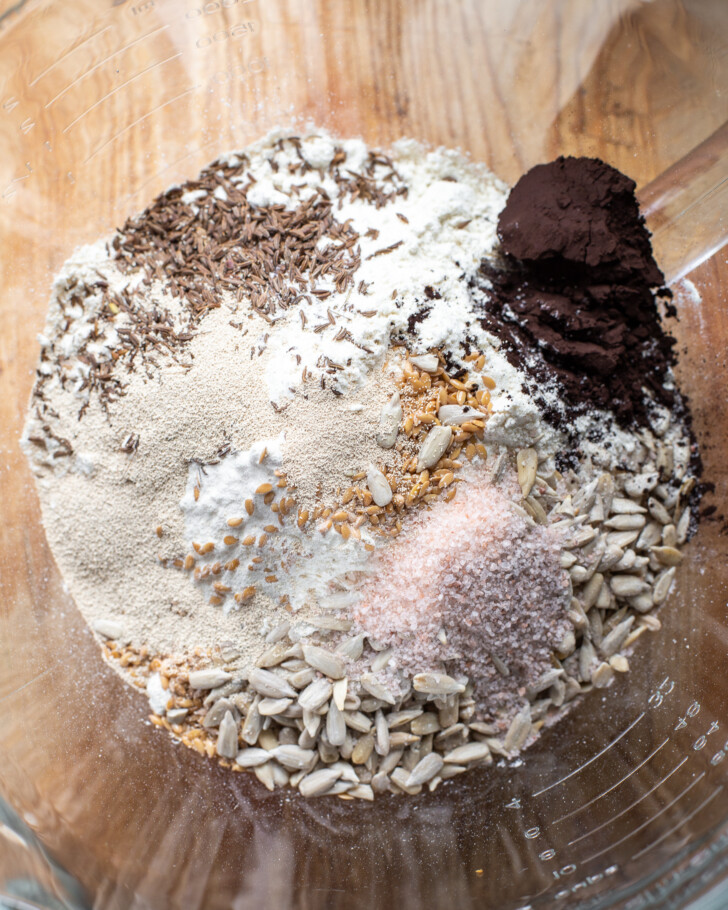
Whisk together all of the dry ingredients in the bowl of a large mixing bowl or stand mixer.


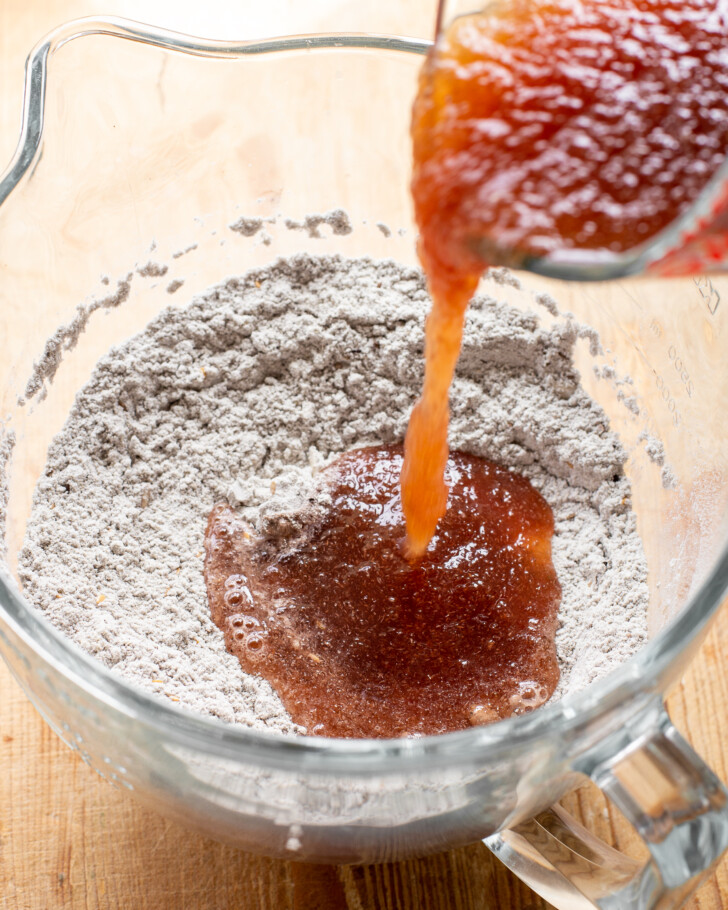
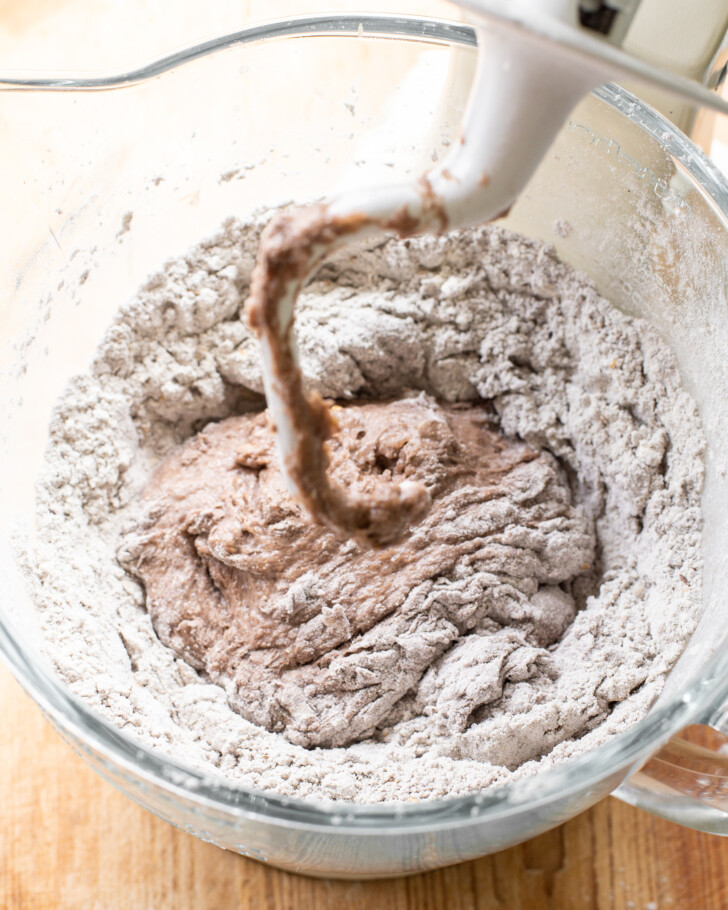
Add the wet to the dry ingredients and use a dough hook or a danish dough whisk to mix it together well, until all the dry ingredients are incorporated and hydrated.
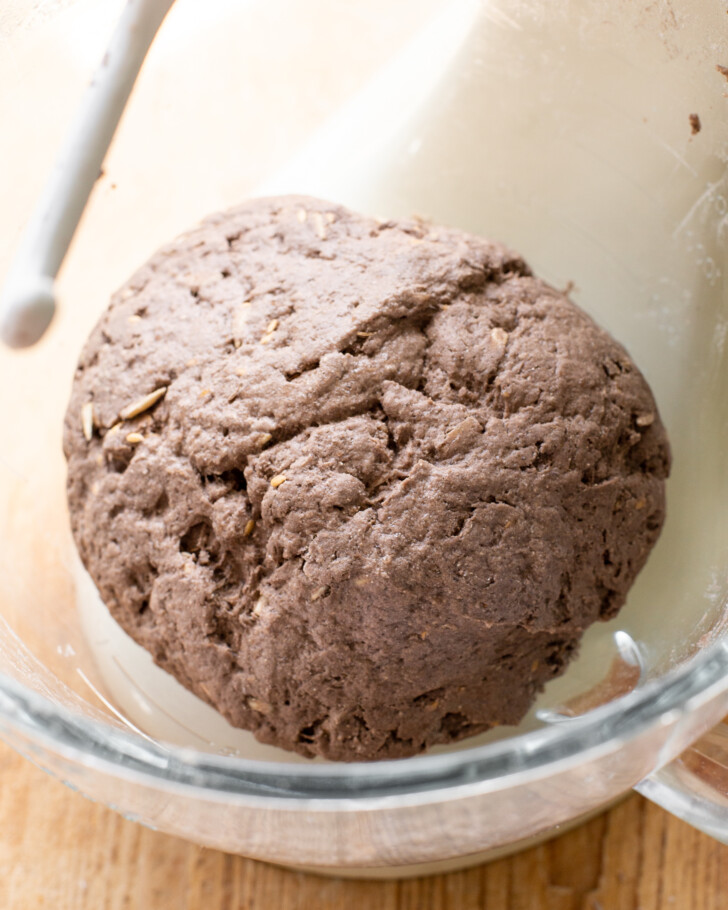
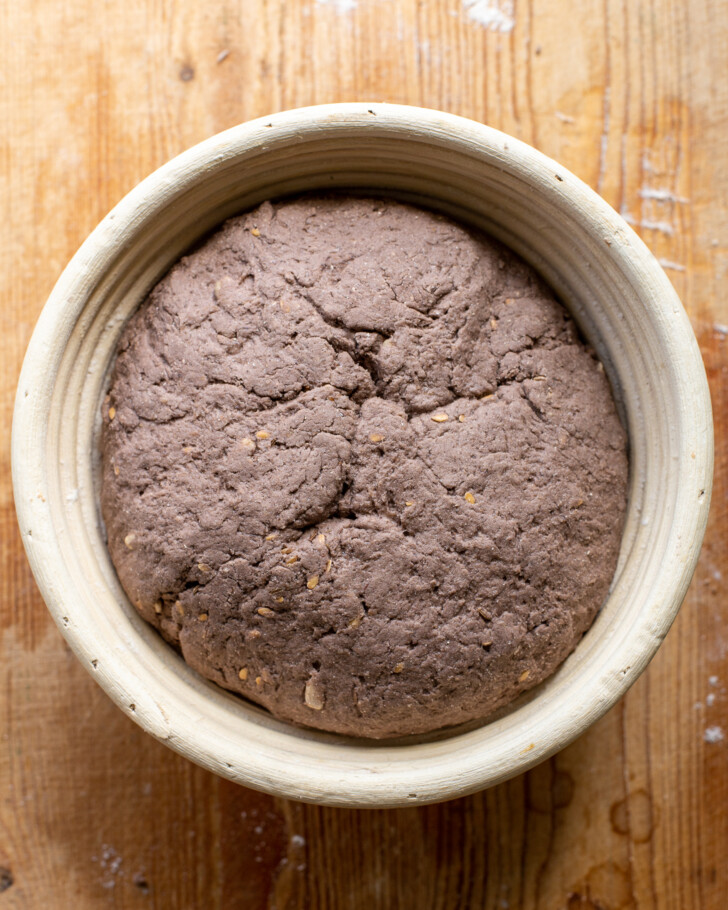
Knead the dough just enough to shape it into a dough round. Add sesame seeds or other seeds to garnish at this time, if desired. Place it in a floured banneton or cloth-lined bowl to rise.
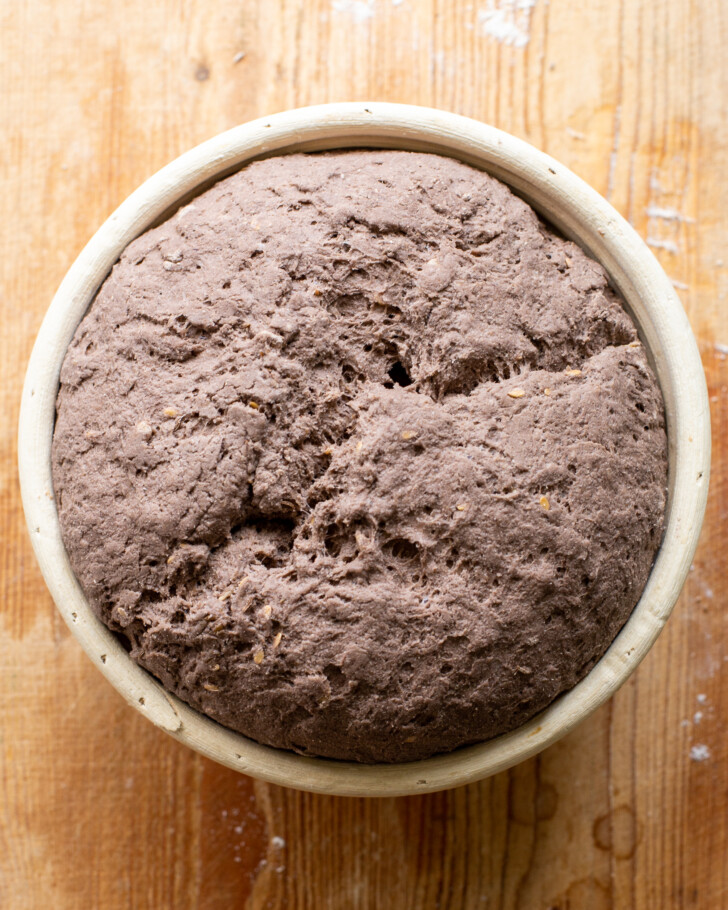
Rise in a warm place for one hour, or until the dough feels puffy and light.
Bake in the preheated over with a lid on for 1 hour, and then remove the lid to bake for the remaining 20-ish minutes, until golden brown.
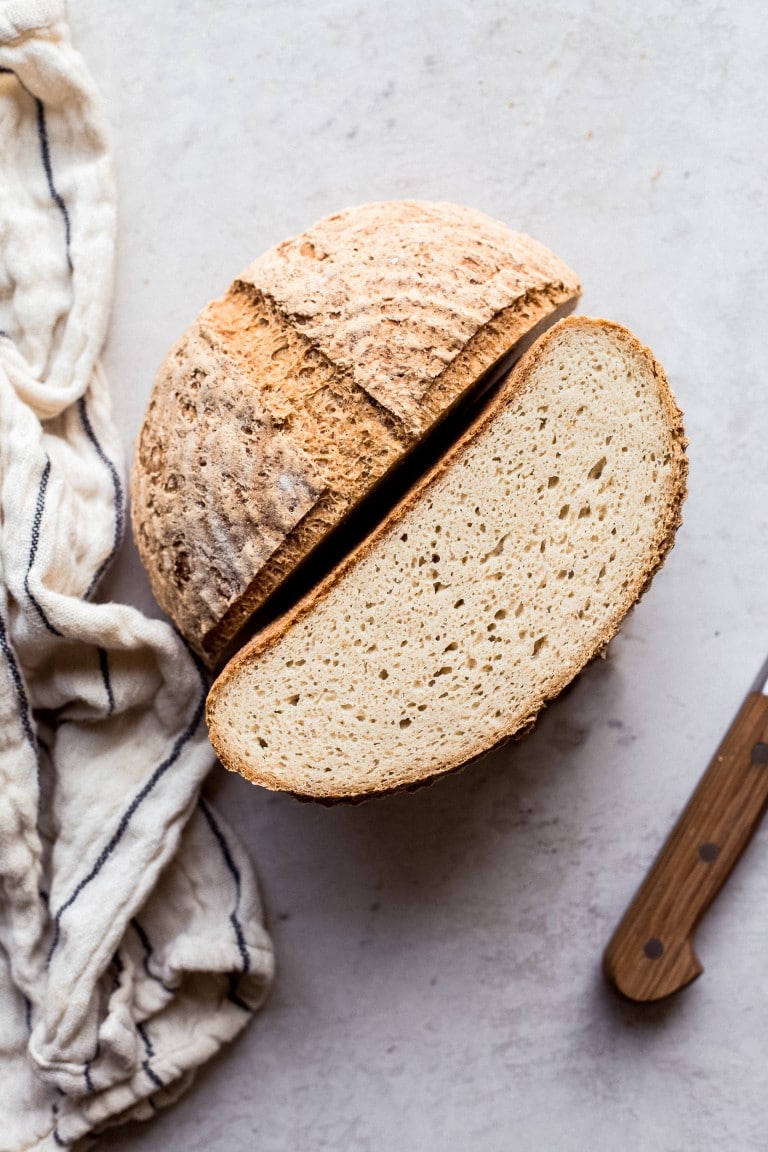
Cool completely before cutting into the loaf! This is super important – cutting in too early will release steam and make for a gummy loaf. Slice and enjoy!!
Can I bake this bread in a loaf pan?
Absolutely! I often make this bread in a loaf pan when I know it will be used for sandwiches.
This 8.5″ x 4.5″ bread pan is my favorite for baking bread loaves in.
To bake your gluten-free rye bread in a loaf pan, follow the same instructions up until you’re placing the dough in the banneton. Instead, shape the dough to a longer oval shape and place the dough seam side down in the metal loaf pan you’ll be baking in. Metal will help conduct the heat more efficiently to help your bread bake through – I don’t recommend using another material.
Cover with a tea towel or plastic wrap, and allow the dough to rise in the pan until puffy, about an hour. When you’re ready to bake, bake for an hour. Check on the loaf and if it’s firm enough, remove it from the pan and bake directly on the oven racks for another 20 minutes or so, until golden all around and hollow-sounding when you knock on the sides or bottom.
Since you’re baking without steam when baking a loaf, the crust will be a bit crustier. To prevent this, you can brush the top with oil before and after baking, and/or wrap the warm loaf in a towel as it cools to help soften the crust with the bread’s own steam.
Storing gluten-free rye bread
To store this bread, I recommend keeping it in a bread bag or box for 2 to 3 days at room temperature. It’s best to use it fresh if you plan on eating it untoasted, for things like sandwiches.
You can also slice the loaf, and keep it in a plastic bag in the refrigerator for up to a week, or in the freezer for up to 2 months.
Place your slices into the toaster to reheat whenever you’re ready to enjoy them!
More gluten-free bread recipes…
Homemade Gluten-Free Bread
A classic Gluten-Free Bread boule, made with yeast and ready in just a few hours! It’s light, fluffy, and perfect for sandwiches, toast, and anything else you’d use bread for. This gluten-free loaf is also vegan and free of the top 8 food allergens.
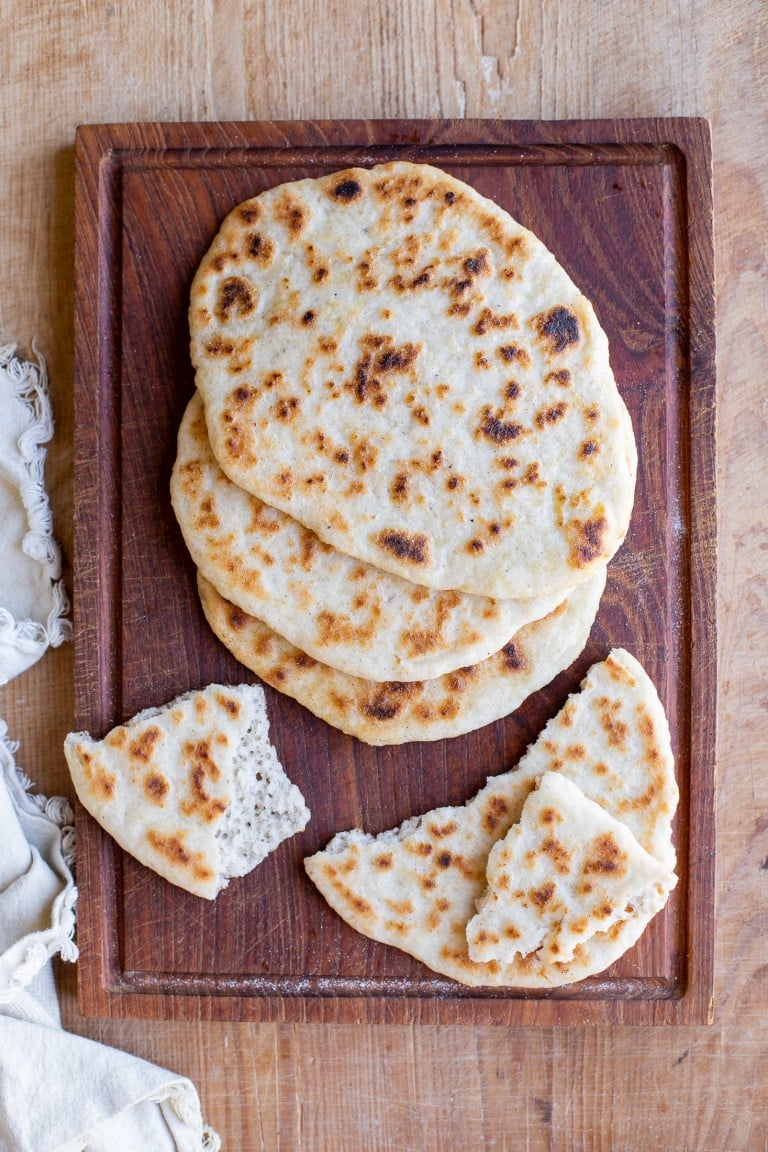
Fluffy Stovetop Gluten-Free Flatbread
You can make this Gluten-Free Flatbread Recipe quickly with just seven ingredients! This recipe works well as a replacement for gluten-free naan bread, gluten-free pita bread, or any other kind of flatbread.
Easy Gluten-Free Focaccia Bread
This Easy Gluten-Free Focaccia Bread Recipe has just eight ingredients and the dough comes together quickly and easily! This fluffy focaccia can be made with a wide variety of toppings and is ready in under two hours, including the rise time. Vegan u0026amp; Top-8 allergen-free.
Gluten-Free “Rye” Bread
Ingredients
Liquid ingredients
- 18 g psyllium husk
- 20 g date syrup or other sweetener of choice, like maple syrup, cane sugar, or honey
- 460 g hot water
Dry ingredients
- 460 g gluten-free bread flour blend, I like the combination of 100g potato starch, 100g tapioca starch, 120g buckwheat flour, 140g sorghum flour if not using my homemade pre-mixed blend
- 30 g (3 tablespoons) sunflower seeds
- 12 g sea salt
- 12 g (1 tablespoon) flax seeds
- 7 g (02¼ teaspoons) instant yeast
- 7 g (1 tablespoon) cacao powder, (in the process photos, I used black cocoa, and in the final loaf photos I used regular cacao powder)
- 7 g (1 tablespoon) caraway seeds
Equipment
Instructions
- In a bowl or liquid measuring cup, mix together the psyllium husk, date syrup or other sweetener, and water. Whisk together, breaking up the psyllium and making sure it’s fully incoporated, and let it set for a few minutes while you mix up the dry ingredients, until it’s thickened and gel-like.18 g psyllium husk, 20 g date syrup or other sweetener of choice, 460 g hot water
- In a large mixing bowl or the bowl of your stand mixer, mix together the flours, salt, seeds, instant yeast, and cacao powder. Whisk to combine.460 g gluten-free bread flour blend, 30 g (3 tablespoons) sunflower seeds, 12 g sea salt, 12 g (1 tablespoon) flax seeds, 7 g (02¼ teaspoons) instant yeast, 7 g (1 tablespoon) caraway seeds, 7 g (1 tablespoon) cacao powder
- Add the thickened psyllium gel to your dry ingredients. If using a stand mixer, fit it with the dough hook and let it mix up the dough until combined and smooth, scraping down the sides a few times during the process, and flipping the dough around to make sure it’s fully mixed on the bottom too. You can also do this by hand. If doing it by hand, I like using a dough whisk to get it mostly combined. Then, turn it out onto the countertop and use your hands to knead the rest of the flour in.
- Use your hands to knead the dough and shape it into your desired shape. Cover with sesame seeds or other garnish, if desired. Then, place it in the banneton (seam side up) or loaf pan (seam side down) for the final proof.
- Cover with a tea towel and let the loaf rise for one hour in a warm place. It should just about double in size, and it will feel light and puffy to the touch when it’s ready. Preheat the oven to 425℉ while it rises with a Dutch oven inside, if using.
- Once it’s risen, score the bread (carefully flipping it out of the banneton onto parchment or a silicone bread sling if baking in a Dutch oven). If you’re baking in a loaf pan, you may want to brush the top with oil to get a nice golden crust and help soften it slightly.
- Place into your baking vessel if using a Dutch oven. I like using a silicone sling for easy removal. If using a loaf pan, just place right into the oven. Bake for 1 hour and 20 minutes, removing the lid for the last 20 minutes if baking in a Dutch oven. It should be golden brown and crusty.
- Remove from the baking pan and set on a cooling rack to cool completely. This is definitely the hardest part, but you really need to let the loaf cool completely so the inside can set. I try to let it cool overnight, but you’ll want to let it cool for at least four to five hours. It should be fully cool to the touch before cutting into your loaf.
- Slice and eat. This bread is great raw, toasted, or however else you want to enjoy it!
Storing gluten-free rye bread
- To store this bread, I recommend keeping it in a bread bag or box for 2 to 3 days at room temperature. It’s best to use it fresh if you plan on eating it untoasted, for things like sandwiches.
- You can also slice the loaf, and keep it in a plastic bag in the refrigerator for up to a week, or in the freezer for up to 2 months. Place your slices into the toaster to reheat whenever you’re ready to enjoy them!
Notes
- Yes, for sure. I often make this bread in a loaf pan when I know it will be used for sandwiches. This 8.5″ x 4.5″ bread pan is my favorite for baking bread loaves in.
- To bake your gluten-free rye bread in a loaf pan, follow the same instructions up until you’re placing the dough in the banneton. Instead, shape the dough to a longer oval shape and place the dough seam side down in the metal loaf pan you’ll be baking in. Metal will help conduct the heat more efficiently to help your bread bake through – I don’t recommend using another material.
- Cover with a tea towel or plastic wrap, and allow the dough to rise in the pan until puffy, about an hour. When you’re ready to bake, bake for an hour. Check on the loaf and if it’s firm enough, remove it from the pan and bake directly on the oven racks for another 20 minutes or so, until golden all around and hollow-sounding when you knock on the sides or bottom.
- Since you’re baking without steam when baking a loaf, the crust will be a bit crustier. To prevent this, you can brush the top with oil before and after baking, and/or wrap the warm loaf in a towel as it cools to help soften the crust with the bread’s own steam.


Wow! Thank you for this recipe! Cannot wait to bake this. Can I substitute the buckwheat flour with brown rice flour or more sorghum flour by any chance?
Hi Neha, yes absolutely! Enjoy :)
I made this today, I realised half way through that I only had self raising gluten free flour so that’s what I used. Looks great, it’s cooling at the moment, so I’m eagerly waiting to eat it
I hope it turned out delicious, Nicki!!
I made this today and it is fantastic (even though I think I forgot the salt). Beautiful texture. Nice crust.
So glad you enjoyed it, Jennifer!! Thanks so much for the feedback :)
Spot on for rye bread. I didn’t have caraway seeds so I had to sub for fennel seeds. Hubby isn’t gluten free and he even commented on how much like rye bread it was. Definitely a keeper in this house.
So glad you and your husband loved it, Rachel! Thanks for the feedback :)
This bread is incredible. I followed it exactly as written, and it came out perfect. I will be making it again and again.
Thank you so much, Ellen! So glad you loved it!
Hi, this bread sounds delicious, but was wondering if you have any recipes without yeast? I don’t have a sourdough starter either. So was thinking baking powder, soda, or live culture yogurt. Thank you
Hi Jodi, no I don’t have any gluten-free bread recipes without sourdough starter or yeast. Each one helps to make a loaf that’s most similar to regular bread. Without them, you’d have something more similar to a quick bread in consistency (like a banana bread).
Has anyone tried using other levening agents besides yeast? I’m on an elimination diet and can’t do yeast right now.
Hi Jenna, the only other option would be a sourdough version, where you can use the same add-ins to bring in the rye flavor.
This bread is perfection – thank you so much for sharing this recipe, Rachel. I used a loaf pan and arrowroot starch instead of potato starch. The result is fantastic!
So glad you’re loving it, Rea!
I am currently deceased at how delicious this bread is. I am not sure how many tries it took to get to this end result but it’s absolutely gorgeous and you can’t even tell it’s not real rye. I recently found out that I’m allergic to several of the top 9 and I’ve been studying. This recipe gave me life. You are an absolute national treasure. Thank you so so so so much.
This makes me so happy!!! Thank you so much for this kind comment, Sarah! This recipe indeed took lots of tries, and I’m so glad the effort was so worth it!
I’ve been making your sourdough for several months and decided to try this “rye” bread (rye is my husband’s favorite). I have to say that his bread is amazing. Thank you for all of your awesome recipes. I can’t wait to try more (like the pumpkin scones – yum!).
Hi Julia, thanks so much for the feedback! So glad you loved it.
Oh no! I realized I have added SESAME seeds INTO the dough, not sunflower! Have I completely ruined the bread? (it is already rising so I’m going to at least bake it but hoping it won’t be a waste)
No that’s totally fine! I add sesame seeds to breads all the time :) will still be totally delicious!
Woo! Thank you for the quick reply, Rachel :) This bread tastes amazing (even despite my misstep). ALL THE STARS!
So glad you’re loving it, Dani!! Wooohoo!