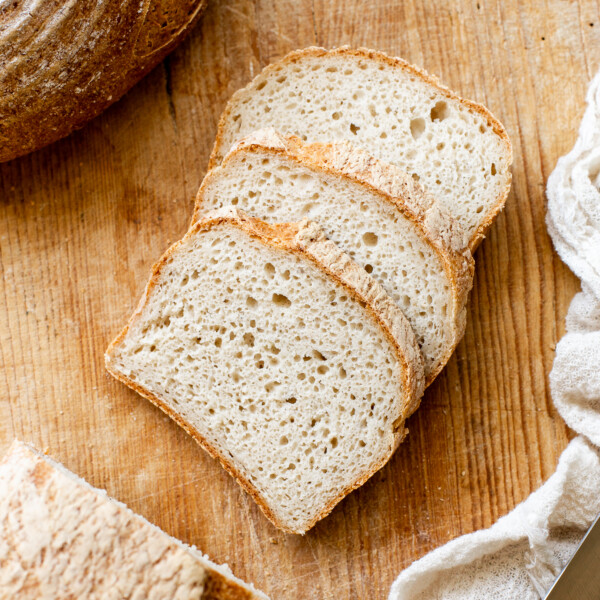
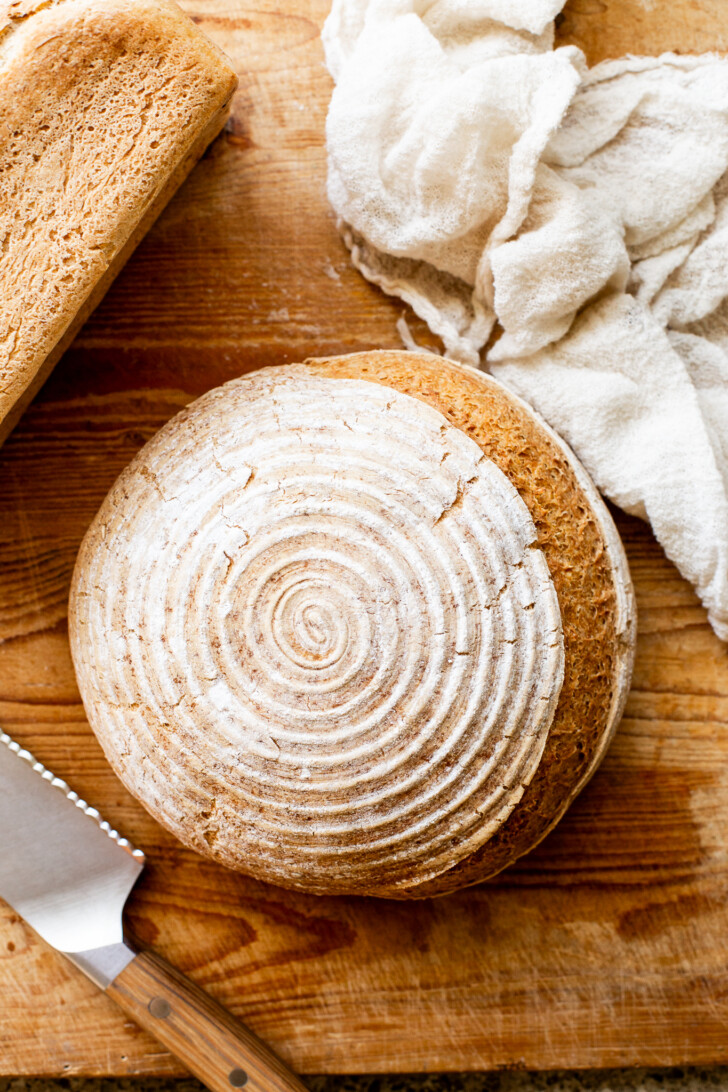
This Gluten-Free Bread recipe with yogurt (I use dairy-free to make this a vegan bread) was repeatedly called “the best gluten-free bread ever”! The yogurt adds softness and tang to the fluffy gluten-free bread, giving it a sourdough-like flavor without the need for a starter. You only need seven ingredients and three hours of mostly hands-off time to make this delicious yeast bread.
Meet my new favorite gluten-free bread recipe! That’s a big statement since I adore all of my gluten-free bread babies. The classic yeasted gluten-free bread loaf has been a staple in my kitchen for a while and I love its ease. The gluten-free sourdough was my first bread love, but it can take a while to make from start to finish and sometimes I’m impatient.
This new gluten-free yeast bread marries the two: it uses yogurt and apple cider vinegar to give a tanginess to the loaf that’s reminiscent of sourdough bread, but it’s raised with instant yeast, so it only takes less than three hours from start to finish.
Why you’ll love this easy gluten-free bread:
- Only need seven ingredients
- It’s gluten-free and vegan
- Made with instant yeast
- Only needs to rise for one hour
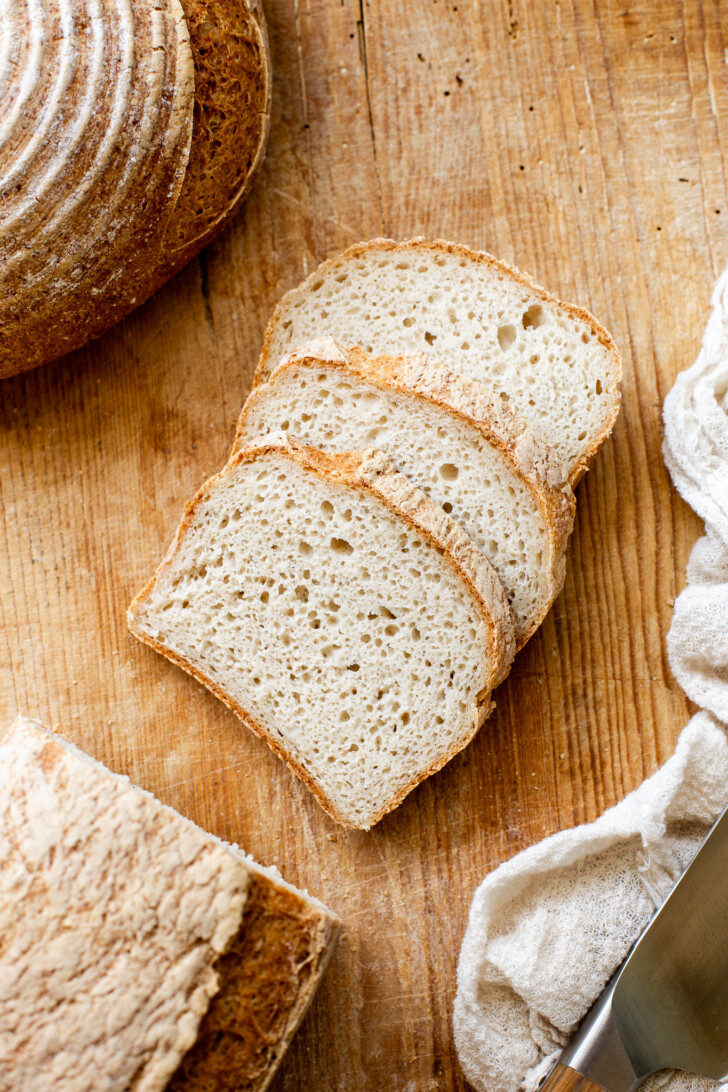
- Soft, tender & tangy – without the sourdough starter!
- Ready in less than three hours
Ingredients to make Yeasted Gluten-Free Yogurt Bread
A note: I don’t share any volume measurements for this bread, because I find it’s so much easier and more accurate to use weight. Please get a baking scale if you’ll be doing bread baking with any kind of regularity – it will make things much easier and more accurate! Plus, less messy measuring cups :)
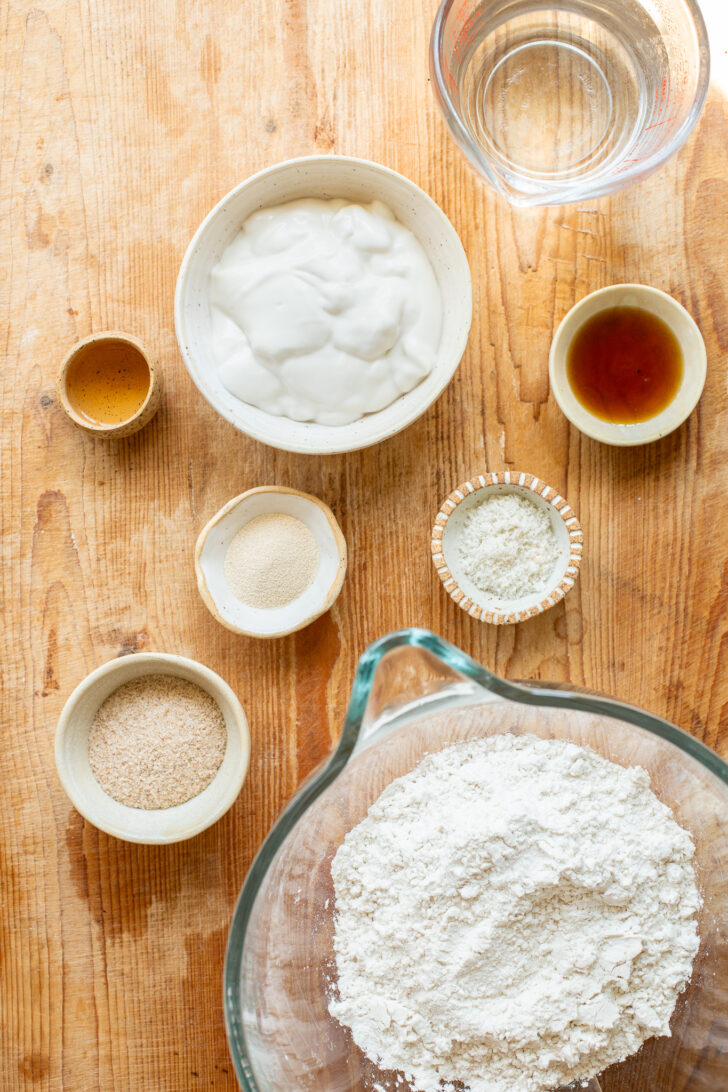
- Psyllium Husk: this is the thickener and “gluten” substitute for this bread loaf. Read all about psyllium husk here.
- Sweetener: I like using raw cane sugar or maple syrup.
- Hot Water: the hot water helps activate the yeast. Use filtered if you can.
- Unsweetened Yogurt: since I’m dairy-free/vegan, I always use unsweetened dairy-free yogurt.
- Apple Cider Vinegar: this adds a tangy flavor to the bread and can help with the rise.
- Gluten-Free Bread Flour Blend: read more below about my favorite gluten-free bread flour blend.
- Sea Salt: for flavor!
- Instant Yeast: I like using instant yeast because it removes the step of activating yeast and makes this super quick and easy to make!
What’s the difference between active dry yeast and instant yeast? Active dry yeast must be activated by warm water before use, usually along with some kind of sugar to help feed the yeast and get it nice and bubbly. Instant yeast is mixed directly into the dry ingredients and is activated when the dough is mixed together. I find it easier to troubleshoot with active dry yeast because if your instant yeast doesn’t activate, you need to restart the whole recipe.
What’s the best gluten-free bread flour to use?
I always use my homemade gluten-free bread flour blend for this recipe and it works fantastically.
The only other pre-mixed flour blend I’ve tried is this multi-blend flour from Vitacost, which is made with similar ingredients to my homemade blend and makes for a delicious fluffy bread.
I have not tested this recipe with any blends that incorporate xantham gum or guar gum, so I can’t say how blends that add those gums would affect the recipe. Experiment as you please, but I can’t make any guarantees beyond these two blends.
To make your own gluten-free flour mix for this loaf, you can use about 40% starches (like potato starch, corn starch, arrowroot starch, and/or tapioca starch) to 60% whole grain gluten-free flours (like brown rice flour, oat flour, white rice flour, sorghum flour, millet flour teff flour, or buckwheat flour). Each has its own properties and flavors, but it can be super fun to experiment here and see which combination makes for your favorite loaf.
What is psyllium husk? Do I need it?
You can read all about psyllium husk here! But, the short answer is, the psyllium husk is the fibrous husk of a seed, and when combined with water, it creates a thick gel. The psyllium gel helps make your gluten-free bread dough easier to handle and shape.
From my experiments: you need psyllium husk for good gluten-free bread. It is necessary for this recipe and almost all of my gluten-free bread recipes. I don’t recommend skipping it or replacing it with anything else. It makes the dough workable, so it doesn’t squish all over the place. It’s also what makes your bread chewy and stretchy.
NOTE: psyllium husk and psyllium husk powder are different. You want the full husk. I usually find it in the supplement area of most grocery stores, and you can also find it for sale online.
This recipe uses yogurt – can it be made dairy-free/vegan?
YES! In fact, I’m dairy-free, so all of my tests use dairy-free yogurt. I tested this with both cashew yogurt and coconut yogurt, and both were delicious. I’m sure regular dairy yogurt will also work great. Just be sure to use an unsweetened/unflavored yogurt (unless you want to use the yogurt as a flavoring agent).
Making gluten-free bread with yogurt
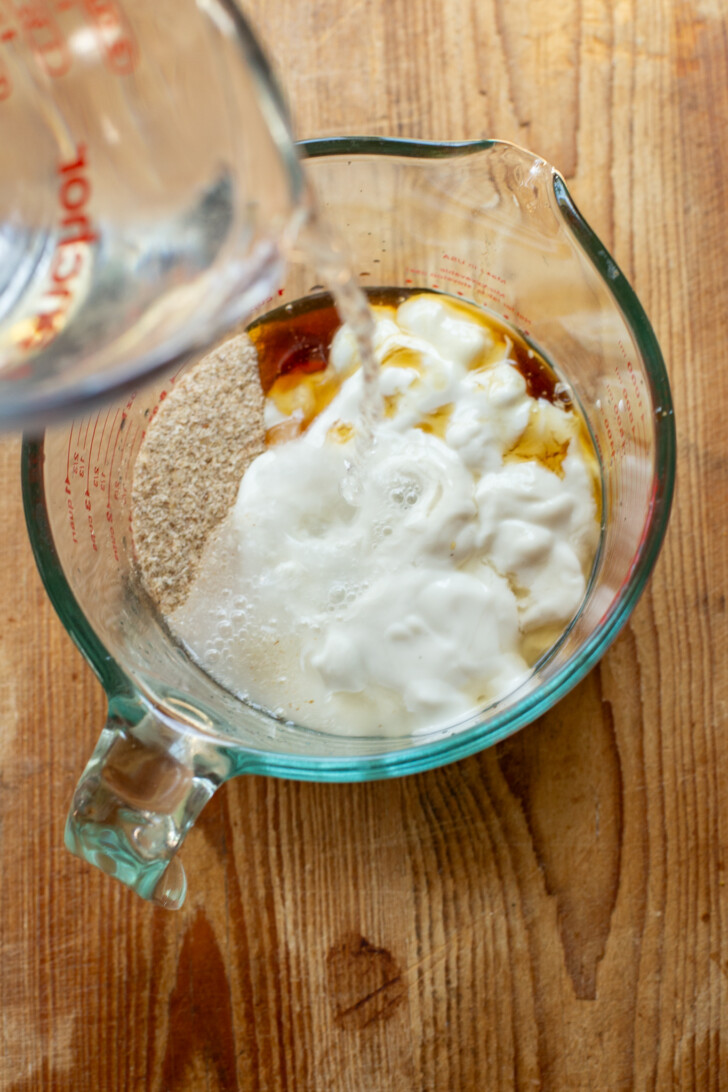
Make the psyllium gel. Mix together the psyllium husk, sweetener, yogurt, apple cider vinegar, and water. Whisk and let it set for a few minutes until thickened and gel-like.
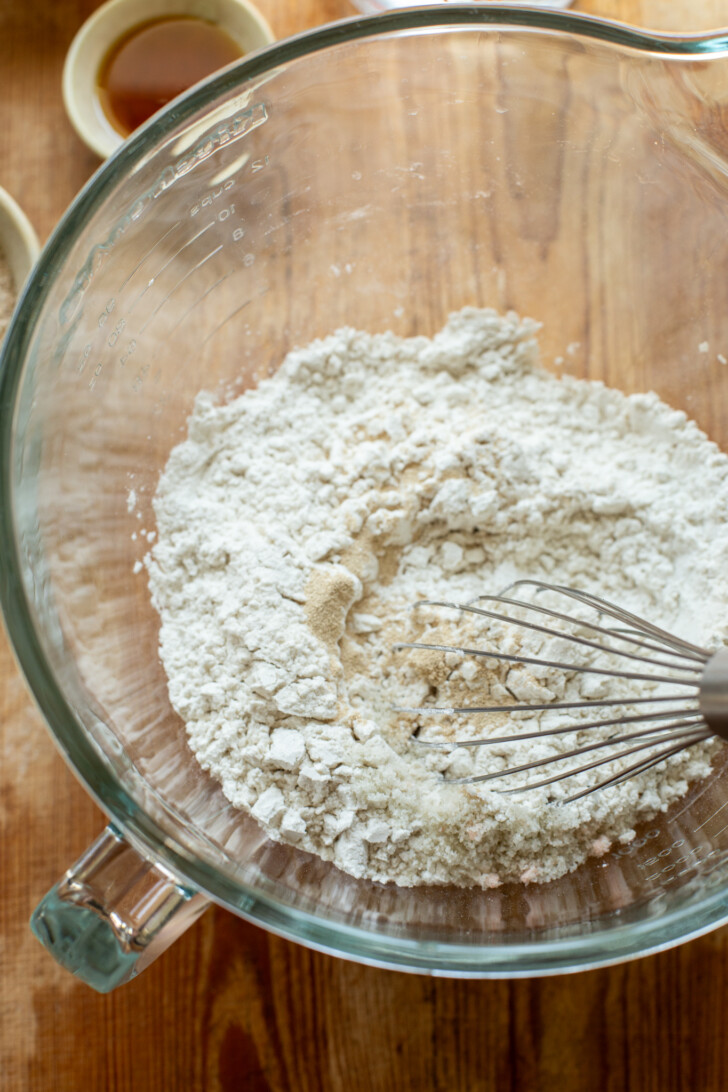
Mix together your dry ingredients. In a large mixing bowl or the bowl of a stand mixer, whisk together the gluten-free flour blend, instant yeast, and salt. Whisk to combine.
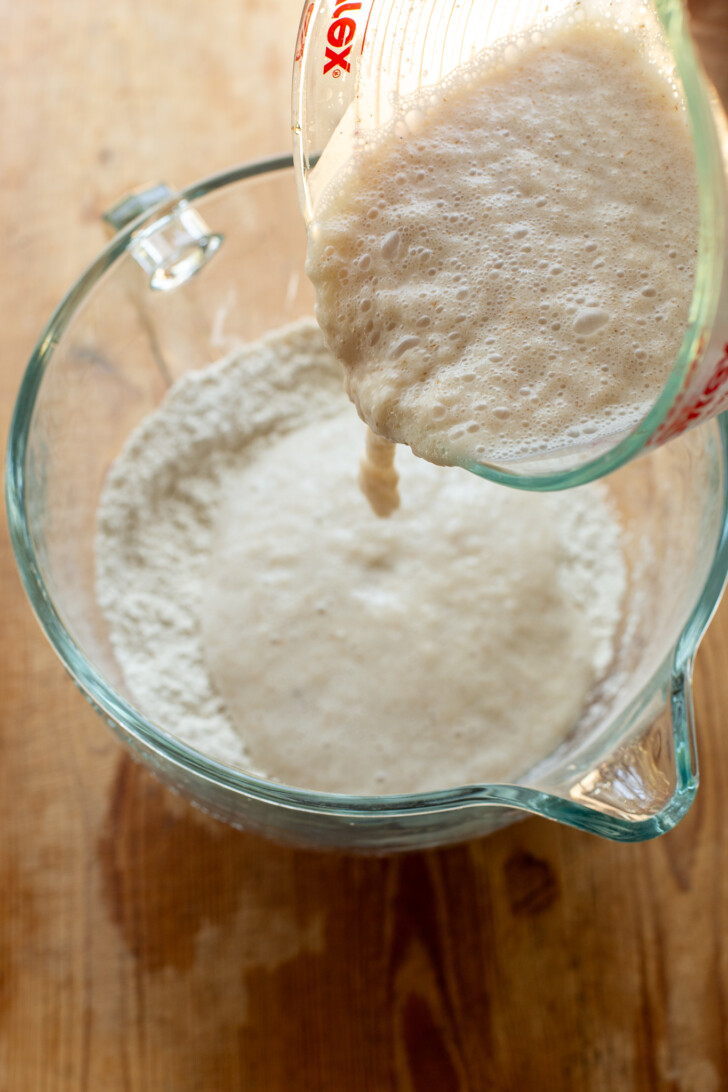
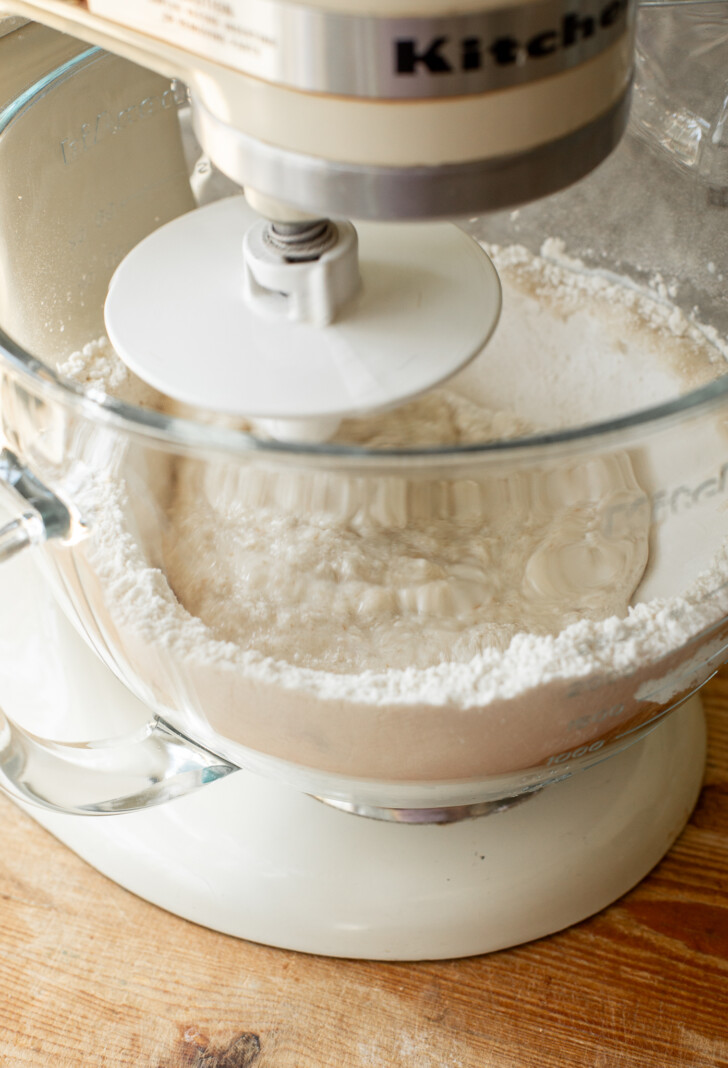
Combine everything and form into a dough. I mix everything in my stand mixer with the dough hook, but you can also do this by hand. If mixing by hand, I like to use a dough whisk to get it combined. Then, turn it out onto the countertop and use my hands to knead the rest of the flour in. The dough should feel pretty soft and puffy – this is not a super dense dough.

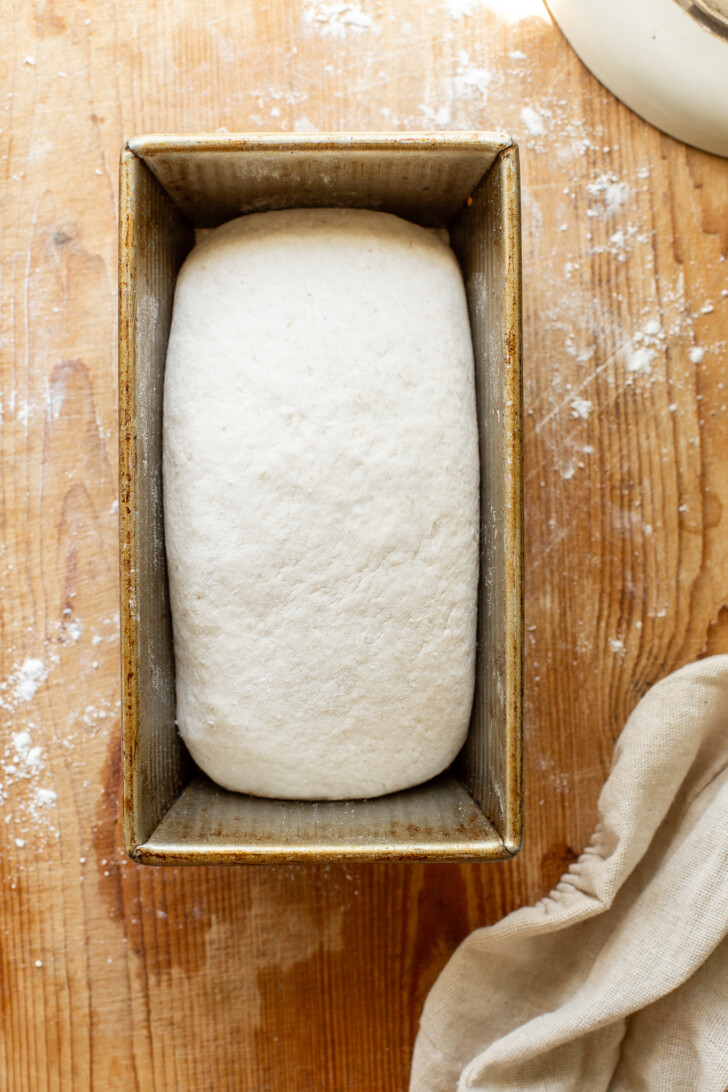
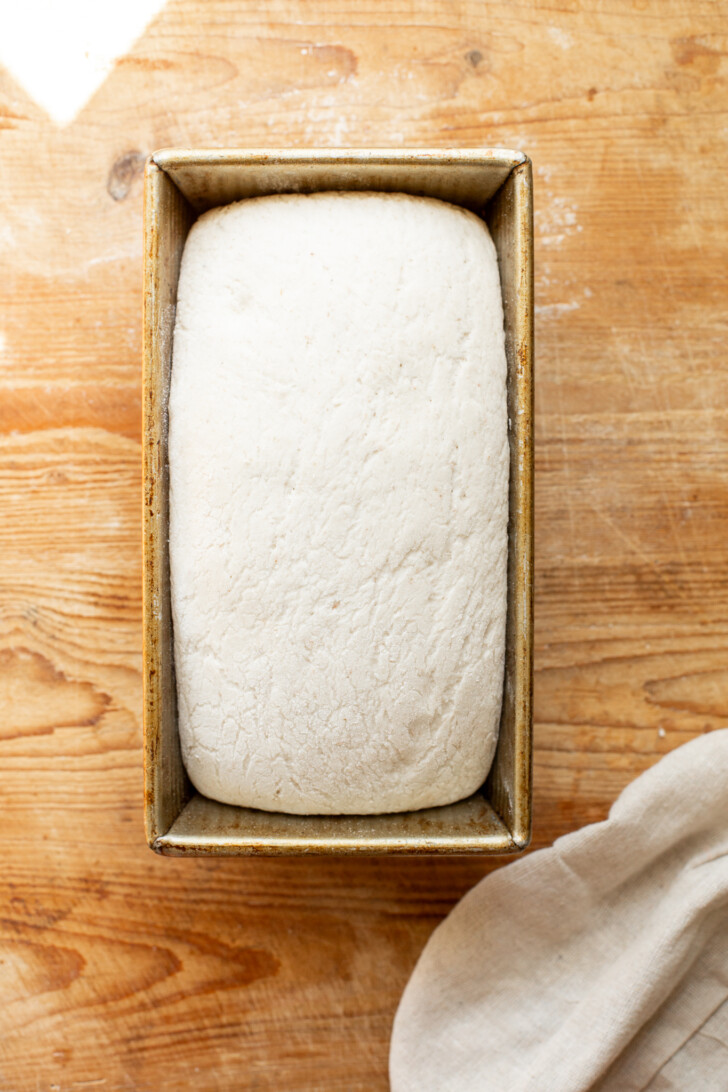
Knead and shape the dough. Use your hands to knead the dough into your desired shape/shapes. Then, you’ll place it in the banneton or loaf pan for the proof.
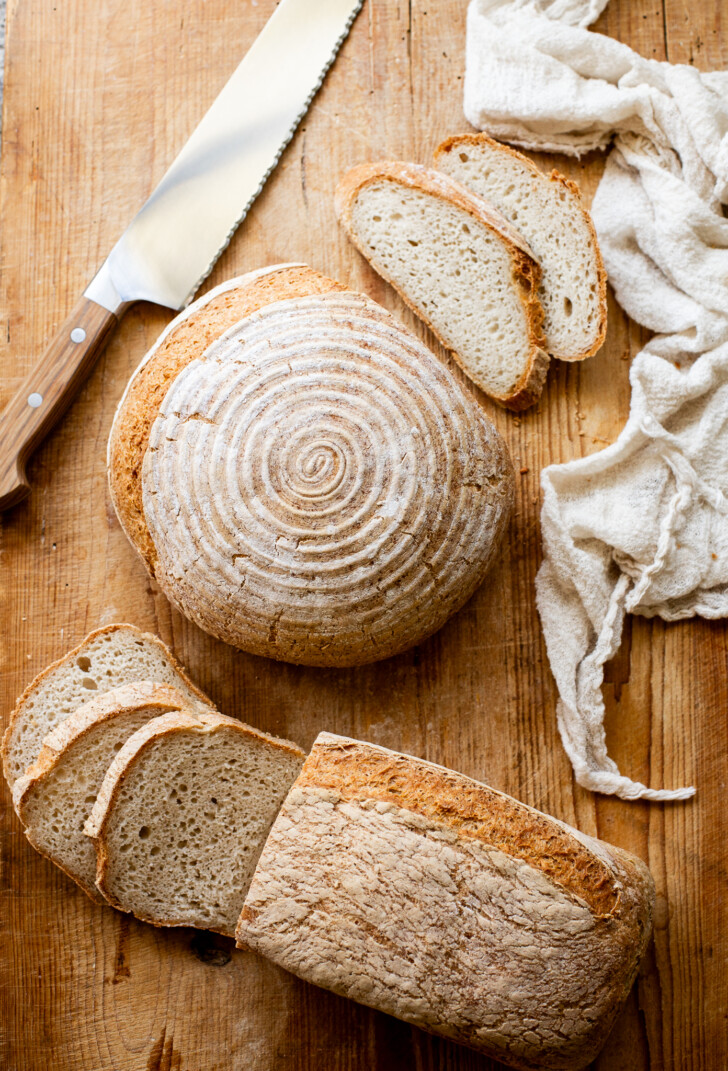
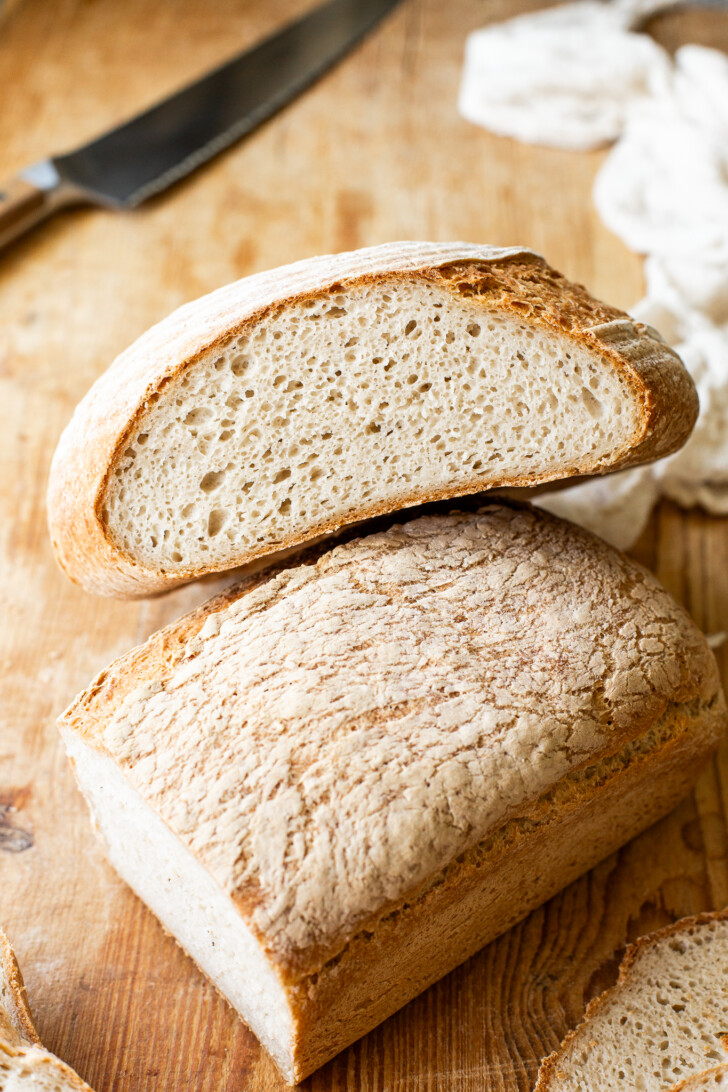
Rise, score, and bake! Let the loaf rise for one hour in a warm place, or until it’s light and puffy to the touch, and preheat the oven to 425℉ while it rises. Once the bread has risen, score it with a knife or lame (flipping it out of the banneton onto parchment, or a silicone sling if baking in a Dutch oven). Then, place it into your baking vessel. Bake for 1 hour and 20 minutes, removing the lid for the last 20 if baking in a Dutch oven.
Remove from the baking pan. Turn the oven off, place the loaf directly on the oven rack, and prop the oven door open. I usually use a wooden spoon for this. Let the bread start to cool inside of the oven for 30 minutes to 1 hour. This helps to finish cooking off any gumminess inside of the loaf.
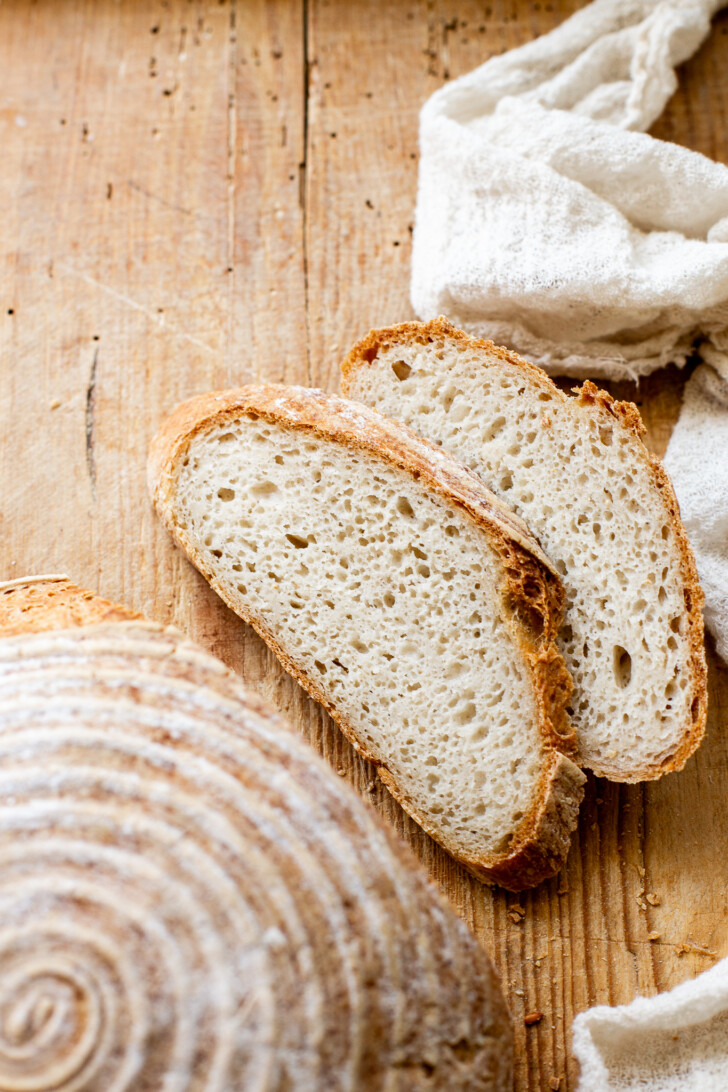
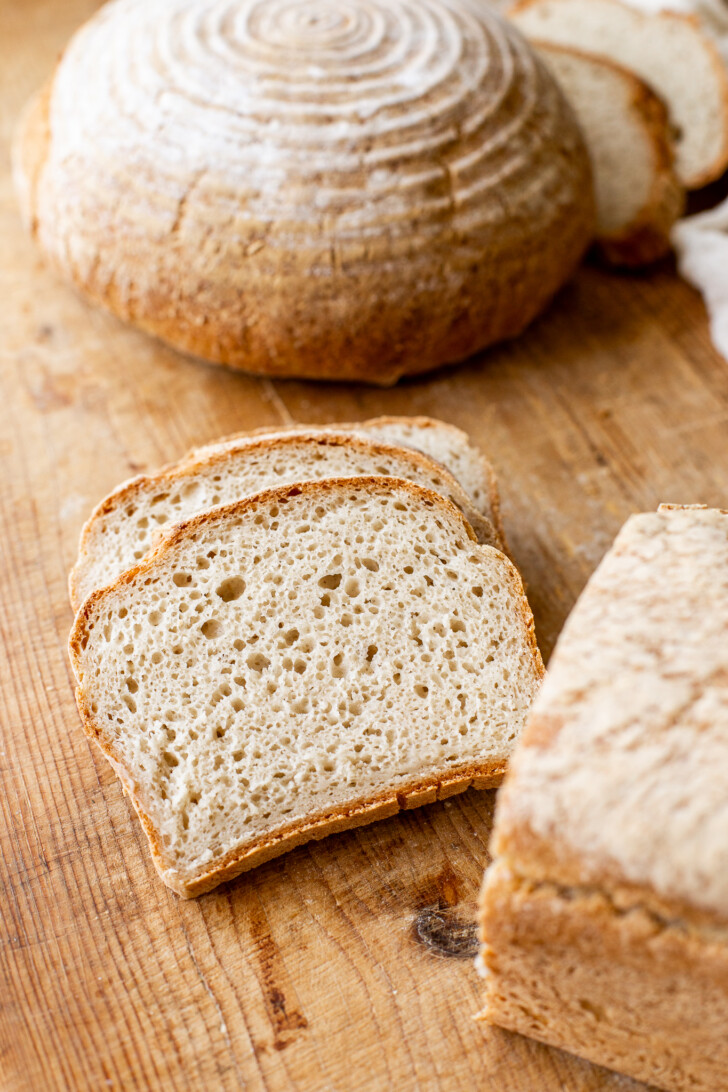
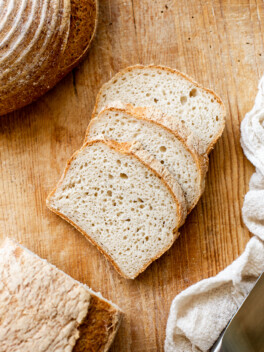
Cool completely. This is definitely the hardest part, but you really need to let the loaf cool completely so the inside can set. I usually try to let it cool overnight. You definitely want it to be fully cool to the touch before cutting into your loaf. Then…slice and eat! Definitely the best part :)
How to store gluten-free bread
At room temperature: You can also keep it in a bag or container at room temperature for up to 3 days. The bread will start drying out by day 3 or 4, so I recommend freezing it by then.
In the refrigerator: place into an airtight bag for up to 1 week.
In the freezer: I like to slice the whole loaf and keep it in the freezer. It will store well for up to 6 months. Place sheets of parchment between each slice to prevent them from sticking together.
To reheat from frozen: microwave the bread slices for 30-60 seconds or place in the oven at 350F for 5 minutes, or until you’ve reached your desired level of toastiness.
More gluten-free yeast bread recipes
- Classic Gluten-Free Bread
- Gluten-Free Bagels
- Gluten-Free Rye-Style Bread
- The Best Gluten-Free Pizza Crust
- Gluten-Free Cinnamon Raisin Bread
- Easy Gluten-Free Focaccia Bread
Gluten-Free Bread with Yogurt
Ingredients
- 18 g psyllium husk
- 20 g maple syrup or cane sugar
- 320 g hot water
- 200 g unsweetened yogurt, I used dairy-free cashew yogurt, don’t use a super thick yogurt here – a thinner one works great
- 5 g (1 teaspoon) apple cider vinegar
- 460 g gluten-free bread flour blend
- 12 g sea salt
- 7 g instant yeast, make sure it’s gluten-free, see Notes for how to use active dry yeast instead
Instructions
- In a bowl or large liquid measuring cup, mix together the psylium husk, sweetener, water, yogurt, and apple cider vinegar. Whisk together, breaking up the psyllium, and let it set for a few minutes until it’s thickened and gel-like.18 g psyllium husk, 20 g maple syrup or cane sugar, 320 g hot water, 200 g unsweetened yogurt, 5 g (1 teaspoon) apple cider vinegar
- In a large mixing bowl or the bowl of your stand mixer, mix together all of your flour blend, salt, and yeast. Whisk to combine.460 g gluten-free bread flour blend, 12 g sea salt, 7 g instant yeast
- Add the psyllium gel to your dry ingredients. If using a stand mixer, fit it with the dough hook and let it mix up the dough until combined and smooth, scraping down the sides a few times during the process, and flipping the dough around to make sure it’s fully mixed on the bottom too. You can also do this by hand. If doing it by hand, I like using a dough whisk to get it mostly combined. Then, turn it out onto the countertop and use your hands to knead the rest of the flour in. The dough should feel pretty soft and light – this is not a super dense dough. If your dough seems dense or dry, it could be from a difference in yogurt texture. Add up to 30g extra water to get to the right consistency if it seems necessary to make your dough workable!
- Use your hands to knead the dough and shape it into your desired shape. Then, place it in the banneton (seam side up) or loaf pan (seam side down) for the final proof.
- Cover with a tea towel and let the loaf rise for one hour in a warm place. It should just about double in size, and it will feel light and puffy to the touch when it’s ready. Preheat the oven to 425℉ while it rises with a Dutch oven inside if using.
- Once it’s risen, score the bread (carefully flipping it out of the banneton onto parchment or a silicone sling if baking in a Dutch oven). If you’re baking in a loaf pan, you may want to brush the top with oil to get a nice golden crust and help soften it slightly.
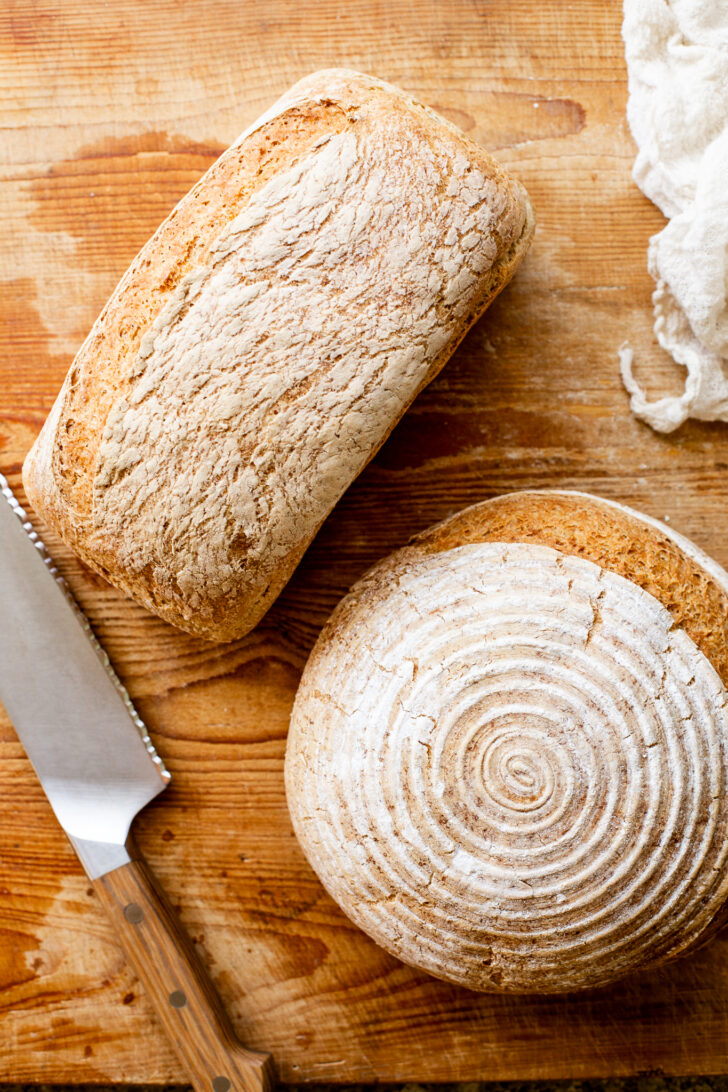
- Place into your baking vessel if using a Dutch oven. If using a loaf pan, just place it right into the oven. Bake for 1 hour and 20 minutes, removing the lid for the last 15 minutes if baking in a Dutch oven. It should be golden brown and crusty.
- Remove from the baking pan. Turn the oven off, place the loaf directly on the oven rack, and prop the oven door open. Let the bread start to cool inside of the oven for 30 minutes to 1 hour. This helps to finish cooking off any gumminess inside of the loaf.
- Remove from the oven and set on a cooling rack to cool completely. This is definitely the hardest part, but you really need to let the loaf cool completely so the inside can set. I try to let it cool overnight, but you’ll want to let it cool for at least four to five hours. It should be fully cool to the touch before cutting into your loaf.
- Slice and eat. This bread is great raw, toasted, or however else you want to enjoy it!
- To store, I like to slice the whole loaf and keep it in the freezer. It will store well for up to 6 months. You can also keep it in a bag or container at room temperature for up to 2 days, or in the refrigerator in an airtight bag for up to 1 week.
Notes
How to store gluten-free bread
- At room temperature: You can also keep it in a bag or container at room temperature for up to 3 days. The bread will start drying out by day 3 or 4, so I recommend freezing it by then.
- In the refrigerator: place into an airtight bag for up to 1 week.
- In the freezer: I like to slice the whole loaf and keep it in the freezer. It will store well for up to 6 months. Place sheets of parchment between each slice to prevent them from sticking together.
- To reheat from frozen: microwave the bread slices for 30-60 seconds or place them in the oven at 350F for 5 minutes, or until you’ve reached your desired level of toastiness.

Thank you for sharing this recipe. I’ve heard sourdough was good bread, but a challenge to make. I haven’t had sourdough bread for 20+ yrs so I don’t even remember what it tastes like. My bread turned out dense with a crispy crust, but I think it tastes good. My dough raised to the top of my loaf pan and then while baking it rose a little more. I think maybe it was dense because of the whole milk yogurt that I used. I did add in a little extra water. Is it possible that maybe I needed to add a little more water? Or did I maybe overwork it on the counter?
Hi Connie, increasing the liquid might have made it too dense – too much moisture can do that! Since I’m vegan, I haven’t tried it with a whole milk yogurt, but the extra fat in that may have also contributed to the density.
I feel like I missed something. The bread looked great before I baked it. The 425F seemed excessively high and I ended up with a brick. I read and reread the recipe but didn’t see anything about turning the temp down. I baked it in a loaf pan. Not sure if that makes a difference.
Thank you so much.
Hi Dawn, does your oven run hot by any chance? Did it seem over cooked? By brick do you mean dense, or burned? 425 is what worked with my oven but you may need to cook at 400 if yours seems to bake the bread faster! Sorry you had trouble with it – hope it’s still edible at least!
Thank you so much for your quick reply. It is just quite burnt on the outside. But when I cut into it this evening, the interior was great! So yummy and soft. I think I will try bumping down the temperature next time. Thank you for helping me trouble shoot.
Oh I’m so glad to hear the inside was great! I think a lower temp + covering with foil or something similar halfway through baking should help with any excess browning.
Hi! This looks amazing. I am unfortunately very sensitive to yeast and have been looking for a faily simple gluten and yeast-free bread recipe, and was wondering if you think I can remove the yeast from this recipe, and instead add a longer raising time (15-18 hours maybe?), and let the yogurt do the raising? Thank you!!
Hi Michelle, unfortunately no, yogurt can not work in place of the yeast. Sourdough bread would be my recommendation if you can’t have commercial yeast, and if you can’t have yeast at all, I’d look for a recipe that uses baking soda or powder for lift.
Hi Rachel, I am writing you from Spain :) . so happy to have found your page !
I have tried to make a variety of bread without gluten and the last one I made turned out great. Especially because of the Psyllium husk, which as you often say in your comments, is essential for a good glutenfree bread, I 100% agree. But this bread I make is made with riceflour and buckwheatflour, and as you probably know, buckwheat has quite an intense flavour. So, searching for other options online, I found your flour-blend and this recipe which I am definately going to try, But..one question, I make my bread in a breadmachine, do you think this recipe can be made in it? Any tips? I normally use the short normal programme which takes 2,5h more or less. Thank you so much and keep up the good work ! Big hug from here :)
Hi Stefi, I don’t have a bread machine so unfortunately I’m unable to test any of my recipes using one and I’m not sure how it would work out! While I hope it would, unfortunately I can’t make any guarantees. If you decide to try it, I’m super curious about the results! You could also try using the bread machine recipes you’ve used successfully but with my flour blend. Hope this helps!
That’s ok, no worries. I will do some experiments and let you know ;) .
I made this loaf and initially I thought my mistake was cutting into it before it had cooled down and it was still very gummy. Tried again and this time added a little more water as I had thick yoghurt and followed the instructions to the letter and let it stay in the oven on the rack while off for a few hours. Let it cool overnight and it’s sadly still a very gummy texture. Any ideas what’s gone wrong? I was so disappointed because it did taste really nice toasted but it’s so gummy and sticky.
Hi Brenda, sorry you had trouble. I wouldn’t recommend adding extra water to a recipe unless the dough won’t come together because it can throw off the ratio and you can easily add too much. Did you change anything else about the recipe?
Hi Rachel! I’ve been using your GF sourdough recipe which has been great! I want to give this recipe a try, for a quicker alternative! One question : is it possible to include sourdough discard in this recipe somehow? Maybe in place of the yogurt? I’d love to use up some of my discard and get the natural tang!
Hi Alisha, I haven’t tried this recipe with sourdough yet but it would probably work in place of the yogurt!
Hi! Do you use whole psyllium husk or powder? Can’t wait to try this!
Hi Liz, I always use whole psyllium. Enjoy!
Thank you so much!
Hi! Excited to try these! Have you made this into dinner rolls like your sourdough rolls? If so, how would you modify this recipe to make into smaller rolls? Thanks in advance!
Hi Caroline, I haven’t tried that! This dough is a bit softer so it would likely be harder to shape into individual rolls – you’d likely be better off tucking them into a pan closer together where they could make pull-apart style rolls if that makes sense. Just divide into the number you want, space evenly in a square pan or rectangular pan (like 9 rolls in a 9″ pan), brush with oil/butter, and bake for about 45 to 1 hour 15 minutes. I’m not sure about exact bake time since I haven’t tried it but I would recommend checking on them about 45 minutes. Hope this helps!
Thank you so much for the information and speedy reply! I really appreciate. Can’t wait to try recipe!
Of course – would love to hear your feedback once you try it!
Thank you for this recipe. I made this today with a few modifications, modifications in line with your notes: I used active dry yeast, mix of tapioca and arrowroot at about 35% of total flour volume (I didn’t have any potato starch), the rest a mix of sorghum flour and millet flour. I baked it in a loaf pan. The edges overcooked! Not quite burned, but basically hard as a rock. Inside seems good, it’s still cooling. It was almost impossible to get the loaf out of the pan. Do you have any advice on what might have gone wrong? I will try again. I’ll be able to make bread crumbs and salvage some of the first try. thanks for any advice!
Hi Emily, were you using a nonstick pan? If the pan is dark colored (like a dark metal) this can contribute to some overbaking. You can line the pan with parchment to help make it easier to remove in the future.
Recipe was fantastic and straightforward. It tasted better than many wheat based traditional sourdoughs. I subbed fine white rice flour for the brown rice since I only have white rice on hand and added some arrow root to the starches because I was low on tapioca starch. This will definitely be in regular rotation! Thank you!
Fabulous, thanks so much for the feedback, Jeremy! So glad you loved it.