This Fluffy White Cake with Vanilla Buttercream makes a two-layer white cake with a tender crumb that pairs perfectly with the creamy vanilla buttercream.
 It’s so surreal, but I’m already going back to school. It seems like just a few posts ago I was telling you all about my summer plans and how excited I was to be heading back to the sunny San Diego weather. Now, I’m in San Francisco with my dad, road-tripping right back up to Washington.
I’ve had a phenomenal summer, filled with tons of wonderful memories, vacations, friends, family, baking adventures, new experiences, and cakes.
Lots of cakes.
For some reason, I decided this summer that I really like making fancy, pretty, yummy layer cakes. They’re exciting to make, impressive, and because the store bought ones usually taste so gross and artificial, people are crazy impressed with a cake tastes amazing. You have no idea how many times I’ve heard “I don’t like cake, but this is so good” this summer. It seems most people just aren’t used to the joys of a homemade, completely from scratch cake.
 It’s a problem, and definitely one I want to help solve.
Cakes seem so daunting that most people pass them up to make cookies, or brownies, or whatever. But what I’ve learned this summer is that the challenge is fun, and after you come to terms with the fact that maybe your frosting job may not be as absolutely perfect as Martha’s, Rosie’s, or Amanda’s, you’ll have a blast trying out new frosting techniques and making layer cakes just for fun.
Yeah, most people don’t just make a layer cake for kicks and giggles. They’re a lot of work for that, but I like to.
That way, I can test recipes and try new frosting techniques before posting them on the blog. Usually, my “test cakes” don’t make it up here because of ugliness reasons. I’m not known for my amazing decorating abilities, and it usually takes me a few tries to nail a certain pattern or type of piping. It’s definitely not my forte.
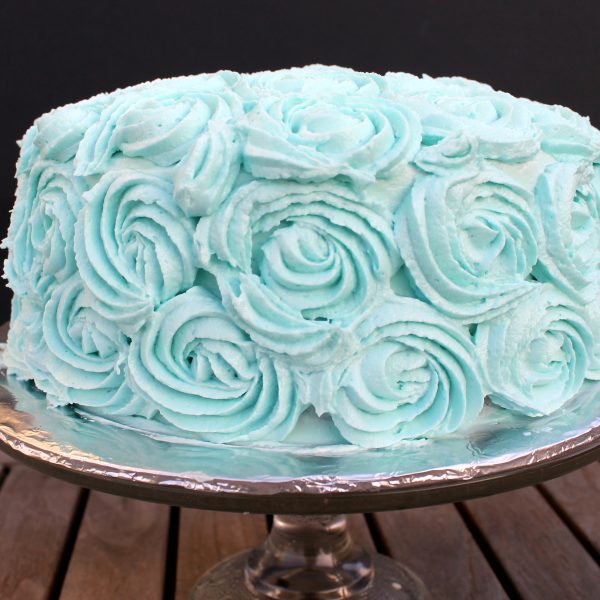
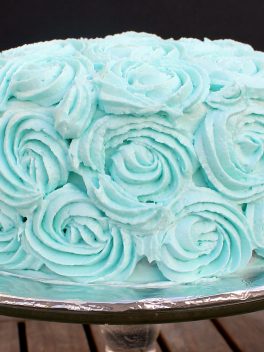
 However, when testing cake recipes for a cake I made this past weekend, I decided to test a new (and incredibly scary looking!) frosting technique. It looked so intimidating, and although I do frosting roses like this on my cupcakes, I didn’t know how it would work on the side of the cake. As you can see, it was way easier than I thought. By clicking here, you’ll find a tutorial for how to make the adorable frosting roses for your cake!
As for how the cake tasted, well, it’s delicious. I was looking for a light, fluffy white cake that mimicked the texture of Funfetti without all the artificial ingredients. This Whiteout Cake is delicious, but the cake doesn’t have the light airiness that I craved for this cake. I really wasn’t even planning on posting this, as it was a tester, but my dad come downstairs, saw it, and insisted that I at least take pictures.
I’m definitely glad he forced me into it, because after stealing a bite I knew it was a recipe I had to share! It’s the perfect fluffy cake, and if you add 1/2 cup of sprinkles to the batter, it’s a dead ringer for Funfetti cake, without all of the preservatives and artificial ingredients. Note that the method used is a backwards creaming method, so it’s really important not to over-beat past the times stated or it will come out tough! Hope you enjoy, and remember, layer cakes are fun! :)

Fluffy White Cake with Vanilla Buttercream
Ingredients
Fluffy White Cake
- 5 large egg whites, 5 oz./150 grams, room temperature*
- 3/4 cup whole milk, 180 mL/6 oz., room temperature*
- 2 1/4 teaspoons pure vanilla extract, 12.5 mL
- 2 1/2 cups sifted cake flour, 10 oz./285 grams–weighed after sifting
- 1 3/4 cups sugar, 12 oz./350 grams
- 1 tablespoon + 1 teaspoon baking powder, 19.5 grams
- 3/4 teaspoon salt, 5 grams
- 12 tablespoons unsalted butter, 6 oz./170 grams, room temperature and cut into cubes
Fluffy Vanilla Frosting**
- 3 sticks + 2 tablespoons, 375 grams/13 oz. unsalted butter, softened and cut into cubes
- 3 cups sifted, 480 grams/1 lb + 1 oz. confectioners’ sugar
- 2 tablespoons 30 mL heavy cream
- 2 teaspoons 10 mL pure vanilla extract
- Gel food coloring, if desired (I used a mix of turquoise and sky blue to achieve the color you see)
- Pinch of salt
Instructions
For the cake
- Preheat oven to 350°F. Grease, line with parchment, and flour two round 8-inch pans.
- In a medium bowl or measuring cup, combine and stir the egg whites, 1/4 cup of milk, and the vanilla. Set aside.
- In the bowl of an electric mixer fitted with the paddle attachment, combine the dry ingredients together on low speed (I use the “stir” setting on my mixer) for 30 seconds.
- Add the butter and remaining 1/2 cup of milk, and mix on low speed until just moistened. Increase to medium speed and mix for 90 seconds.
- Scrape the sides of the bowl and begin to add the egg mixture in 3 separate batches; beat on medium speed for 20 seconds after each addition.
- Divide the batter in two, spreading it into the prepared pans evenly with a small offset palette knife. If you have a kitchen scale, weigh to ensure 2 even layers.
- Bake 25-35 minutes or until a cake tester comes clean when inserted into the center. Be so careful to not overbake! Check cake at 20 minutes, but not before, and once you feel it’s almost ready, set the timer for 2 minute intervals. Mine took about 29 minutes to be done, so keep a close eye on them! Let cool on racks for 10 minutes before loosening the sides with a small metal spatula, and invert onto greased wire racks. Gently turn cakes back up, so the tops are up and cool completely.
- You can wrap tightly and store at room temperature for up to 2 days, refrigerator for up to 5 days, or frozen for up to 2 months, but I like to make the same day as serving, so if you are serving that day, go ahead and frost them!
For the frosting
- In the bowl of an electric mixer fitted with the paddle attachment, whip butter for 8 minutes on medium speed (I use “4" on my KitchenAid). Butter will become very pale & creamy.
- Add remaining ingredients and mix on low speed for 1 minute, then on medium speed for 6 minutes. Frosting will be very light, creamy, and fluffy.
- Best used right away.
Assembly
- Place bottom cake layer on cake plate or round thin cake board.
- Place 1 cup of frosting on top, and spread evenly with a small offset palette knife.
- Gently place 2nd cake layer face down on top. Place a generous scoop of frosting on top, spreading evenly with a small offset palette knife and working your way down the sides until you have a thin layer of frosting over the entire cake - a crumb coat. Chill until set — about 30 minutes.
- Remove from refrigerator and frost however you like! If you're doing roses (or other piping job), add more powdered sugar (I used about 1 1/2 cups) to stiffen the frosting and follow the instructions here.
- Store in a cake keeper at room temperature for up to 2 days, or in refrigerator for up to 5 days. Best eaten day 1.
Notes

I just love how you made those roses. What a gorgeous way to decorate a cake.
Do we make this cake wothout egg yolks?
There are no egg yolks in this cake – it’s a white cake.
yes
Cake with egg white
That is the prettiest shade of blue and the cake is beautiful! I love how you’ve also taken such care to list the measurements so meticulously. So glad your dad made you take the photos and share this recipe x
Thanks for posting. I have never made a cake from scratch and this was easy and fun!
Your cake looks gorgeous! I used your recipe for cake but a different one for the icing. I can’t vouch for the taste since the cake was made for a friend but he said it was delicious, and it sure smelled great in the oven! Here’s the link to my blog post (linking back to you, of course): http://beyond-bakery.blogspot.com/2012/11/rose-cake-vanilla-with-vanilla.html
Thanks for sharing!
This cake was terrible. it came out so dry and dense! I followed the recipe exactly like it said and I was so disappointed I made it for my mom birthday and she was sad that it didn’t turn out! I’ve made way better cakes! But the icing was delicious I will use it again.
Hi Savannah, I’m so sorry the cake didn’t come out for you! Unfortunately, there’s a lot of things that can go wrong with baking and I can’t tell you what happened. This cake has always worked for me and I wish I knew how to help. I’m glad you liked the frosting though!
Hello everybody! I’m yet another woman half blessed, half cursed with a greedy sweet tooth.
I am always wanting dessert, but lately I’ve been in search of more
healthy alternatives for obvious reasons. My favorite dessert is the cupcake and I have started a
website totally dedicated to healthy cupcake recipes.
There is the whole range of healthy cupcake recipes ever invented,
including vegan cupcakes, gluten free cupcakes, weight loss cupcakes, and
of course – fruit cupcakes.
How many cups of frosting does this make?
That cake looks very pretty and yummy! I found it on Pinterest and am for sure going to make it! I love that you convert the measurements! That is very helpful because it’s always so annoying when you have to convert them yourself! Thanks for that!
I made this batter twice and both times it only yielded barely 4 cups of batter- which does certainly not fill 2 8″ cake rounds.
Hi Jaime, I’m not sure what to tell you, since I’m not there in the kitchen with you. Every time I’ve made this batter, which is quite a few, I’ve never had this issue. Are you sure you’re using all of the ingredients in the correct proportions? If you could let me know about any changes you may have made, I may be able to help pinpoint the problem.
Does the egg whites need to be whipped before added to the cake
Nope! Just add them in as is and you’ll be good. Enjoy!