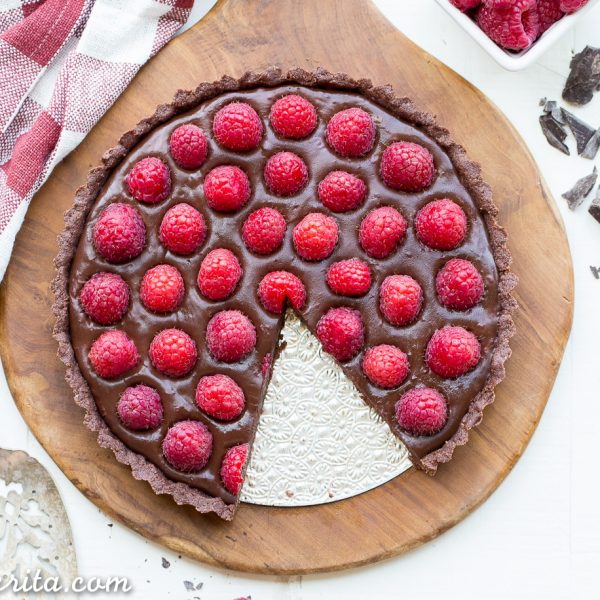
This No-Bake Raspberry Chocolate Tart comes together in just ten minutes! The no-bake gluten-free chocolate crust is filled with vegan chocolate ganache and topped with fresh raspberries for a decadent, guilt-free treat.

One of my absolute favorite parts about summertime is the berries. There’s nothing like a ripe strawberry that has juice dripping down your chin, or being able to pop sweet and tart raspberries in your mouth. I love all of them. As they come into season and get sweeter, brighter, and more affordable, they become a staple of my summer diet.
While I love to devour them alone, enjoying their sweetness and freshness, I also love to make (and eat) berry tarts. If you’ve been around Bakerita for a while…you’ve probably seen some of my favorites. This Chocolate Berry Tart is one my ultimate favorites and this Blueberry Crisp Tart with Oatmeal Crust is comforting and delicious.
This No-Bake Chocolate Raspberry Tart though, it might take the cake. In addition to being super easy, it’s also healthy – it’s gluten-free, refined sugar-free, vegan, and Paleo-friendly! Oh, and you don’t even have to turn on your oven. It’s perfect for those hot summer days when you can’t bear the thought of adding more heat to your house.
How to make the gluten-free no-bake chocolate crust
The tart crust is simple and chocolatey. It’s simple to make with just…
- Almond Flour – I always use superfine blanched almond flour for the best results
- Cocoa Powder – you want an unsweetened cocoa or cacao powder here
- Coconut Oil – refined is best if you want to avoid any coconut flavor
- Maple Syrup – honey or another liquid sweetener will also work.
- Pinch of Salt
To make, simply mix all of the ingredients together with a quick stir until they stick together, and then press into the pan.
How to make chocolate ganache tart filling
The chocolate filling is just as easy to make!
- Finely chop the chocolate with a serrated knife and place in a bowl.
- Bring full-fat coconut milk to a simmer and pour it over your chocolate.
- Let it sit for a minute, add some raspberry preserves, and stir until smooth and creamy.
- Pour it into the crust and top with raspberries.

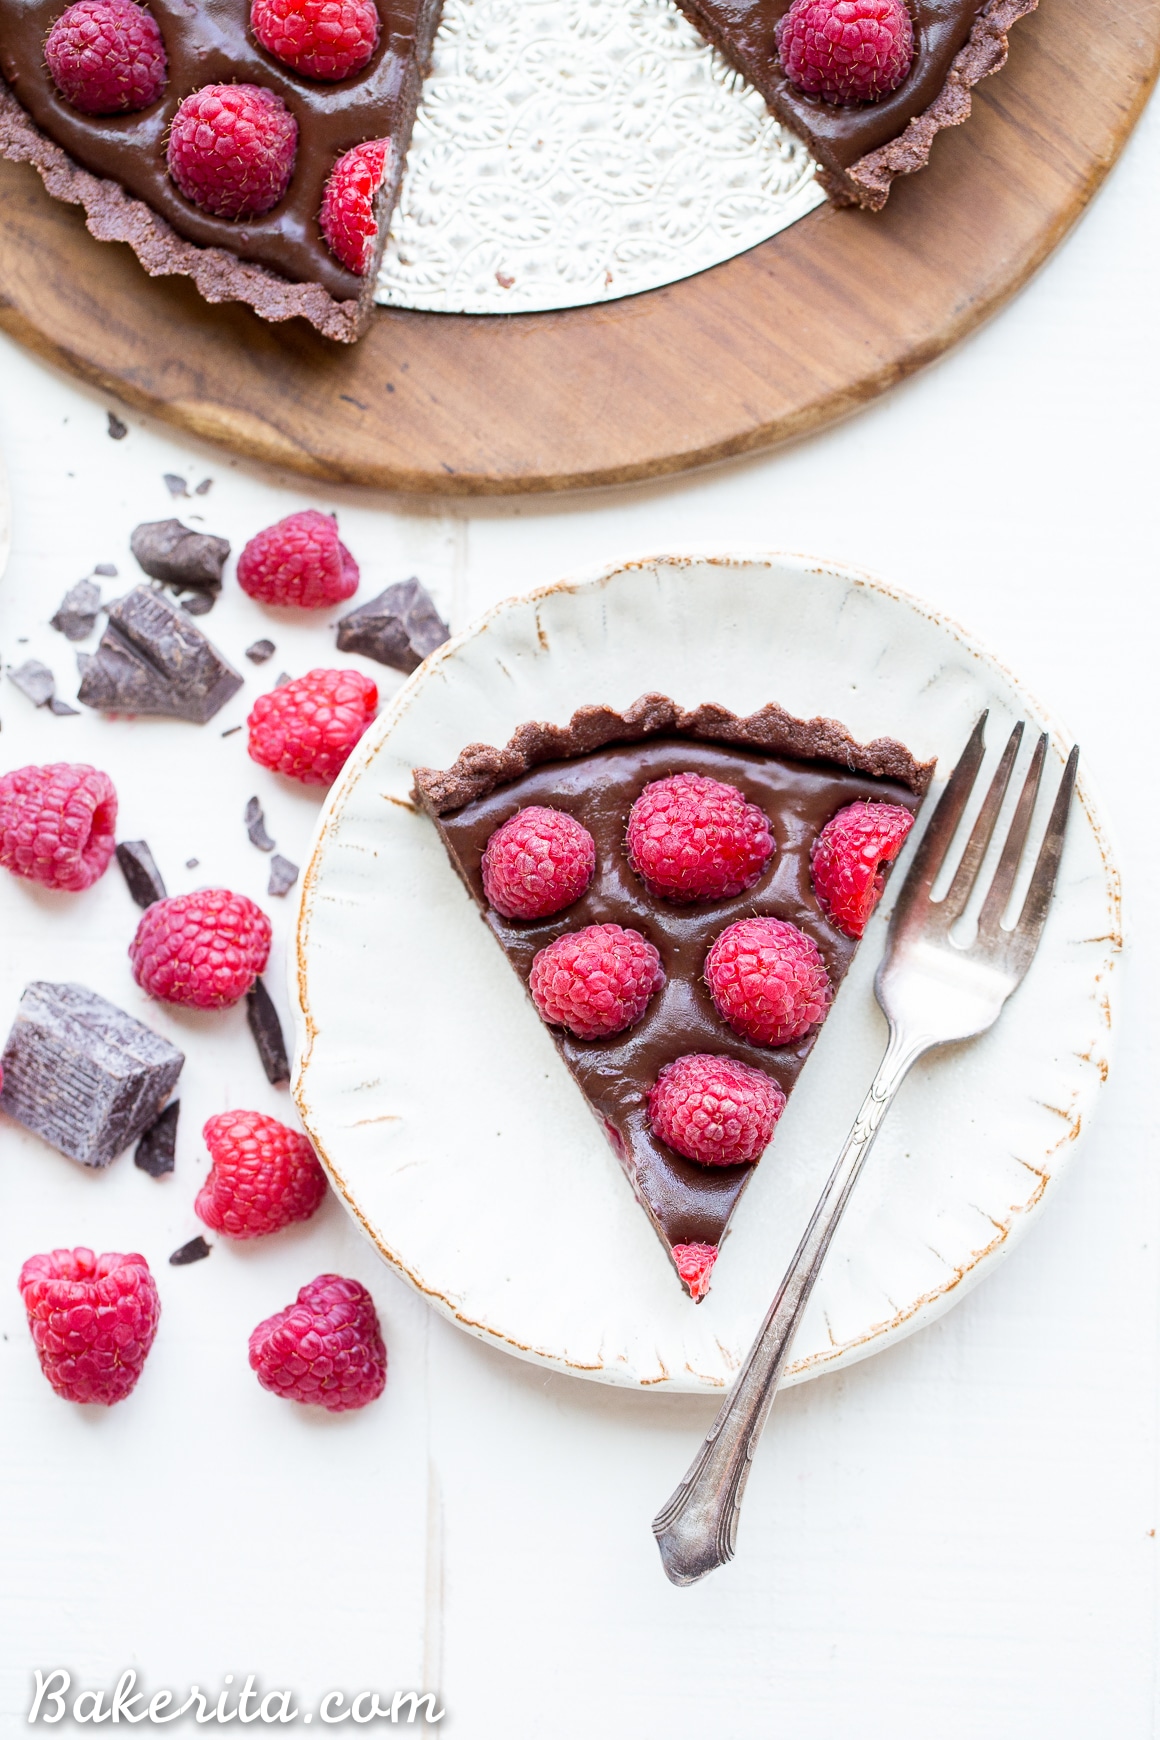
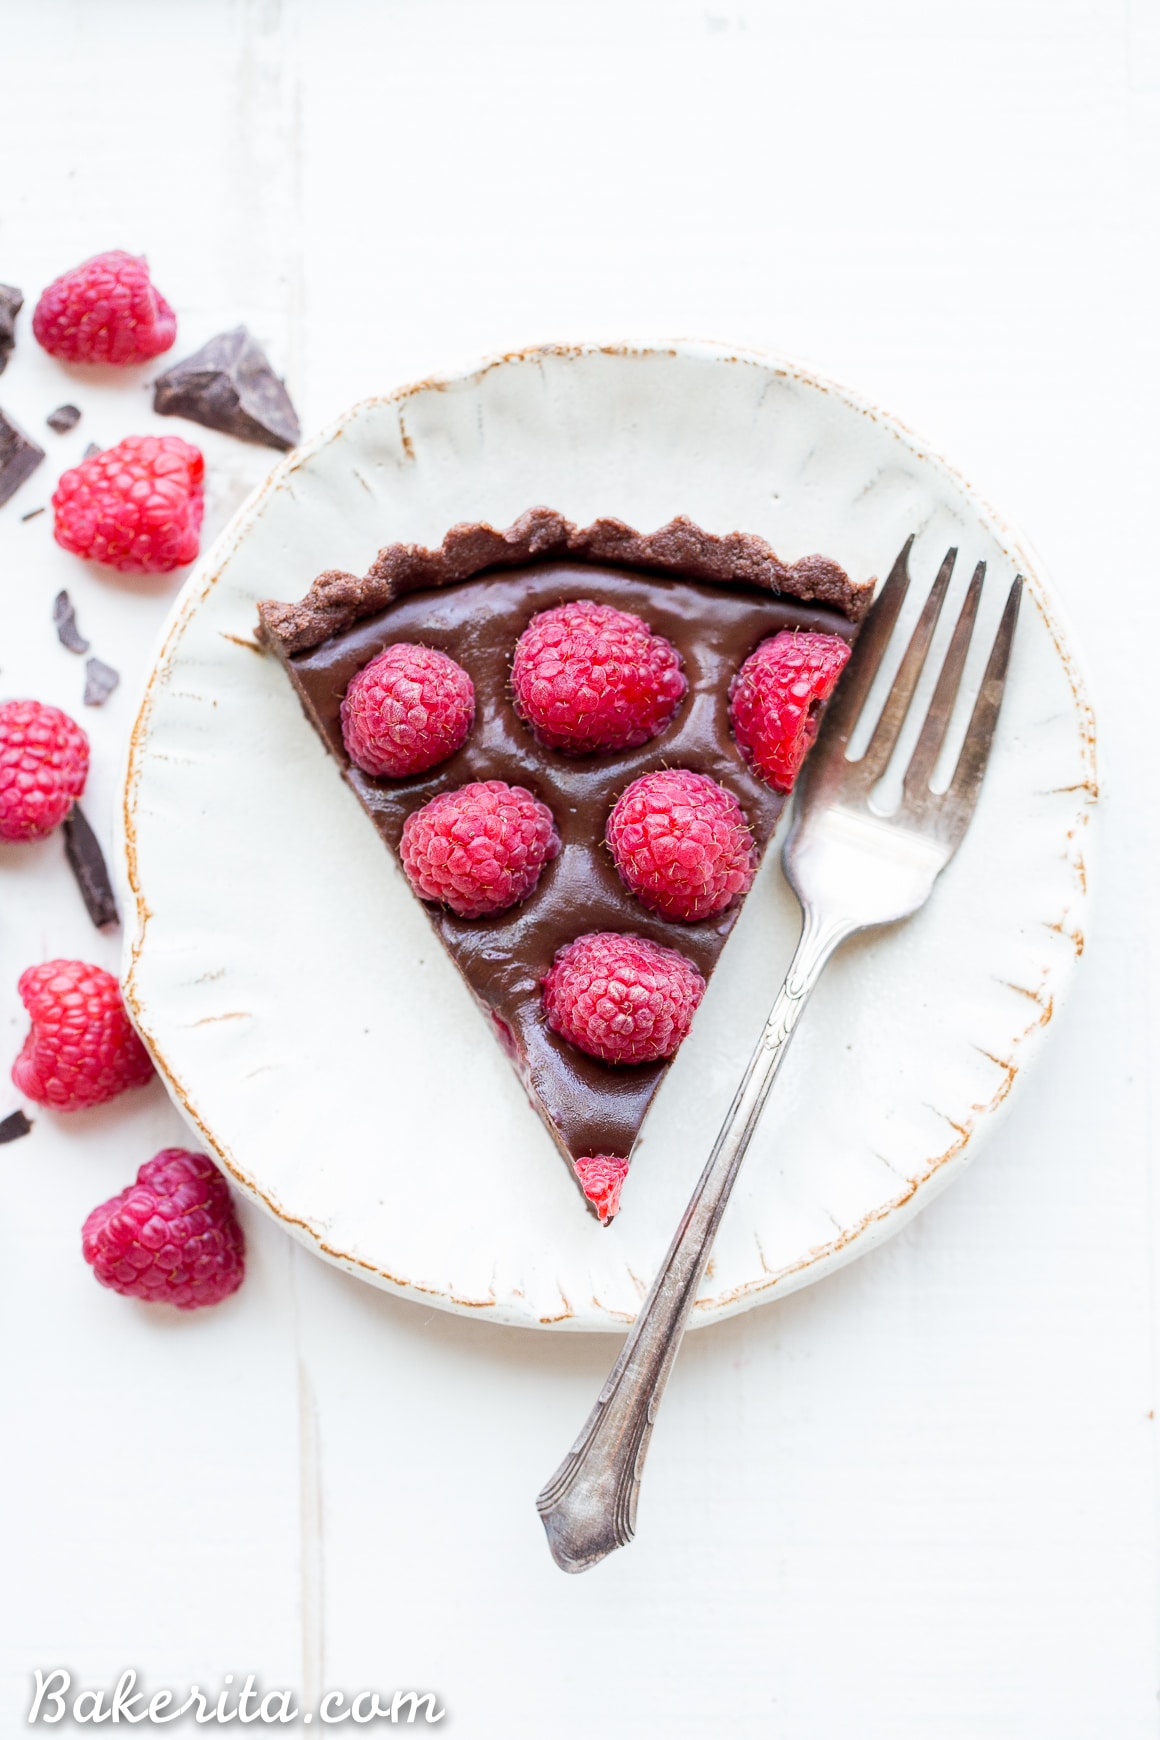
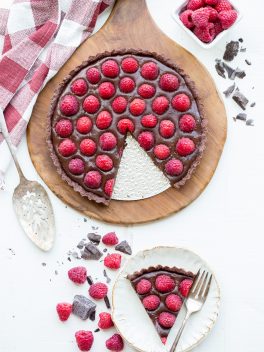
After you finish pouring in the vegan chocolate ganache filling, garnish with gorgeous, fresh raspberries! I arranged mine simply, packing the raspberries together for maximum raspberry flavor. I love Driscoll’s raspberries (and all of their berries) because they’re always sweet and always delicious. They add the perfect touch of fruity sweetness to this dessert.
This healthy, fruity dessert is sure to be a favorite and even though it’s healthy, you totally won’t get the looks people give when they hear the words “healthy” and “dessert” next to each other.
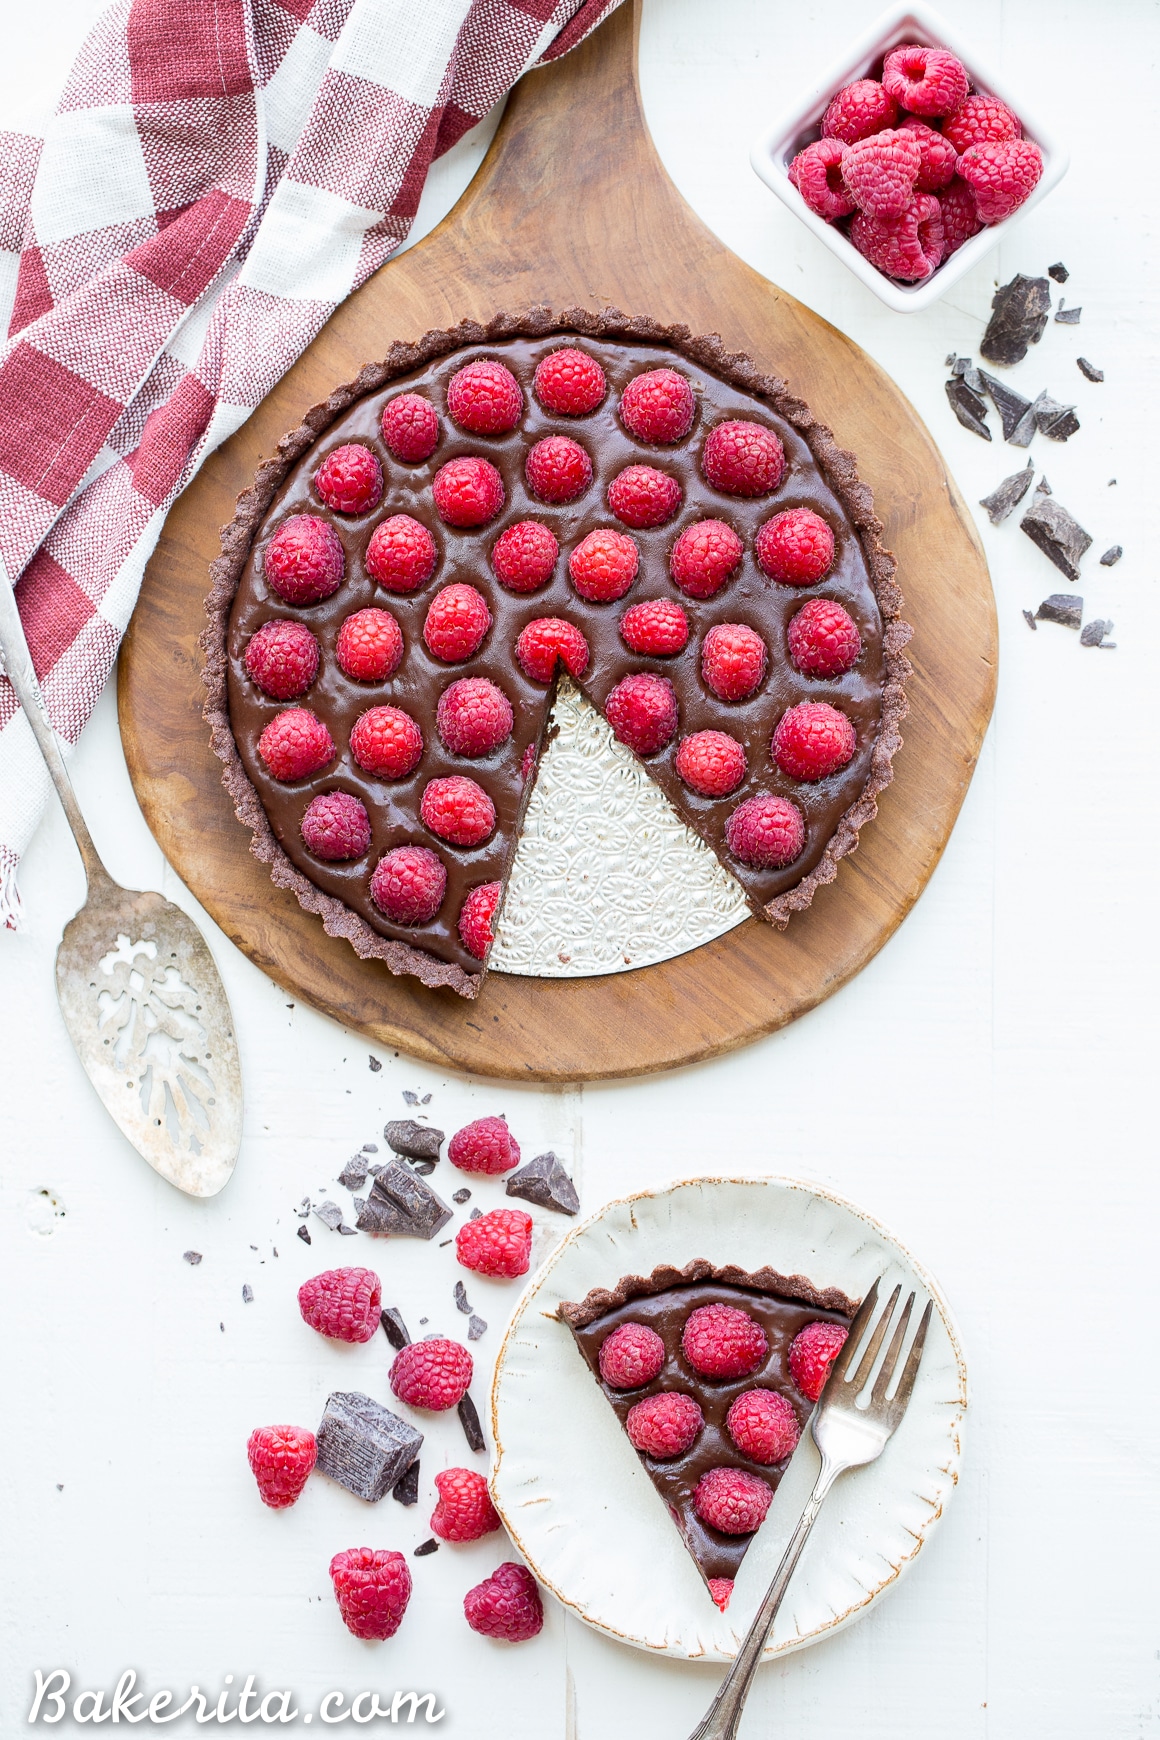
We finished this tart SO quickly in my house. Like, record-breaking quick, because it was so darn good. Creamy and rich from the chocolate, and the fruit added just the amount of freshness.
Want to make it ahead of time? This tart stays great in the refrigerator for about 2 days – after that, the raspberries get a little less fresh and it’s better as leftovers.
This tart is the perfect quick treat to enjoy at the end of your day, but it’s gorgeous enough to serve at any summer gathering you have. It’s a dessert that’s sure to please! Enjoy :)
Mo vegan tart recipes you’ll love:
- Blueberry Crisp Tart with Oatmeal Crust
- Strawberry Lemonade Tart
- No-Bake Chocolate Pomegranate Tart
- Chocolate Strawberry Tart
Vegan No-Bake Raspberry Chocolate Tart
Ingredients
For the crust
- 2 cups (192g) almond flour
- 1/3 cup 28g unsweetened cocoa powder
- 1/3 cup 67g coconut oil, melted
- 2 tablespoons 40g pure maple syrup
- Pinch of kosher salt
For the filling
- ½ cup 114g canned full-fat coconut milk
- 6 oz. 170g bittersweet chocolate, finely chopped
- ¼ cup 80g raspberry preserves, 100% fruit
- 2 cups 240g fresh raspberries
Instructions
- Lightly grease a 9-inch pan with a removable bottom with coconut oil.
- In a bowl, combine all of the ingredients for the crust and stir together until it comes together and sticks together when pressed. Press evenly into the prepared tart pan, using the flat bottom of a glass or measuring cup helps with this. Set aside.
- Finely chop the chocolate, using a serrated knife helps a lot with this. Place the finely chopped chocolate in a large bowl.
- In a small saucepan, bring coconut milk just to a boil. Pour hot coconut milk over the chocolate, shaking the bowl to make sure it’s all covered, and let stand 1 minute. After a minute, stir until smooth and creamy. Whisk in raspberry preserves. Pour the filling into the prepared crust.
- Garnish the top with raspberries while the chocolate is still warm, pressing them in so they stick.
- Place tart in the refrigerator to set and cool completely, about 1-2 hours. Slice and serve.
- Store all leftovers in an airtight container in the refrigerator.
Paid Endorsement from Driscoll’s – Visit www.driscolls.com for more berry recipes.


Thank you for this awesome recipe! I made your recipe and wrote a blog about it!
Can you use unsweetened dark chocolate in place of bittersweet chocolate? Want to make this for a friend who can’t have sugar.
Hi Stephanie! You can, but be sure to add some stevia or another sweetener or the tart will be far too bitter – unsweetened chocolate is pretty much inedible without any sweetener added. Just add stevia drops to taste! Enjoy.
Is the coconut milk sweetened or unsweetened?
I always use unsweetened canned coconut milk.
This recipe was delicious and easy to make, and of course caught everyone’s eye because it was so beautiful! But I’m disappointed to say that even after a half hour in the freezer and four hours in the refrigerator, it melted after being room temperature for ten minutes! It was liquid practically! What can I change or add to make it thicker? Because otherwise this recipe would have been perfect! :-(
Hi Meredith, I’m so sorry you had troubles! That’s so odd. The most likely issue I thought of is the coconut milk – did you use full fat canned coconut milk? It’s much thicker than the coconut milk that can be found in the refrigerated section now, and could’ve caused it to be runny. The filling is essentially a ganache, so the thickness can be adjusted pretty easily by adding additional chocolate or reducing the amount of liquid. I hope this helps! Again, my apologies you had this issue. Happy New Year!
hi! love this recipe :)r. i was wondering – can coconut flour substitute the almond flour? or is coconut flour only suitable for baked recipes? thanks so much!
Hi Kelan – coconut flour is much more absorbent than almond flour, so it probably would make the crust way too dry! You could substitute any other nut flour, but I wouldn’t recommend coconut flour.
Hey! This looks fantastic. I was wondering if I could substitute the coconut milk for Greek yogurt! I’m not a fan of the taste of coconut milk. I’m looking forwards to making this!
Could I add lime juice instead of the preserves as well? Thanks.
Also, you can definitely add some lime juice! Enjoy.
Hi Angie, I don’t think Greek yogurt would substitute very well since you have to heat it up, but you could sub an equal amount of heavy cream or 1/3 cup almond milk. Enjoy!
You can substitute drained firm tofu. Use whatever sweeteners you like. We use monkfruit
Thanks for sharing, Patti!
How do I make the raspberry preserves? Or is this something I buy?
Thank you
Hi Leanne. I purchased “100% fruit” fruit preserves for this recipe, though you could certainly make some yourself if you wanted.
This tart looks delicious and I can’t wait to try it myself! Is it best to make this tart the day you plan on eating or can it be made ahead and kept in the refrigerator until you get ready to serve?
Hi Traci! I would recommend making it the day your serving for the best result, but if you want to make it ahead of time, I would recommend just holding off on adding the berries on top until right before serving so they’re the freshest. Enjoy!
Can I sub condensed milk for the coconut milk?
Hi Nancy, I suppose you could, but it will add a lot of sweetness so you may want to use a very dark chocolate. Enjoy!
Hi Rachel,
There is a VERY important last step to this recipe that I highly recommend you add – REFRIGERATE! It is completely missing from your recipe!!!! I had no idea that I was supposed to refrigerate this after making it, and even though I only had 2 hours between making it and serving it, I didn’t refrigerate it at all and it was a total runny disaster. For people unfamiliar with using coconut oil, we don’t know that it needs to solidify, I asked my friends and they told me I should have frozen the crust a bit before adding the chocolate/coconut oil and then refrigerate the whole thing. PLEASE update your recipe! Thank you!
Hi Kristen – thank you for pointing out my mistake! I can’t believe that the recipe didn’t have instructions to refrigerate, I think the last line of instruction may have been deleted actually. I’m so sorry! I updated it now, because yes, it definitely needs to be refrigerated before it can even be cut.