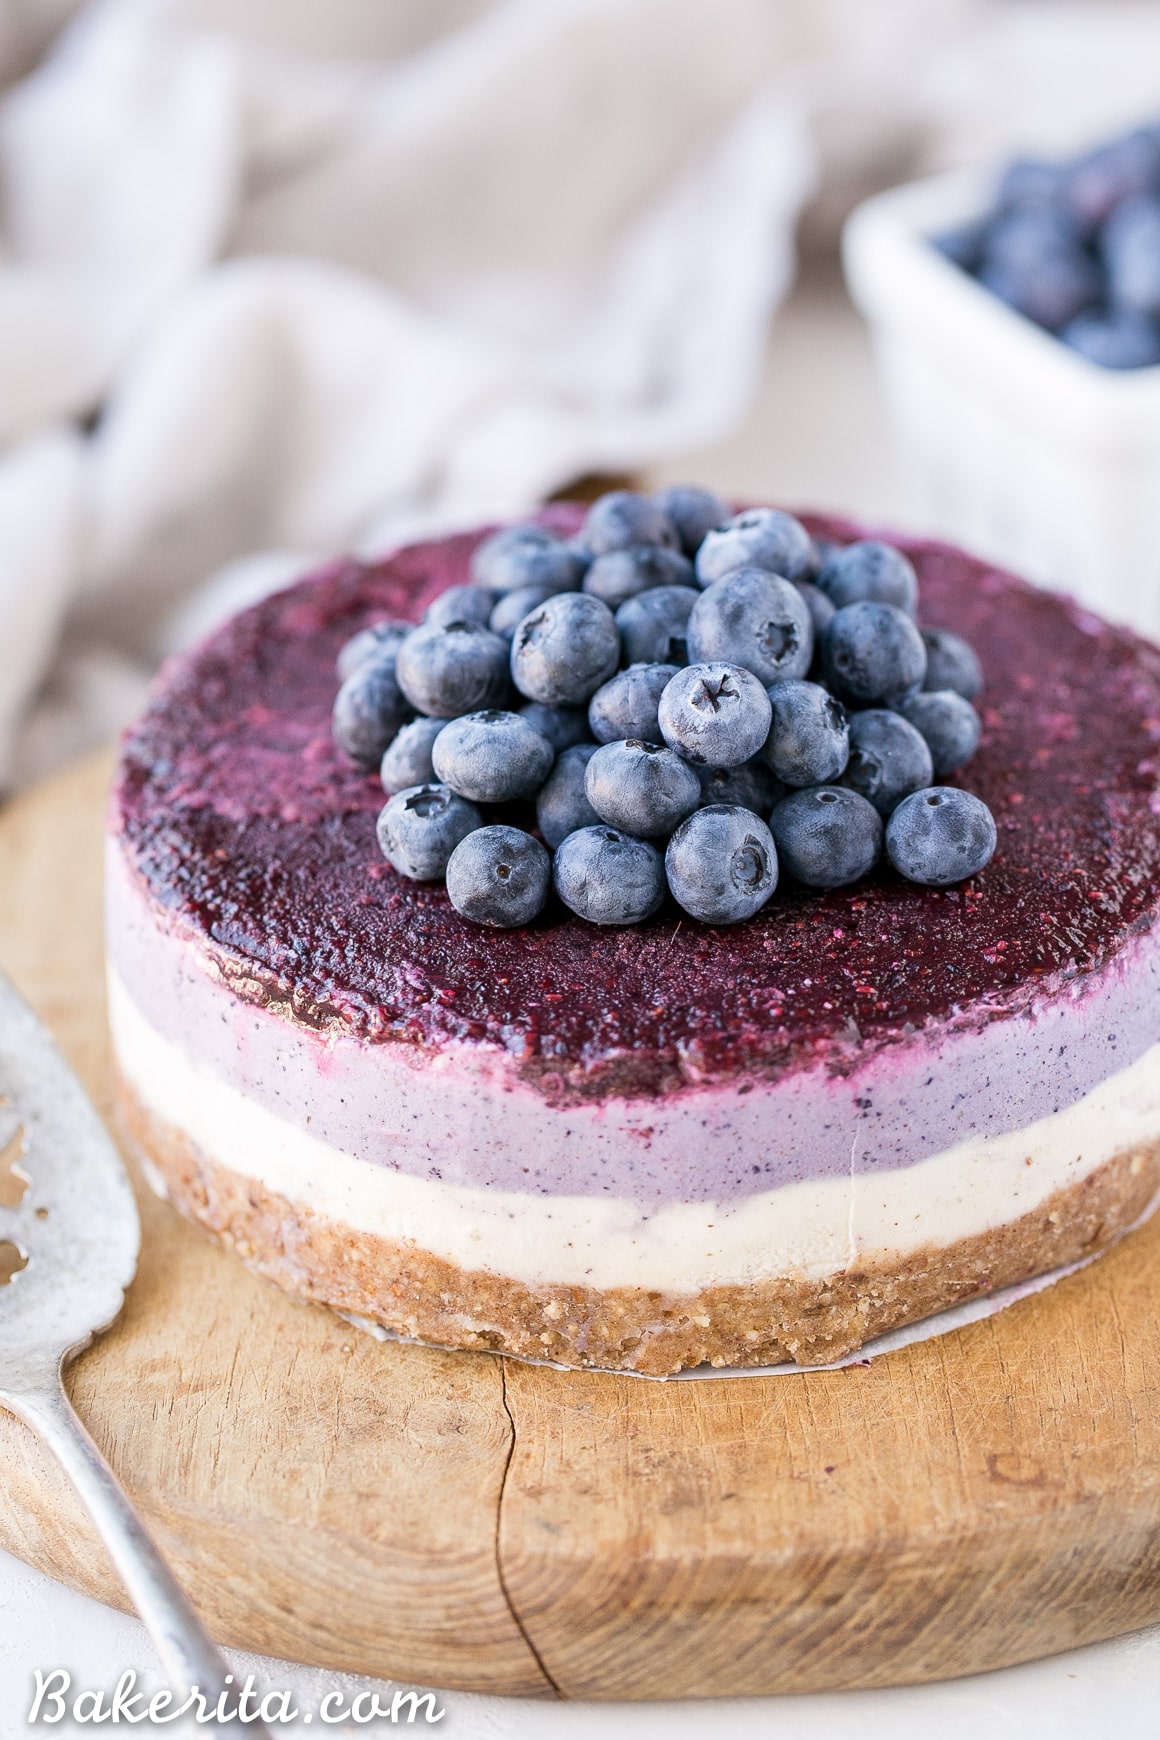
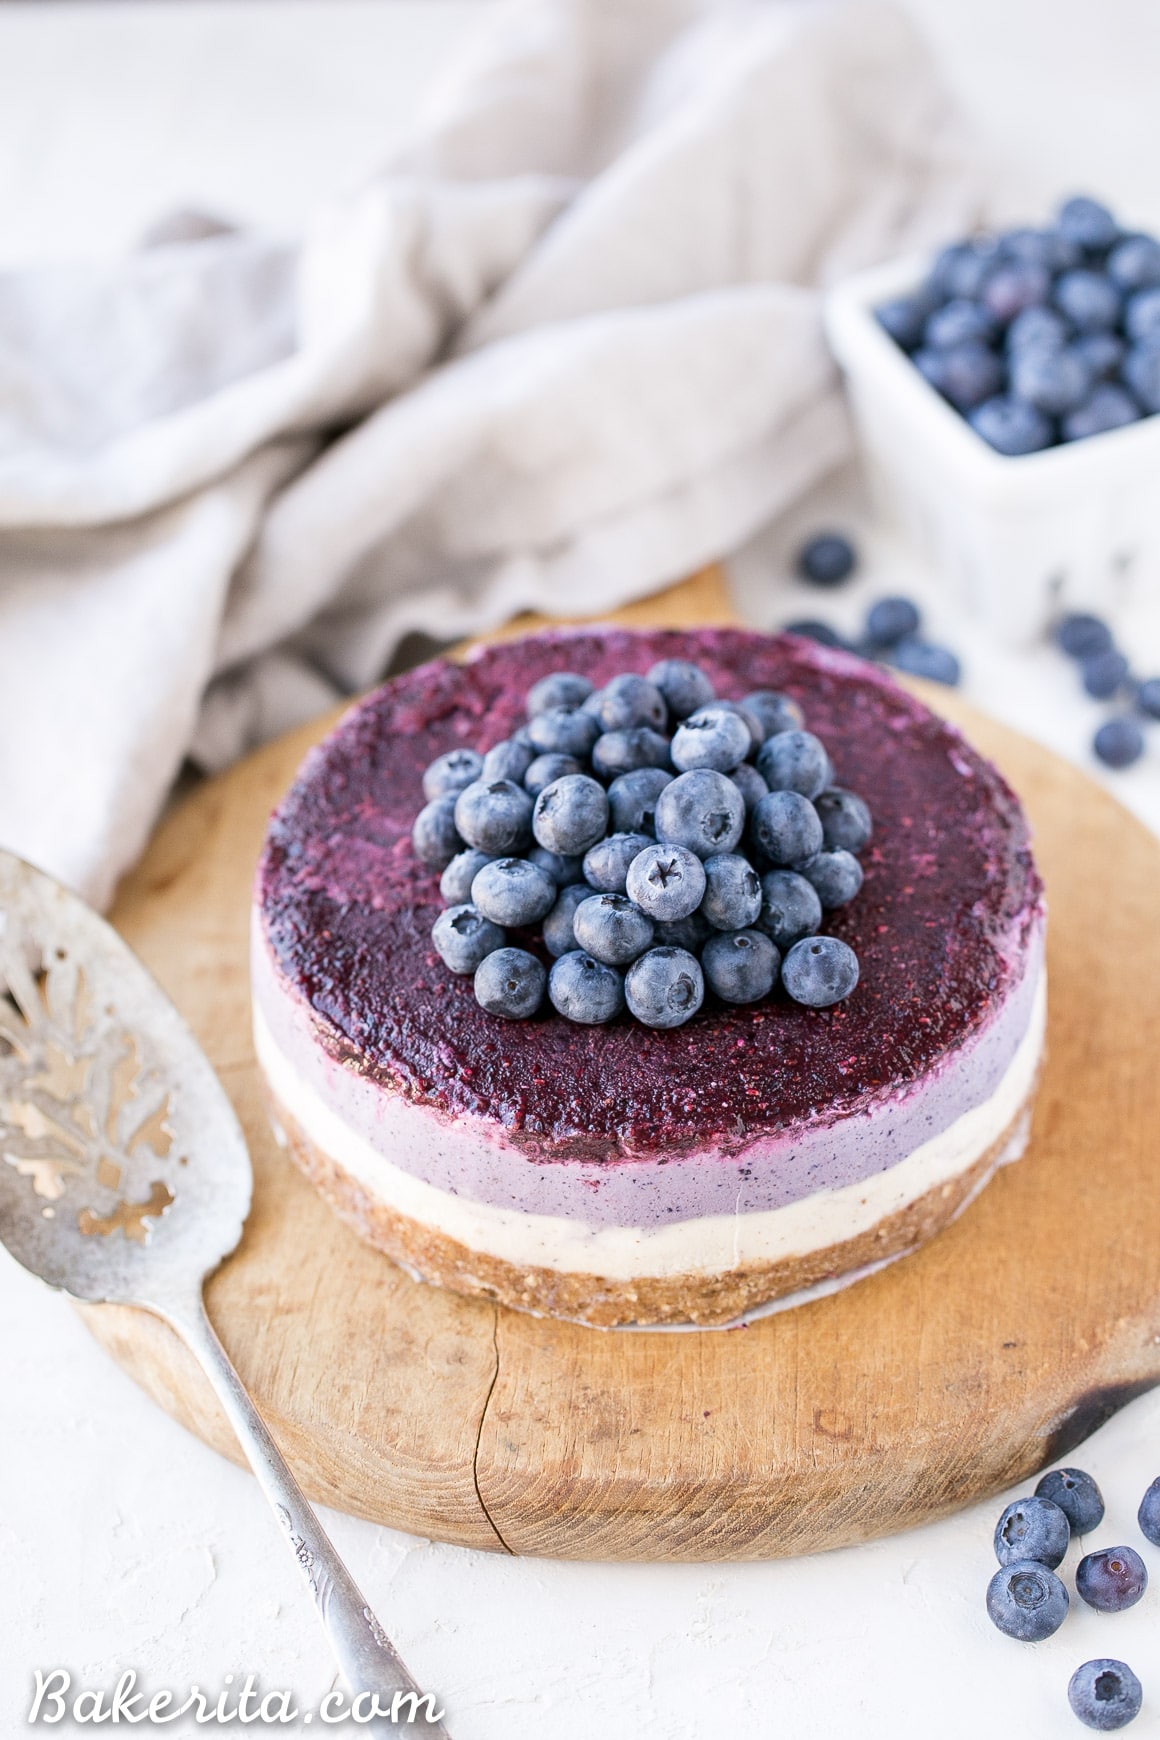
This no-bake Layered Blueberry Vegan Cheesecake is simple to make, Paleo and gluten-free, and a total stunner! Made with soaked cashews and full-fat canned coconut milk, the cheesecake layers are lusciously smooth and creamy with a tart, fruity topping. The date-based cheesecake crust is also gluten-free.
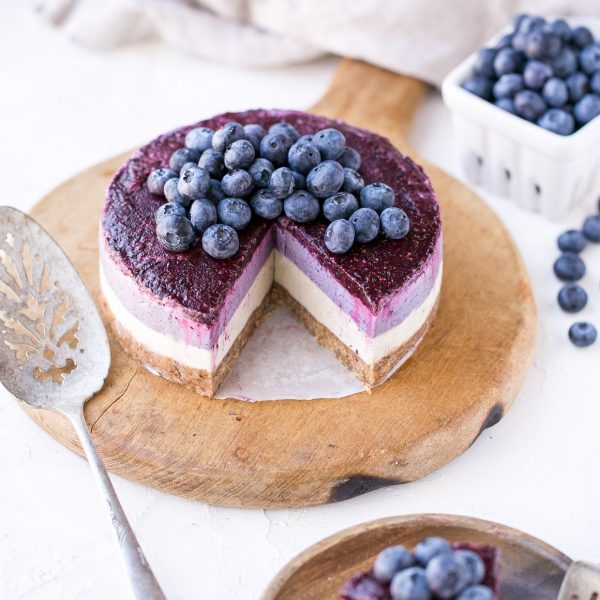
Looking at the pictures of this no-bake layered blueberry cheesecake makes me seriously giddy inside! Isn’t she a beauty?!
I’m pretty sure no-bake, raw vegan cheesecake recipes are my new favorite thing. While I’ve always loved a good no-bake dessert recipe, the love affair with cheesecakes *specifically* began when I realized how beautiful and photogenic they can be after photographing this raspberry cheesecake for my friend Monica, and then this citrus-topped lemon cheesecake stunner. I think this blueberry version is my latest favorite, though. Not only is it so pretty with those layers, but it tastes ridiculously good.
I also have some fabulous no-bake vegan cheesecakes in my best-selling cookbook, Bakerita! Mocha chip cheesecake or salted caramel cheesecake, anyone?! Both recipes are in the book :D
How do you make a vegan cheesecake?
If you’ve had a vegan, cashew-based cheesecake – you know how good they are. If not, let me initiate you!
Like my other raw cheesecakes, this one is made with CASHEWS as the base! If you’re skeptical about cashews’ ability to replace luxuriously creamy cream cheese, you wouldn’t be the first. I was skeptical for a while…until I tried it. The raw cashews are soaked in water, which helps them blend into a luxuriously creamy cheesecake base that is so delicious!
For the crust
We use a simple pecan & date-based crust for this recipe. It’s lightly sweetened with the dates and flavored with cinnamon, which pairs so well with the blueberry flavors in the filling. The crust is lightly sweet, chewy, and crunchy!
If you don’t have or don’t like pecans, any other nut or seed will work here too.
How to make vegan blueberry cheesecake filling:
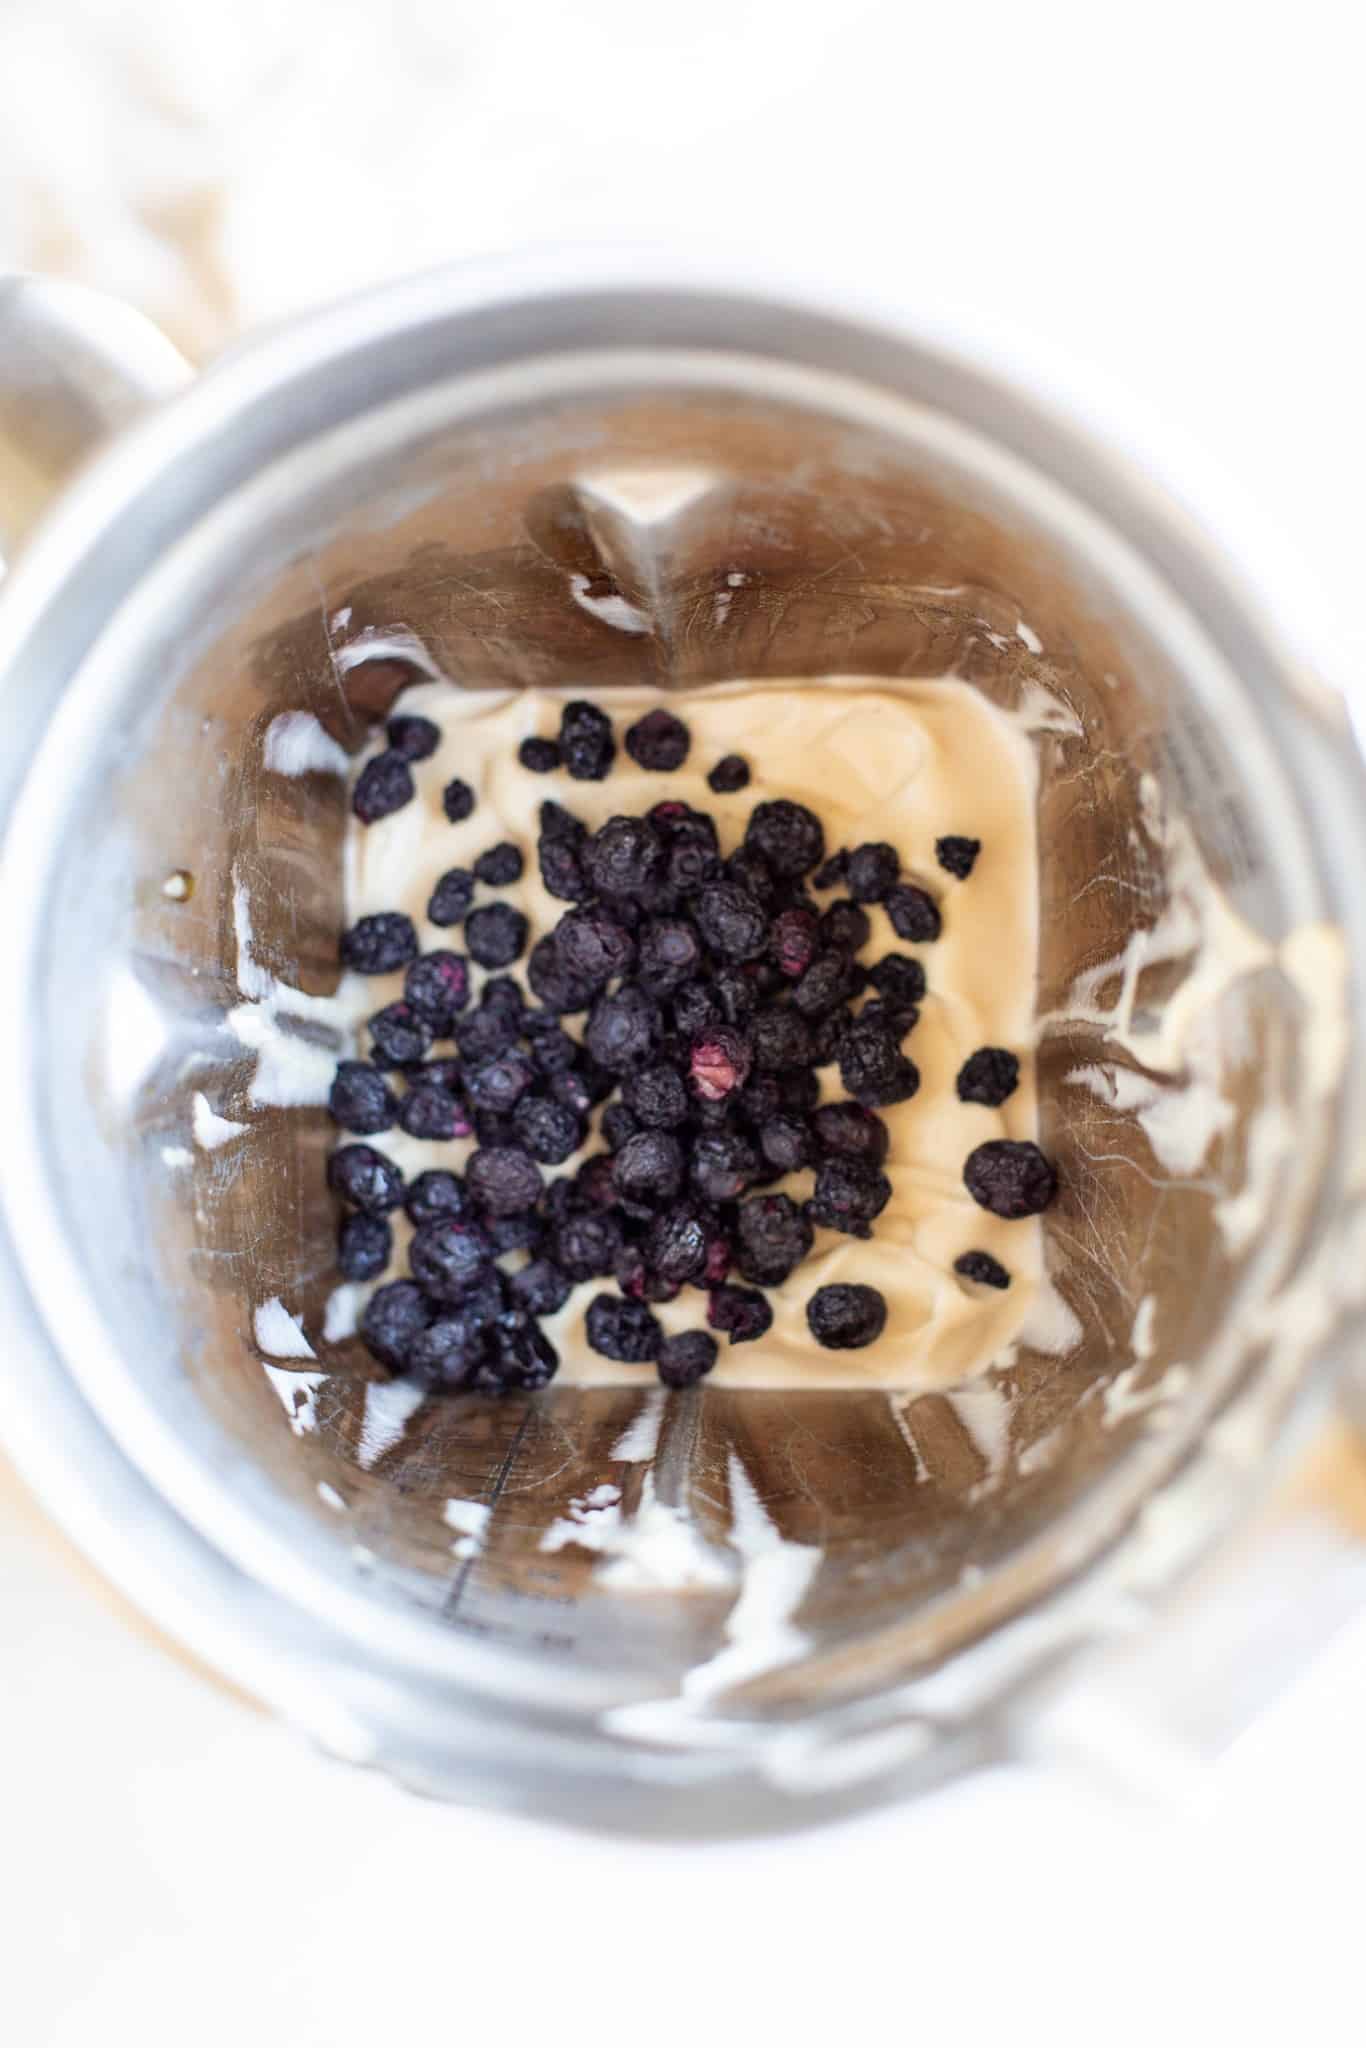
To start, soak the cashews for 8 hours. They’ll become incredibly soft and creamy, and the soaking will help them blend easily into the most luxurious, creamy filling you can imagine.
- Raw Cashews: These are the stars, and they’re what give us an ultra-luxurious creamy cheesecake filling.
- Full-fat Canned Coconut Milk: for extra creaminess and to help our cashews blend smoothly.
- Coconut Oil: I like using refined coconut oil for no coconut flavor. Don’t substitute this with another oil—the solidifying properties of coconut oil help the cheesecake hold its shape.
- Maple Syrup: our sweetener of choice! Any liquid sweetener you love will work.
- Lemon Juice: adds a cheesecake-y tang.
- Vanilla Extract
- Freeze-Dried Blueberries: for that vibrant blue color and flavor!
All together, these make a pretty damn close replica of the cheesecake you know and love.
This one removes all those refined sugars and dairy, though, and makes a “cheesecake” that will actually fill you up and give you some nutrients. Such a win! This vegan and paleo cheesecake will certainly satisfy that cheesecake craving.

What gives the blueberry flavor?
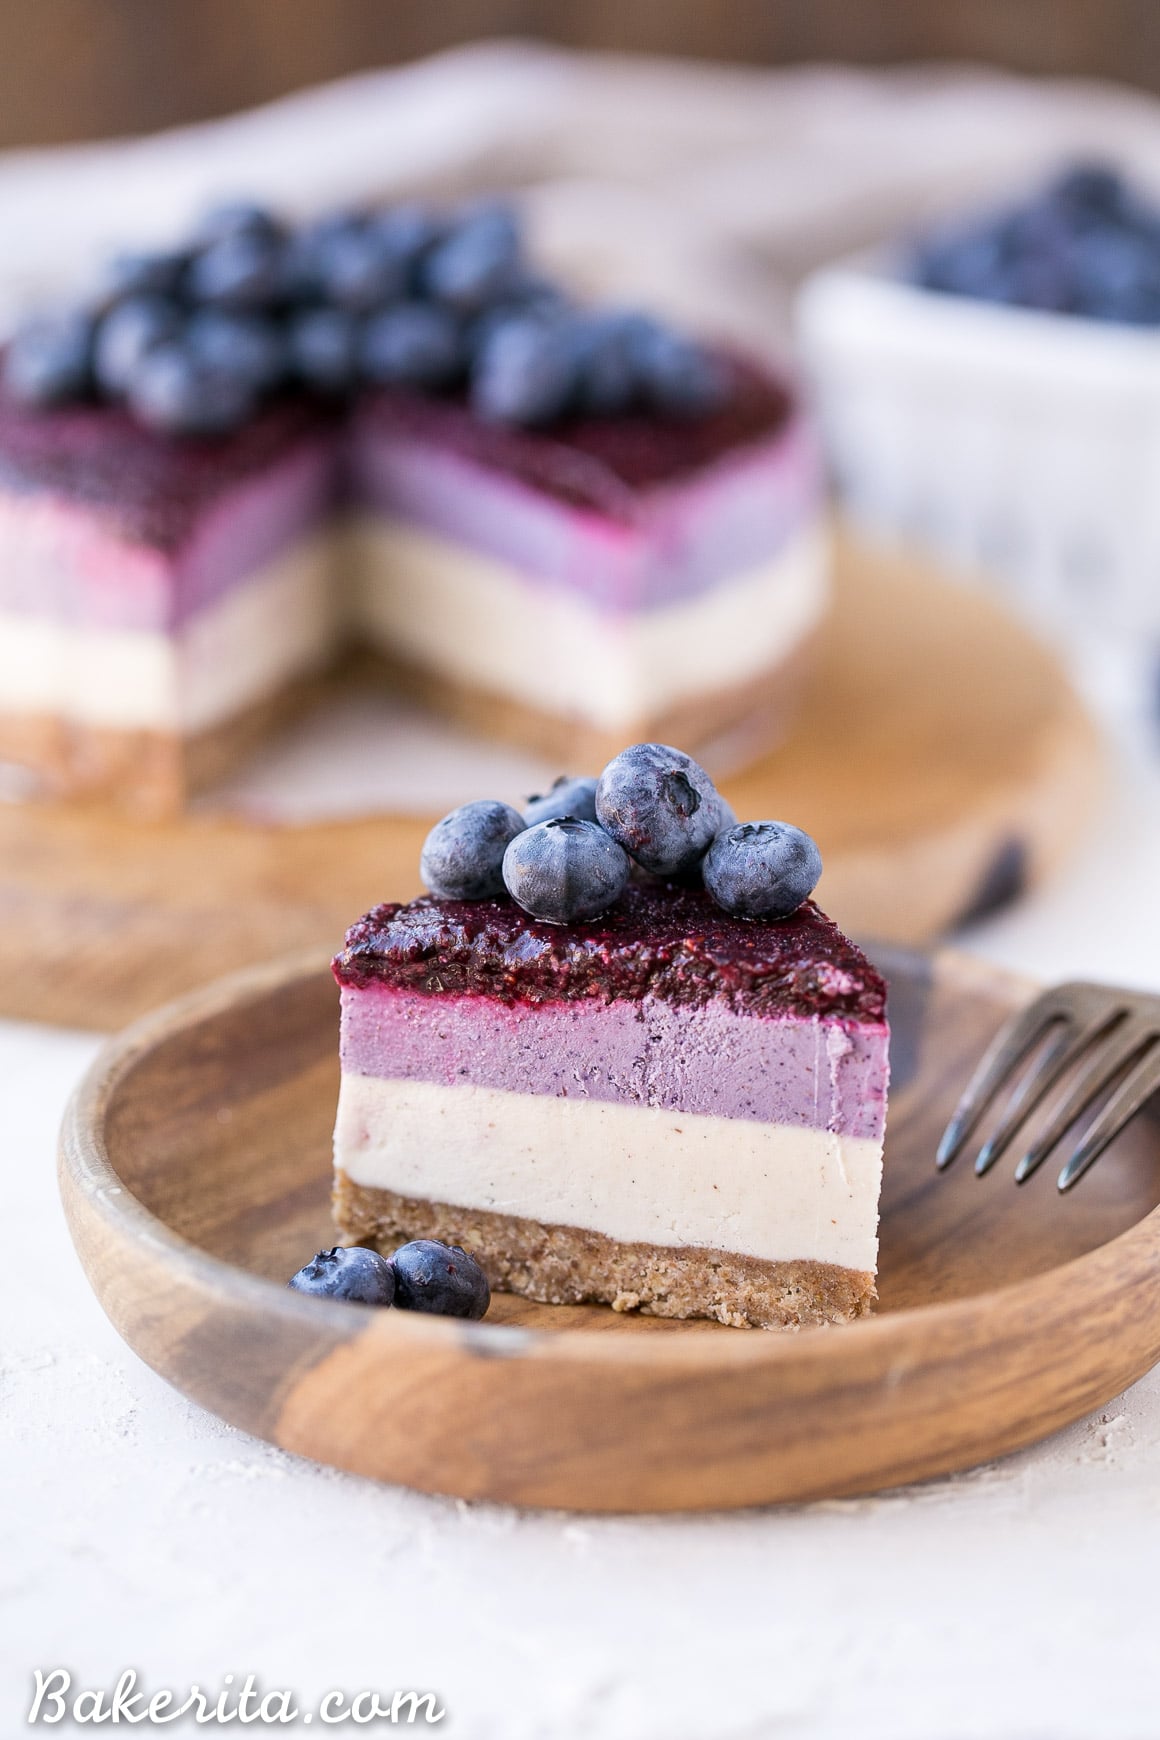
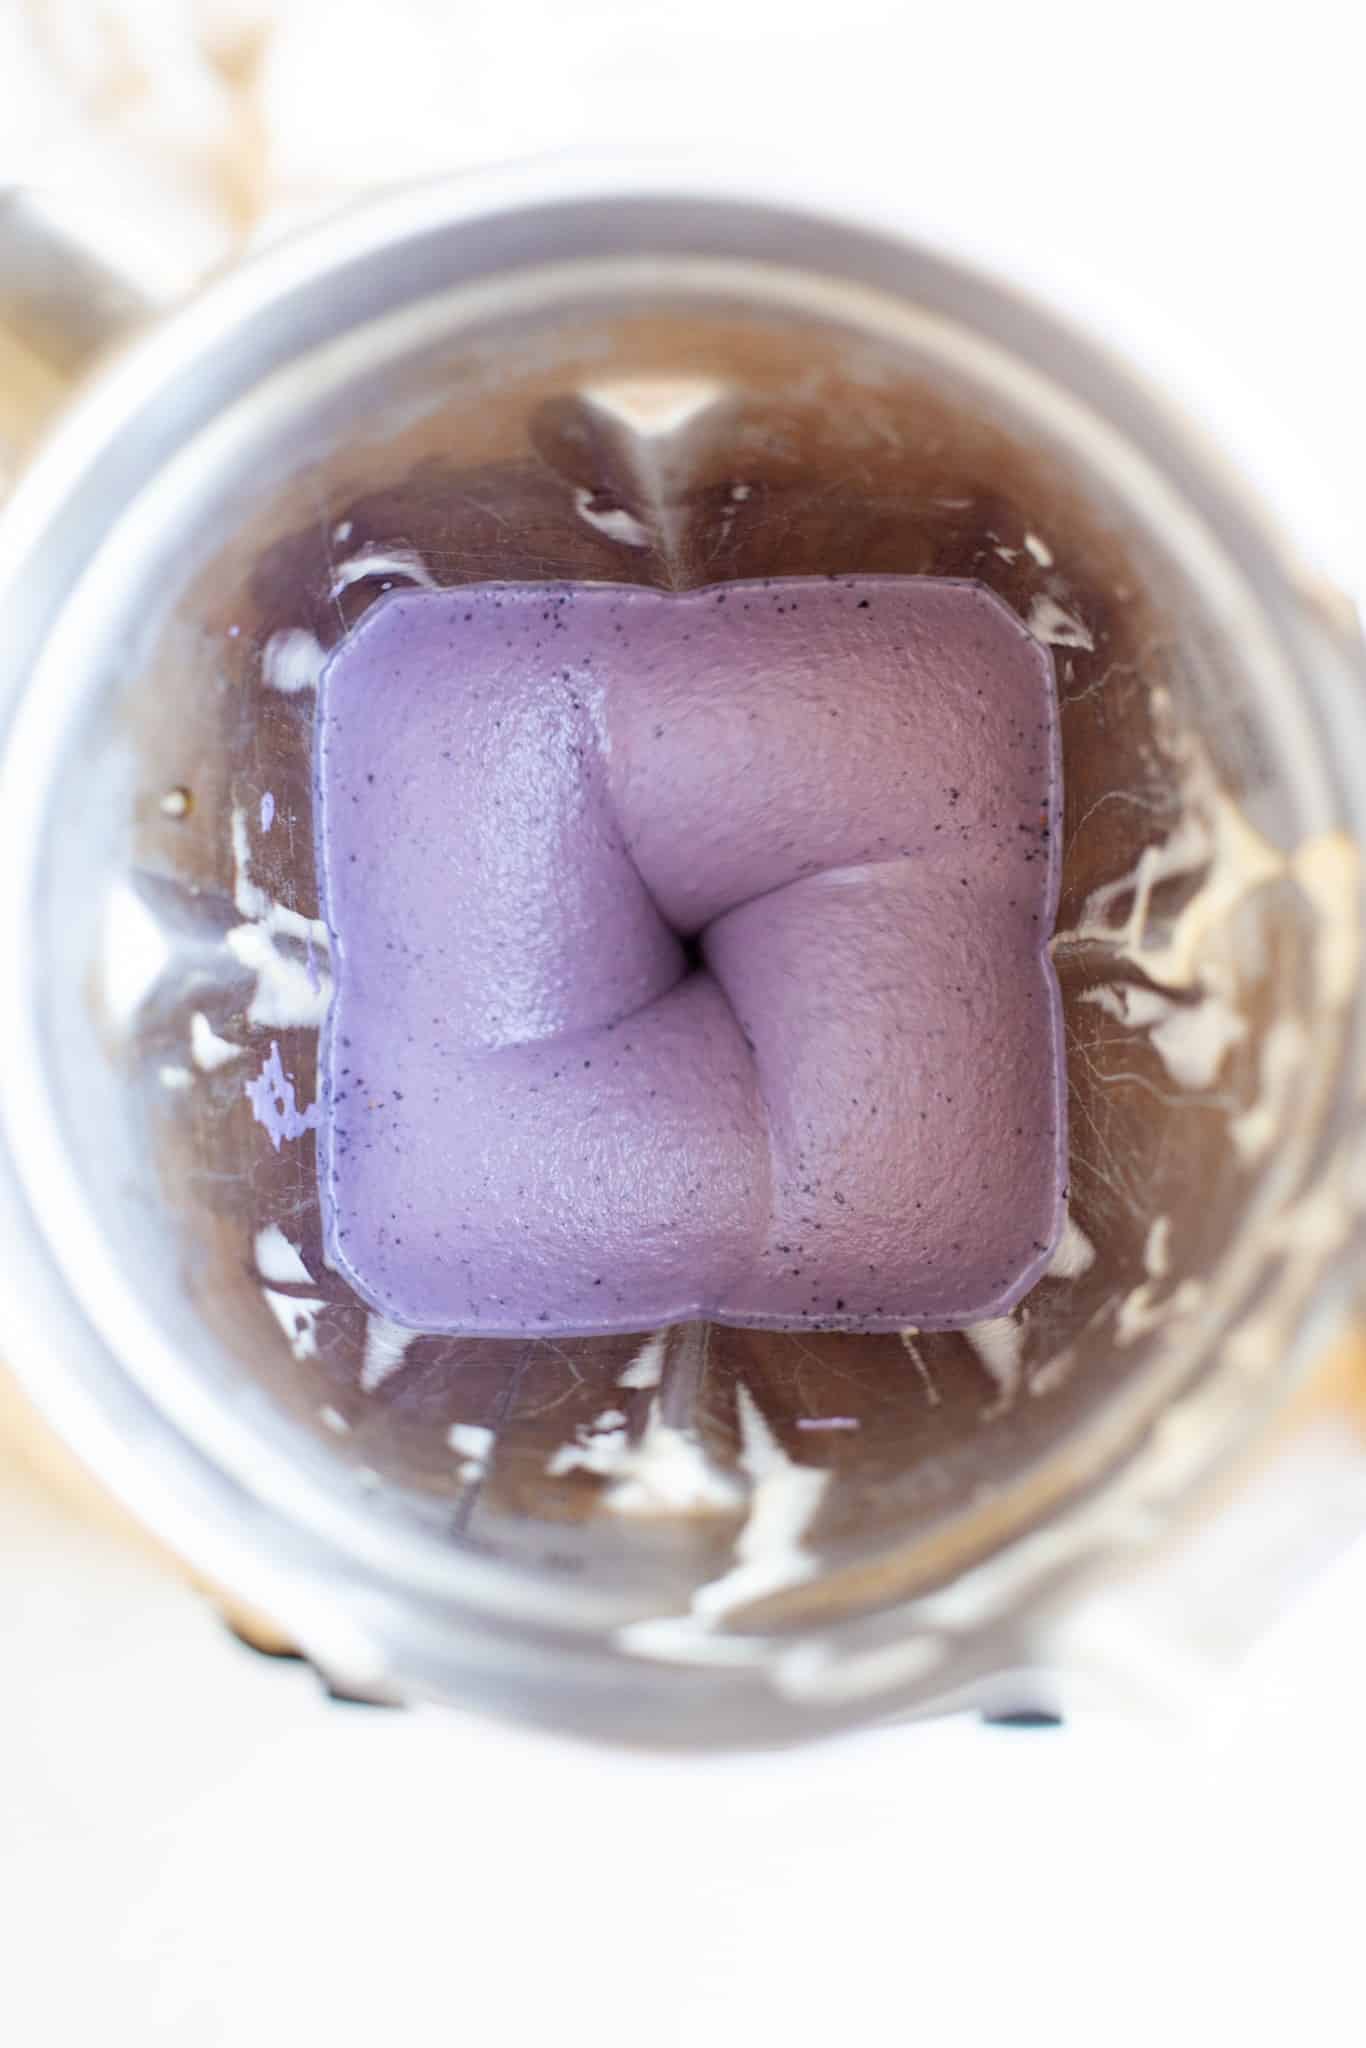
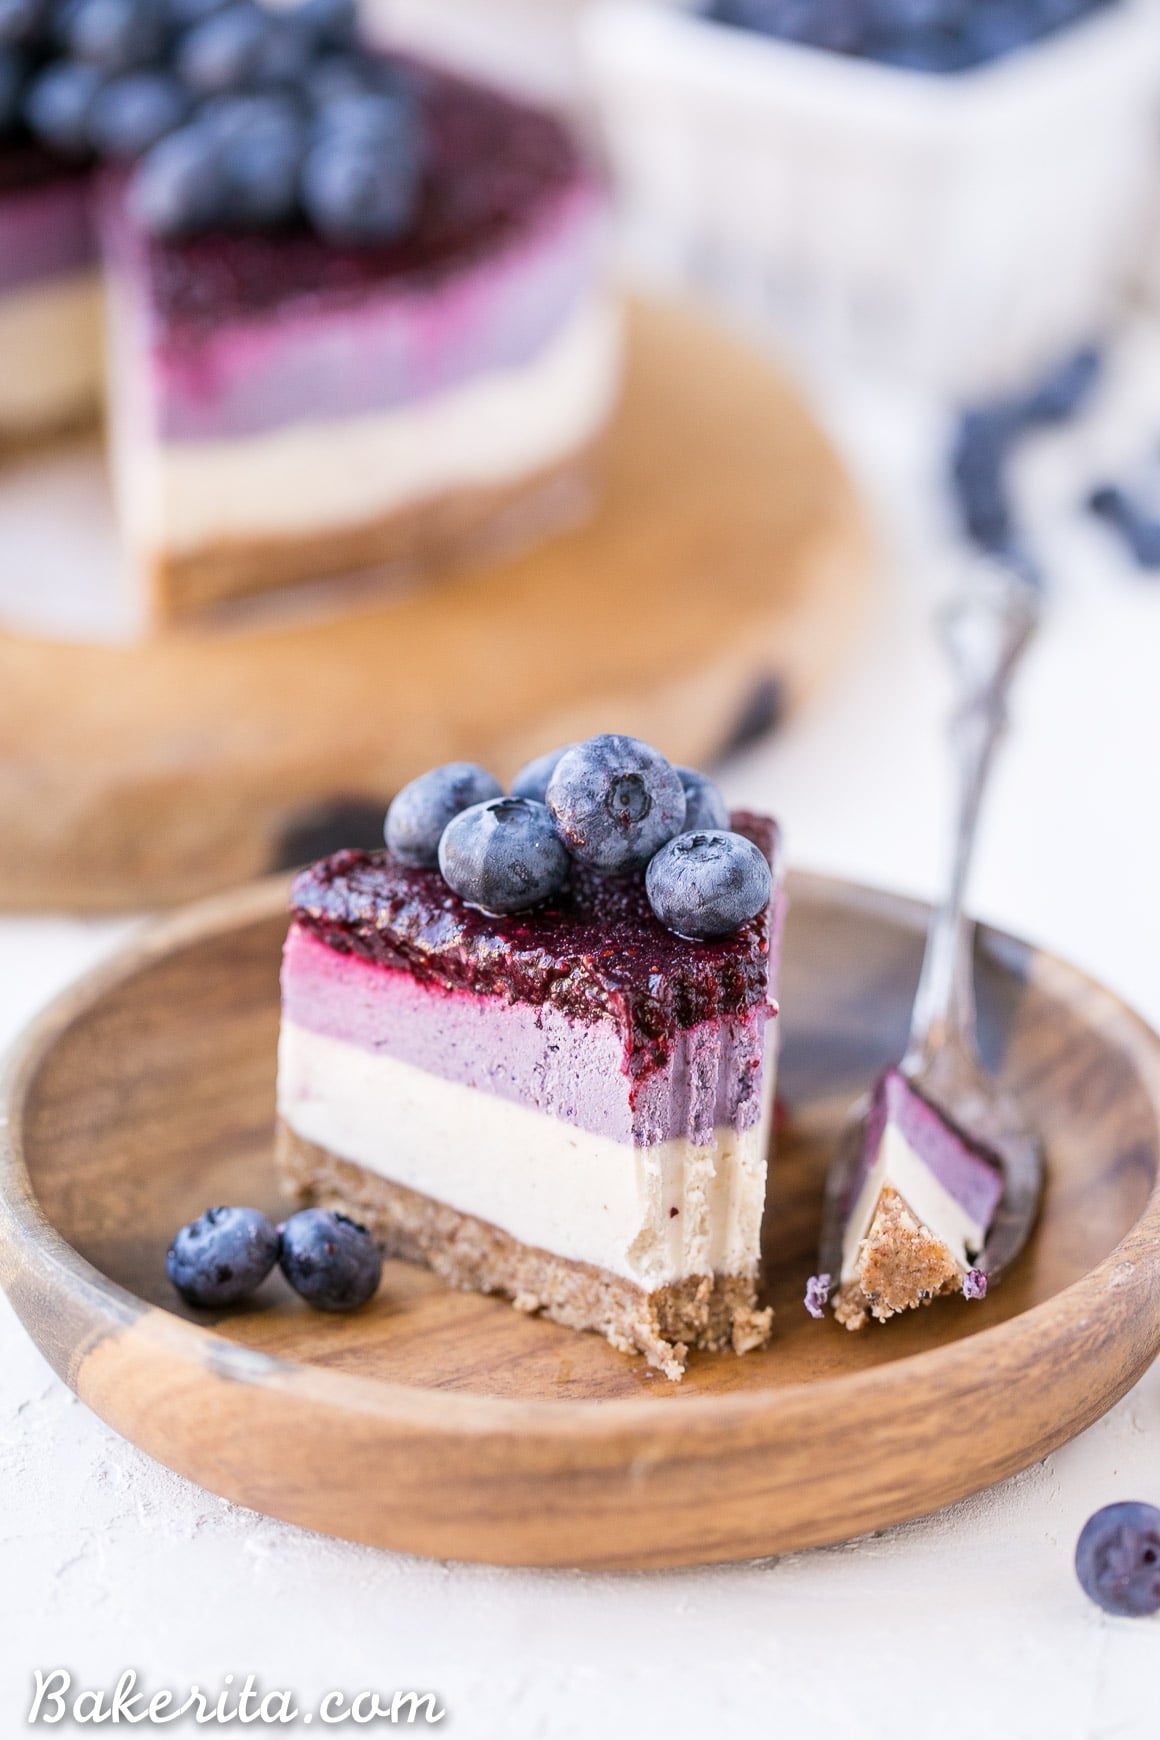
Half of the filling has freeze-dried blueberries blended right into it! That’s what gives the top layer that gorgeous blue color and a mellow blueberry flavor.
Freeze-dried blueberries are different from dried or frozen blueberries. They’ve had the moisture removed from them, so they add flavor and color but no extra moisture. It’s important you use freeze-dried blueberries; otherwise, the flavor won’t be as strong, and the texture will be off.
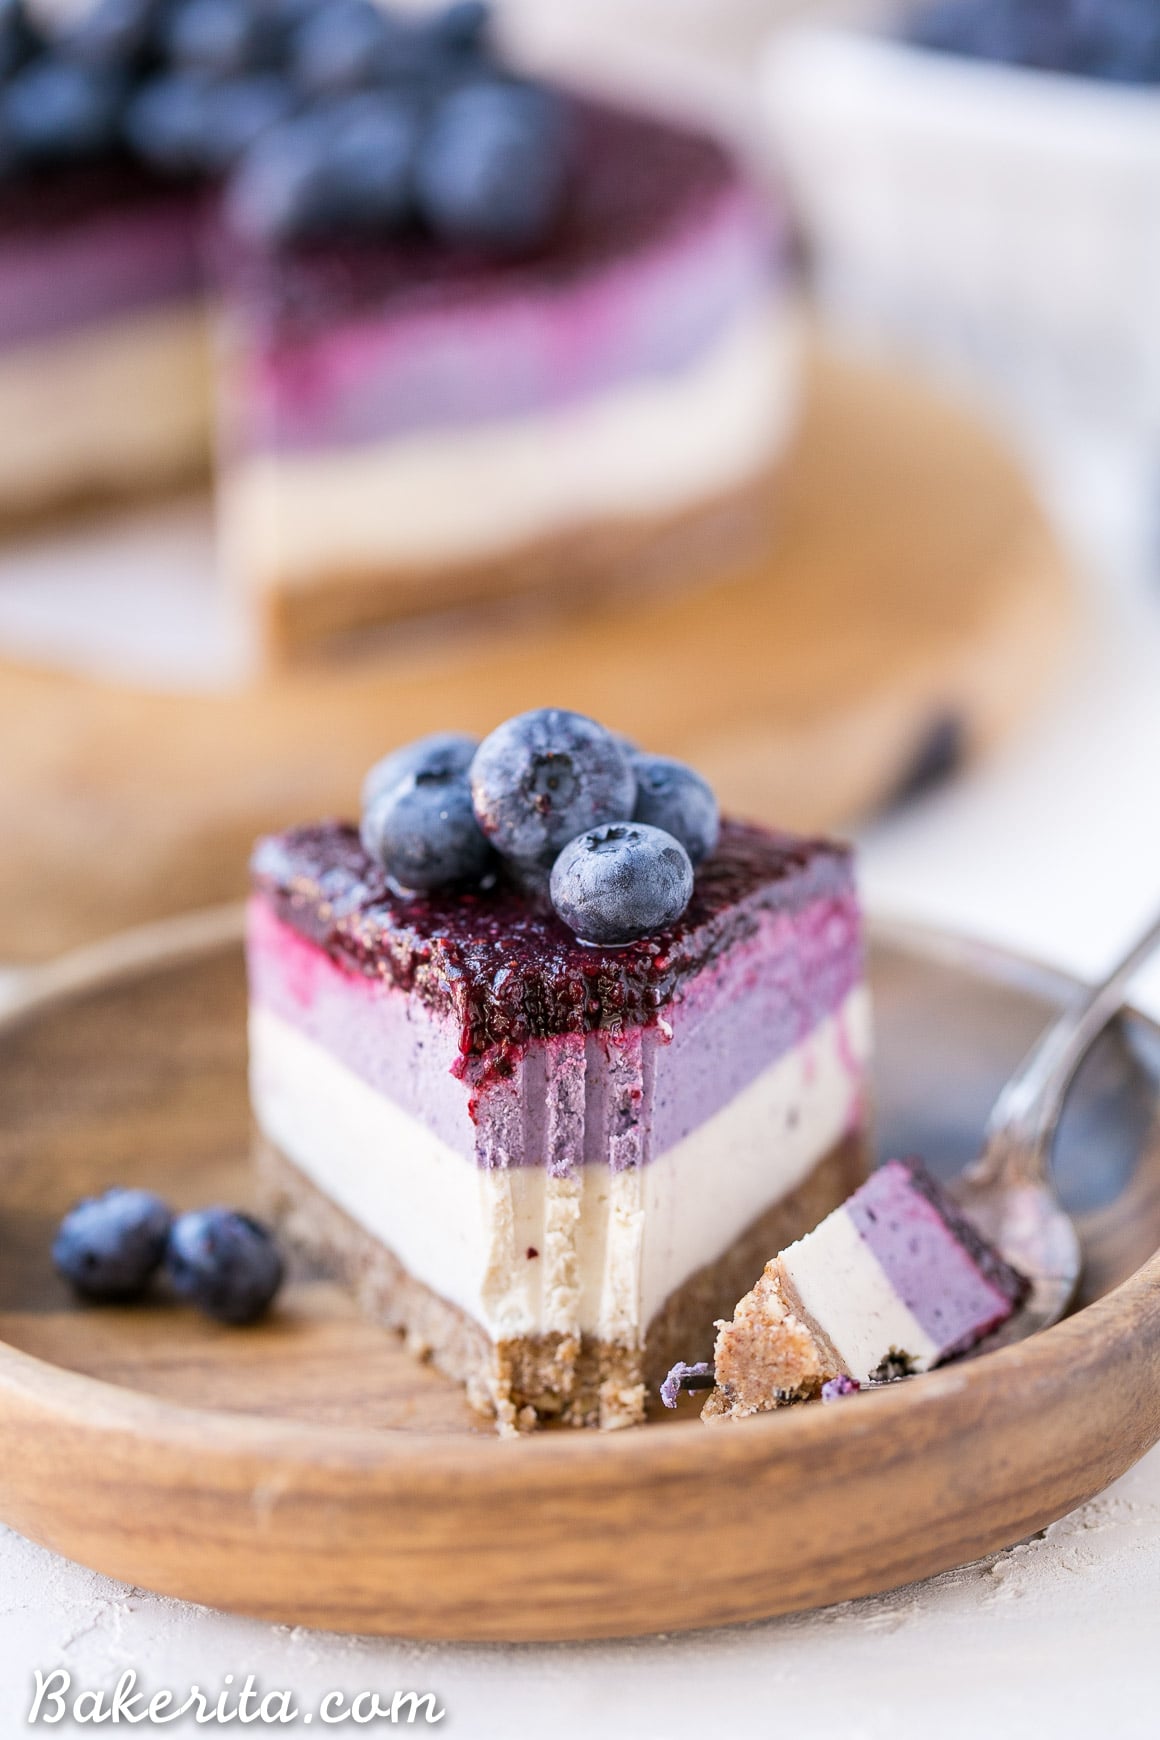
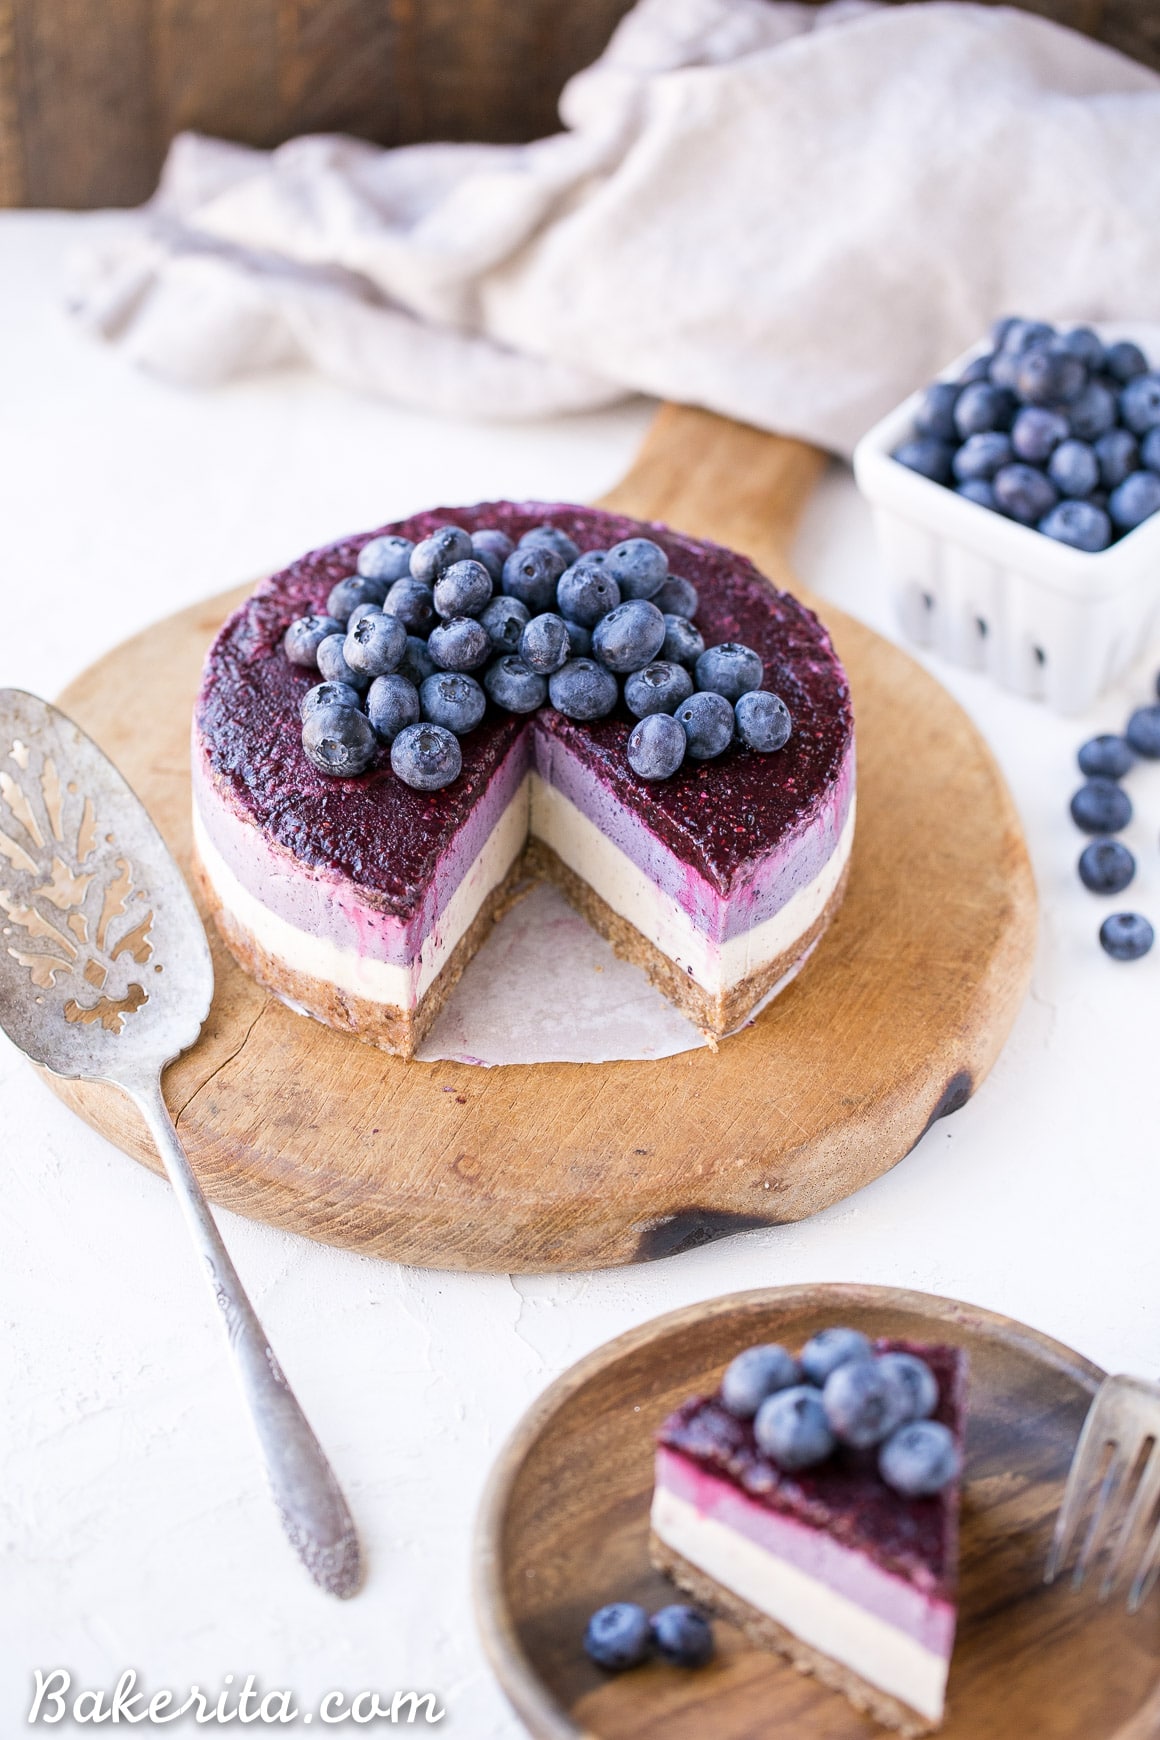
How to assemble blueberry vegan cheesecake
The freeze-dried blueberry cheesecake layer is spread over the first creamy vanilla layer. Then, it all goes into the freezer to harden up while you make the final layer.
We add a final burst of blueberry layer with a quick blueberry jam-like topping. It helps brighten up the richness of the cashew-based layers. There’s no sweetener! To make it, blend blueberries with a touch of lemon juice and chia seeds to help thicken it up.
This no-bake layered blueberry cheesecake is definitely going to be a new favorite around here. The rich and creamy cheesecake layers are hard to resist —especially once you add the tangy, jammy blueberry topping!
How to store no-bake vegan blueberry cheesecake:
You can store this vegan cheesecake in the refrigerator or freezer. It will keep in the refrigerator for one week or in the freezer for at least six months!
Store it in an airtight container to ensure it lasts and doesn’t absorb other odors from the refrigerator or freezer.
To serve from frozen, let it thaw at room temperature for about an hour or overnight in the refrigerator. This will help it soften to a delicious, creamy consistency you’ll love.
Want more vegan paleo cheesecake recipes?!
- No-Bake Vanilla Bean Cheesecake
- Vegan No-Bake Mint Chip Cheesecake
- No-Bake Chai Cheesecake Bars
- Strawberry Shortcake Bars
Layered Blueberry Vegan Cheesecake (Paleo)
Ingredients
For the crust
- ½ cup (65g) raw pecans
- ½ cup (48g) almond flour
- 2 pitted dates
- 2 tablespoons (25g) coconut oil
- 1 teaspoon cinnamon
- ¼ teaspoon kosher salt
For the cheesecake
- 2 cups (240g) raw cashews, soaked in cold water for at least four hours or preferably overnight (see Notes)
- ½ cup (114g) canned coconut milk, shaken
- ¼ cup (50g) coconut oil, melted and cooled (use refined coconut oil if you want no coconut flavor)
- ⅓ cup (111g) pure maple syrup
- 2 tablespoons fresh lemon juice
- 1 tablespoon vanilla extract, or ½ teaspoon vanilla bean powder
- ¼ cup (10g) freeze-dried blueberries
For the blueberry layer
- 1 cup fresh or frozen blueberries, thawed, if frozen
- 1 tablespoon fresh lemon juice
- 1 tablespoon chia seeds
Instructions
- Grease a 6” springform pan with coconut oil, or line an 6-inch cake pan with strips of parchment paper for easy removal, and grease well with coconut oil. Set aside.
- Add the pecans, almond flour, pitted dates, coconut oil, cinnamon and salt to a food processor or high-powered blender and pulverize until it comes together into a sort of sticky dough, with small pecan bits remaining. Don’t over process, or it’ll turn into nut butter! Press the pecan date dough evenly along the bottom of the prepared pan.½ cup (65g) raw pecans, ½ cup (48g) almond flour, 2 pitted dates, 2 tablespoons (25g) coconut oil, 1 teaspoon cinnamon, ¼ teaspoon kosher salt
- In the same food processor or high-powered blender (no need to wash between – I used my Vitamix, but most powerful blenders should do the job), combine all of the filling ingredients except for the freeze dried blueberries and blend for about 2 minutes, or until the mixture is silky smooth and creamy. Scrape down the sides as necessary. You may need to add a bit more coconut milk or lemon juice to get it to blend smoothly if your blender isn’t super high-powered.2 cups (240g) raw cashews, ½ cup (114g) canned coconut milk, ¼ cup (50g) coconut oil, ⅓ cup (111g) pure maple syrup, 2 tablespoons fresh lemon juice, 1 tablespoon vanilla extract
- Once it’s smooth, taste the mixture and adjust the sweetness/tartness levels by adding more maple syrup, vanilla, or lemon juice, if desired.
- Pour 2/3 of the filling into the prepared pan over the pecan crust. Smooth out the top and tap the pan hard against the counter a few times to release any air bubbles. Place in the freezer. If you want super clean layers, let it freeze for about an hour or until firm before adding the blue layer on top.
- Add the freeze-dried blueberries to the remaining batter and blend to incorporate. Spread over the plain layer. Return to the freezer.¼ cup (10g) freeze-dried blueberries
- Rinse out the blender, and add the fresh blueberries, lemon juice and chia seeds to it. Blend until smooth, and then pour over the other layers.1 cup fresh or frozen blueberries, 1 tablespoon fresh lemon juice, 1 tablespoon chia seeds
- Place in the freezer to set for at least 3 hours or until completely firm before slicing and serving. I recommend running your knife under hot water to warm it up before cutting the cheesecake with the still-hot (dried) knife.
- You can let thaw for about 20 minutes from frozen at room temperature, or for the best texture, transfer to the refrigerator at least an hour before serving. Store in the refrigerator for up to 5 days, or in the freezer for up to 2 weeks.
Notes
Tips & FAQs
- You can also cover the cashews in very hot/boiling water and let them sit for about an hour if you want to speed up the process – it won’t be quite as creamy and may need to blend for longer, but it will do the trick!
- If you want to use an 8″ springform pan, you’ll want to double the recipe.

Hello, I’m wondering if after freezing it and having it set if its okay to move it to fridge or if we should keep it in the freezer. Also how long can it be left out at room temp before melting? Thank you :)
Hi Neffy, it should be just fine in the fridge! You can probably leave it at room temp for about an hour (as long as it’s not super hot out) before it gets super soft. Enjoy :)
Hey, do we need to soak the chia seeds at all before use?
Nope!!
Absolutely loved this recipe ! It was easy to make and it turned out delicious .
So thrilled you enjoyed it, Diana! Thanks so much for your feedback :)
hi there,
I’m very late to the party, but I’m curious as to whether this recipe freezes well? I’d like to make it in advance for Xmas. If it is freeze-able, do you have any tips on thawing?
TIA xx
Hi Santie, it freezes perfectly! Just wrap it up tightly in plastic wrap and/or a plastic zip bag so it’s not exposed to the freezer air to freezer burn. Hope this helps – enjoy!
Hey I’m going to make this today and was wondering if I use powdered blueberries how much should I use? (I assume 1/4 cup is too much) and how long do the layers need in the freezer before adding the next one on top so they don’t mix? Thanks
Hi Felicity, I’d start with about 1-2 tablespoons, taste, and add more from there. It just needs to be firm enough so the top feels hard to the touch. Takes a a half hour or so in my freezer.
Hello
This looks absolutely divine! Quick question- do you add both layers at the same time or let the first layer set first over the base and then add the blueberry layer
Many thanks
Neerja
Hi Neerja, either will work, but if you want a super clean division between the layers you can freeze for a little while between them!
Hi Rachel
What can I use instead of almond flour? My daughter is allergic to almonds. I need to use a GF flour.
Any suggestion?
Thank you
Hi Anna, you can just use more pecans in place of the almond flour. Enjoy! :)
Any chance you could include this piece of info regarding first layer freeze time in your recipe directions? It would have really helped. It was a lot of expensive ingredients and didn’t turn out in clean layers as I hoped. I am disappointed to only see this now way down in the comments. This matters a lot when using a Vitamix for the full 2 minutes as directed in the recipe as it heats up the ingredients.
Hi Jane, yeah I’ll add it! I’ve gotten clean layers just by placing them on top without a lot of freeze time in between, but if you want super clean layers, about an hour between layering them will work.
Hi Rachel
I just made this cheesecake for tomorrow’s New Year party and can’t wait to try it. It was very easy to follow!
One question. What would you recommend to use instead of cashews?
No almonds because of allergies.
Thank you
It came out splendidly! Thanks so much! It was a surprise bday cake for my boyfriend’s mother. She’s a vegan and didn’t even dream of a bday cake (Romania is not the best place to be vegan). She was thrilled…wish I could add some photos here. Thank you so much!
So glad to hear that the cake was a hit!! Thanks for your feedback, Diana :)
I haven’t tried this yet — but I have a question. Is the pie really only 6 inches diameter? (6 inches across) That seems so tiny! And it serves 10 people? I’ve just never seen a pie so small. I was going to make it, but then when I saw it needed a 6 inch pan, I was very surprised. Sounds like it would serve 2 to 4 people. :)
Hi Linda, yes it’s only 6 inches! It’s super rich because of the cashew base. You can always double it and put it in an 8″ pan if you’re worried about it not being enough, but I’ve never heard that complaint! It definitely serves more than 2 to 4 – you’d be VERY full if you ate half of it!
Looks stunning!