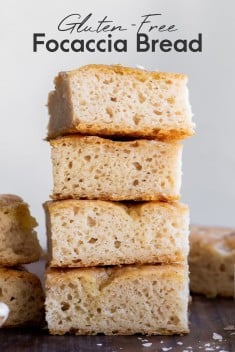
This Easy Gluten-Free Focaccia Bread Recipe has just eight ingredients and the dough comes together quickly and easily! This fluffy focaccia can be made with a wide variety of toppings and is ready in under two hours, including the rise time. Vegan & Top-8 allergen-free.
Looking for a sourdough version? Try this Easy Gluten-Free Sourdough Focaccia!
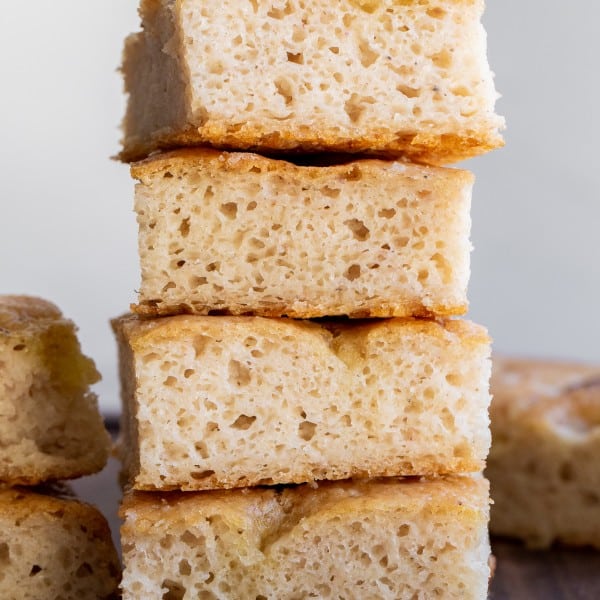
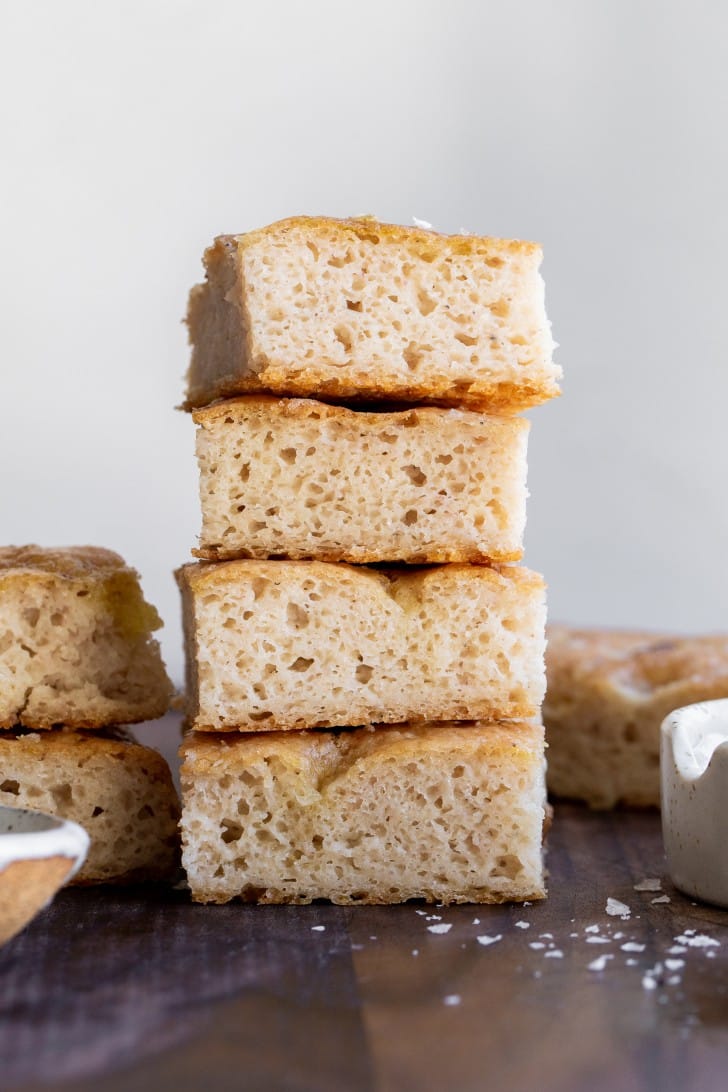
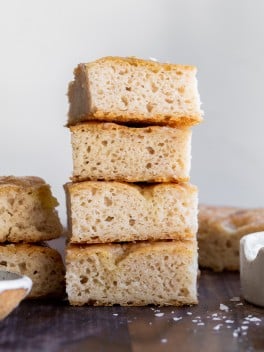
Fluffy, delicious, gluten-free bread that you can tear into while it’s still warm and is ready in under two hours…dreams do come true!!! This focaccia is the manifestation of all my gluten-free bread baking dreams. Focaccia, with all of it’s olive oil-y goodness and it’s ability to transform based on the toppings you choose, is one of the best kinds of bread, in my opinion. Whether it’s dipped in more olive oil and balsamic, used as toast or sandwich bread, or served with pasta, it’s always a winner, and this recipe seriously makes me swoon.
If you like this recipe, you’ll want to check out all of my delicious gluten-free bread recipes!
Ingredients for gluten-free focaccia
- Yeast & Sweetener: yeast is used to help the bread rise, and the sweetener is used to help feed the yeast and make it active.
- Psyllium Husk: this is used to help bind the dough and make it easily workable. It also adds a nice chewy texture to the focaccia.
- Starch & Whole Grain Gluten-Free Flours: the combination of starch, like potato starch or tapioca starch, plus gluten-free whole grain flours, like brown rice flour, sorghum flour, quinoa flour, etc. create a wonderful flavor and texture for the dough and bread.
- Olive Oil: no focaccia is complete without olive oil! We use a generous amount in the pan and on top of the dough before it goes into the oven.
How to make gluten-free focaccia bread
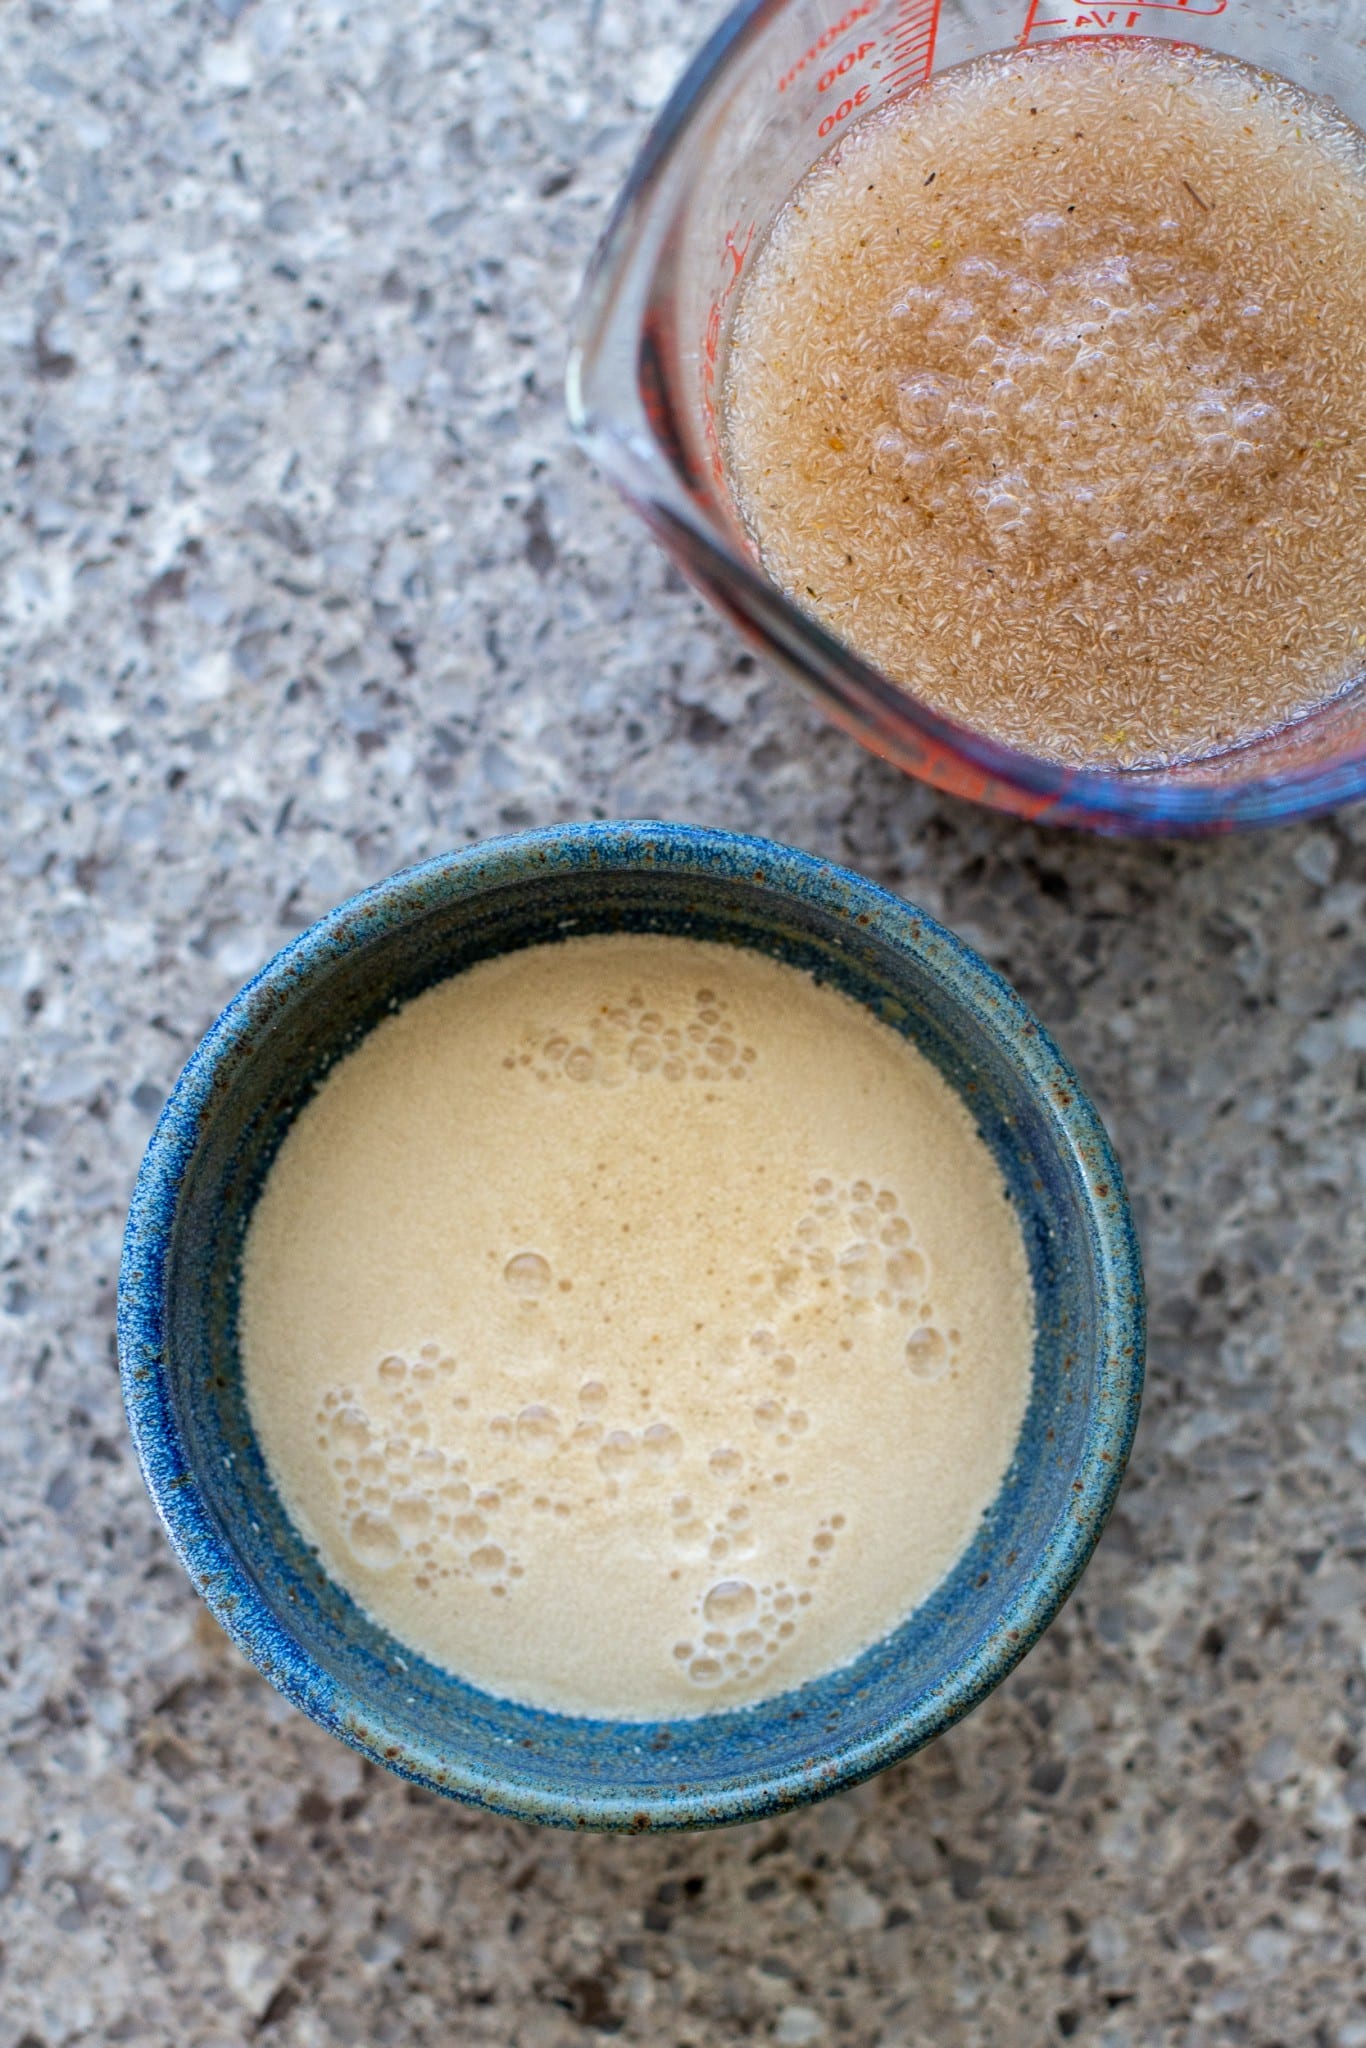
Step 1. Activate the yeast by mixing it with warm water and the sweetener of your choice. It should get bubbly after a few minutes.
Step 2. Mix together the psyllium and water and let it sit to form a gel while you mix the flours.
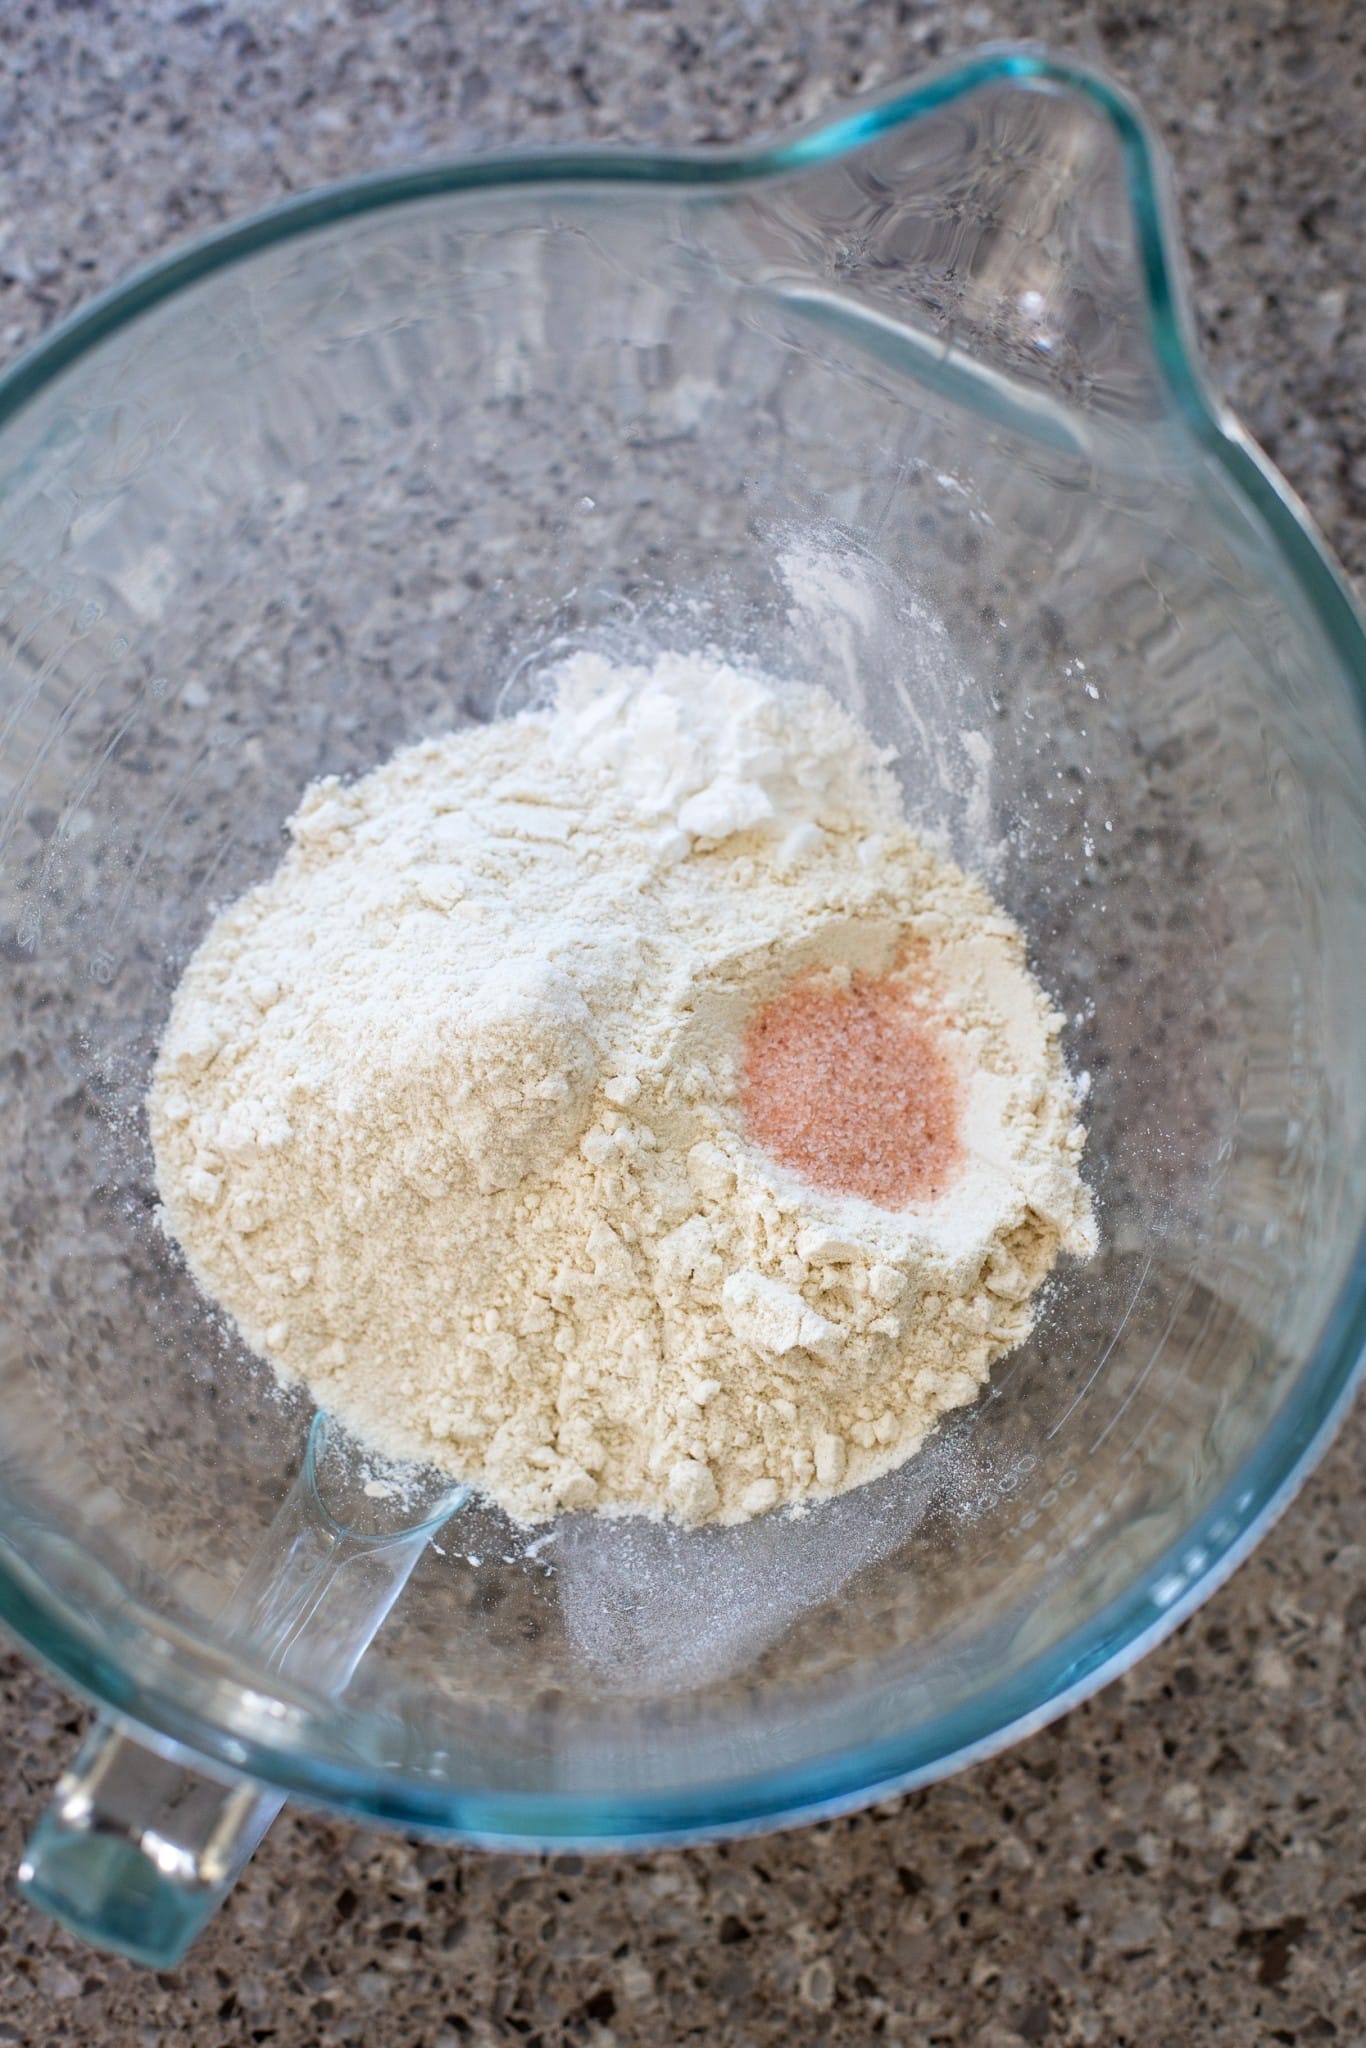
Step 3. Combine the starch & whole grain flours with the salt in a mixing bowl or the bowl of a stand mixer.
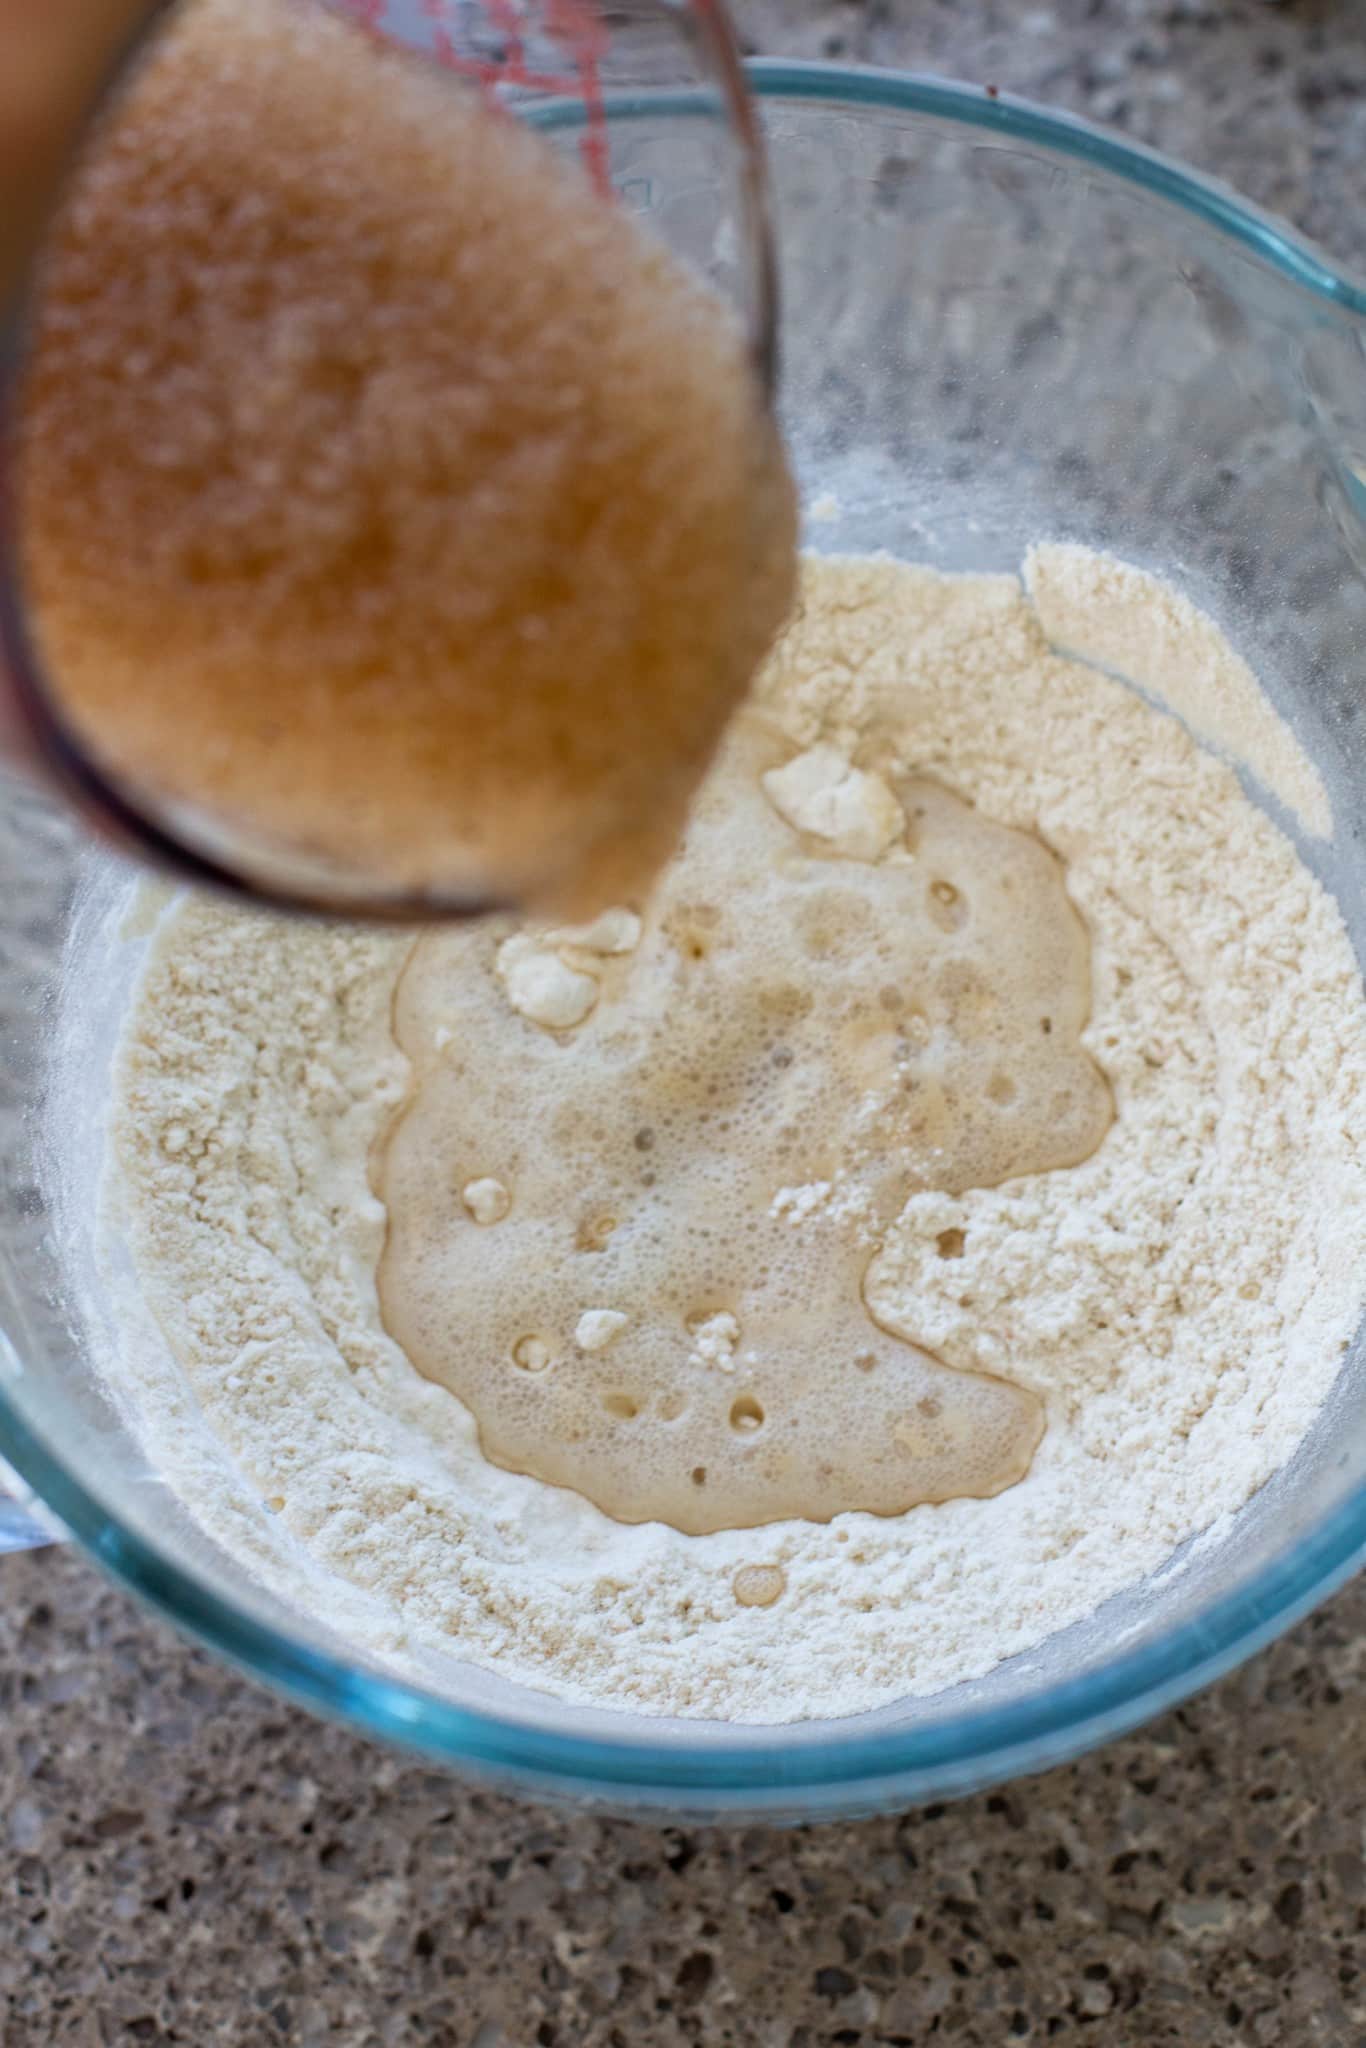
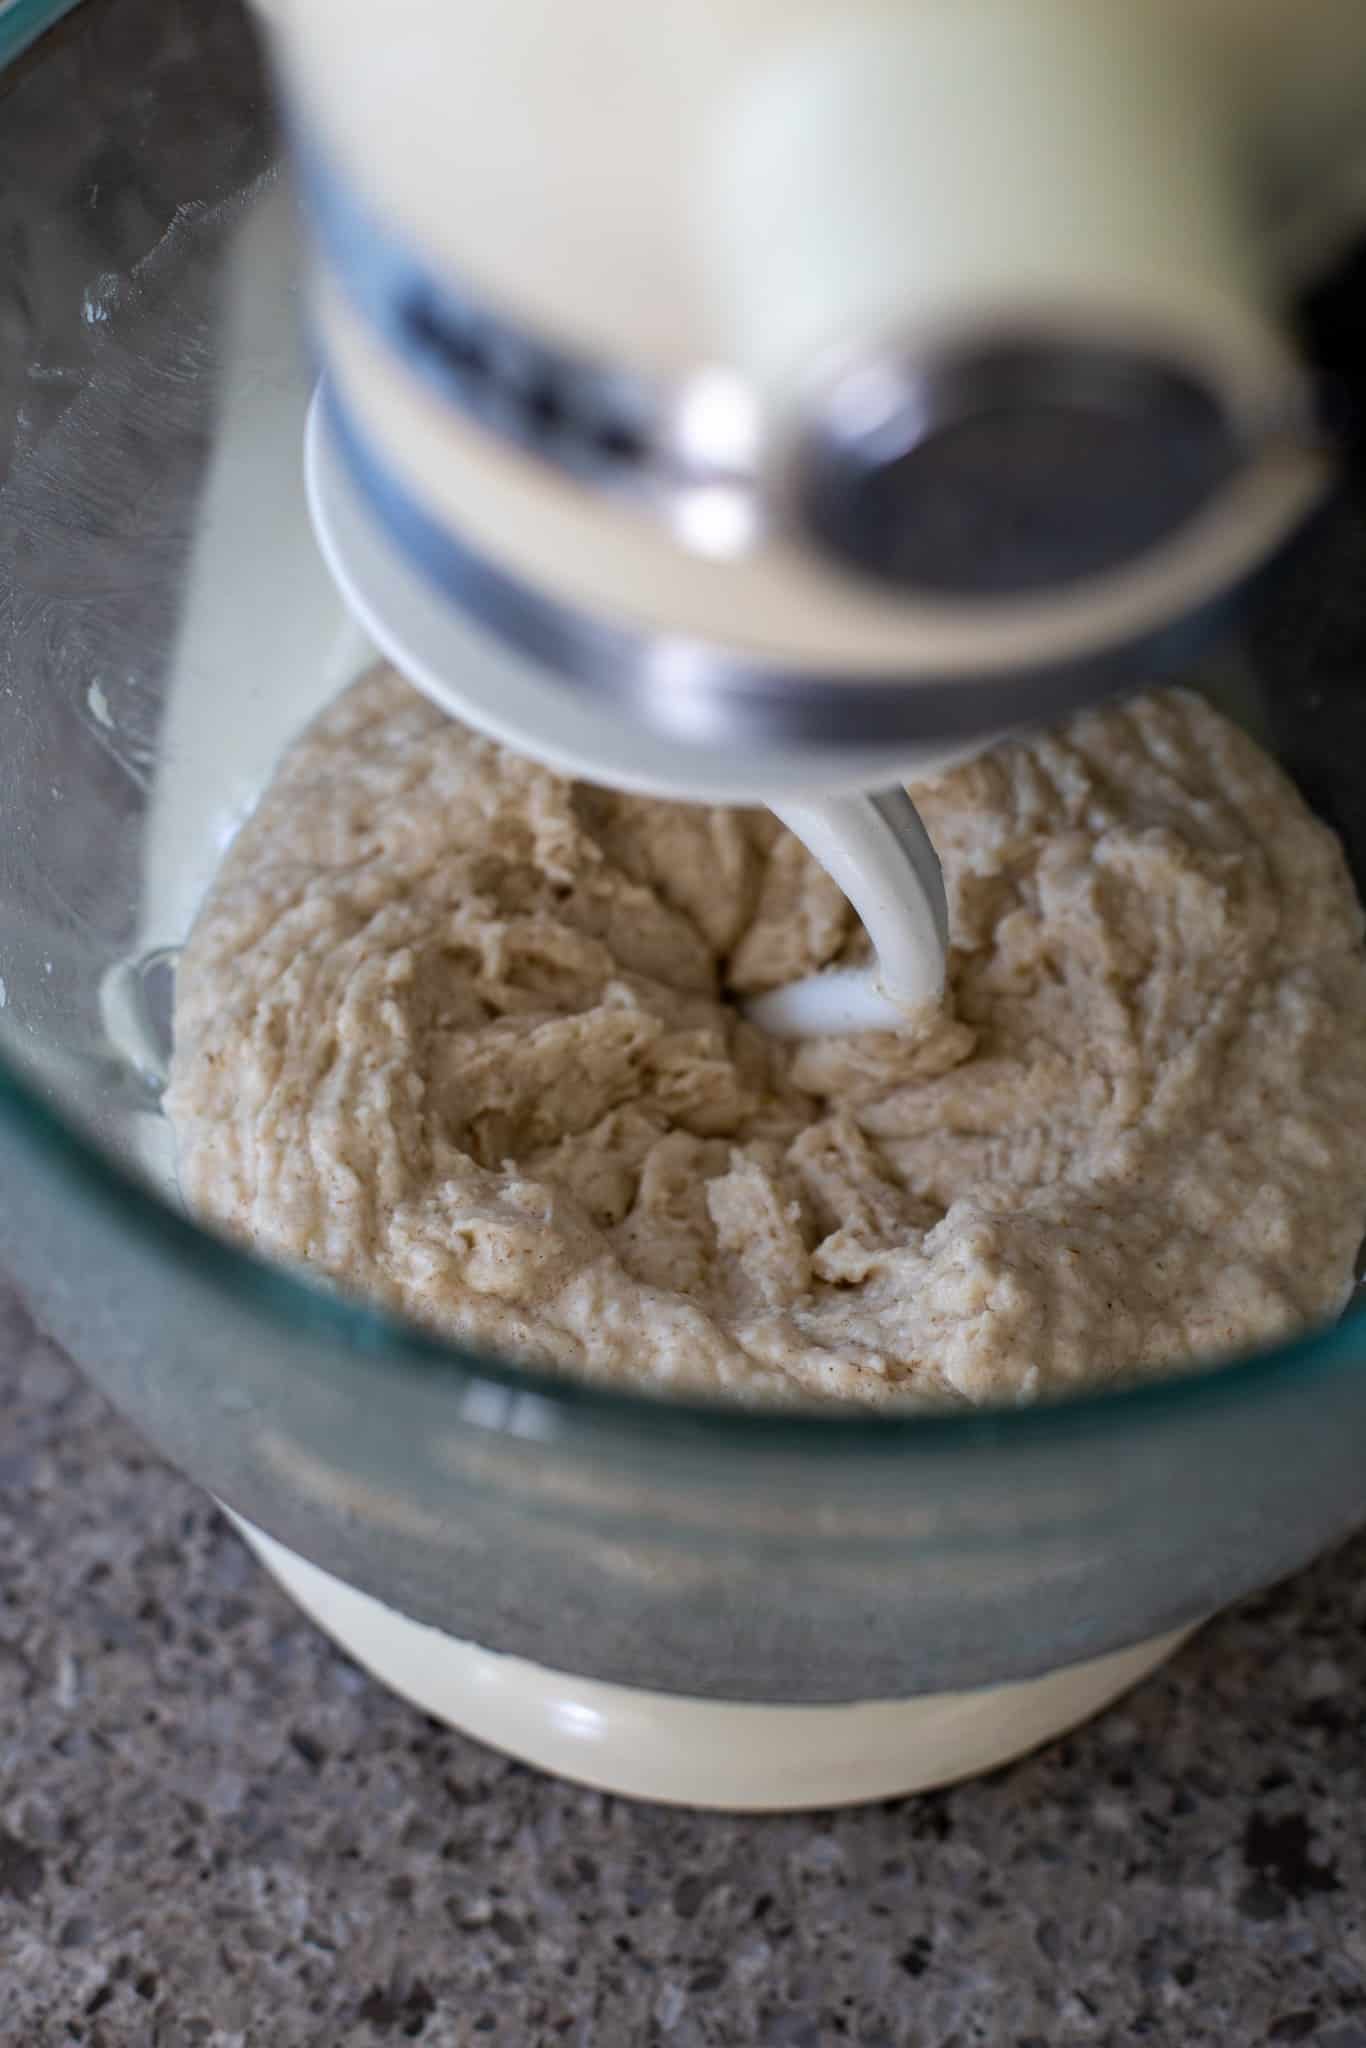
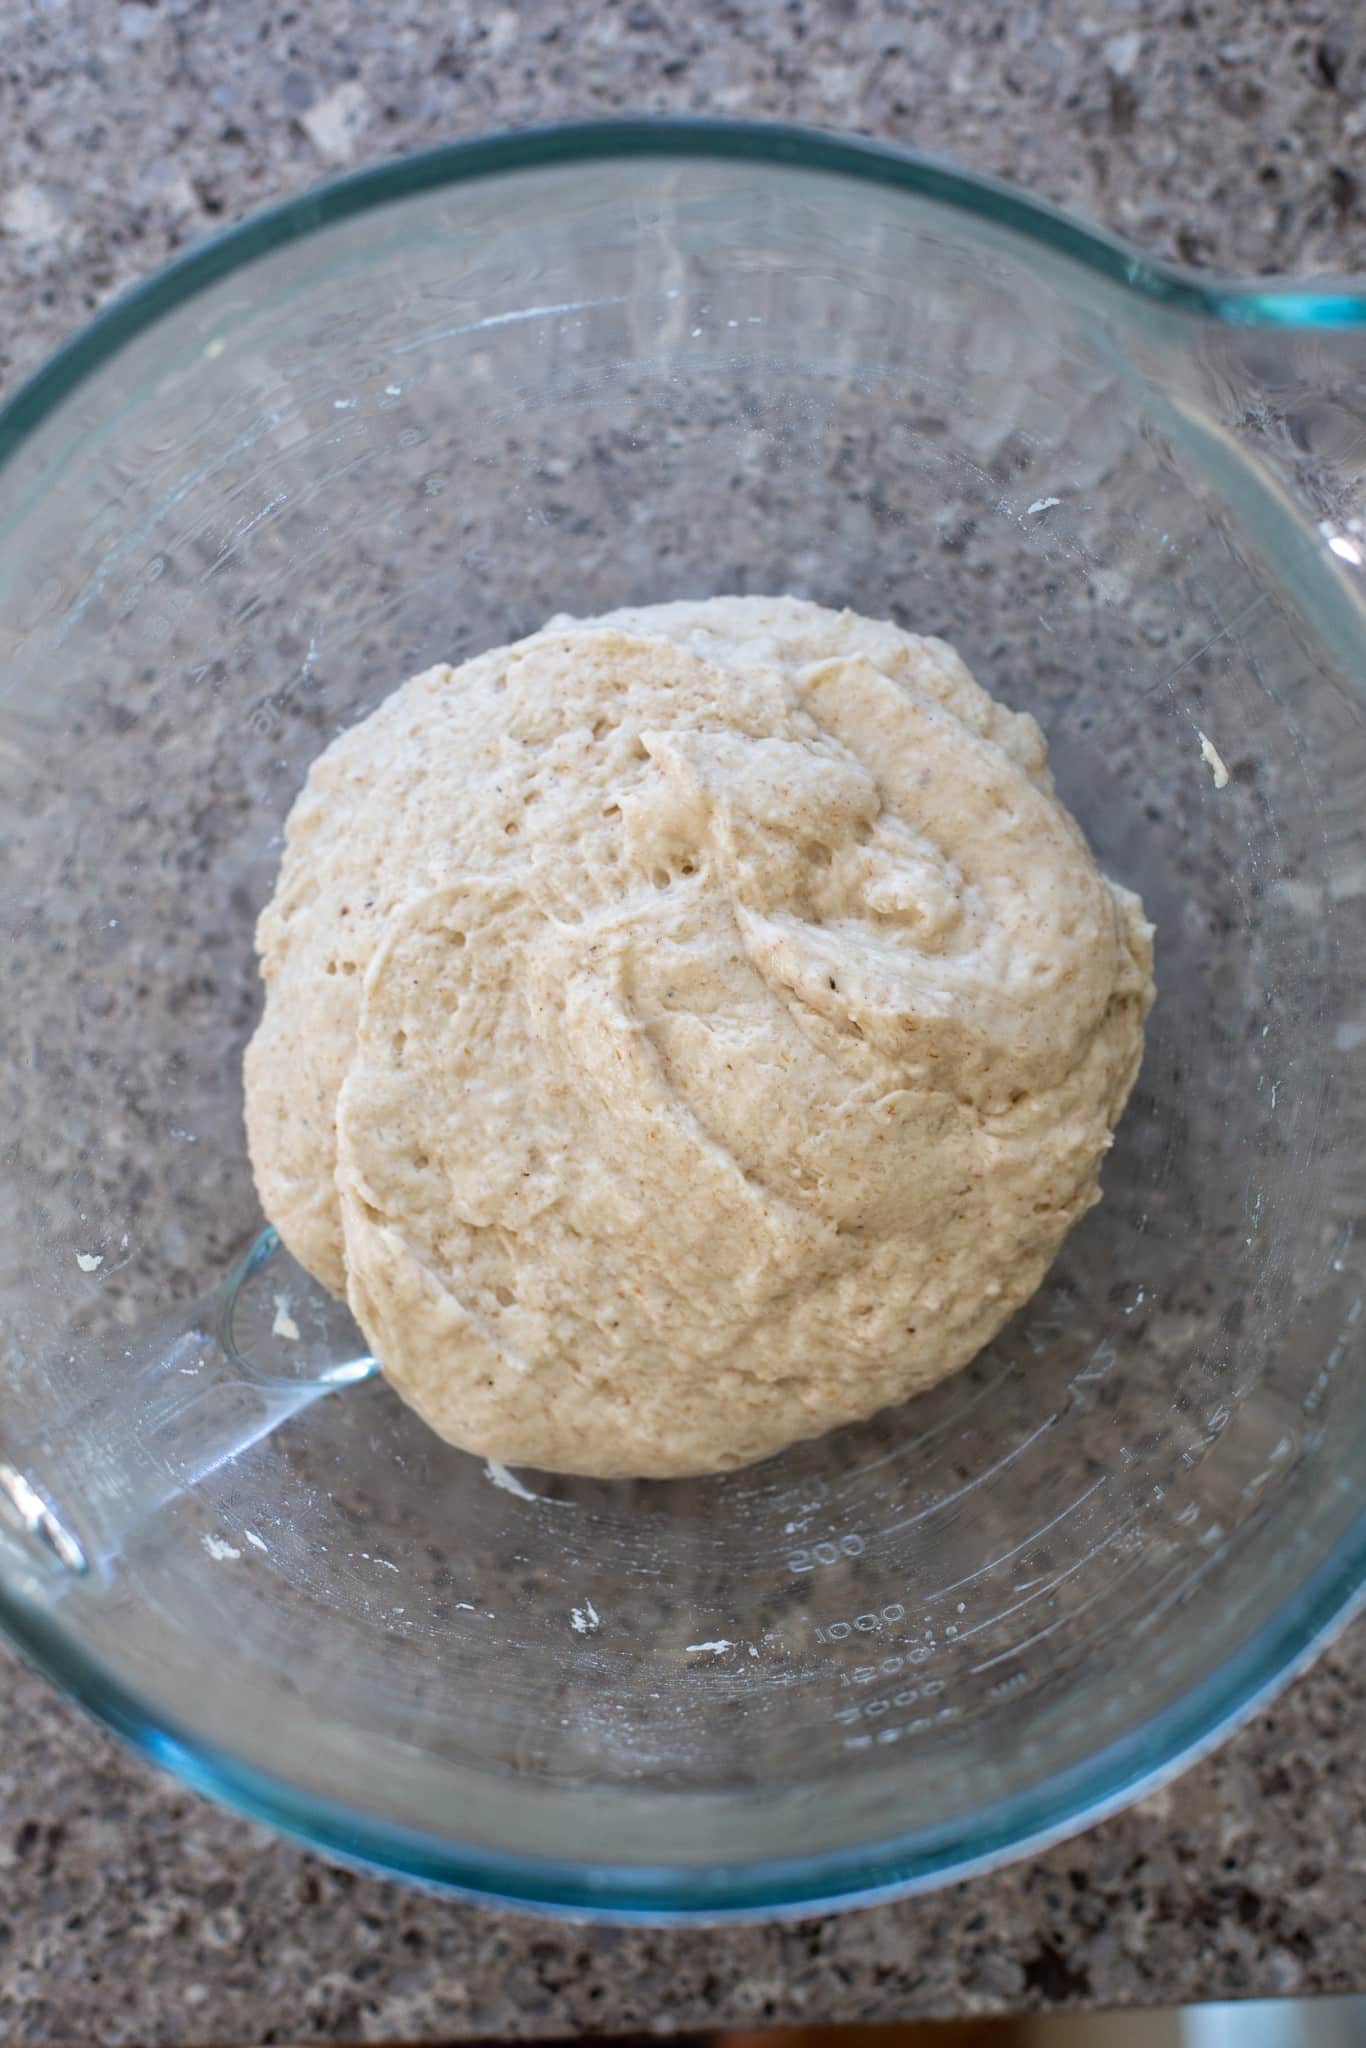
Step 4. Mix the yeast and psyllium mixtures into the flour and stir to completely incorporate. Use a scraper to ensure that all of the flour is completely hydrated.
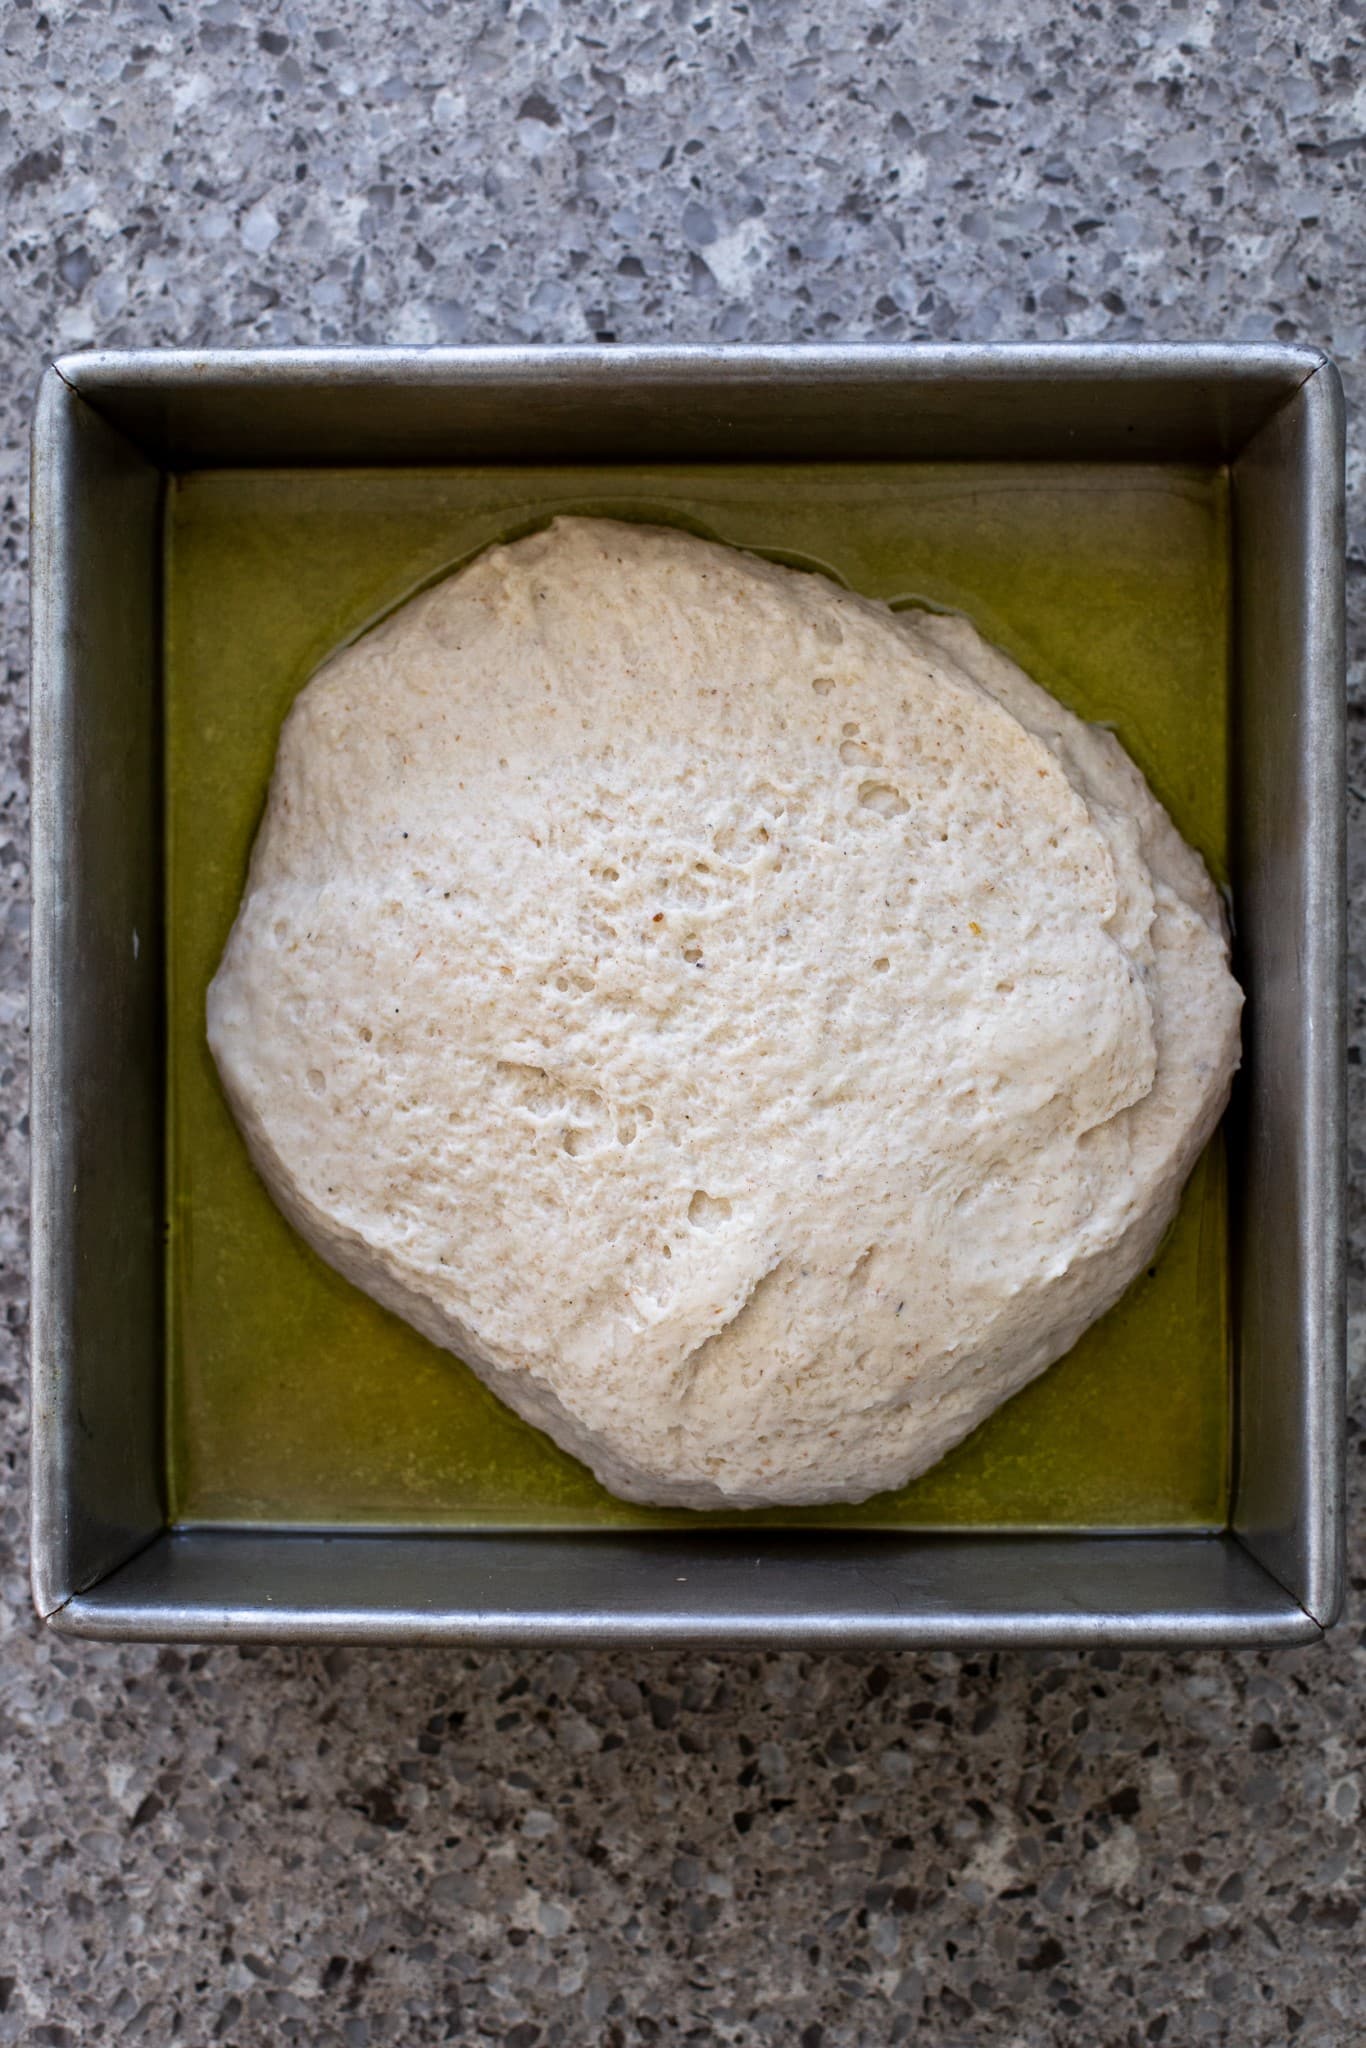
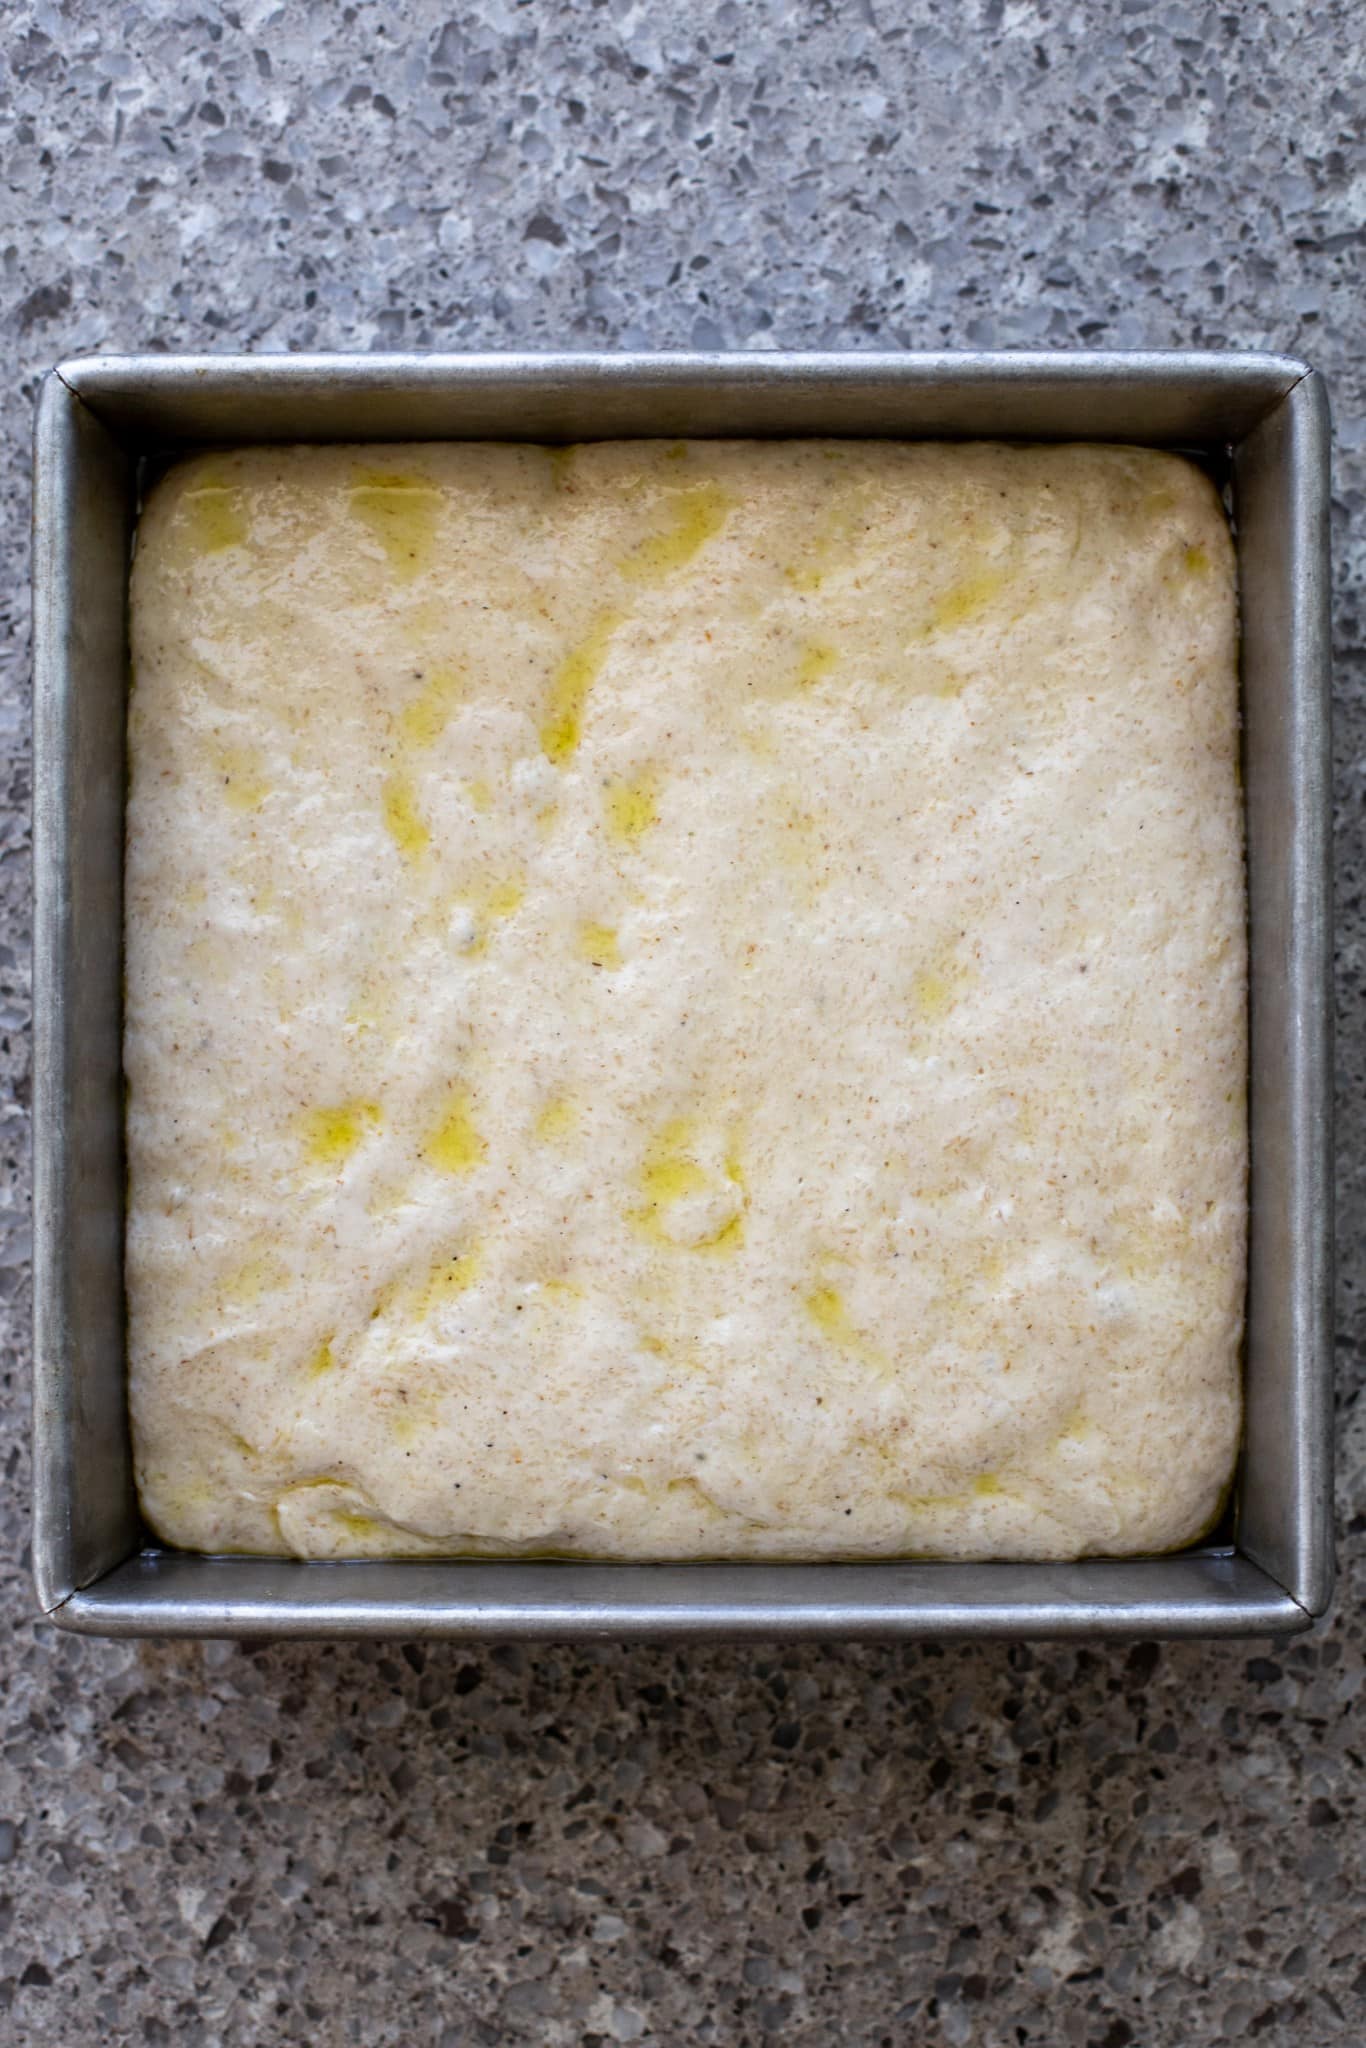
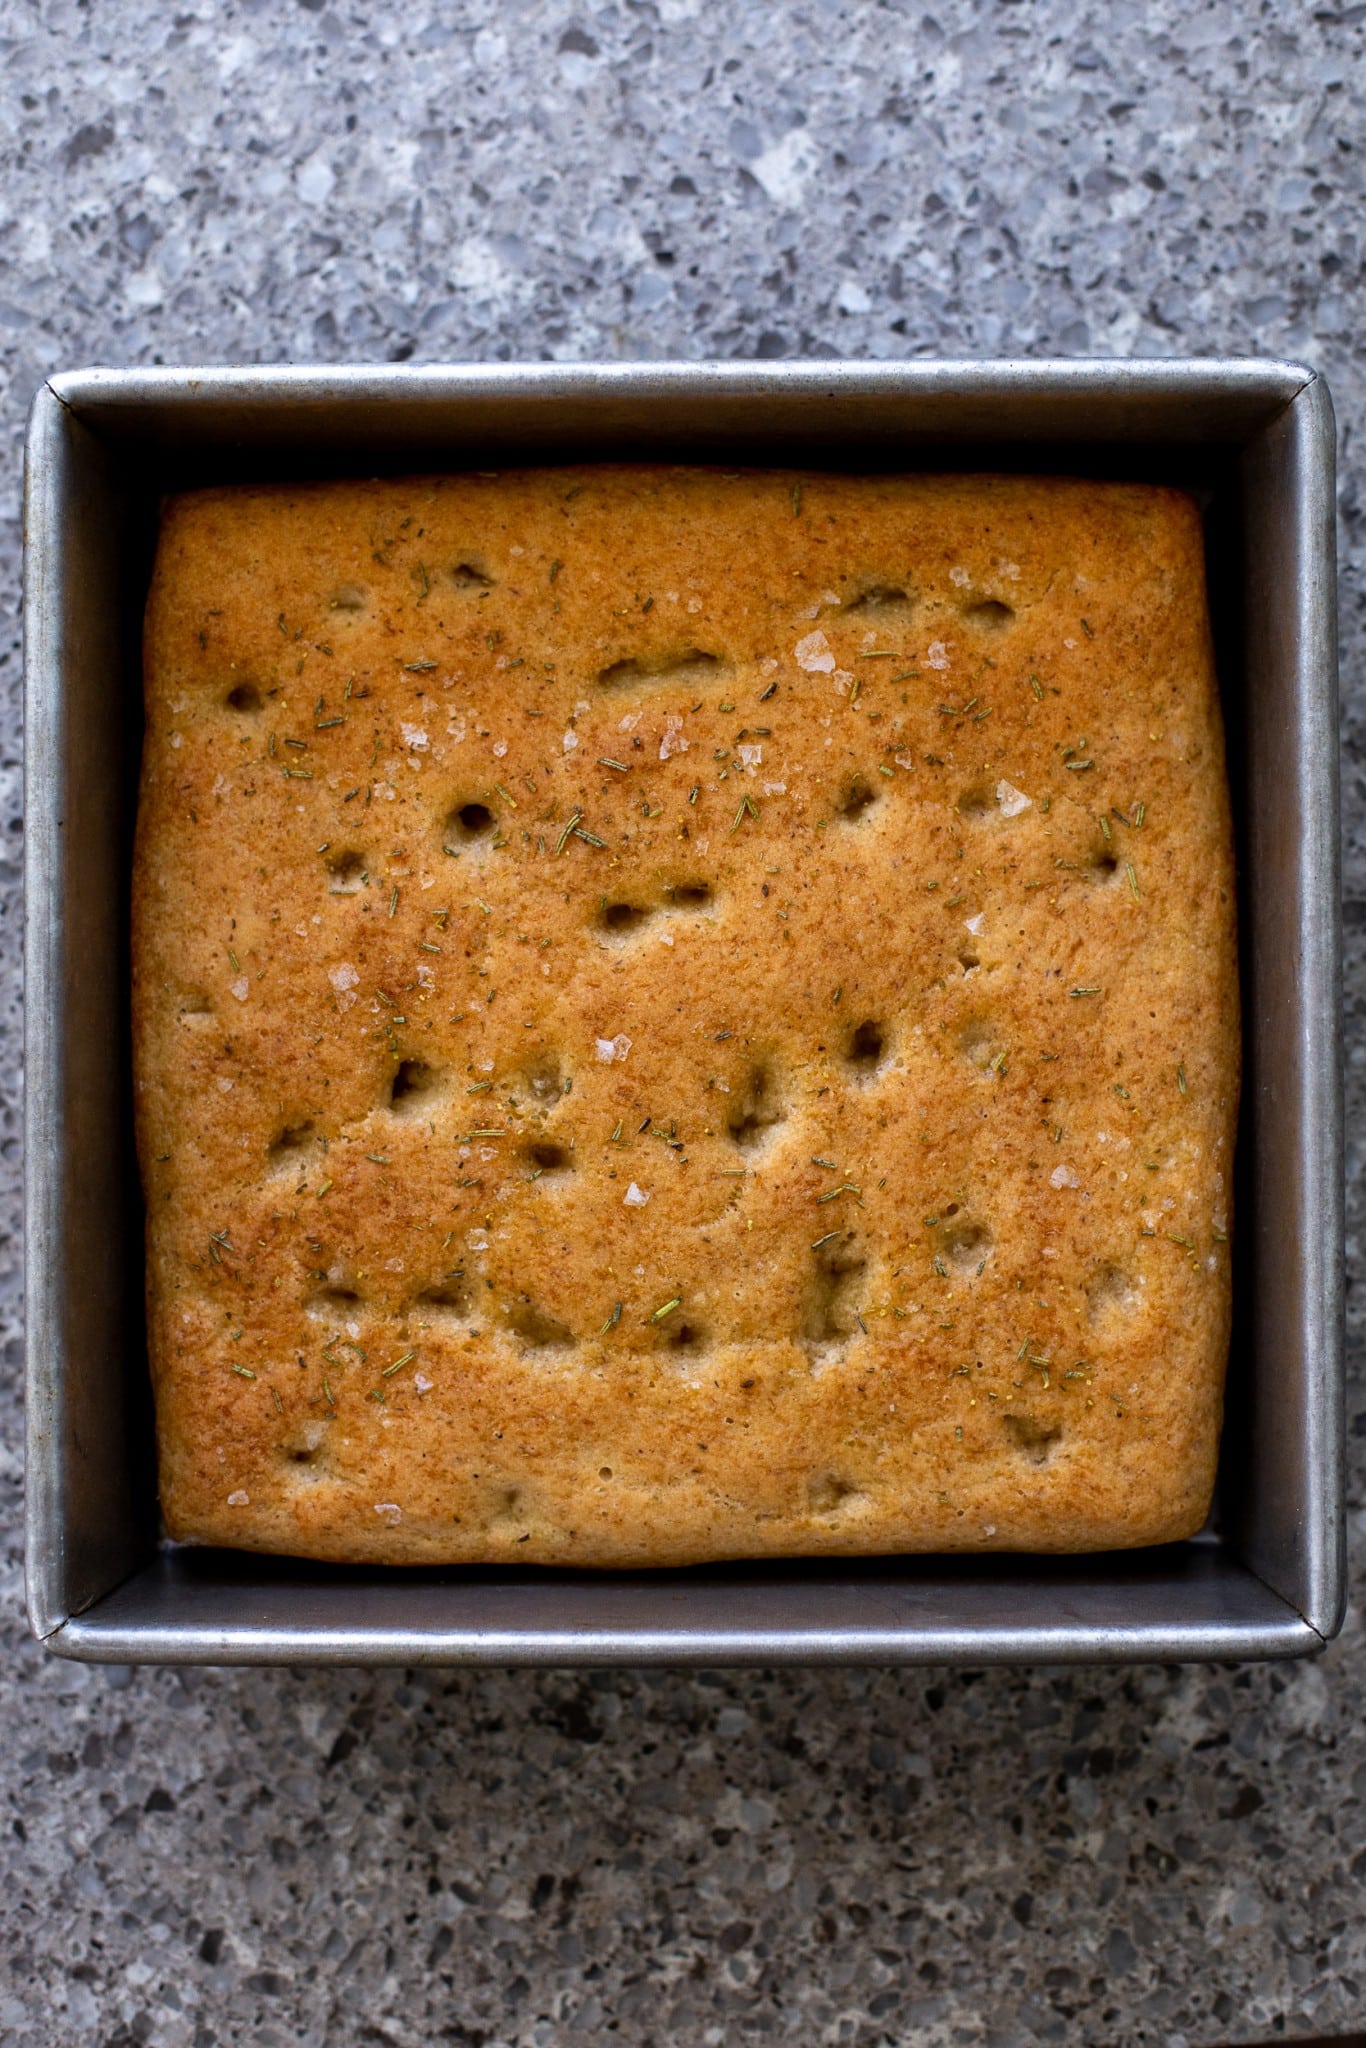
Step 5. Spread the dough into an oiled pan and let it rise for one hour, until puffy.
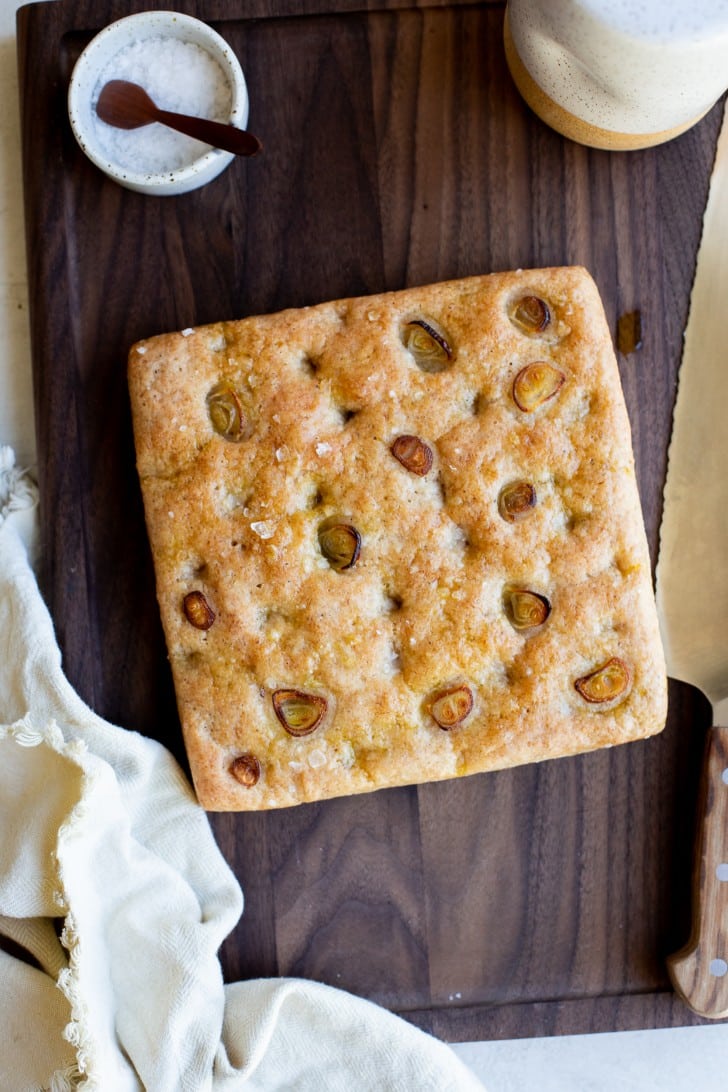
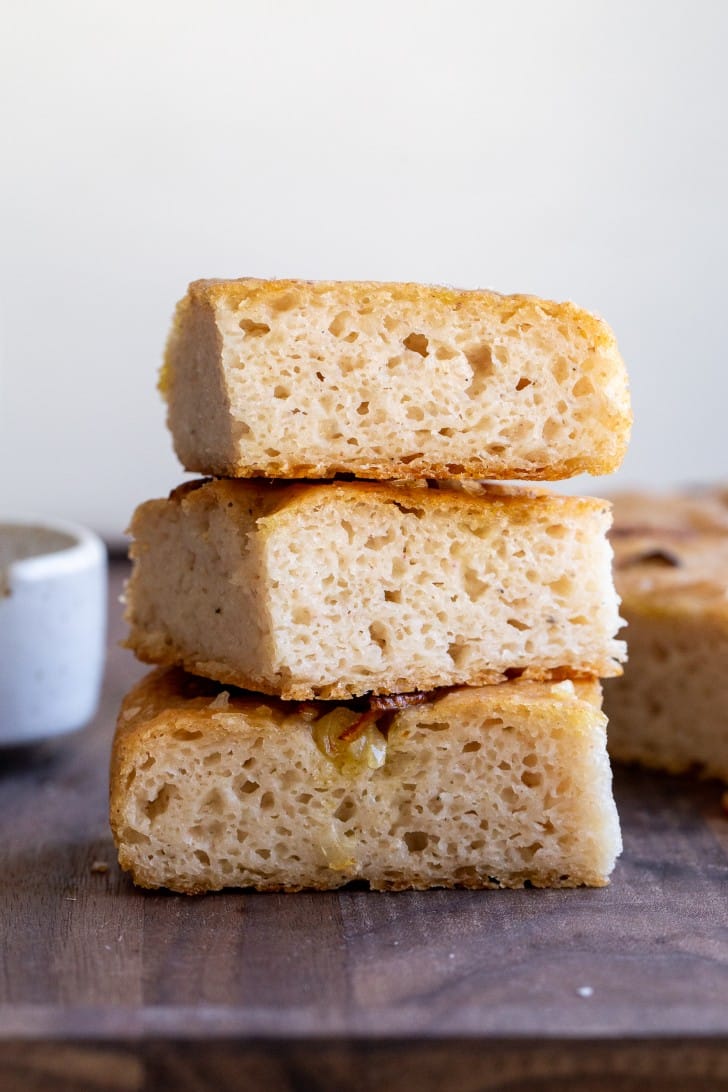
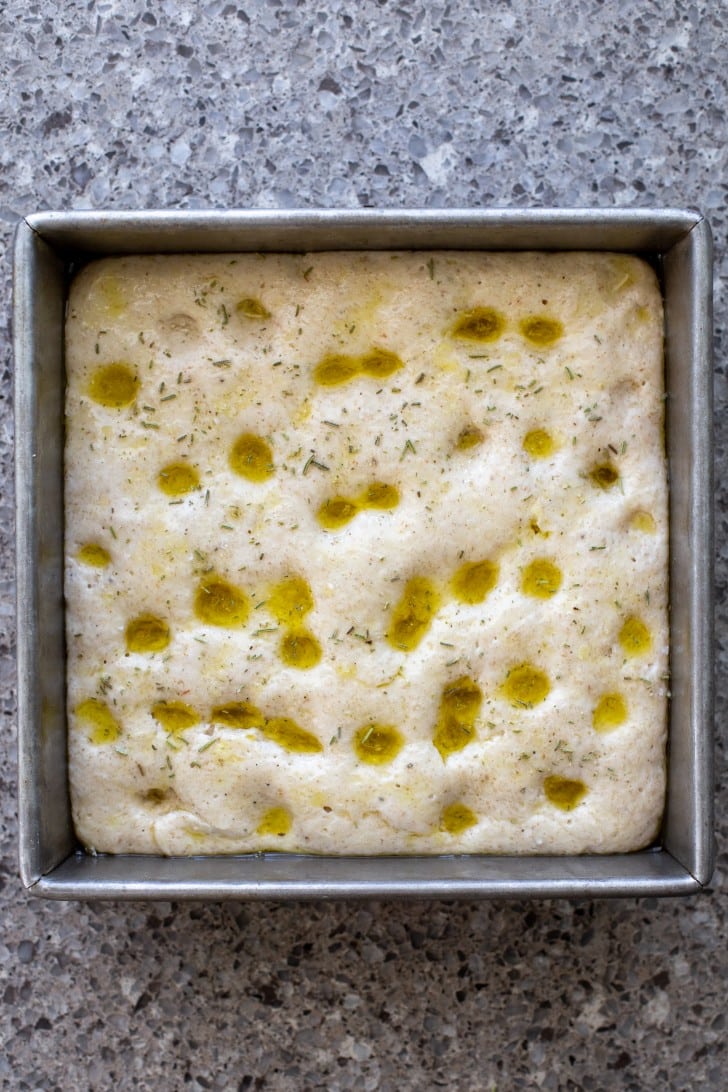
Step 6. Cover with oil and dimple with your fingers. Add your toppings now too, if using!
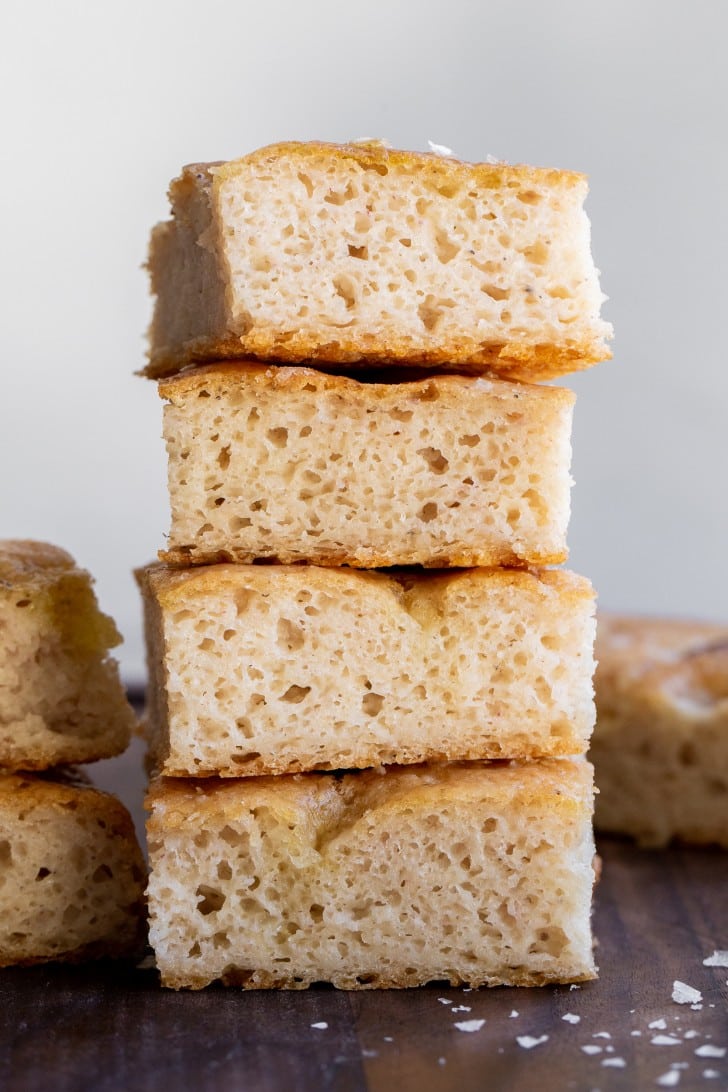
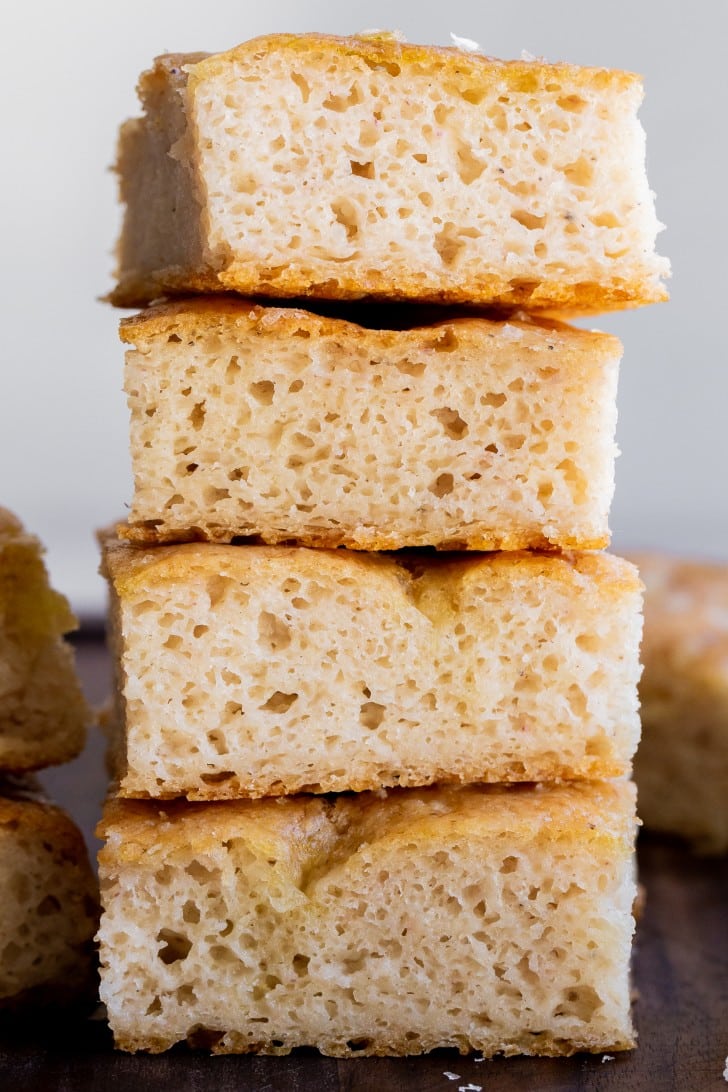
Step 7. Bake for 35 to 40 minutes, or until the top is golden brown. You’ll want to remove it from the pan as soon as you can without burning yourself to prevent the bottom from getting soggy at all.
Step 8. Serve, and enjoy!! The most important step :)
Topping ideas
This is a great time to be creative, and if you search Instagram or Pinterest, you’ll find a TON of ideas, but here are a few to get you started! And of course, simple with just a little flaky sea salt is always great too :)
- Sliced shallots (what I used in the photos) or onions
- Fresh or dried rosemary, or other herbs
- Tomatoes, sliced, or cherry tomatoes
- Roasted garlic
- Roasted red peppers
- Marinated artichoke hearts
Tips for the best gluten-free focaccia
- Make sure your ingredients are fresh, especially the yeast! If your yeast is old, it won’t activate as well and your bread won’t rise as much.
- Use the correct water temperature to activate your yeast. If the water is too hot, it will kill the yeast, and if it isn’t hot enough, it won’t activate. The right temperature should be warm enough that you can hold a finger in the water without it burning you, but should still feel warm/hot to the touch.
- Use a baking scale! I don’t really give you a choice here, since I list all of the ingredients in grams, and it’s for a good reason. Baking by weight will give you much more consistent results.
How to serve focaccia
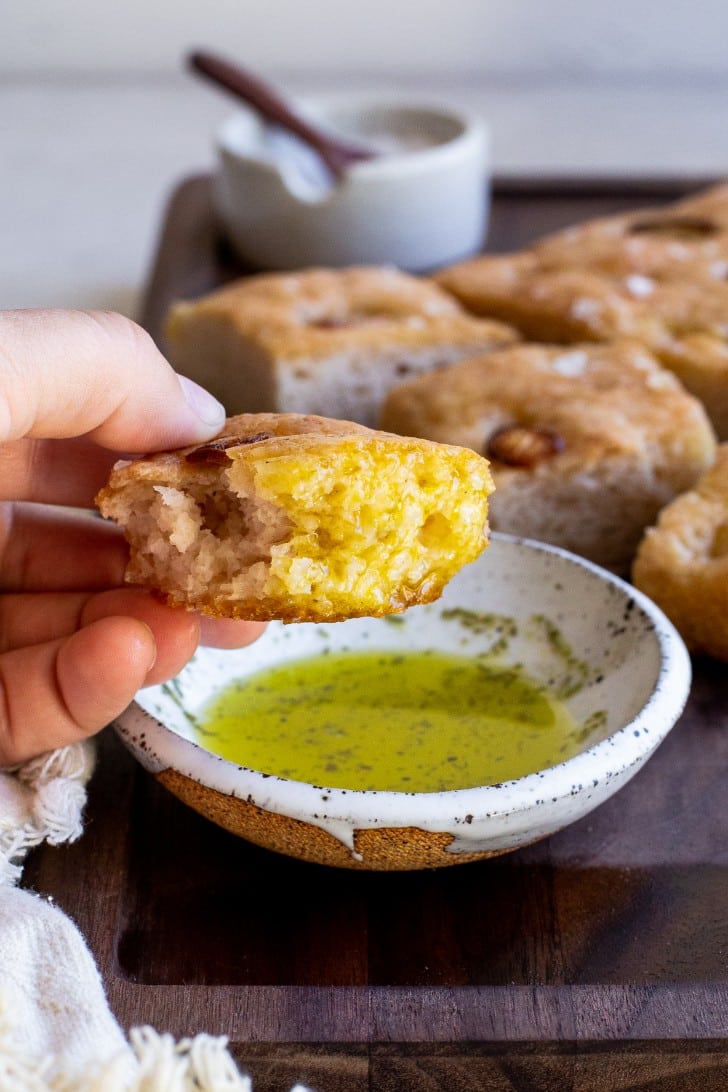
I love serving this warm from the oven with an olive oil dipping sauce. You can add in herbs, like oregano, rosemary, and thyme, along with chili flakes if you want a little bit of heat. Balsamic vinegar is great in this mix too.
You can also use this focaccia as sandwich bread, serve it with a marinara sauce for dipping, serve it alongside pasta, salad, or any other Italian-style dinner, or just use it as you would use any other toast. It makes great garlic bread or gluten-free croutons, too!
How to store focaccia
- Room temperature: store in an airtight container for up to two days.
- In the fridge: in an airtight container for up to a week.
- In the freezer: slice and freeze in an airtight container for up to six months.
To reheat: to refresh the focaccia, whether kept at room temperature or in the freezer, place the bread into a 400℉ oven and heat until crisp and warm for about 5 minutes.
You may need…
More gluten-free bread recipes to try
- Homemade Gluten-Free Bread
- The Best Gluten-Free Pizza Crust
- Gluten-Free Bagels
- Gluten-Free Cinnamon Raisin Bread
- Easy Gluten-Free Sourdough Focaccia
Easy Gluten-Free Focaccia Bread
Ingredients
To activate the yeast
- 7 g (2.5 tsp) active dry yeast
- 100 g warm filtered water
- 20 g maple syrup, honey or cane sugar
For the loaf
- 12 g whole psyllium husk
- 275 g filtered water, room temperature
- 80 g starch of choice, such as potato starch, tapioca starch, or arrowroot starch
- 220 g gluten-free whole grain flours of choice, such as a combination of sorghum flour, brown rice flour, quinoa flour, buckwheat flour, millet flour, etc.
- 10 g sea salt
- Olive oil
Equipment
Instructions
- Grease a 9×9″ square baking pan with a generous amount of olive oil; set aside.Olive oil
- In a small bowl, combine the yeast with the sweetener of your choice and warm water, between 100-110℉. It should feel very warm, but not too hot, to the touch. Let it sit to activate for about 10 to 15 minutes. You should notice it start to to bubble, and then it will get nice and foamy on top.7 g (2.5 tsp) active dry yeast, 100 g warm filtered water, 20 g maple syrup
- Combine the psyllium husk and the water in a bowl or liquid measuring cup. Let it thicken and gel up for about 5 minutes.12 g whole psyllium husk, 275 g filtered water
- In a large bowl or the bowl of a stand mixer, combine the starch, flour, and salt. Add in the activated yeast mixture and thickened psyllium gel mixture. Mix until a smooth dough forms, making sure to scrape down the sides and the bottom to make sure all of the flour is hydrated. If the dough seems sticky, let it rest for a few more minutes to let the psyllium and flours absorb.80 g starch of choice, 220 g gluten-free whole grain flours of choice, 10 g sea salt
- Press into your prepared baking dish, or press it into a similarly sized shape on a baking sheet.
- Let rise for 1 hour at warm room temperature. While the dough rises, preheat the oven to 425ºF. The dough will feel lighter and puffy when it’s ready.
- When it’s fully risen, drizzle the dough with a healthy glug of olive oil and use your fingers to press dimples into the dough.Olive oil
- Add toppings if desired, or just sprinkle with flaky sea salt.
- Bake for 35 to 40 minutes, or until golden brown and baked through.
- Let cool for 30 minutes and then remove from the pan and allow to cool completely on a wire baking rack (this keeps the bottom from getting soggy). You can also serve this one while it’s still warm – it’s so delicious that way!
- Store at room temperature for two to three days, in the fridge for up to a week, or slice and freeze in an airtight container for up to six months.

Thank you for this recipe! I have been making gf rustic boules and loaves for 3 years and this is the most reliable, predictable and delicious bake. I generally make it with sea salt only and slice for toast and sandwiches.
Thanks for the helpful review, Larry! So glad you’re enjoying this recipe.
If using a premade flour blend (ie Vitacost), how much should be added?
You’ll use the total of all the flours/starches called for. 300g in this recipe!
Hi
Can I use instant yeast instead of active one? Thanks!
Hi Mariana, yes you can – just add it to the dry ingredients instead of activating it separately!
Can I use all Sorghum Flour, instead of a combination?
You can use it for all of the grain flour, but you’ll still want to use some kind of starch for lightness.
I have made this several times and just love it! 2 questions:
Rachel what is your preferred flour combo
and
When making it into pizza, do you simply add sauce and a topping and bake?
Many thanks,
Jessica
Hi Jessica, I vary my flours a lot but I love sorghum, millet, and/or superfine rice flours for this one. For pizza, I recommend following the instructions in my gluten-free pizza recipe :)
This was absolutely delicious! Everyone (coeliacs and non-coeliacs) loved it. Amazing sourdough-like texture. For the main flour I used a mix of: 1/2 buckwheat flour, 1/4 rice flour and 1/4 Orgran (Australian brand) gluten-free plain flour.
For the starch component I used tapioca flour.
So glad it was a hit, thanks so much for the feedback!
Hiya, would it be possible to use my active starter instead of yeast do you think? If so, would you know how much to use? Thanks!
Hi Issy, sounds like you’re looking for my sourdough focaccia recipe :) enjoy!
Have you tried making this dough ahead of time, letting it rise, then refrigerating overnight to bake the next day? I am curious to prep that <3
Thanks!
I would recommend refrigerating it before the rise and then letting it come to room temp before baking! Some people like to bake straight from the fridge too.
I just tried this recipe a few times both times with different flours. But its doughy and gummy. Is this because of the psyllium husk? Has anyone else experienced this? If so how can I correct this. I am new to Gluten Free Baking so not sure if its supposed to be like that. If so, why would anyone enjoy this.? Would xantham gum be better to use?
Hi Rachael, psyllium husk is necessary to keep the dough together and workable, but you could try reducing it slightly if you’d like to experiment. Which flours are you using? Is it rising and baking long enough? An underproofed and/or underbaked loaf will be both sticky and gummy. It’s definitely not supposed to be doughy and gummy – this recipe frequently gets rave reviews from people who still eat gluten when I make it!
Hi Rachel, I tried this recipe and it came out amazing. Didn’t taste different with gluten free flour absolutely delicious!!
Would love to know more recipe with gluten-free flour.
So glad you’re loving it, Shweta!