
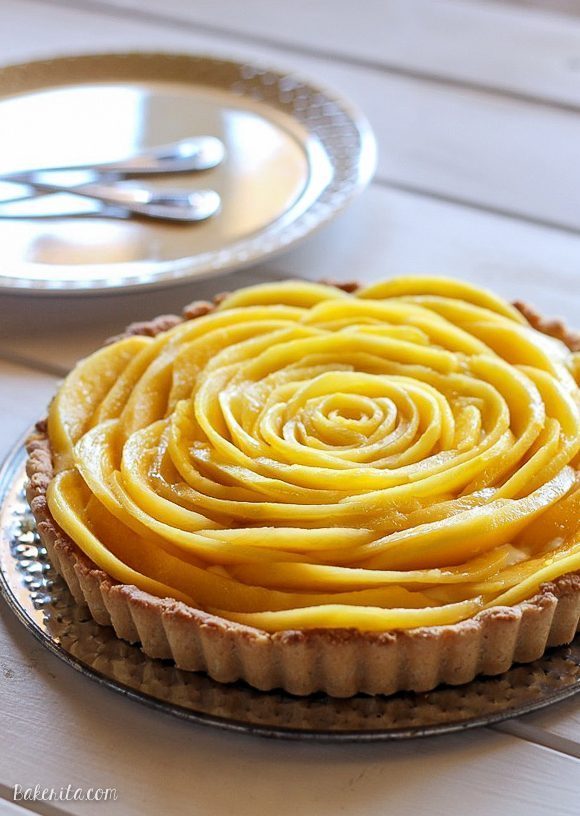
This Mango Tart uses fresh, ripe mangos and coconut cream to make a delicious dessert that’s gluten-free, Paleo-friendly, refined sugar-free, and vegan! The recipe includes step-by-step photos of how to make a beautiful mango flower.
I’m back in America! I’ve spent the past week acclimating to the (gorgeous) San Diego weather, getting some sun on my skin (that it had seriously been missing for the past six months), and of course, getting reacquainted with my kitchen! For real though guys – you have no idea how good it feels to be baking again. I miss London and having so many adventures terribly already, and I’ve barely been home a week, but it also feels so so nice to be back with my family, with all of the comforts of home!
My list of recipes to make had been getting extraordinarily long through my baking hiatus. I still have tons more recipes I need to make/perfect/share with you guys! This Mango Tart has been on my to-do list for ages. Thankfully, the recipe came out perfectly the first time I made it. If you’re from North County San Diego, you’ve likely had the Mango Tart from Pasta Pronto (now Urban Pi) in Del Mar. That tart is soooo goooood, with the juiciest mangos you can imagine, a wonderfully light creamy filling, and a crunchy delicious crust. I needed to replicate it, and with this tart, I’ve done just that – but made it a bit healthier.
How to make a mango tart
The key to this tart is firm, sweet, perfectly ripe mangos. They’re the star of the show. A subpar fruit will make a subpar tart (though the crust and filling will still be delicious!).
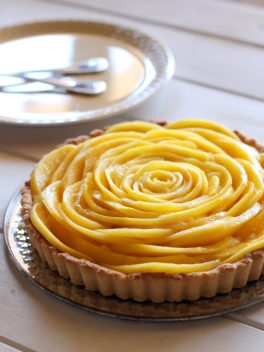
I know it looks super intimidating to put together, but I promise, it’s really not! It just takes a few minutes to lay the thin mango slices around and inwards towards the center. The outcome is a gorgeous, incredibly impressive, and amazingly delicious tart.
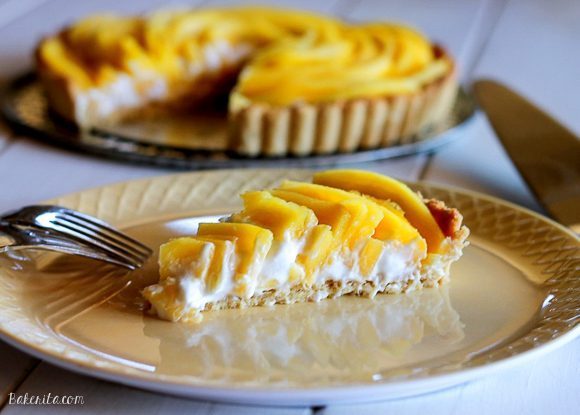
The best part?! Besides being gorgeous, and delicious, it’s also healthy! The crust is my favorite almond coconut crust! It comes together in minutes with a wooden spoon and just a few ingredients. The filling does require a bit of forethought with putting the coconut milk in the fridge overnight. However, the actual active prep time is just a few minutes. The whole mango tart recipe is gluten-free, grain-free, vegan, Paleo, and soy-free.

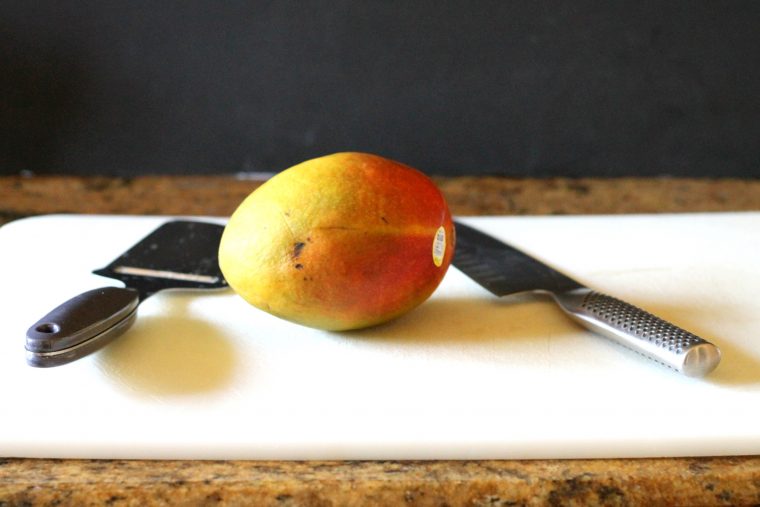
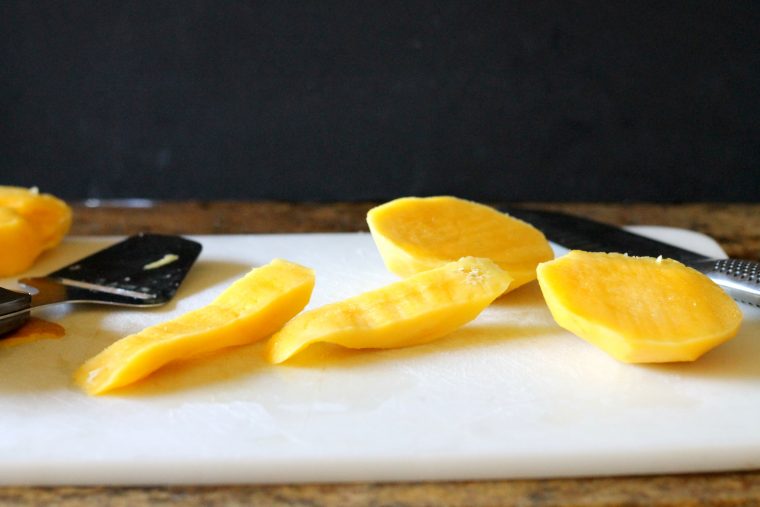
As I’m continuing to explore gluten-free baking, I’ve come to realize that when I make something gluten-free, it’s not too hard to convert to Paleo. I’ve been loving the results, so let me know if you’d like to see all my Paleo recipes! I have some good ones to share with you all :). Cutting the mango is a bit of a hassle. It’s easiest to do when the skin isn’t on which makes it a little slippery, but the whole process is rather simple! Here are some step-by-step photos of how I did it:
How to make a mango flower
As for the creation of the mango flower, here are some photos to show the process. I also hopefully explained it decently in the instructions, but if you have any other questions, feel free to ask me in the comments!

This gluten-free mango tart was the most perfect treat to make for the beginning of summer. It will be amazing with a variety of different fruits for different times of the year. I’m excited about stone fruit versions later in the summer – peaches and nectarines would be amazing! I hope you all love it and will share it with all of those that you love! Hope everyone’s summer is off to a great and sunny start! Lots of recipes coming your way :)
Here are others you might like too!
- Gluten-Free Vegan Chocolate Tart
- Vegan Fruit Tart
- No-Bake Lemon Cookie Fruit Tarts
- Grapefruit Tart
- Blackberry Crisp Tart
- Strawberry Chocolate Tart
Mango Tart
Ingredients
For the crust
- ⅓ cup 26g unsweetened shredded coconut
- 1½ cups 126g blanched almond flour
- 2 tablespoon 30g coconut oil, melted
- 2 tablespoon 30g maple syrup
- ¼ tsp salt
For the filling
- 1 13.5 oz. can full-fat coconut milk or coconut cream, refrigerated overnight
- 1-3 tablespoons maple syrup, depending on your tastes
- 1 teaspoon vanilla extract
- 2 ripe mangos
Instructions
For the crust
- Preheat oven to 350ºF. In a food processor, pulse together almond flour, salt and shredded coconut until finely ground. Melt together coconut oil and maple syrup and add to almond flour and coconut mixture. Pulse until coarse crumbs form (dough should clump together when squeezed with fingers).
- Transfer dough to a greased 9-inch tart pan with a removable bottom. Using a measuring cup or your fingers, evenly press dough in bottom and up sides of pan.
- Bake in center of oven until golden and firm, about 12-16 minutes. Transfer to a wire rack to cool completely, at least 1 hour.
For the filling*
- Remove can of coconut milk from the refrigerator and flip it upside down (this will cause all the liquid to be at the top). Open the can, and pour the coconut water into a separate bowl (you can save this for smoothies or discard it).
- You will be left with the coconut cream in the bottom of the can – this is the thick, white creamy part. Scoop this out and transfer to another large bowl. With a hand mixer or whisk, whip the coconut cream until fluffy. Add the maple syrup and vanilla and whip again until combined. Place in the fridge until ready to assemble the tart.
To prepare the mango
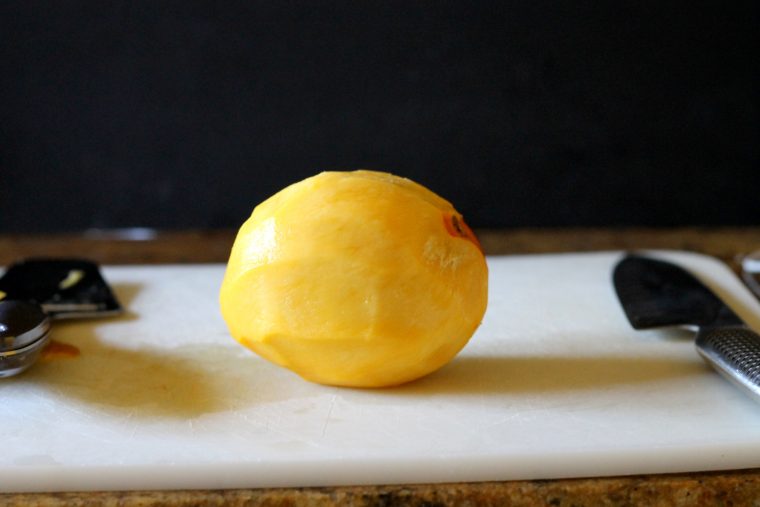
- Peel the mangos with a vegetable peeler or a knife. Hold the mango upright on the counter with your fingertips. Position your knife to one side of the center stem and slice straight down, cutting as closely as possible to the seed. Turn the mango and slice off the other “cheek.” You will have two big pieces of mango and the flat seed.
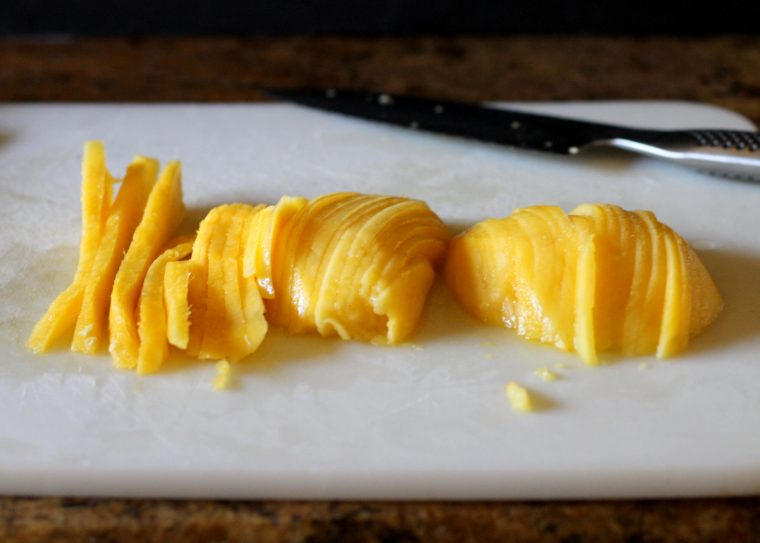
- Slice the mango cheeks lengthwise into very thin strips.
To assemble
- Remove the whipped coconut cream from the fridge. Spread it in an even layer over the completely cooled crust.
- Starting with the longest strips of mango, place the slices around the edge of the tart. Repeat, working your way in, slightly overlapping the rows. When you reach the center of the tart, roll one mango slice into a curl and place in the center. Keep refrigerated until serving, and enjoy!


Yay, new recipe!! I really enjoyed following along with your European adventures, Rachel, but I’m also excited for some new recipes! This tart is beyond gorgeous. Seriously, when I saw it on instagram, my jaw hit the floor. Beautiful! :)
Can this be frozen and shipped?
Hi Ceria, because the freshness of the mangos is so important to the flavor, I wouldn’t recommend it. It’s also very delicate and likely wouldn’t make the journey well. I’d recommend something like cookies, brownies, or bars for shipping!
This tart looks so beautiful!!! What a great summer recipe. Can’t wait to give it a go :)
It’s so hard to adjust back to real life, especially when you’ve been gone as long as you have! This tart is seriously so incredibly beautiful, I’d have hard to time eating it, I’d just want to stare at it! ha! Welcome back!
Wow, that looks awesome. I love the arrangement of mango slices, it came out so perfect. :) Love the summery flavors, I’ll have to try this sometime (although it wouldn’t look nearly as pretty…) :D
This sounds amaaaaazing Rachel! I am going to try it tomorrow!
Welcome home,Rachel! I know how exciting travelling can be, but also that there’s no place like home. I’m still living out of a suitcase but looking forward to that ‘settling at home’ feeling.
As for this tart … wow! It looks so beautiful and you explained perfectly how to put it together. And it’s healthy, too. What more could you want from a dessert?!
This looks SO good. I can’t wait for mangos to come into season so I can make this :)
Welcome home Rachel! I’m so glad you enjoyed yourself and are settling back in to your home. This mango tart looks divine. I’m on a fruit cake over at my blog and just mangoes haha. They are found everywhere here in Jamaica and of course coconuts too so I can’t to try this out! It is absolutely beautiful.
UGH ignore my first comment please! I was reading Beth’s own and wrote her name hahaha please delete it!
Haha, no problem! Deleted :)
This tart is stunning! And with mango and the coconut cream!! I love it – two of my favorites! So perfect for summer too : ) And welcome back!