This Gluten-Free Sourdough Pizza Crust requires just six ingredients, 10 minutes, and one bowl needed to mix up the dough! This easy sourdough discard pizza dough recipe is also vegan, and couldn’t be easier to make. Thanks to Lodge Cast Iron for sponsoring this post!
I am SO excited to share this Gluten-Free Sourdough Pizza Crust recipe with you today. Since I shared my gluten-free sourdough bread recipe, I have heard from so many first-time sourdough bread bakers who are having so much fun learning how to make gluten-free sourdough. It’s so much fun, and so empowering to be able to make your own bread. I’ve heard from so many readers who have gotten totally obsessed with making bread now, just like I did.
But eventually, you’ll want to branch out to other ways of using your sourdough starter and your sourdough discard. Maybe you want to try something like these Sourdough Chocolate Chip Cookies, or these Gluten-Free Vegan Sourdough Scones? Both good options, but my new obsession has got to be this recipe for gluten-free and vegan sourdough pizza crust. It’s all the things you want:
- Easy to make
- Only needs SIX ingredients!
- One bowl
- Ten minutes prep time
- Can use active or discard starter
- Can be thin & crispy or thicker & fluffy
- Baked on the Lodge Cast Iron Pizza Pan so it has a super crispy bottom
- Holds up well to toppings
I’m so excited to partner with Lodge Cast Iron for this post! Their USA-made products are so affordable, so high quality, easy to care for, and their bakeware line is perfect for making all things gluten-free sourdough. The Pizza Pan we use in this recipe helps us get the perfect crispy crust.
This recipe is AMAZING. Our family just recently went gluten free for a couple family members, and I’ve been trying to do gluten free sourdough, and this is the best gluten free substitute I’ve found so far. This tastes pretty much exactly like regular pizza crust….This recipe is definitely a keeper.
Comment from Lady E
What’s in gluten-free sourdough pizza crust?
Okay, you know how I mentioned this recipe only calls for six ingredients? Well, two of those ingredients are salt and water, which barely count. So really, you’ve only got four ingredients! Here’s what you’ll need:
- Gluten-Free Sourdough Starter: I have instructions in my Instagram highlights for how to make one! The starter does not need to be active, it can be after the full rise and fall of the starter. However, I wouldn’t use old discard, like one that’s been sitting in your fridge for a few days.
- Psyllium Husk: this acts as the gluten in this recipe. It gives the crust a nice chew and helps make the dough easier to work with. You can read more about psyllium husk’s role in gluten-free bread baking in this post.
- Water: when mixed with the psyllium, these will form a gel that will help make a smooth, hydrated, workable dough! I prefer using filtered water.
- Starch: I’ve done most of the recipe testing with potato starch, but tapioca flour or arrowroot flour will also work well here!
- Gluten-Free Whole Grain Flours: I’ve used brown rice flour, quinoa flour, and sorghum flour in the test here. Any whole grain gluten-free flour should work well.
- Salt: I like using sea salt or pink salt
How do I make the dough?
- Combine the psyllium husk and the water, and let it thicken.
- Add in the sourdough starter and mix to combine.
- Add in the flours and salt. Mix until a smooth dough forms.
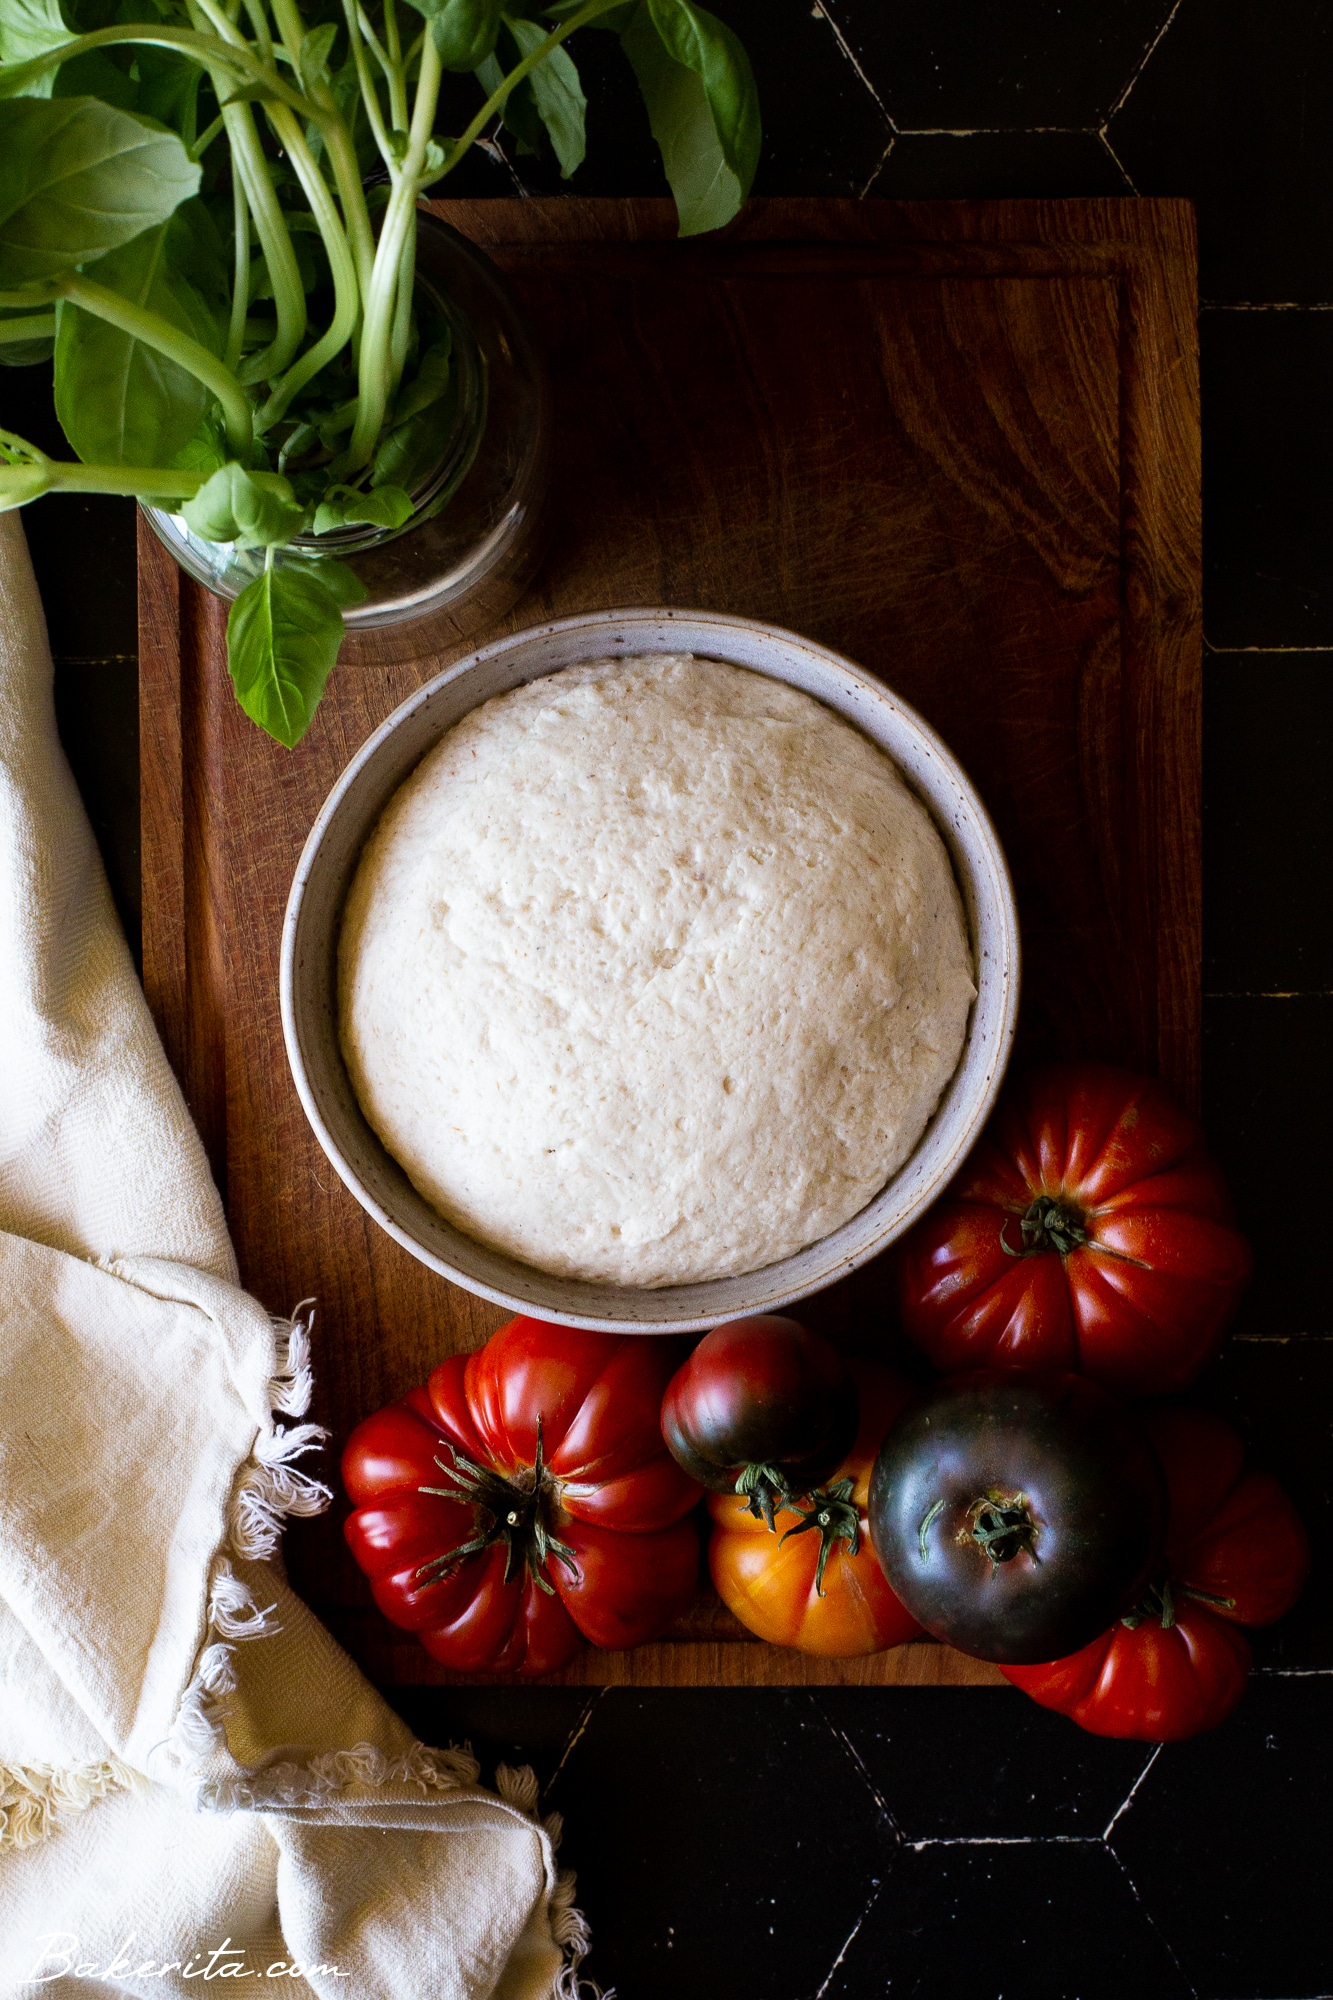
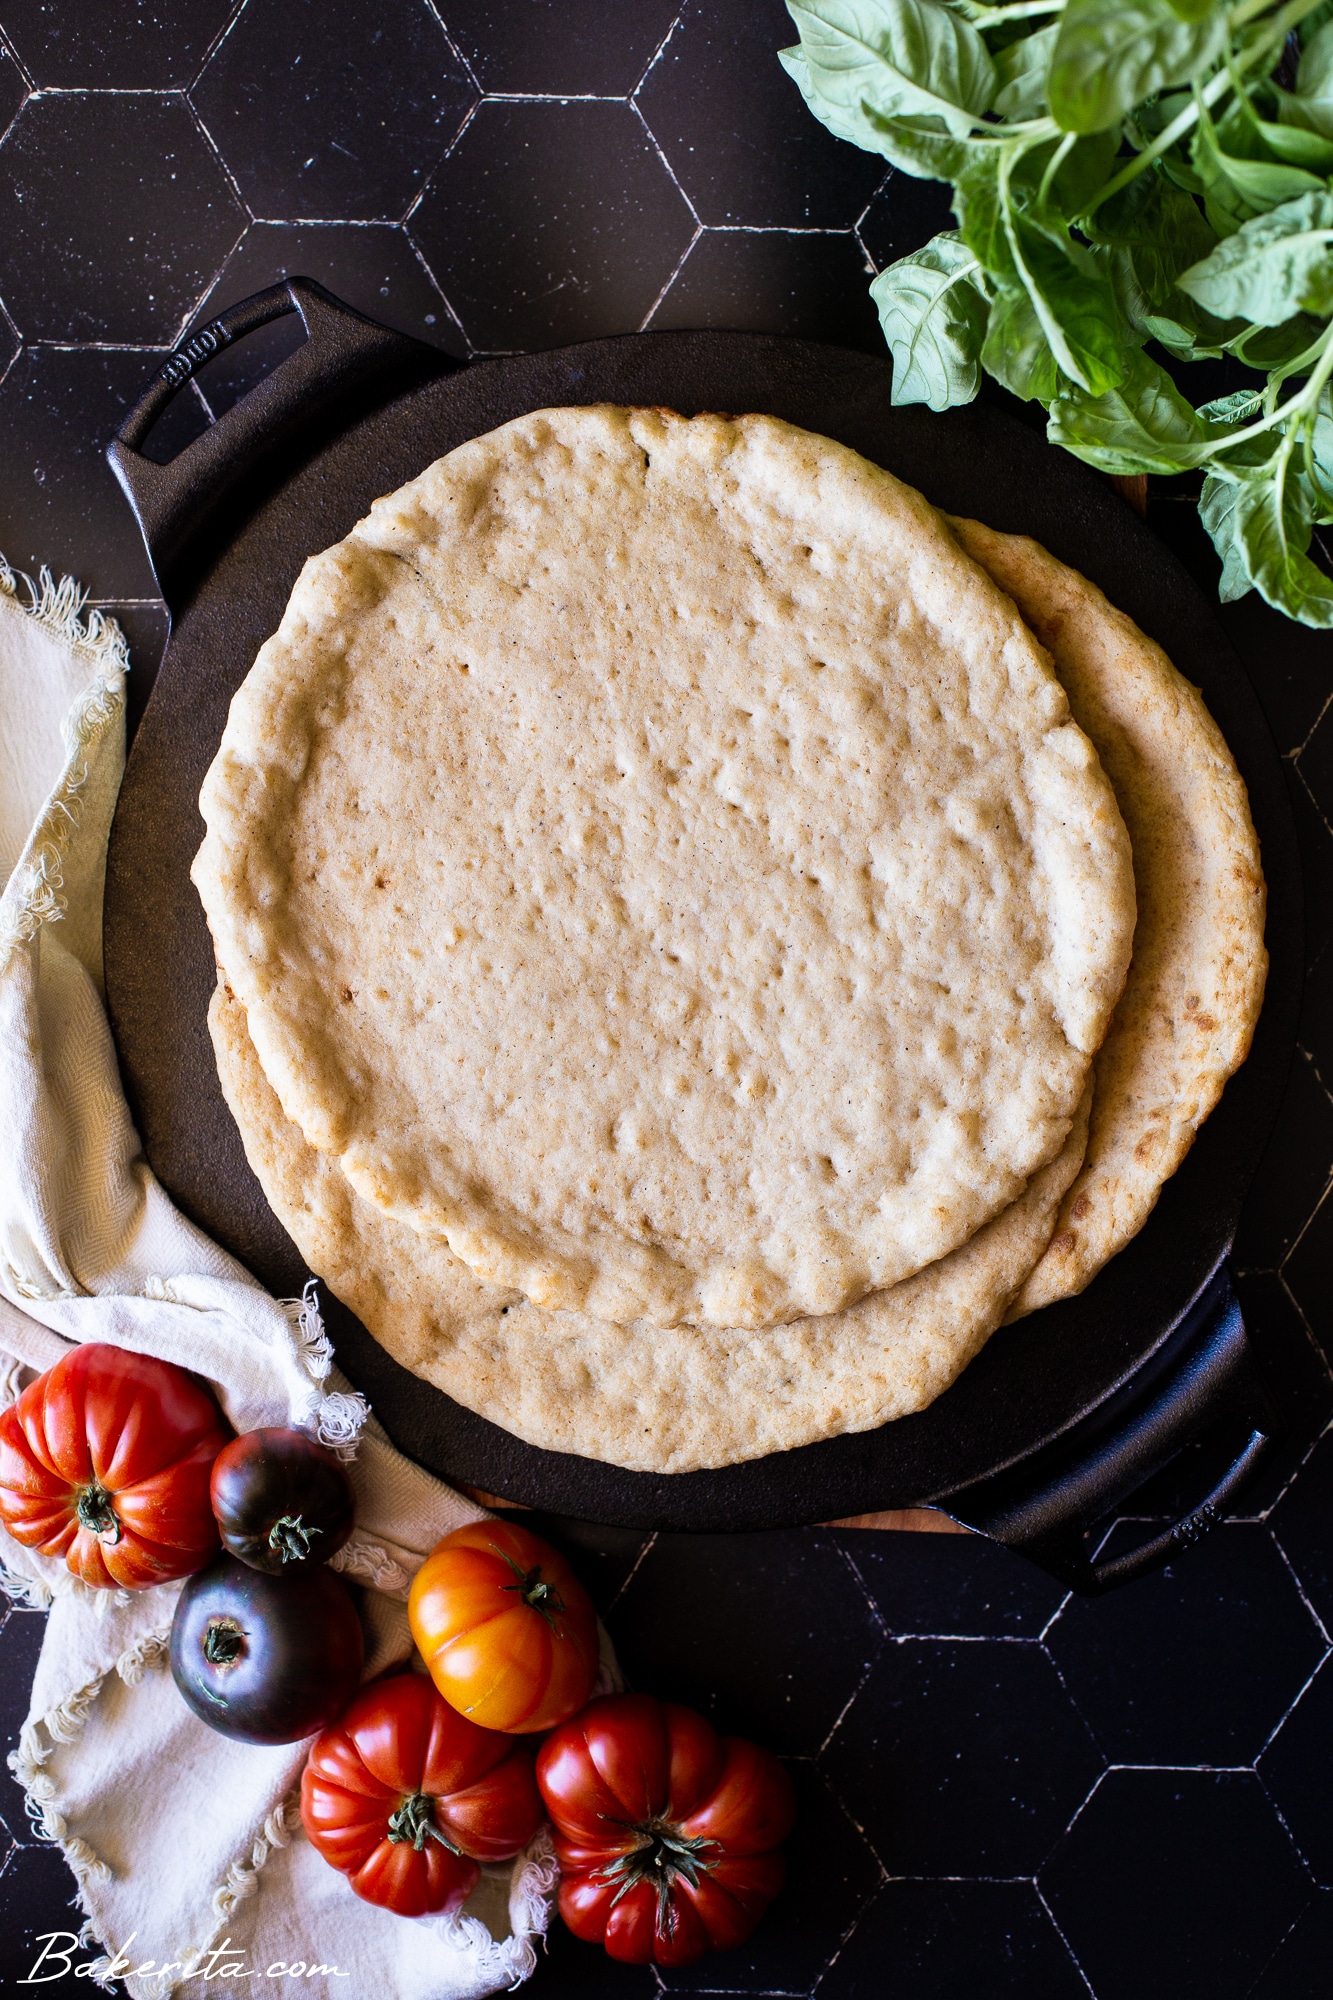
- If you want a thick crust, leave the crust in one ball and move to a greased bowl to rise. If you want thinner crusts, divide the dough into two, form into balls, and place in separate greased bowls to rise.
- Let rise for 3 hours at room temperature, or for up to a day in the refrigerator.
How long does the dough have to rest?
The dough should rest for about 3 hours, or overnight/many hours in the fridge before you press it into shape. The exact timing is more forgiving than the bread recipe, you just want to see some puffy lightness happening in the dough!
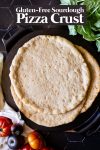
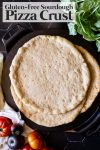
What’s the best way to shape the dough?
When you’re ready to bake, preheat the oven with the Lodge Cast Iron Pizza Pan inside, and then lightly grease a sheet of parchment paper. Flip the dough out onto the parchment. Drizzle the dough with some oil if needed to help it spread more easily.
Use your hands or a rolling pan to press the dough out into a circle, working from the inside towards the outside. You should be able to press it into shape pretty easily! It doesn’t need to be perfect, and remember, the texture of the dough will seem different than traditional pizza dough, because the lack of gluten makes it stretch in a different way!
Let’s bake!
I know it’s hard to replicate the crispy crust you get from good restaurant pizza. I’ve tried so many times over the years, and since I want things **crispy** to the max, it’s never quite there. BUT – I have a pizza baking game-changer, and it makes all the difference in getting a super crispy crust: the Lodge Cast Iron Pizza Pan.
Lodge Cast Iron is a long-time favorite in my house: I love that they’re made in the USA, come seasoned and ready for use, and literally get better as they age. I have had my cast iron skillet since college, and she’s very well-loved!! I know this Pizza Pan will get the same kind of love and attention for as long as I’m making sourdough…and even if I stop, I’m sure I’ll be baking up this loaded vegan paleo pizza crust instead! The Pizza Pan is part of their bakeware line!
Let’s talk about why it’s so special for pizza crust baking. Because cast iron is heavy and super sturdy, it conducts heat really well. So, when you preheat the Pizza Pan in a crazy hot oven, it can not only take the heat, but it will heat up itself. It’ll get REALLY hot, so when you transfer your dough very very carefully onto it, it will immediately start cooking the bottom, help the dough crisp up instantaneously. By conducting all that heat through the iron, you’ll get a nice crispy crust super quickly.
For the safest and easiest way to get the dough onto the hot Lodge Cast Iron Pizza Pan, I like pressing the dough out into its shape on a piece of parchment paper that’s on a big cutting board (which allows me to move it right next to the hot pan) and then sliding the whole sheet of parchment onto the pan to bake. Doing this means you can’t bake higher than 450F, or the paper will burn, but it makes it much easier to transfer the dough cleanly.
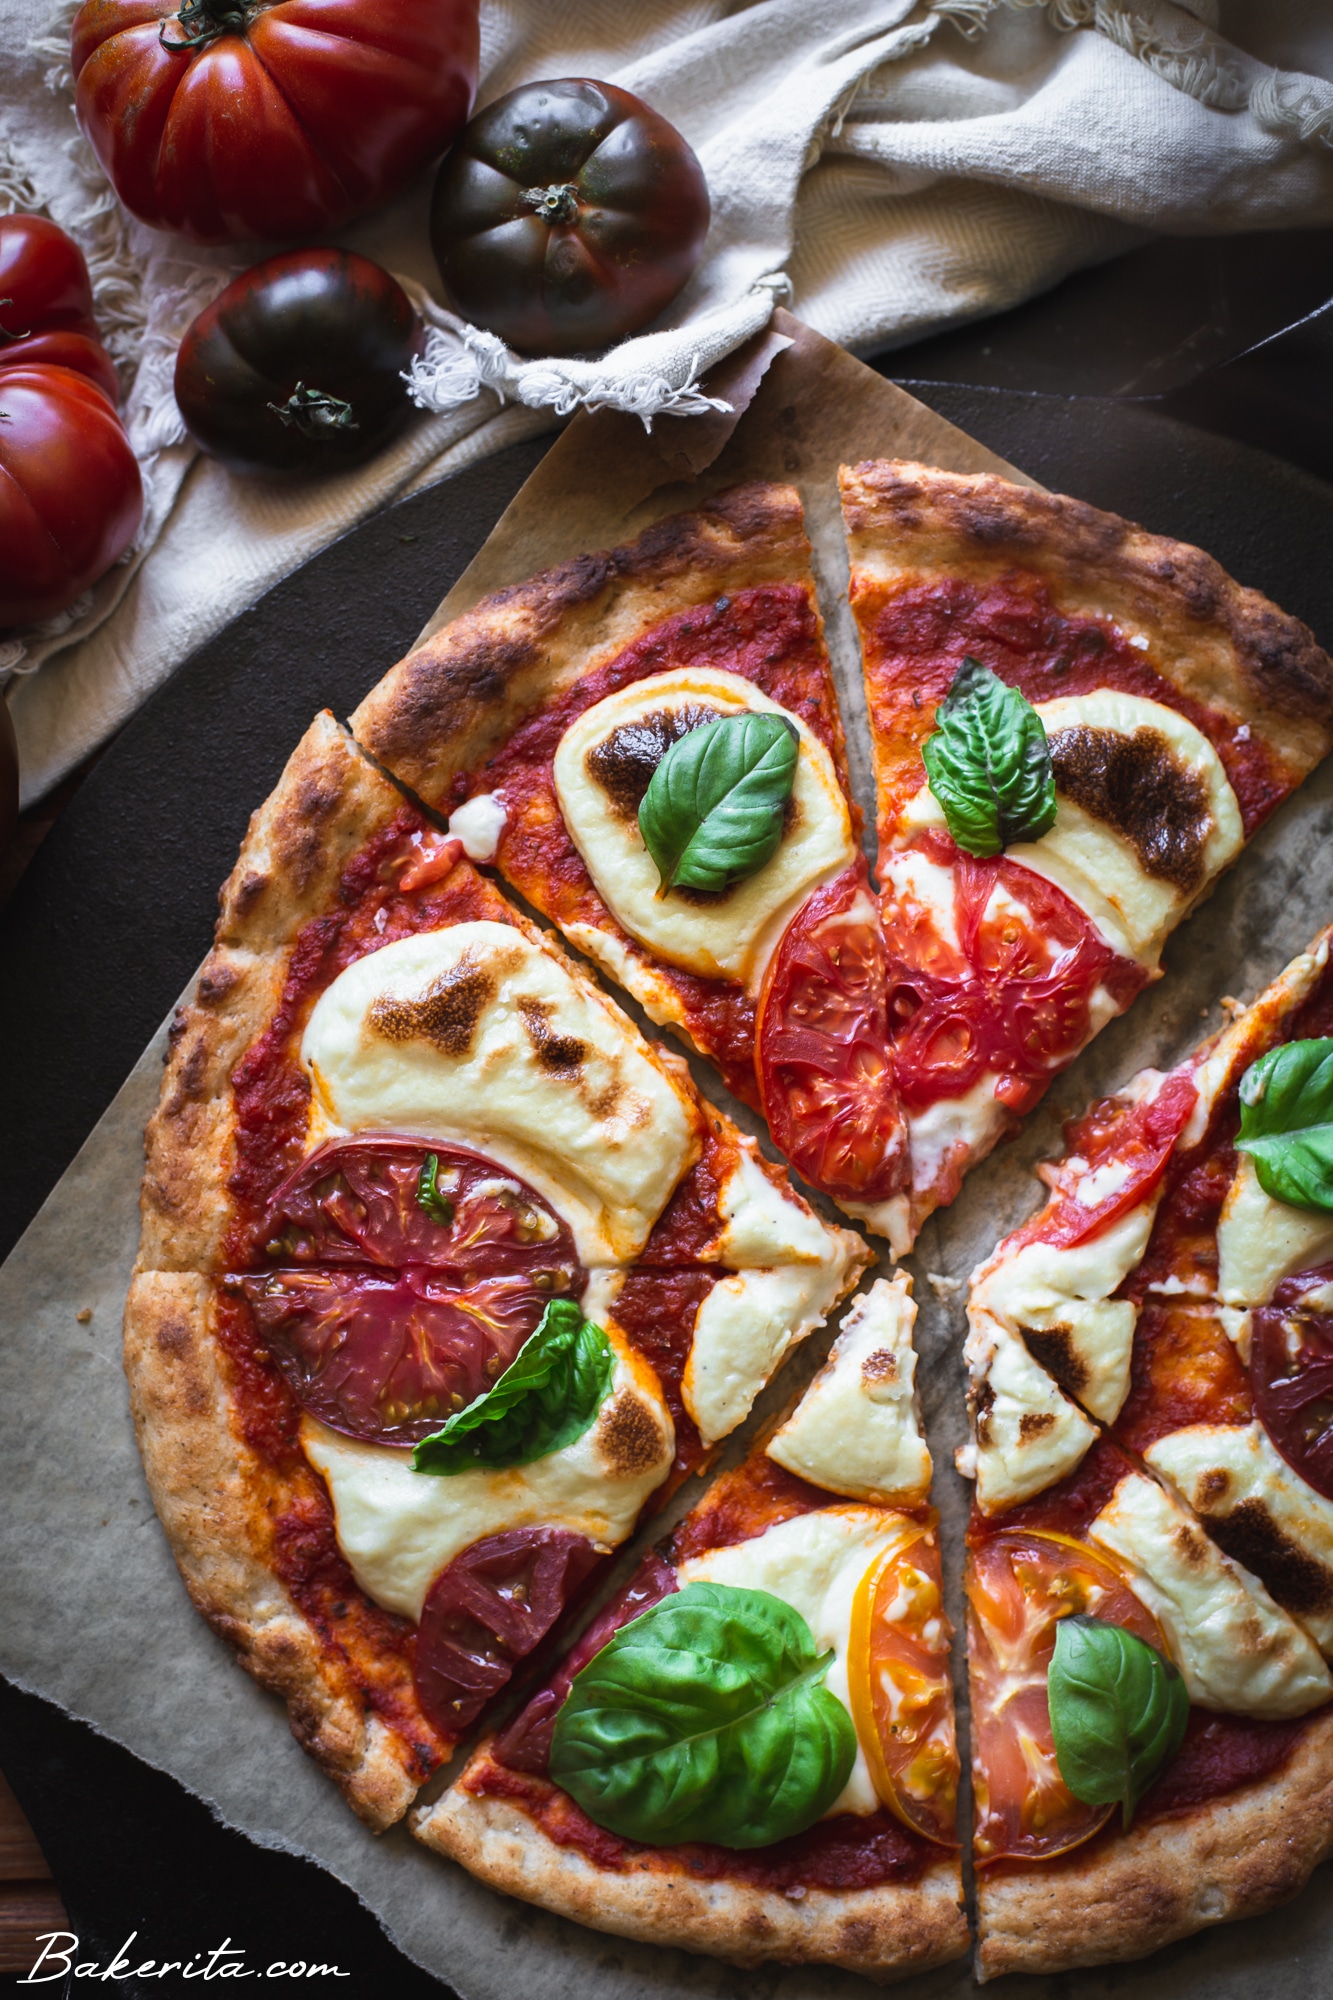
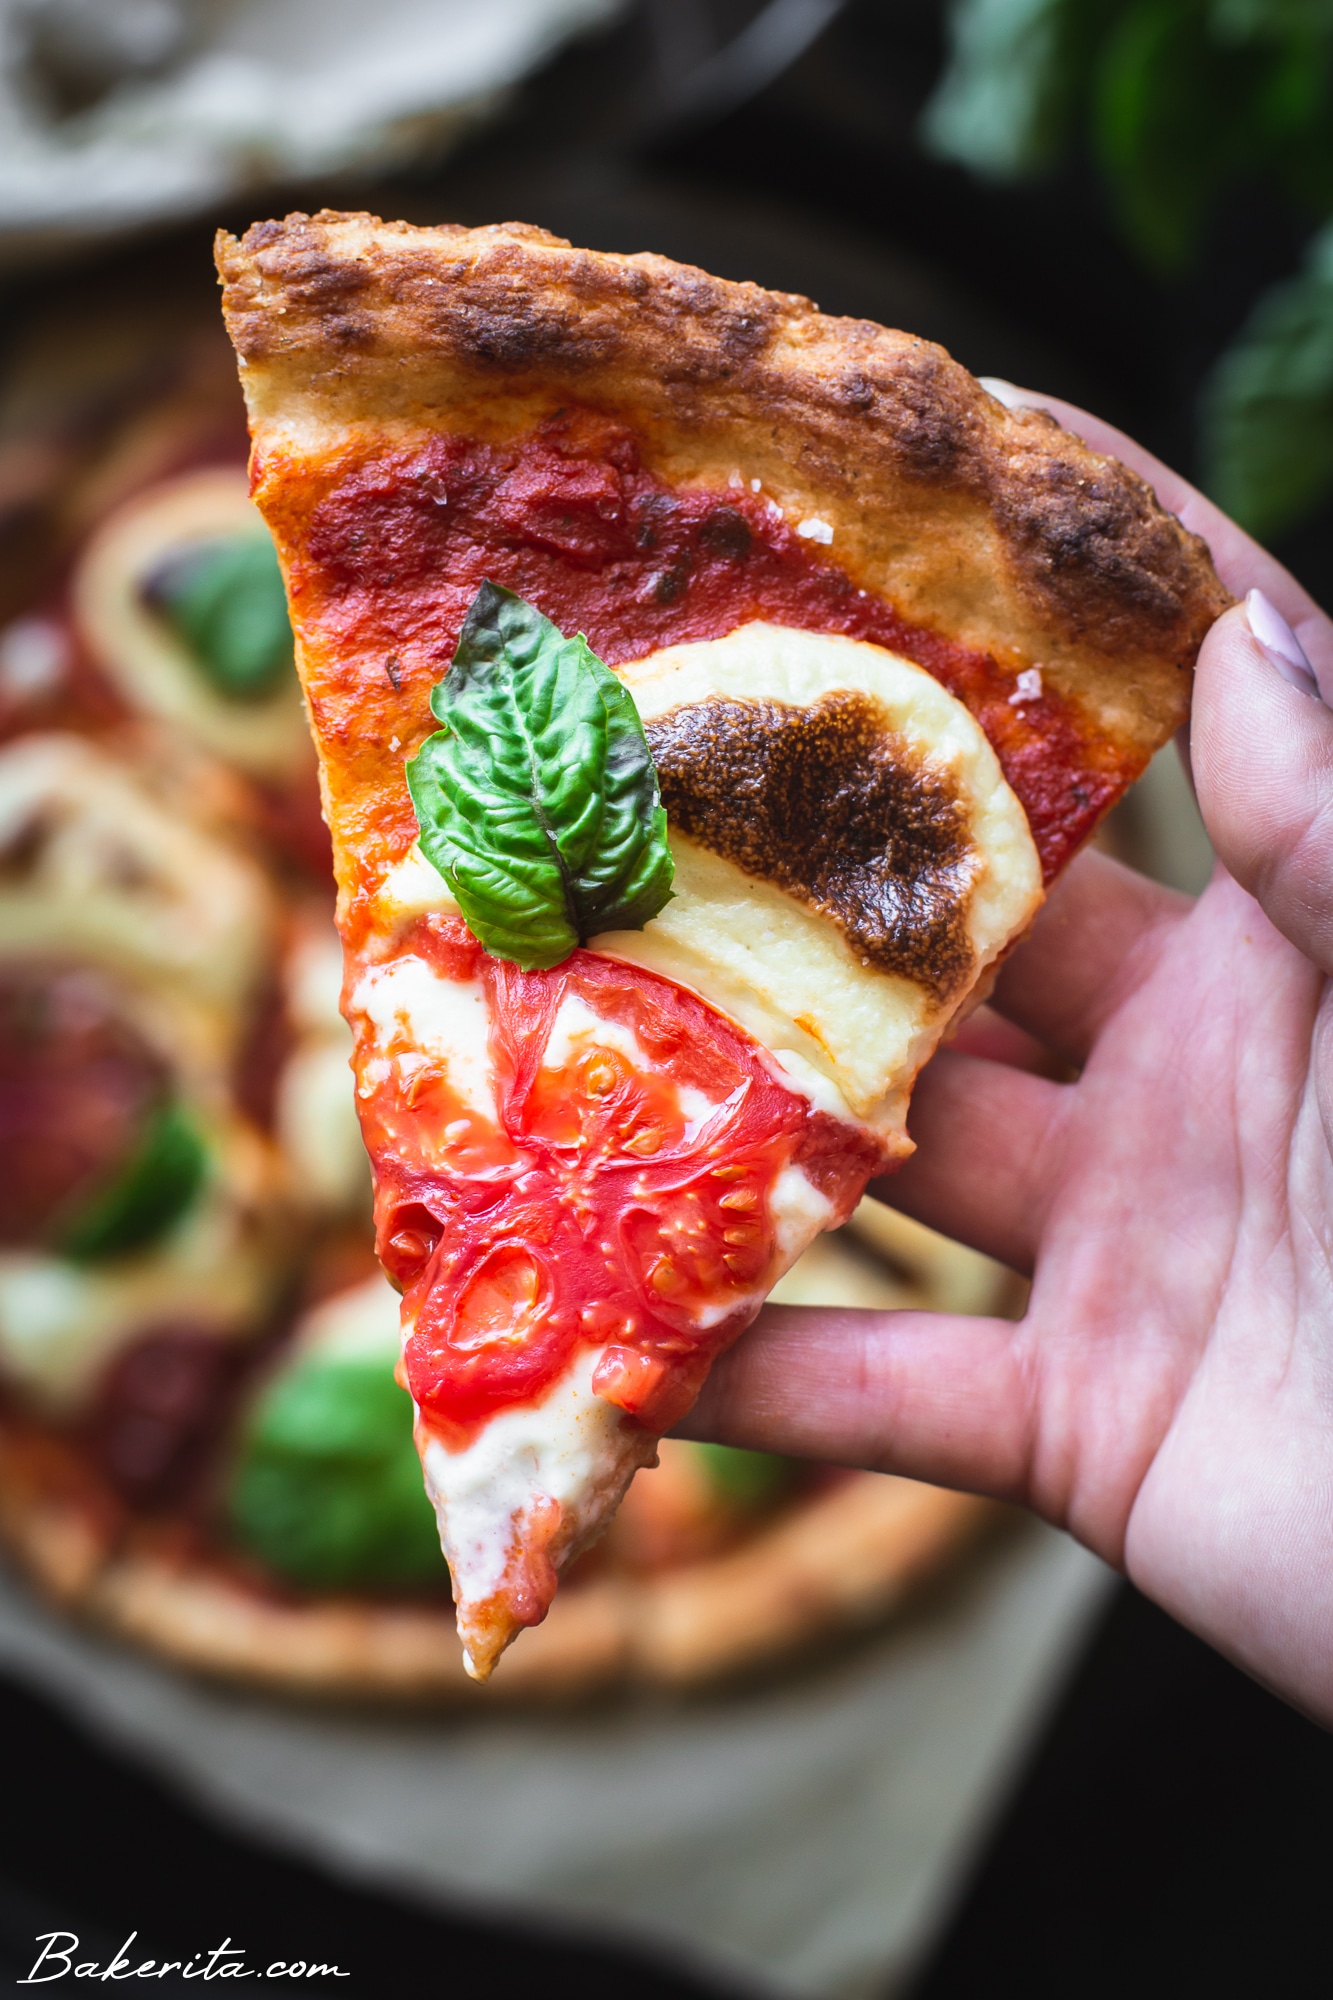
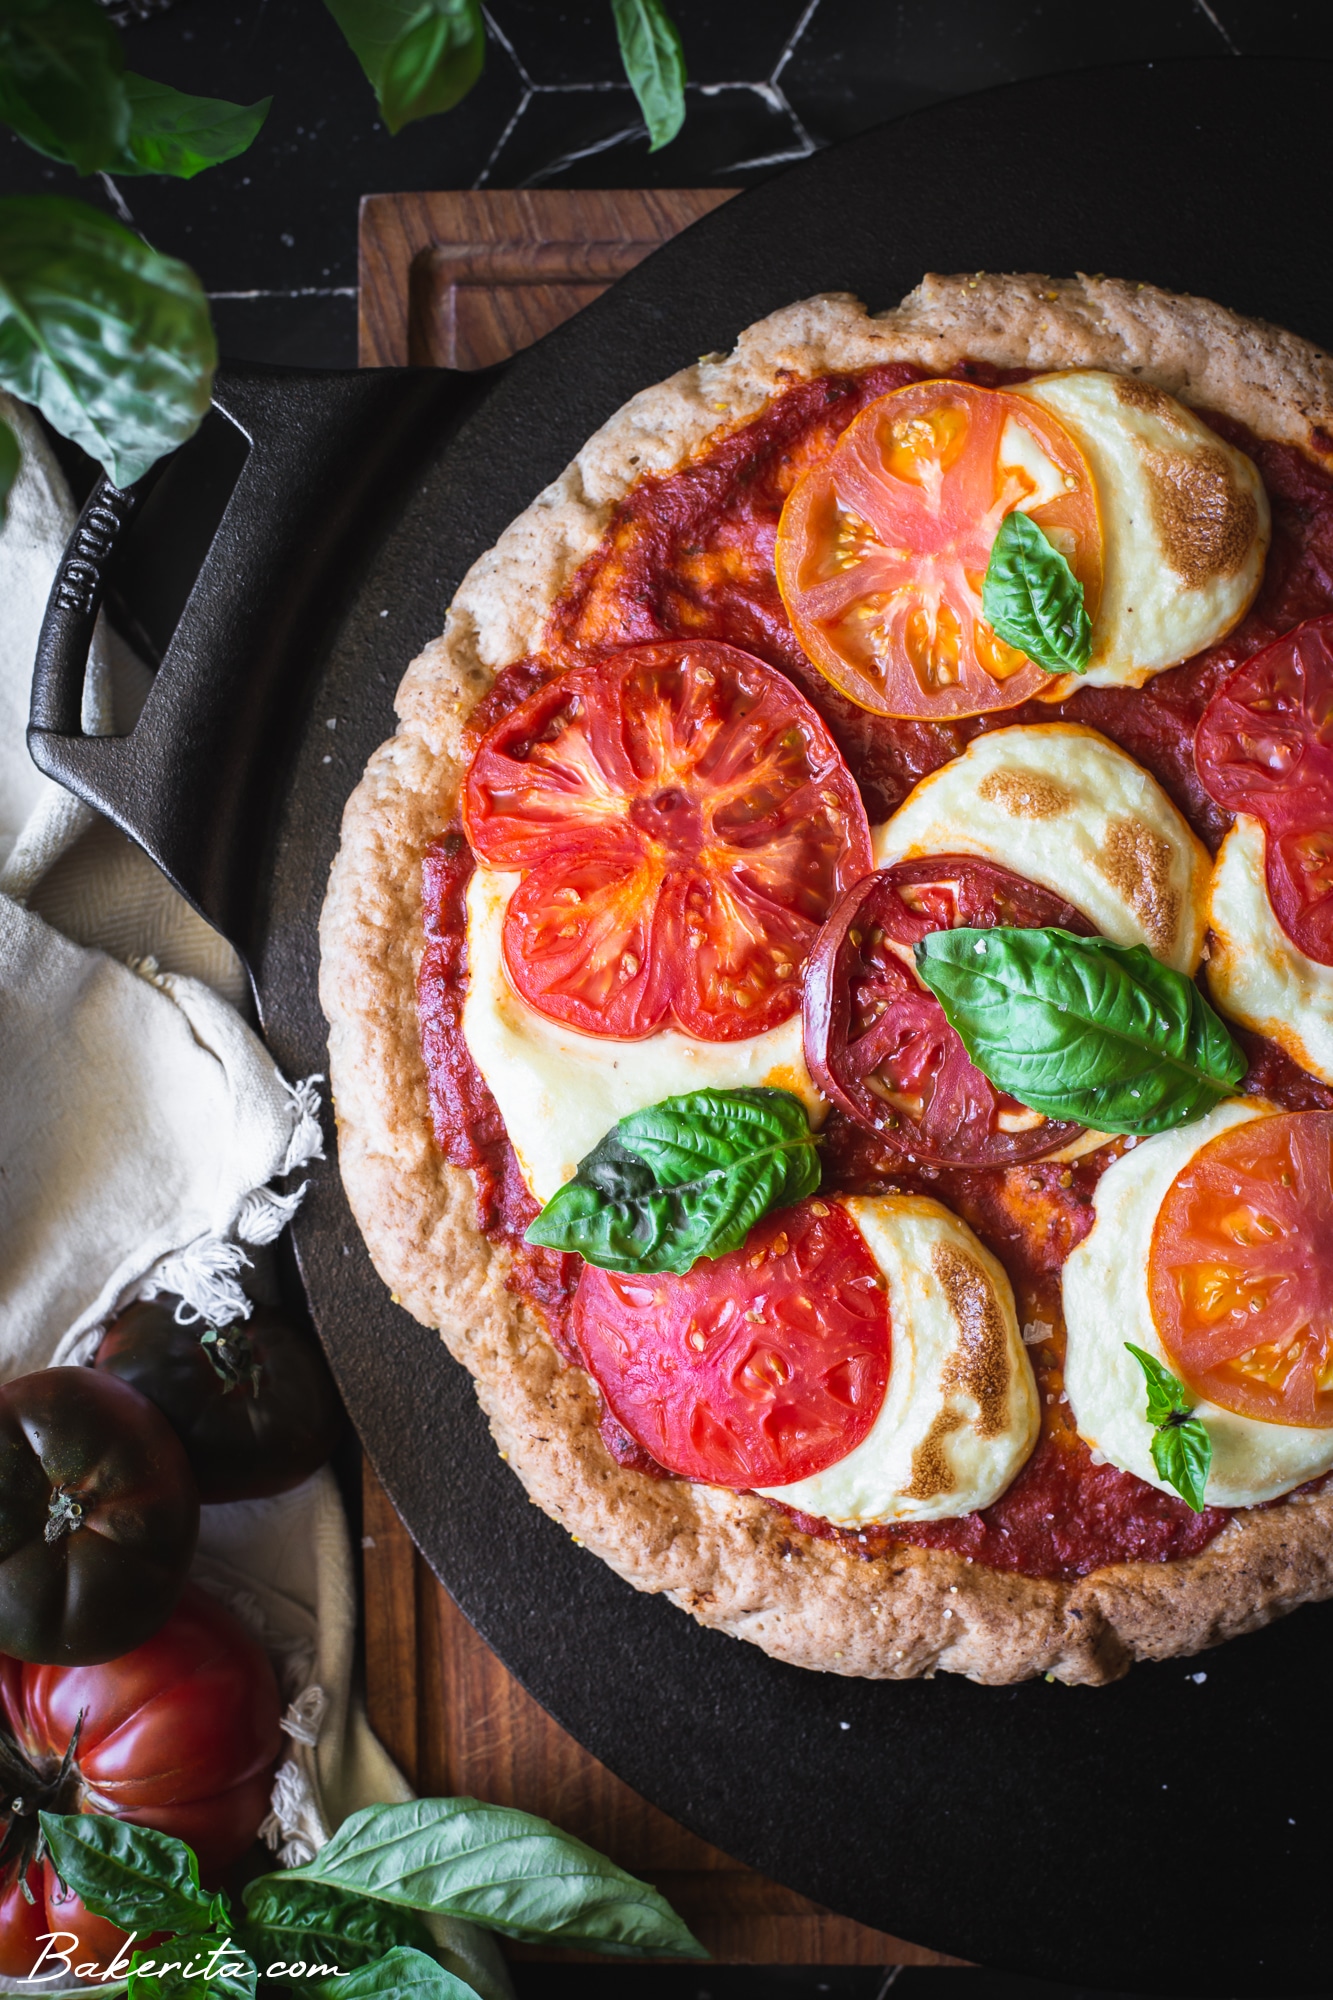
Once your gluten-free sourdough pizza crust is on the Pizza Pan and in the oven, it will need to bake for about 8 to 12 minutes, depending on how crispy you want. I like getting it a little golden on the edges, and firm enough to slide around easily on the pan. Remember – you’ll be baking it again with toppings!
Once it’s ready to go, remove it carefully from the oven, add all of your pizza toppings, and bake for a few more minutes until the toppings are golden. If you want, you can slide the pizza crust off the parchment paper before you add toppings and bake right on the pan. This allows you to use a higher temperature to get a crispier pizza too if that’s what you’re into!
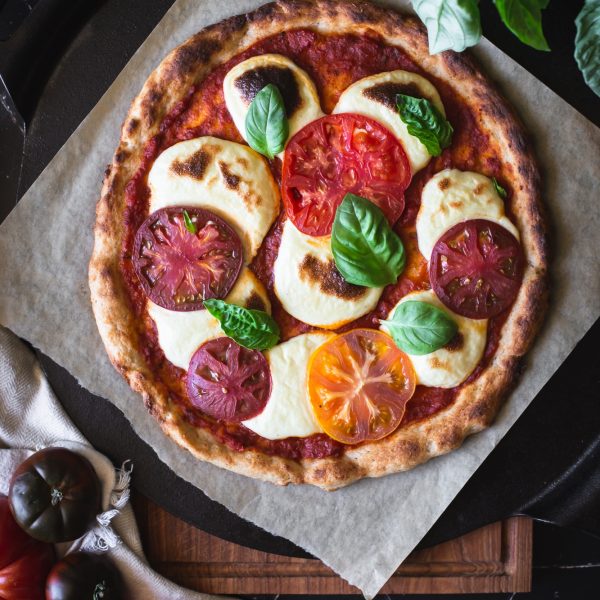
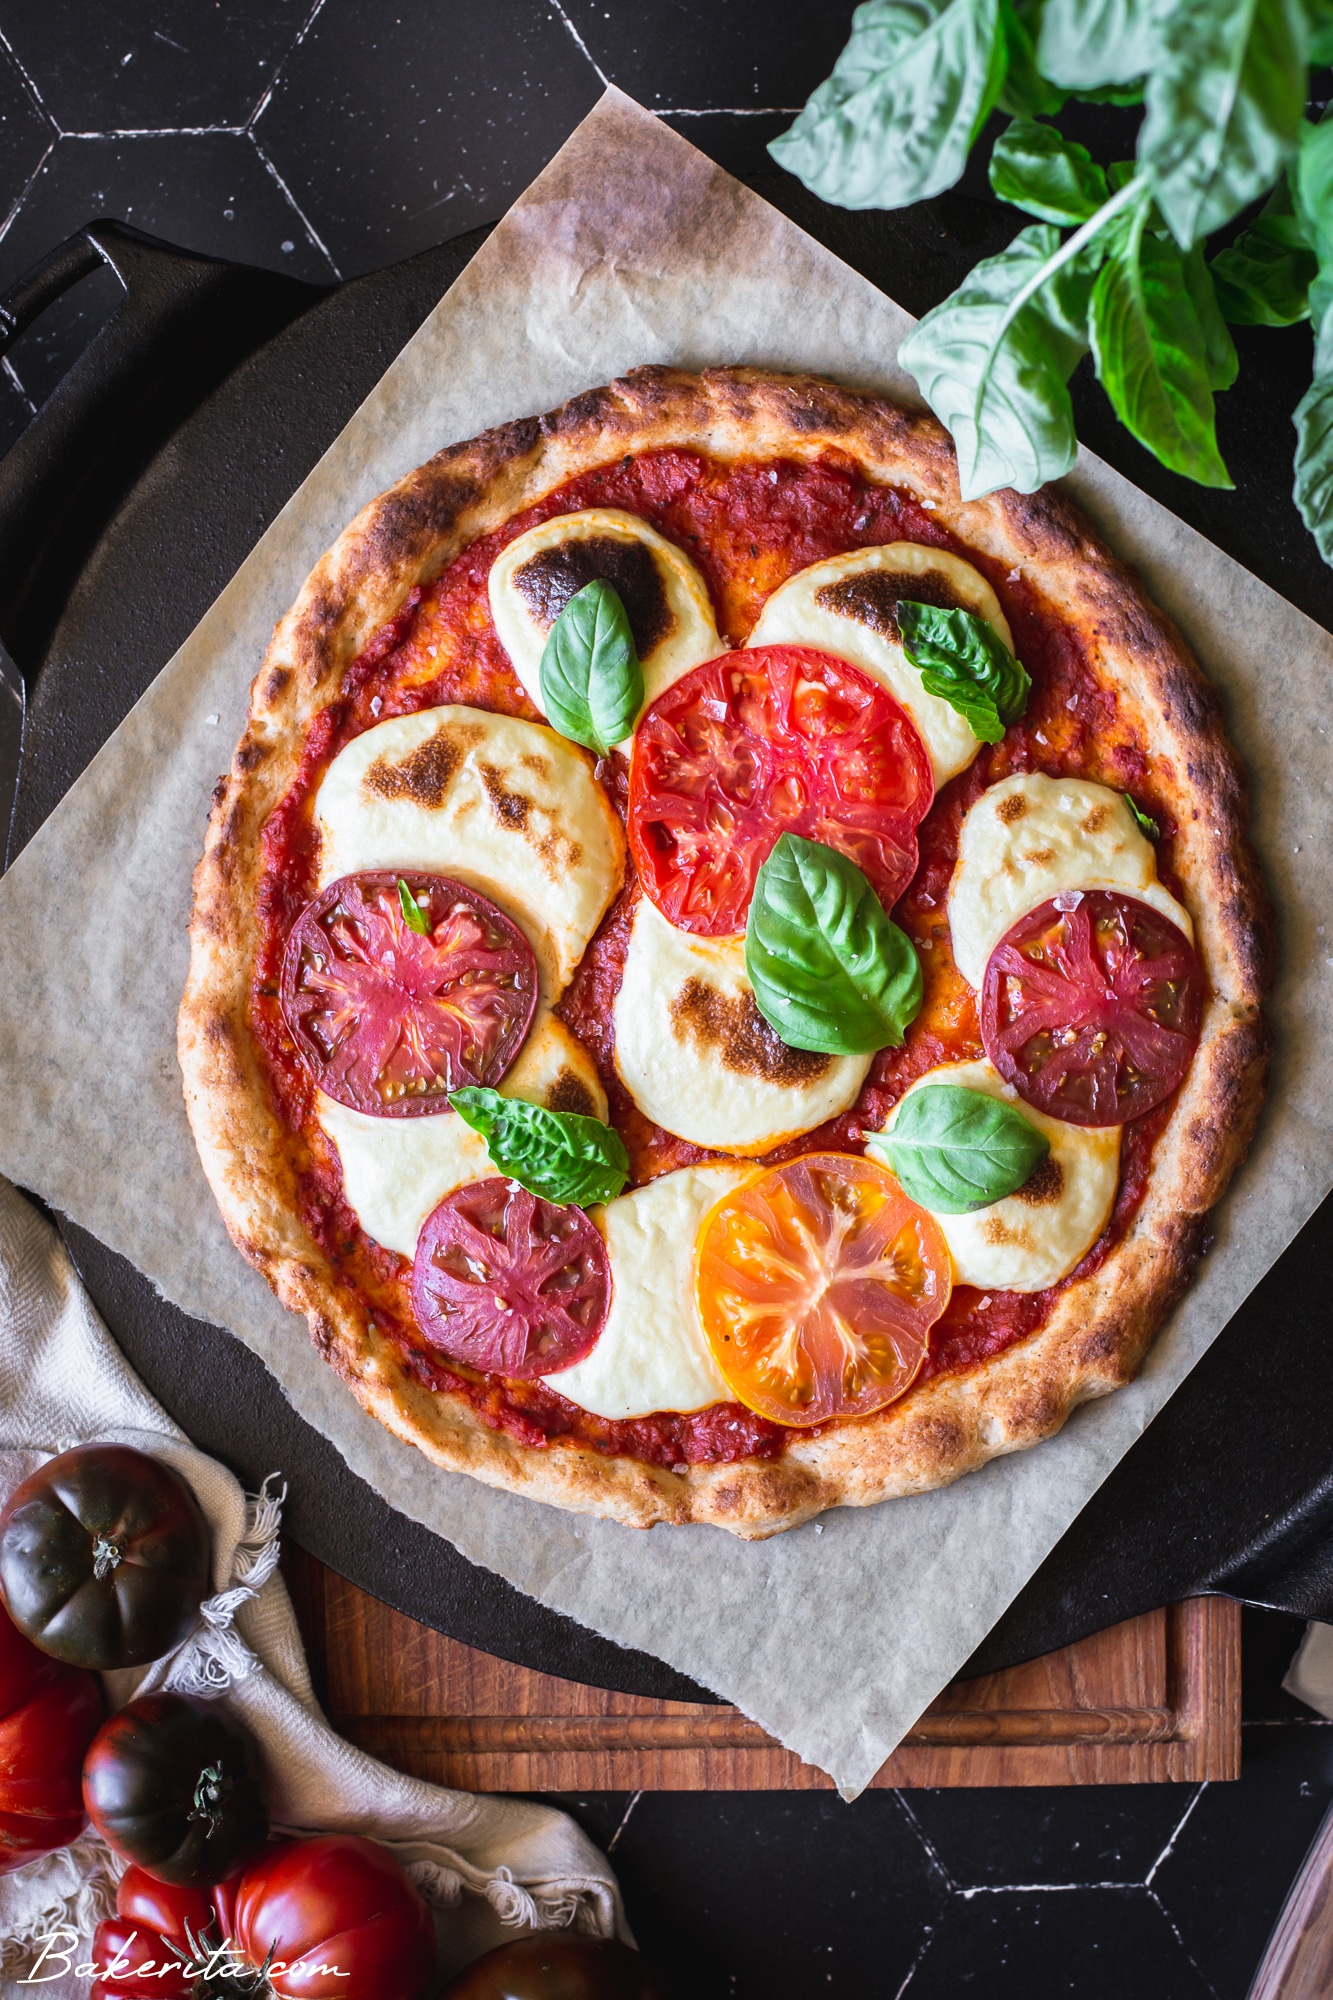
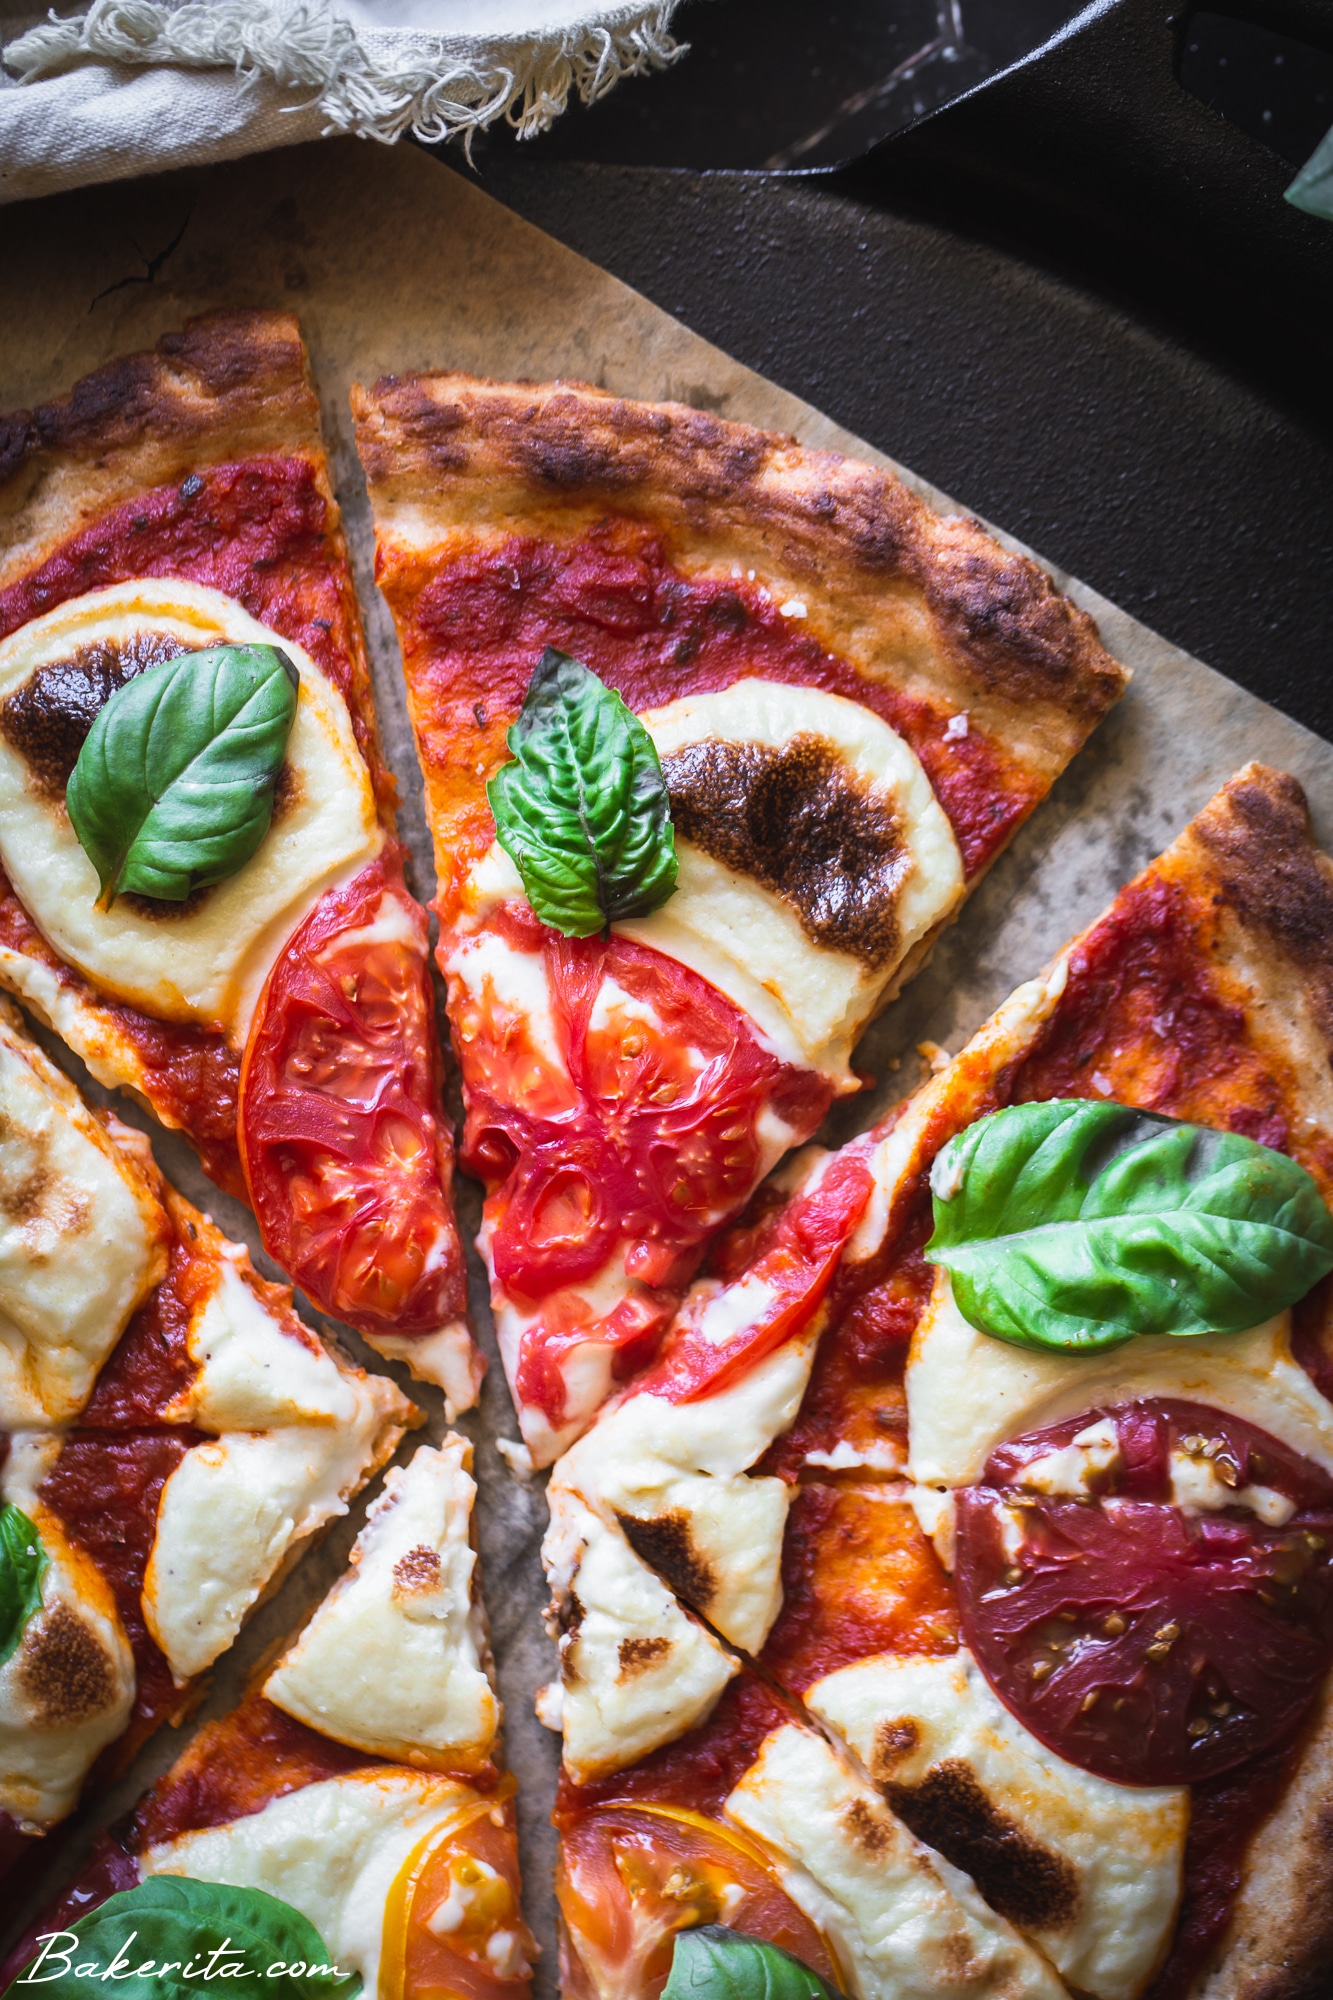
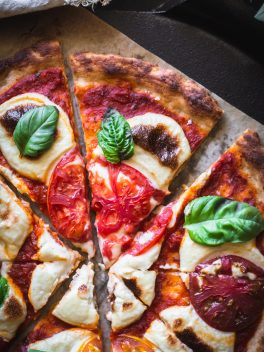
Once your toppings are golden and your cheese is melted, slice up your gluten-free sourdough pizza masterpiece and enjoy your magical creation!!!
Gluten-Free Sourdough Pizza Dough FAQ
Why do you need to pre-bake the crust?
The gluten-free crust needs to be baked before the toppings are added to ensure any excess moisture is drawn out of the dough, which helps it to crisp up. It helps prevent the dough from getting soggy.
What are the best toppings for this crust?
Whatever your heart desires!! You can go for any kind of toppings you like on this pizza :)
Does this recipe make a thin or thick crust pizza?
Either! If you choose to use the full sourdough pizza dough recipe for one pizza, you’ll get a thicker, fluffy, but still-crispy-on-the-bottom pizza. If you divide the dough in half, you’ll get a thinner, crispier crust.
Can I freeze homemade pizza crust?
YES! This crust freezes very well. I par-bake the sourdough pizza dough until it’s just firm enough to slide around the pan on its own, just the faintest golden brown. Let it cool completely, and then seal it as best you can, in a zip bag, plastic wrap, or best of all, vacuum-sealed. Keep in the freezer until ready to use, or up to 3 months.
When you’re ready to use, let the sourdough pizza crust thaw to mostly room temperature, and then add your toppings and bake as usual.
I hope you love this recipe as much as I do! It’s a definite staple in my house, and I can’t wait to experiment with all different sorts of toppings. My Lodge Pizza Pan is soon to be very well loved. Enjoy, and leave a comment down below to let me know what you think!
Other favorites you may like…
- Gluten-Free Vegan Pizza with Mushrooms & Onions
- Gluten-Free Sourdough Bread
- Vegan Caesar Salad
- Gluten-Free Sourdough Chocolate Chip Cookies
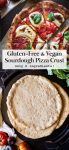
Gluten-Free Sourdough Pizza Crust
Ingredients
- 12-15 g psyllium husk, see Notes
- 300 g filtered water, room temperature
- 150 g gluten-free sourdough starter, can be active or fresh discard (see Notes)
- 80 g starch of your choice, such as potato starch, tapioca starch, or arrowroot starch
- 145 g gluten-free whole grain flours of your choice, such as quinoa flour, sorghum flour, brown rice flour, or combination. I have tested with these three.
- 10 g sea salt
Instructions
- Combine the psyllium husk and the water in a large bowl or the bowl of a stand mixer. Let it thicken and gel up for about 5 minutes.12-15 g psyllium husk, 300 g filtered water
- Add in the sourdough starter and mix to combine.150 g gluten-free sourdough starter
- Add in the starch, flour, and salt. Mix until a smooth dough forms. If the dough seems sticky, let it rest for a few more minutes to let the psyllium and flours absorb. Depending on how much psyllium you use, your dough will be pretty soft but should be workable. More psyllium will make it firmer and a bit easier to work with at this point.80 g starch of your choice, 145 g gluten-free whole grain flours of your choice, 10 g sea salt
- If you want a thick crust, leave the crust in one ball and move to a greased bowl to rise. If you want thinner crusts, divide the dough into two, form into balls, and place in separate greased bowls to rise.
- Let rise for 3 hours at room temperature, or for up to a day in the refrigerator.
- When you’re ready to bake, preheat your oven with the Lodge Cast Iron Pizza Pan inside to 450°F.
- Lightly grease a sheet of parchment paper and place it on a large cutting board or sheet pan. Flip the dough out onto the parchment. Drizzle the dough with some oil if needed to help it spread more easily.
- Use your hands or a rolling pan to press the dough out into a circle, working from the inside towards the outside. You should be able to press it into shape pretty easily! It doesn’t need to be perfect, and remember, the texture of the dough will seem different than traditional pizza dough, because the lack of gluten makes it stretch in a different way.
- Once it’s shaped, move the cutting board or sheet pan right next to the hot Pizza Pan. Slide the whole sheet of parchment, with the crust on top, onto the pan to bake.
- Pre-bake the crust without toppings for about 10 minutes, depending on how crispy you want it. I like getting it a little golden on the edges, and firm enough to slide off the parchment paper.
- Once it’s ready to go, remove it carefully from the oven. Slide the crust off the parchment and directly onto the pizza pan. Add all of your pizza toppings, and bake for 5 to 10 more minutes, or until the toppings are golden and the cheese is melted.
- Remove from the oven, slice and serve immediately. Enjoy!


Best pizza dough ever! I’ve been following Rachel’s guide for making sourdough and starter for a few months now. I thought I would try out the pizza dough and SO simple and honestly the best crust I’ve ever had (I’m a thin crust gal). My boyfriend is not a fan of when I make gluten-free things, but he said this was the best pizza dough he’s also ever had. This will be our new go-to recipe for at home pizza! Thanks for all your bomb recipes
Woohoo!!! Thanks for the feedback, Vanessa. Best compliment ever!
This recipe is awesome! My entire family loved the pizza. Thank you for another great recipe!
This has become our go-to pizza recipe. It’s easy to make and the taste is amazing! I’ve been doing about 50 g sorghum, 50 g quinoa flour & 45 g brown rice flour.
So thrilled you’re loving it!! Thanks for your feedback, Becky :)
Hi there!
I was ambitious last week when my kiddos were asleep and made a double batch to immediately stick in the freezer for the next few pizza nights. Maybe I missed it somewhere, but how would you recommend cooking with toppings on day-of? I par-baked like you suggested, then froze once cool. Would I let thaw a bit, add toppings, then bake again? Same temp? Or should I add toppings straight from freezer, then bake? Thanks so much! So excited to try them, they smelled great!
Hi Amelia, thanks for asking this – I will add info to clarify, but yes, I would thaw it until mostly room temperature, and then add your toppings and bake until it’s golden and crispy!!
Wow, just Wow! Made last night with arrow root starch, brown rice flour and sorghum flour. It really was absolutely one of the most delicious gluten-free pizzas I’ve ever had! Thank you once again for another flawless recipe, Rachel!
So thrilled you’re loving the pizza recipe, Maureen! One of my favorites as well :)
I made this for the first time tonight, but it didn’t rise much and ended up being a little gummy (I made one thick crust). We LOVED the flavor and texture otherwise, and I’m hoping to keep improving. Please send any tips!
Hi Jenny, my guess is that it was under proofed and you needed to let it rise a little longer! If you’re using the sourdough “discard” it can take longer for the crust to rise. You can also let it rise again for an hour or so after pressing it into shape for an extra fluffy crust – this is particularly helpful if you’re doing the thick crust version. Glad you enjoyed it!
I am looking forward to making this crust after all of your rav reviews. Just a quick question though, I only have the psyllium husk powder and am wondering if it can be used or do I need to go to the store?
Hi Erika, the powder is more absorbent so you’d have to use less volume-wise, but it should be the same in grams I think?! I’d start with about 10g and if it seems like it hasn’t thickened all the liquid in about 5 minutes, add an extra 2g! Hope this helps :)
Yes that was helpful. thank you so much. It is rising now
Made this dough and pizza last night. It was wonderfully chewy! The dough had a great consistency and taste. I was able to make two 10-12 inch pizzas and LOAD it with of my veggie toppings. I used my fresh discard from a rice-flour starter, and combined rice, sorghum, and tapioca flours per your instructions. Your sourdough is next!! Thanks!!!!
So glad you loved it, Patricia!! Hope you love the sourdough just as much :)
This recipe was super easy and the result was a delicious dough, thank you for the inspiration! I added a splash of olive oil to the wet mix, used tapioca and potato starch, for the flour I used a mix of white rice, millet and oat. I let my dough rest in my warm kitchen all day and it was simple to roll out and bake on my pizza pan. I will be referring to this recipe again :)
So glad you enjoyed it, thanks for the feedback Silver!!
Best pizza crust I’ve had since I stopped eating gluten. Thanks for the recipe!
So glad to hear that, Clara!