
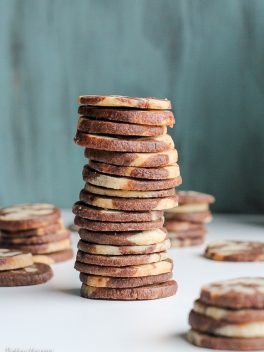
This recipe for Chocolate Vanilla Swirl Icebox Cookies makes tons of cookies that are perfect for holiday baking. They look beautiful and you can keep a roll in your fridge or freezer, ready to slice ‘n bake!

I’m very much a maker. I love to create things and make things from scratch, which is where my love of baking derives from. There’s such a feeling of satisfaction from being able to look around the kitchen and see a bunch of things you’ve made (cookies! jam! brownies!). Even though it takes more time, I get so much more out of making something myself than I do from buying it.
This spills over into my home decor too. When I moved into my apartment, I was obsessive about getting my apartment beautifully decorated and accessorized without spending all my money. Harder than it looks, folks – but I ended up DIYing some fun art pieces and knick knacks that now make my apartment look a little bit more fun and personalized.
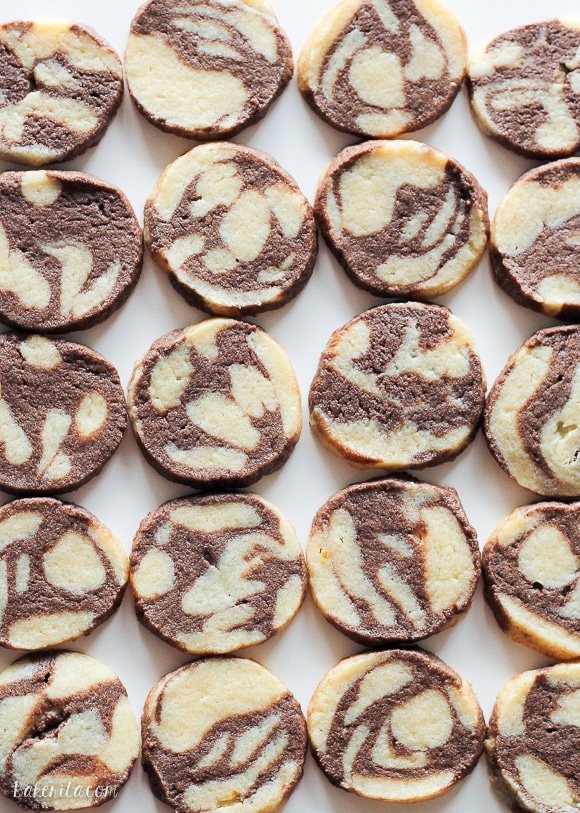
One of my absolute favorite projects that I did was making these marbled clay ring dishes from A Beautiful Mess. They were super easy to make and so much fun, and the whole time I was making them, I couldn’t help but think about applying the same rolling and marbling technique to cookie dough – and it worked!
These cookies were a whole lot of fun to make, and I promise, making those beautiful swirly patterns is really super simple. The cookies are simple sable cookies. You do have to make two doughs – vanilla and chocolate, but you end up with a whole TON of cookies, perfect for sharing and gifting.
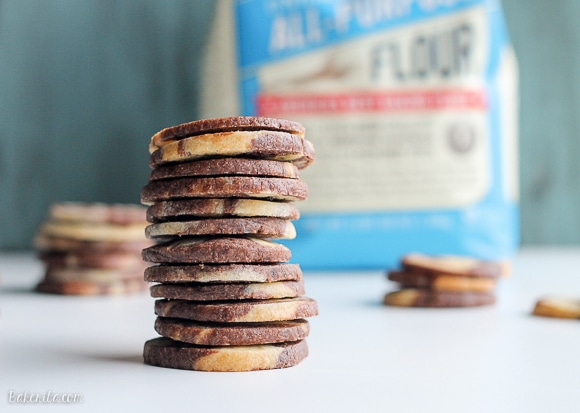
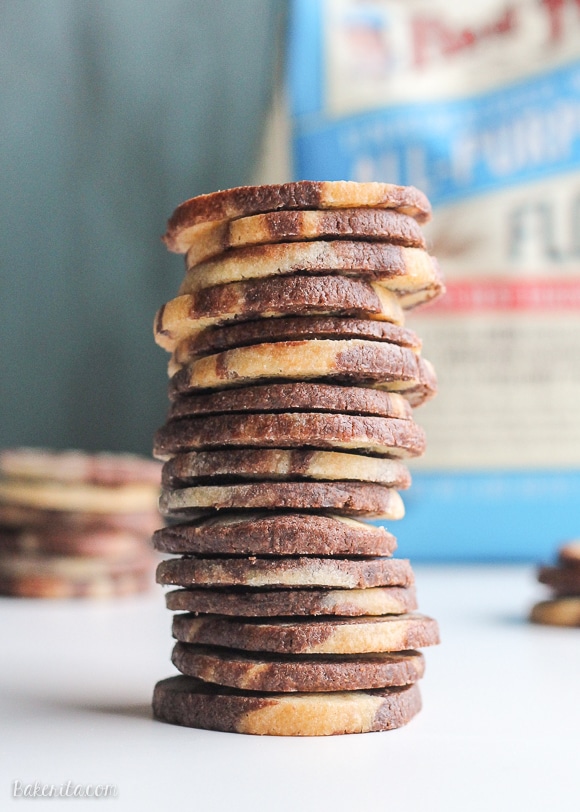
I used Bob’s Red Mill Organic Unbleached All Purpose White Flour, and it produces such perfect cookies! The quality of Bob’s Red Mill products is always top of the line, and this kitchen staple is incredibly versatile and perfect for all of your baking needs. My kitchen is stocked with their products! Get a Bob’s Red Mill coupon by clicking here.
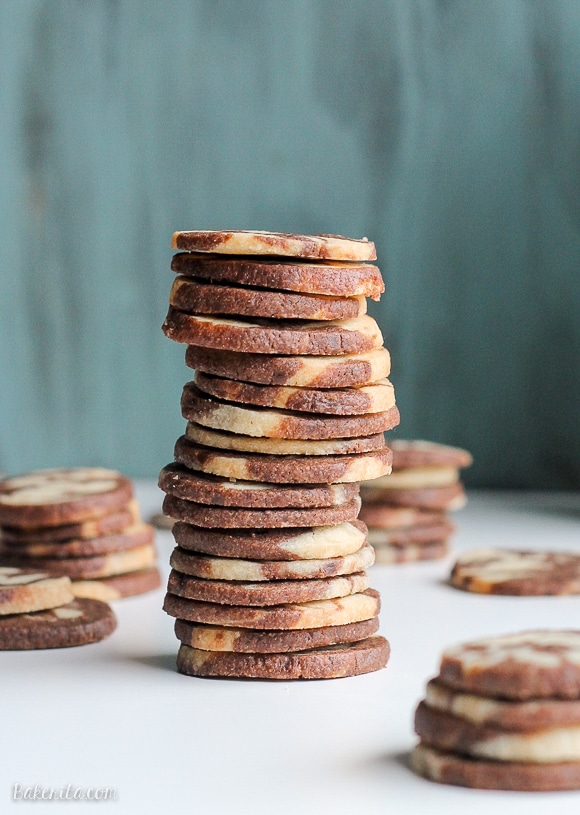
As for how these cookies taste? They’re delicious! The vanilla and chocolate flavors are subtle but flavorful and they’re just crisp enough around the edges without being crunchy. They’re also perfect for gifting! The cookies stack like a dream and don’t take up too much space so they’re perfect to add to a gift or cookie box. This recipe also makes a ton of cookies and the dough can be made weeks in advance if stored in the fridge, or months in advance if stored in the freezer.
A trick to keep icebox cookies round: save your empty paper towel rolls, cut a slit down the side, and store your icebox cookies in the roll! It will keep the sides from getting flattened out.
These Chocolate Vanilla Swirl Icebox Cookies are a fun-to-make, easy-to-eat treat you’ll be glad you have 8 dozen of! Enjoy :)
Chocolate Vanilla Swirl Icebox Cookies
Ingredients
For the vanilla dough
- ½ cup 1 stick unsalted butter, softened
- ⅓ cup granulated sugar
- ¼ cup powdered sugar
- 1 large egg yolk
- 1 teaspoon vanilla extract
- 1 cup + 2 tablespoons all-purpose flour
- ¼ teaspoon salt
For the chocolate dough
- ½ cup 1 stick unsalted butter, softened
- ⅓ cup granulated sugar
- ¼ cup powdered sugar
- 1 large egg yolk
- 1 oz. dark chocolate, melted and cooled
- 1 teaspoon vanilla extract
- 1 cup all-purpose flour
- 2 tablespoons Dutch-processed cocoa powder
- ¼ teaspoon salt
Instructions
- Begin with the vanilla dough. In a large bowl, cream together the butter and both sugars until light and fluffy, about 3-5 minutes. Beat in the egg yolk and vanilla extract until fully combined. Add the flour and salt and mix until just combined. Place the dough in a bowl or on a clean counter while you prepare the chocolate dough.
- In a large bowl, cream together the butter and both sugars until light and fluffy, about 3-5 minutes. Beat in the egg yolk, cooled chocolate, and vanilla extract until fully combined. Add the flour, cocoa powder and salt and mix until just combined. Place the dough in a separate bowl. Cover in plastic wrap and refrigerate until firm, about 1-2 hours.
- Once the dough has firmed up, use your fingers to roll about 2 tablespoons of vanilla dough into a long snake about 8″ long. It helps to do this on a flat, non-stick surface. Repeat until you have three rolls of vanilla dough and three rolls of chocolate. Stack the smaller rolls on top of each other, creating one thick roll, and twist them together carefully – you don’t want to break the dough.
- You should have one thick, twisted log of dough at this point, with swirls of the chocolate and vanilla dough together. Roll the dough gently to smooth out the sides, being careful not to make the log too thin – it should be about 2” in diameter. Wrap the log in plastic wrap and store in the refrigerator for at least one hour or up to 2 weeks. Repeat with the remaining dough until all has been used.
- Preheat oven to 325°F and line a large baking sheet with parchment paper. Slice cookies 1/4” thick and place 1 inch apart on the baking sheet. Bake for 12-15 minutes or until lightly browned around the edges.
- The dough can be frozen for up to 6 months.
Notes
I was selected for this opportunity as a member of Clever Girls and the content and opinions expressed here are all my own.

Quick question: if frozen, do i thaw before baking or do i slice and bake right out of the freezer? And will that change the time or temp?
Hi Shayna, you’ll want to slice and bake while they’re still cold from the freezer, that’s how to recipe is designed so no need to change time/temp.
1 oz. dark chocolate? Hmm….(1) does that mean choco-chips? (2) bittersweet? (3) Can the glass-of-chips be melted inside a container of hot water? (4) Can the marbelizing be accomplished in a similar way to the Red-Velvet Marble Cookies shown via youtube? (5) I’ve never done marble icebox cookies before, and any instructions i’ve seen (which there’s very few) look daunting, as if I might overdo the twisting/kneading (or under-do the twisting/kneading).
Hi! The dark chocolate can be any kind you prefer – I generally use semi-sweet chocolate chips and it can be melted however you like. I’ve never seen the youtube video you’re referencing, so I’m not sure, but it’s worth a shot if the method makes sense to you!
I see, thanks, but i just now note that yours only has yolks. See, in the hope of making marble-colored button cookies for an upcoming party, I actually tried an online checkerboard-cookie recipe (by smitten kitchen) as it had been recommended. But it turned out that the dough was way too mushy and falling apart. So I knew i would be impossible to form anything.
And so, I kept adding stuff, such as some of the reserved egg-whites (since the lack of whites seemed to be making it more crumbly), One TB-cornstarch, more flour, and more sugar. First then it looked like it would be formable – along with some semblance of sweetness – though still not sweet enough. If there’d have been a way to upload attachments, I’d have posted a pic of the first batch i made (prior to adding more ingredients). FYI, since I don’t have various size cookie cutters, I first marbelized the brown/blonde strands as shown in the Red-Velvet video – then rolled the latter into approx. 1.5 diameter log. Then Freezed it. Then sliced the quite-crumbly dough. Then for buttonholes i detached one of those built-in straws from an applesauce squeeze-pouch. And for the circular indentation I used one of those screw-on caps from either Scope or Act-mouthwash. The kind that’s wider at its base than on top. I then pulled thru 1/4″ Offray Gold Organza ribbon. Problem is, the sheer-ribbon became somewhat chocolate-stained, via the process if pulling it thru the buttonholes of a multi-stacked cookie-pile. So frustrating.
Here you go – here’s the pics:
https://i.ibb.co/H42qFmc/marble-button-cookies1.jpg https://i.ibb.co/gMqkPbj/marble-button-cookies2.jpg
Also, these realistic-looking Tiger-Striped (with turmeric) should REALLY interest:
https://www.susanspungen.com/recipes/tiger-striped-sables (Now if only she’d have offered a clear demo of how those stripes were achieved!
I disagree with other commenters on needing more flour. When I tried this tip, my dough became even more crumbly and would not twist together properly into easily molded logs, nor cut easily when taken out of the freezer. The first several times I made this recipe years ago, I increased the butter (1 stick to 1.5 sticks/by 50%) and that DID made the dough more coherent, easy to twist, and easy to slice — cookies were delicious and a hit at that time. I don’t know in what world adding more of the dry ingredient, not the wet, makes dough stick together more.