Description
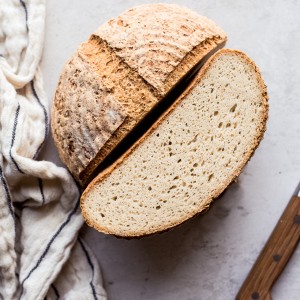
A classic Gluten-Free Bread boule, made with yeast and ready in just a few hours! It’s light, fluffy, and perfect for sandwiches, toast, and anything else you’d use bread for. This gluten-free loaf is also vegan and free of the top 8 food allergens.
A note about measuring: I don’t share any volume measurements for this bread because I find it’s so much easier and more accurate to use weight. Please get a baking scale if you’ll be doing bread baking with any kind of regularity – it will make things much easier and more accurate! Plus, less messy measuring cups :)
June 2023 Note: a previous version of this recipe recommended a bulk ferment after mixing together the dough. However, after making this recipe many times now, I don’t think it makes a big enough different in the final loaf to be worth the extra time, so I’ve removed it from the recipe.
Ingredients
To activate the yeast
- 7g (2.5 tsp) active dry yeast
- 100g warm filtered water
- 20g maple syrup, honey or cane sugar
For the loaf
- 20g whole psyllium husk
- 375g filtered water
- 15g olive oil
- 80g potato starch
- 60g tapioca flour or arrowroot flour
- 150g sorghum flour
- 140g brown rice flour
- 50g quinoa flour or replace with more sorghum flour or rice flour
- 12g sea salt
Instructions
-
In a small bowl, combine the yeast with the sweetener of your choice and warm water, between 100-110℉. It should feel warm, but not hot, to the touch. Let it sit to activate for about 10 to 15 minutes. You should notice it start to to bubble, and then it will get nice and foamy on top.
-
In a bowl or liquid measuring cup, mix together the psyllium husk, olive oil, and water. Whisk together, breaking up the psyllium, and let it set for a few minutes until it’s thickened and gel-like.
-
In a large mixing bowl or the bowl of your stand mixer, mix together all of your flours, starches, and salt. Whisk to combine.
-
Add the psyllium gel and the activated yeast mixture to your dry ingredients. If using a stand mixer, fit it with the dough hook and let it mix up the dough until combined and smooth, scraping down the sides a few times during the process, and flipping the dough around to make sure it’s fully mixed on the bottom too. You can also do this by hand. If doing it by hand, I like using a dough whisk to get it mostly combined. Then, turn it out onto the countertop and use your hands to knead the rest of the flour in.
-
Cover with a tea towel and let the loaf rise for one hour in a warm place. It should just about double in size, and it will feel light and puffy to the touch when it’s ready. Preheat the oven to 425℉ while it rises with a Dutch oven inside, if using.
-
Once it’s risen, score the bread (carefully flipping it out of the banneton onto parchment or a silicone sling if baking in a Dutch oven). If you’re baking in a loaf pan, you may want to brush the top with oil to get a nice golden crust and help soften it slightly.
-
Place into your baking vessel if using a Dutch oven. If using a loaf pan, just place right into the oven. Bake for 1 hour and 15 minutes, removing the lid for the last 15 minutes if baking in a Dutch oven. It should be golden brown and crusty.
-
Remove from the baking pan and set on a cooling rack to cool completely. This is definitely the hardest part, but you really need to let the loaf cool completely so the inside can set. I try to let it cool overnight, but you’ll want to let it cool for at least four to five hours. It should be fully cool to the touch before cutting into your loaf.
-
Slice and eat. This bread is great raw, toasted, or however else you want to enjoy it!
Notes
To store this bread
I like storing this bread in a bread bag, or a plastic bag that’s not fully closed, if I’m just storing it for a few days.
You can also slice and freeze this bread in a freezer bag. Place parchment paper between slices to make sure it doesn’t stick together if that’s a concern. It bakes up super well straight from frozen.
Tools you may need to get baking:
- Banneton: this is a woven basket your bread rises in. You can also use a bowl lined with a clean cloth tea towel, but bannetons do give you beautiful ridges and provide a great environment for your bread to rise. I like using a 7-inch banneton.
- Lame: this is a razor blade you’ll use for scoring your bread before baking. A sharp knife will work well too.
- Stand Mixer: this is optional – I’ve made many loaves using a bowl, a wooden spoon or a dough whisk, and my hands. But if you have one, making bread using your stand mixer and a dough hook makes things super easy.
- Dutch Oven: you don’t need a Dutch oven per se, but it definitely helps: the lid traps the heat and steam, and it helps provide a wonderfully crunchy crust. Preheating the Dutch oven also helps support your bread’s rise once it hits the hot oven.
- Parchment Paper: I find parchment tremendously useful for making a “sling” to help lower your bread into the Dutch oven, so it doesn’t lose its rise from getting “dropped” into the Dutch oven, which can deflate the loaf. You can also use something like this silicone baking mat sling that’s perfect for lowering and lifting your bread into the Dutch oven.