Description
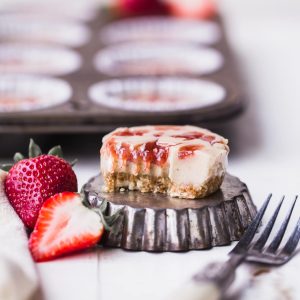
These No Bake Cashew Butter & Jelly Cheesecakes are sweet individual desserts that are lusciously creamy, simple to make, and swirled with strawberry jam. You can customize them with your favorite nut butter and jelly to make them your own! They’re gluten-free, paleo and vegan.
Ingredients
Scale
For the crust
- 1 cup raw cashew, or whatever nut/seed’s butter you’re using in the filling
- 6 Medjool dates, pitted
For the filling
- ¾ cup (192g) cashew butter, can use whatever nut butter you like
- ½ cup canned full-fat coconut milk
- 3 tablespoons maple syrup
- 3 tablespoons coconut oil, melted
- 1 tablespoon lemon juice
- 1 teaspoon vanilla extract
- ¼ teaspoon kosher salt
- ¼ cup fruit preserves, any flavor you prefer, I like to buy ones that are organic and fruit juice sweetened
Instructions
- Line a muffin pan with 8 muffin/cupcake liners. Set aside.
- For the crust, combine the cashews and pitted dates in a food processor or high powered blender and pulse to combine and break up the cashews into smaller bits. Pulse to combine, until the cashews have broken down considerably and everything sticks together.
- Divide evenly between the pans (I used a heaping tablespoon for each) and press into the bottom. Set aside.
- In the same food processor or blender (no need to wash between), combine all of the ingredients in the filling except for the fruit preserves. Turn the food processor or blender on medium-high and blend for a minute, or until the mixture is silky smooth and creamy.
- Divide the filling between the prepared crusts. Dollop a teaspoon of jam onto the top of each and swirl into filling – you can also just add a layer of jam on top if you prefer!
- Place in the refrigerator for at least 2 hours to set completely before serving. Serve chilled, and keep any leftovers in the refrigerator (or freezer for longer storage).
Keywords: cashew butter, cheesecake, dairy free, gluten free, jelly, paleo, vegan
